The Sigma Media Manager is a pro plugin of Bdthemes. In this documentation, we will guide you on how to install and activate the Sigma Media Manager plugin on your site.
What is Sigma Media Manager?
Sigma Media Manager by BdThemes is a powerful WordPress media library organizer designed to keep your files clean, structured, and easy to manage. It lets users create folders, organize media with drag-and-drop controls, apply smart filters, and manage large media libraries efficiently. The plugin also includes AI-powered text generation for image titles, captions, and descriptions, along with bulk unused media cleanup, backup & restore options, and advanced display settings for a faster and smoother workflow.
How to download the Pro version plugin from the Bdthemes account

You can easily download the latest pro version of the plugin from your Bdthemes account. If you have a Bdthemes account, then just log in to your account and download the latest version of the plugin.
1. Go to the link https://accounts.bdthemes.com
2. Enter the Purchase email (The email used for purchasing the Sigma Media Manager).
3. Enter the password.
4. Click on the ‘‘Login To Access Account’’ button to log in to your license management dashboard.
If you don’t have the Bdthemes account, then just register first with your purchasing email, then log in to your account, and download the latest version of the plugin.

5. Select the “Sigma Media Manager” tab from the left sidebar (Products). It will display the plugin information.
6. Here, you will get the license key to activate the pro plugin on the WP dashboard.
7. Click on the “Download Files” button on the top right side.
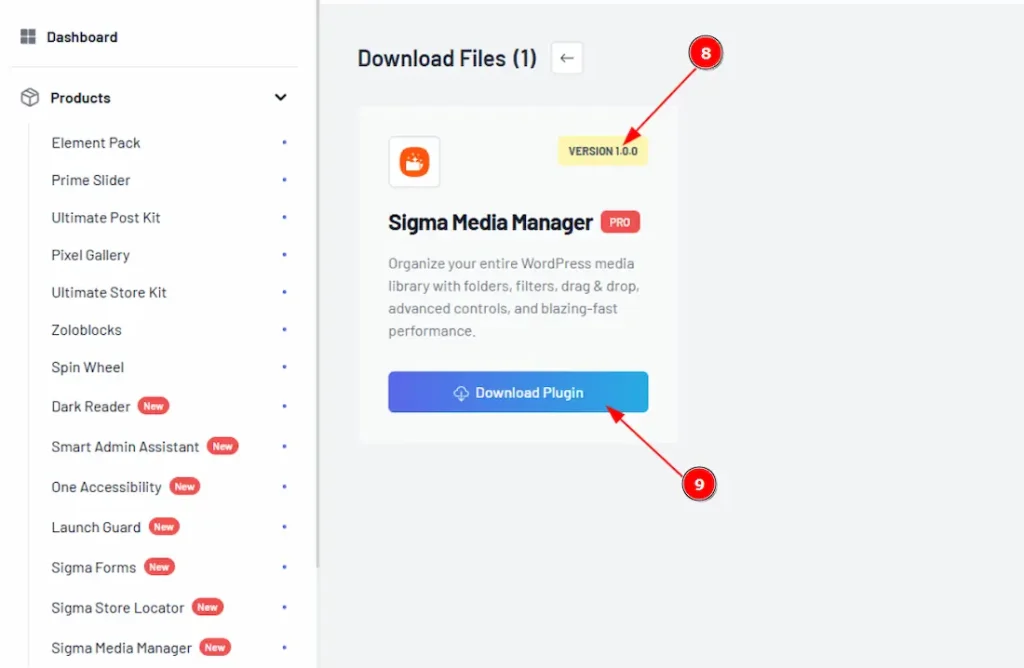
8. In the top right corner, the latest version will appear.
9. Now you will see the Sigma Media Manager plugin. Just click on the ”Download Plugin” button, and it will start to download.
How to install & activate the plugin
After logging in to your WordPress dashboard page, follow these steps-
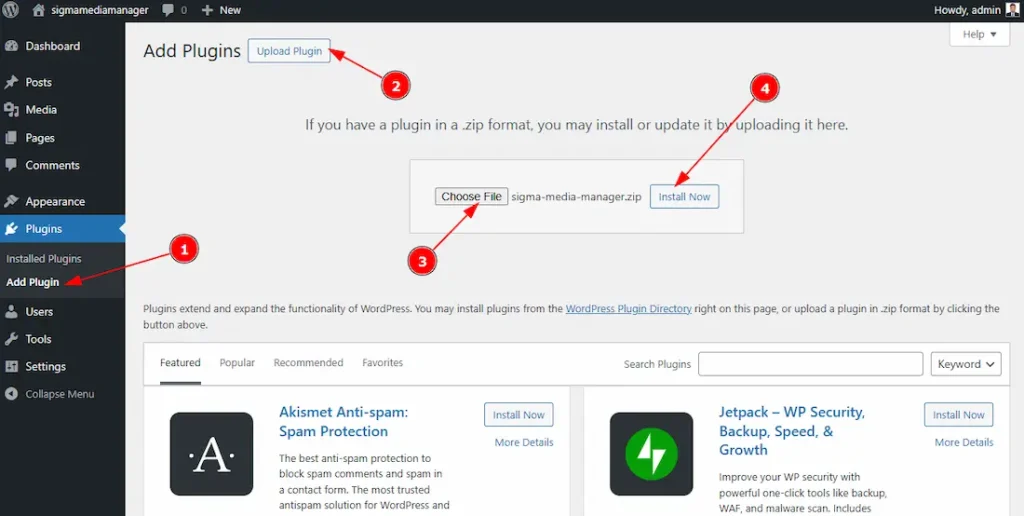
1. Navigate to the Plugins tab and click on the ”Add New Plugin “.
2. Click on the “Upload Plugins” button to add the Pro version file.
3. Choose the Pro version file from here.
4. Then click on the “Install Now” button to start the installation.
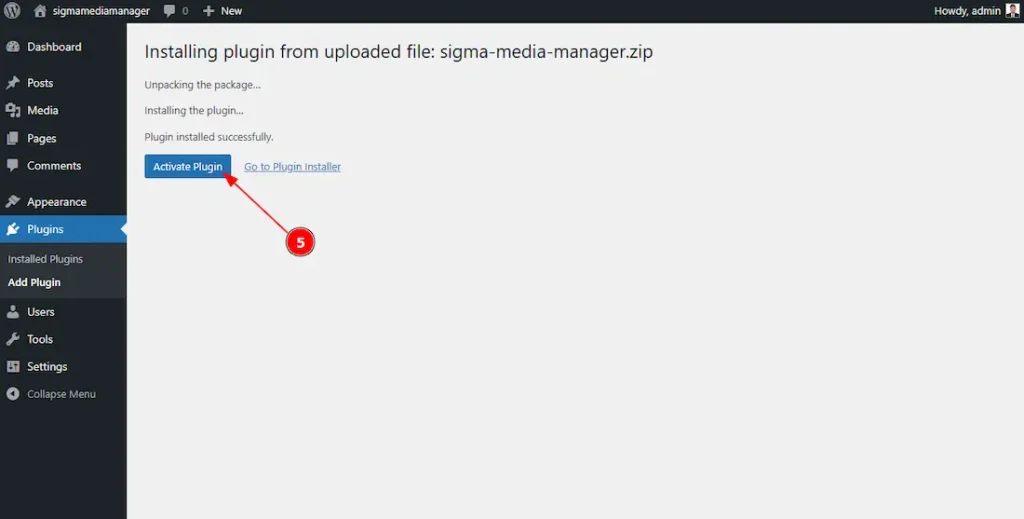
5. After completing installation, the “Activate Plugin” button will appear, and click on it to activate the plugin.
To activate the license key, just follow the instructions below-
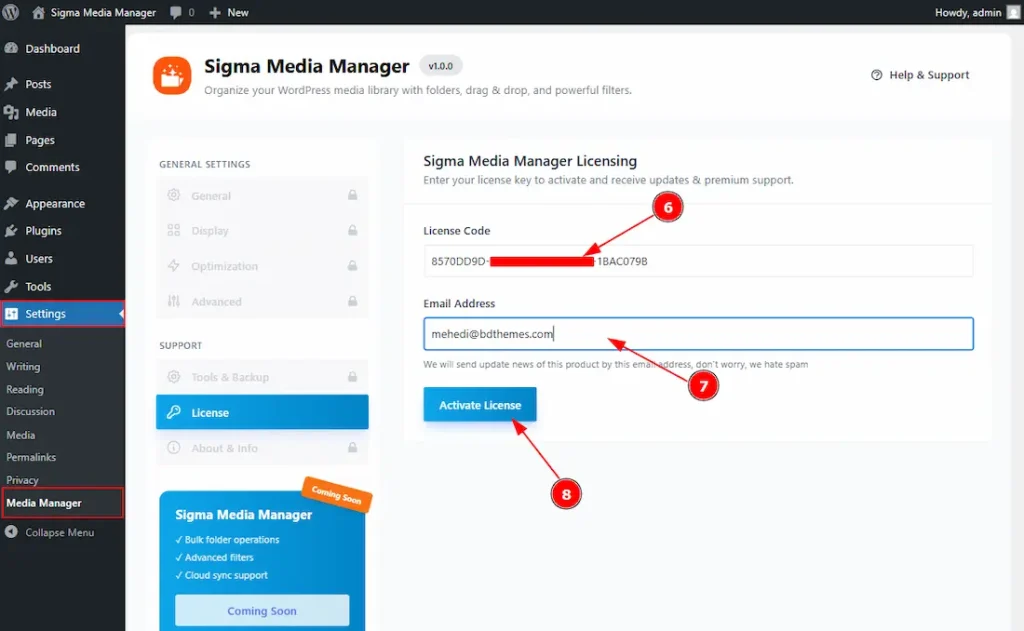
Go to WP Dashboard > Settings > Media Manager > License.
6. Just keep your license key inside the license field.
7. Keep your email inside the email field.
8. After that, just click on the “Activate License” button to activate the license key.

9. You will get to see the license information here after the license is successfully activated on your site. Here, you will see the license status, license type, license expiry date, support expiry date & your license key.
10. You can deactivate the license by clicking on the “Deactivate License” button.
Video Assist
The video will come soon. If you want, you can try the Pro plugin features directly from here.
Thanks for staying with us.