

The Give Register widget makes it easy for your donors to get registered for your donation campaigns.
Let’s see how to use it in this tutorial.
Inserting widget

Find the Give Register widget from the widget menu and place it inside your page.
Content tab
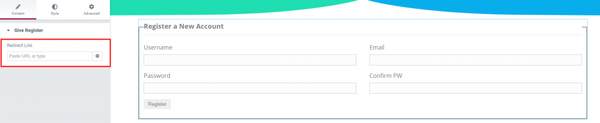
There is a single section having a single option on the Content tab. You can place your redirecting link on the blank field. Upon registering, users will be redirected to the specific internal page within your site.
Style tab
The Style tab has a bunch of sections for customizing the appearance of the register form. Let’s see them one by one.
Give Register
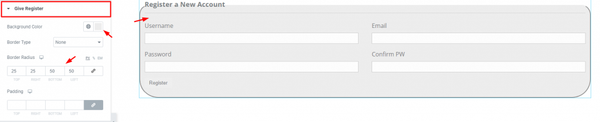
Go to Style> Give Register
Here, you can customize the whole form by background color, border, and padding.
Title
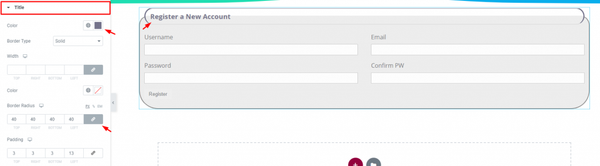
Go to Style> Title
You can find options to change color, border, padding for the title area on top.
Label

Go to Style> Label
Here, you can change the label color and typography as well as add margin.
Input Fields
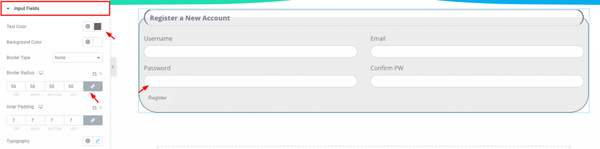
Go to Style> Input Fields
This section is for customizing the input fields by mainly text color, border, and padding.
Submit Button
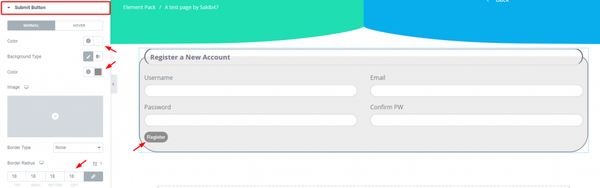
Go to Style> Submit Button
In this section, you can customize the login button by putting new colors and shape it by changing the border-radius.
Conclusion
Watch this video for more visuals on the Give Register widget and visit this demo page for more examples.
Thanks for staying up.