The Advanced Divider widget from Element Pack Pro allows you to create stylish and customizable dividers to separate sections of your content. This documentation explains how to use and customize the Advanced Divider widget in Elementor.
Enable The Advanced Divider Widget
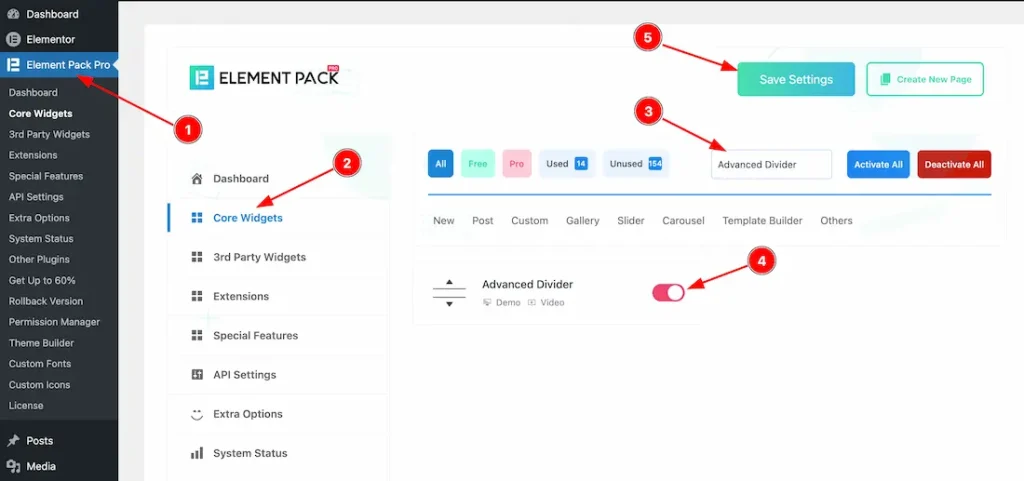
To use the Advanced Divider widget from Element Pack Pro, first, you have to enable the widget.
- Go to WordPress dashboard → Element Pack Pro Plugin dashboard.
- Then, Click the Core Widgets Tab.
- Search the Advanced Divider Widget Name.
- Enable the Advanced Divider Widget.
- Hit the Save Settings Button.
Inserting The Advanced Divider Widget
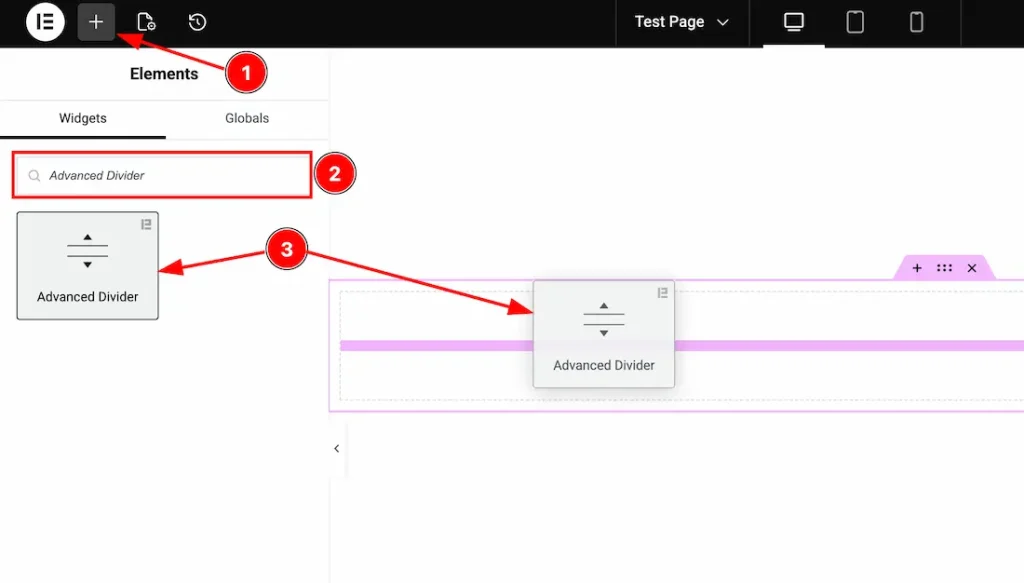
1. Go to the Elementor Editor Page and hit the “+” icon Button.
2. Search the Advanced Divider name.
3. Drag the widget and drop it on the editor page.
Work With The Content Tab
Advanced Divider Section
Go to Content → Advanced Divider
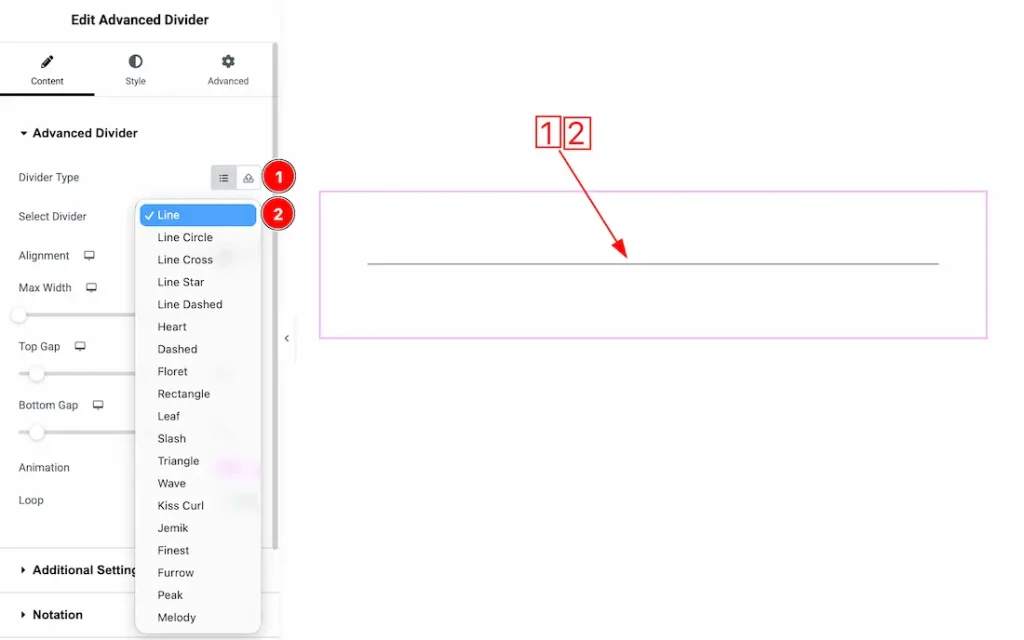
1. Divider Type: Here, you will get the divider type- select and choose. Here we select the divider type – select.
2. Select Divider: After selecting the divider type- select, you will get the listed divider and you can choose one of them that you like.
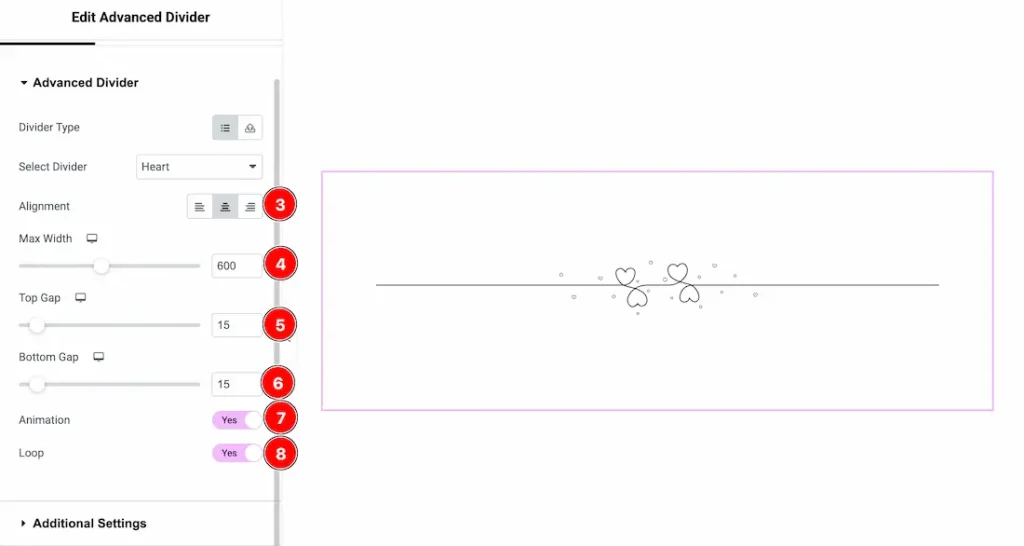
3. Alignment: You can set the divider alignment – Left, Center, and Right.
4. Max Width: You can set the divider’s max width from here.
5. Top Gap: You can adjust the divider top gap from here.
6. Bottom Gap: This option lets you adjust the bottom gap of the divider.
7. Animation: Enable/disable the animation switcher button to show/hide the animation from the divider.
8. Loop: Enable this option to make the divider animation repeat whenever you scroll away and come back to the divider.
Additional Settings Section
Go to Content → Additional Settings
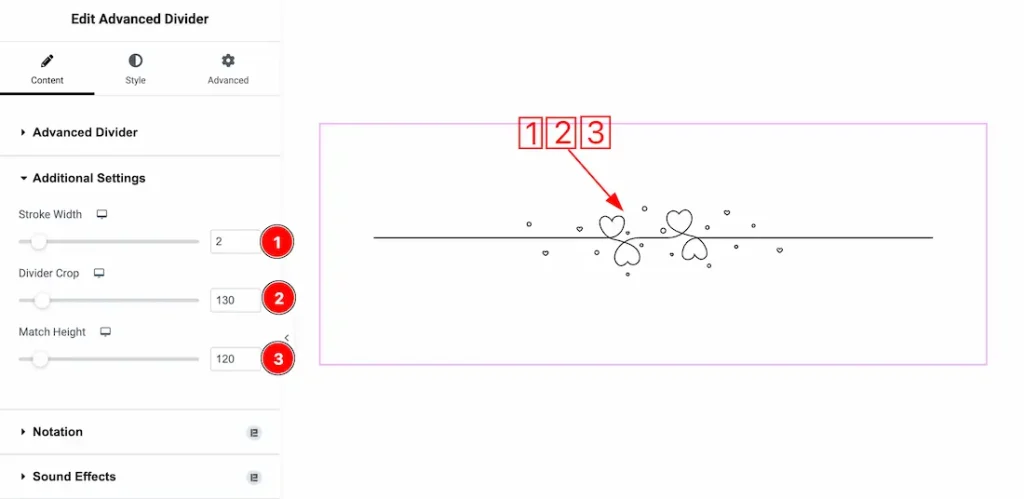
1. Stroke Width: This option lets you set the divider stroke width.
2. Divider Crop: This option lets you set the divider Crop value.
3. Match Height: You can adjust the divider match height from here.
Work with The Style Tab
Advanced Divider Section
Go to Style → Advanced Divider
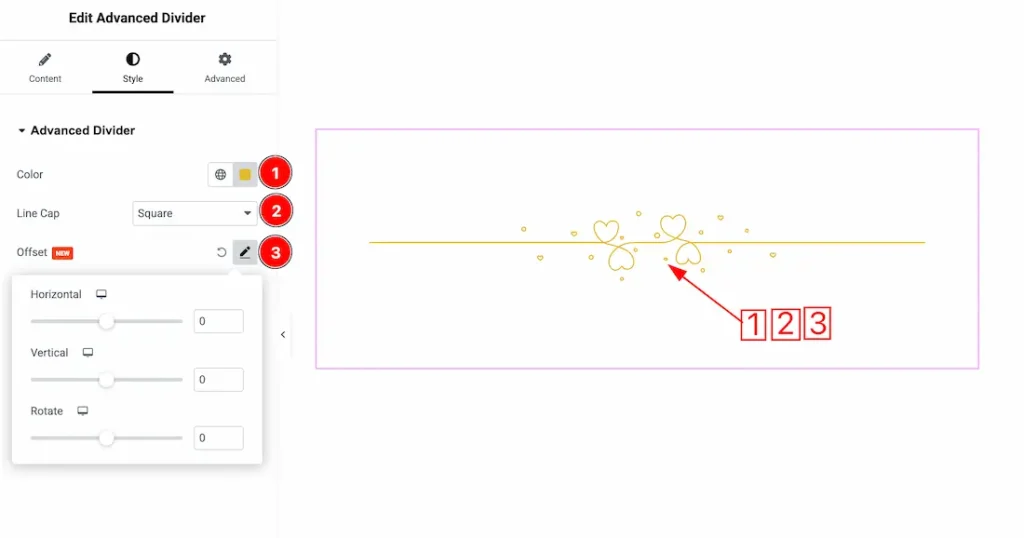
1. Color: This option lets you change the divider color.
2. Line Cap: This option controls the shape of the divider line’s ends. You can set the Line Cap type- Square, Rounded, and Butt.
3. Offset: You can adjust the divider horizontally, vertically, and rotate it from here.
All done! You have successfully customized the Advanced Divider widget on your website.
Video Assist
You can also watch the video tutorial to use the Advanced Divider widget. Please visit the demo page for examples.
Thanks for being with us.