

The eCommerce exclusive Brand Carousel Widget is a handy tool presented by BDthemes and is a part of the Ultimate Store Kit. It lets you branding of your products and your site to catch the eyes of the visitors.
Let’s learn how to use the widget on your site.
Inserting the widget

First, you have to insert the widget on the page. To do that, go to the widget menu, then search Brand Carousel, then drag-drop the widget in the text area on the page.
Content tab customization
Edit the Layout
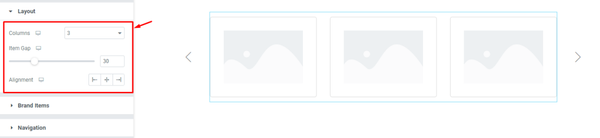
After inserting the widget, we are going to customize the Layout section under the Content tab. To do that, go to Content > Layout. Here, select the Columns number, then set the Item Gap by 30, then select the Alignment to left, middle, or right.
Arrange the Brand Items
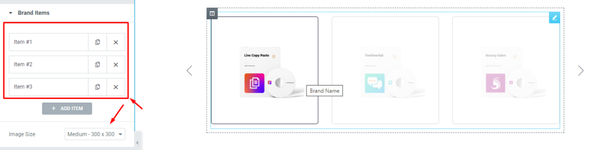
Next, go to Content > Brand Items. Here, you can see the item list by serial number. Below it, there is a button named ADD ITEM by which you can add more items as you wish, and you can see the Image Size option below the button from where you can select the image size and a default carousel view on the page.
Change the first item
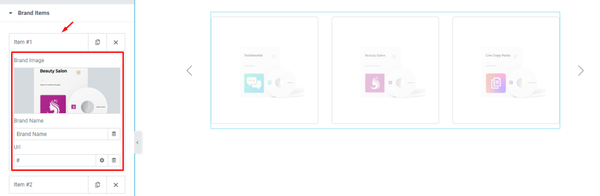
Now, go to the first item, then change the Brand Image, then change the Brand Name.
Set the Navigation
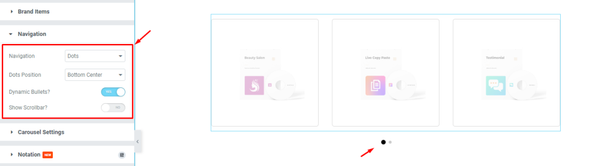
Next, go to Content > Navigation. Here, select the Navigation style, then change the Navigation Position, then enable the Dynamic Bullets? switcher, and see the result on the page.
Change the Carousel Settings
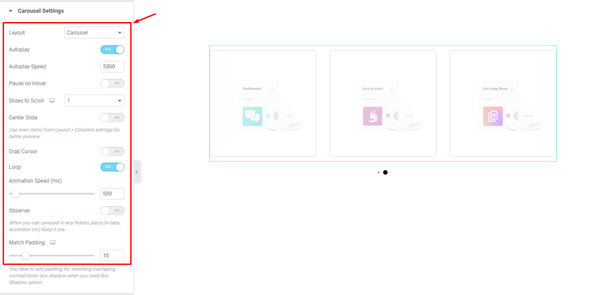
After that, go to Content > Carousel Settings. Here, you can see some fields and switchers, fill up the fields, enable the switchers you need, and see the result.
Style tab customization
Format the Items
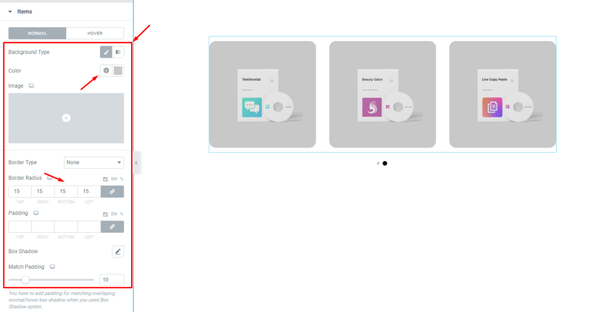
Now, we are going to customize the Items section under the Style tab. To do that, go to Style > Items. Here, you can see two modes i.e.: NORMAL and HOVER. For the NORMAL mode, set a Background, then change the Background Color, then set the Border Radius to 15, and see the result.
Edit the Image
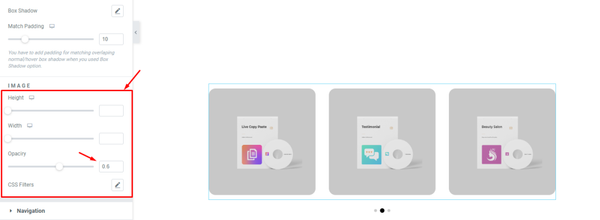
Next, go to the IMAGE sub-section. Here, you can see three fields i.e.: Height, Width, and Opacity, and CSS Filters option. Now, fill up the Opacity field manually or use the scroller as you need. and see the result.
Change the Navigation
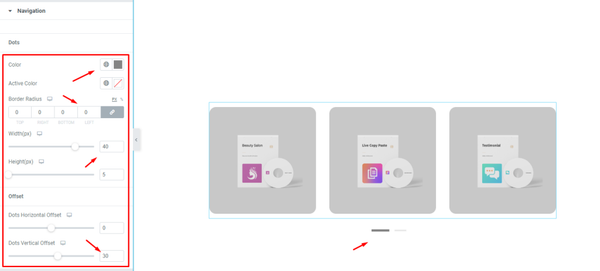
Lastly, go to Style > Navigation. This section is linked to the Navigation section under the Content tab and the options vary upon it. Here, change the Color, then set the Border Radius, then change the Width, then change the Dots Vertical Offset (for Dot), and see the result on the page.
Video assist
If you have more queries about this widget, please watch the attached tutorial video.
You can also see our demo page to learn more.
Thank you.