

The Optick Slider widget is a totally unique slider widget with an attractive layout, a blurred content canvas, and a carousel-type slider panel design, developed by the Ultimate Post Kit plugin. It helps you create an awesome blog page where you can arrange a large number of posts into this slider layout.
Let’s see how it works!
Inserting widget

Find the Optick Slider widget for Elementor from the widget menu in the Elementor page editor and drag it inside your webpage.
Inside The Content Tab
The Content tab holds the base settings for the widget and lays the foundation of the layout of the final content. It’s divided into four parts for the Optick Slider widget for Elementor.
Layout Of Content
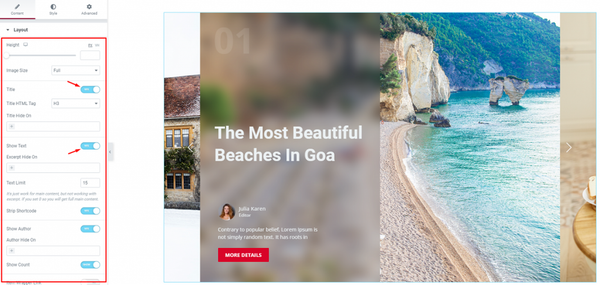
Go to Content> Layout
From the top, you will see a slider height adjustment scrollbar along with image size options. You can adjust image resolution or just preserve the original resolution by selecting the Full option.
Right below, you will see a bunch of switches that turn on/off certain items like the Title, Excerpt, Author, etc. on the WordPress sliders. Some of the switchers come with an additional option to hide a specific item from the display.
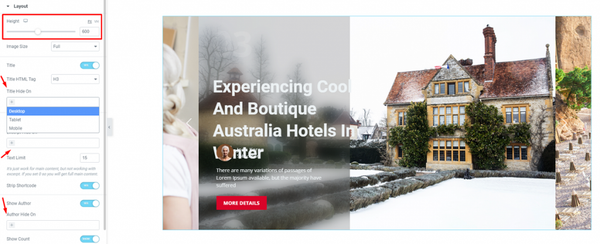
Just click on a field and select the device where you want to hide the specific item (title, excerpt, author, etc.).
Query Of The Optick Slider
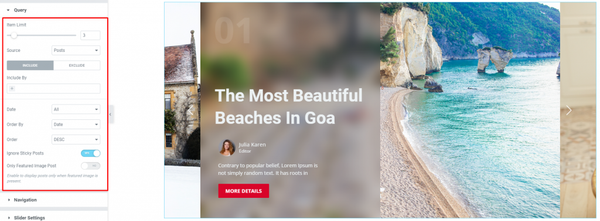
Go to Content> Query
Here, you need to define the number of posts shown on the display by the Item Limit option. The source can be selected from posts, pages, and landing pages. You can show categories, tags, as well as set the order of the posts on the slider for blogs. There’s also an include/exclude option included in the query section.
Available Navigation System
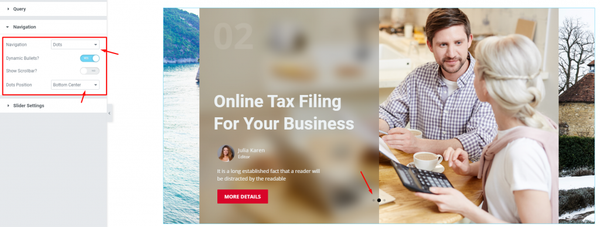
Go to Content> Navigation
Optick Slider widget for Elementor has a separate section to display its navigation. It can either be arrows or dots, or both combined. You can select any of them from the options. Let’s go with the Dots navigation and set the button position to the bottom center.
Slider Settings For Animations
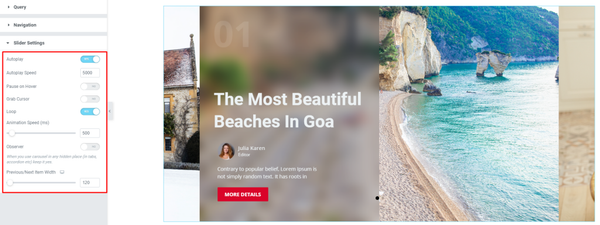
Go to Content> Slider settings
Lastly, you will get the settings for the carousel animation in this section at the bottom. You can set the WordPress sliders animation to Autoplay mode and put a time value for the autoplay speed. There is a switcher that makes the default cursor into a Grab Cursor whenever you hover over the carousel.
Inside The Style tab
The style tab allows you to change or customize the appearance of the Optick Slider widget for Elementor. The options include color settings, borders, paddings, etc.
There are several sections on this tab.
Items Customization Menu
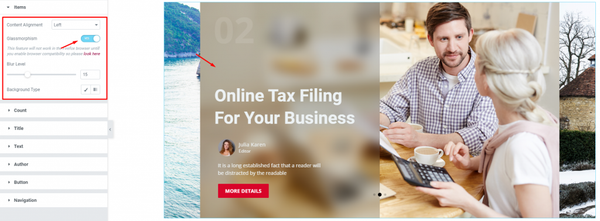
Go to Style> Items
In the first section, you get to reposition the content alignment of the sliders. The Glassmorphism effect is turned on by default that makes the blurred content background on the Optick slider widget. You can adjust the blur level as well as choose a background type over the post images.
Customize Slider Count
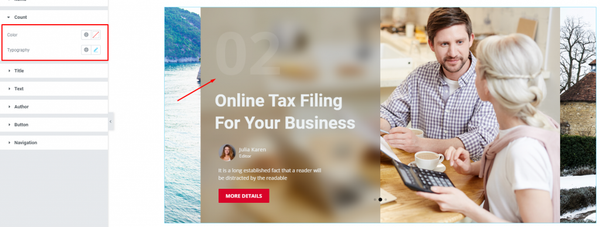
Go to Style> Count
There’s a slider count number, half-visible on the slider items. This is another cool feature of the Optick slider widget for Elementor. You can change its color and typography from this section.
Titles Of The Sliders
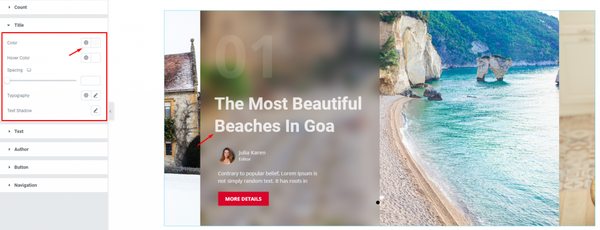
Go to Style> Title
The Title section mainly gives you the option to change the text color and typography of the titles. The color option is available for both active & hover modes. Also, you have the text-shadow & spacing options for this slider for blogs, by the Ultimate Post Kit plugin.
Text Or Slider Excerpt
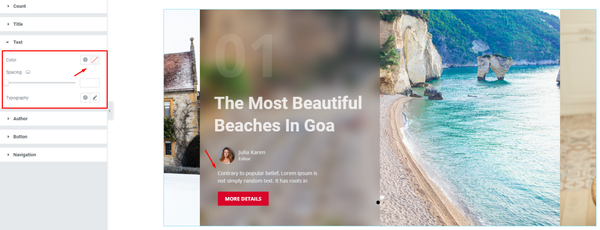
Go to Style> Text
Change color & typography of the post description as well as adjust the spacing from this section.
Post Author Customization
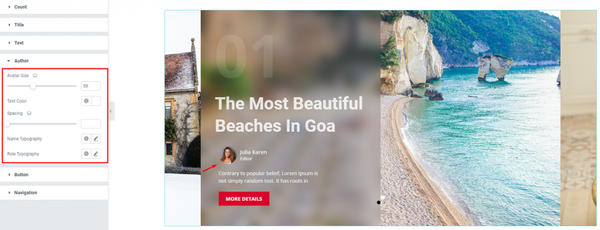
Go to Style> Author
Of course, each post has an author that will be displayed at the bottom of the post block of the Optick Slider widget. However, the author’s name and image can be customized by color & typography, size, and spacing through this section.
Call To Action Button
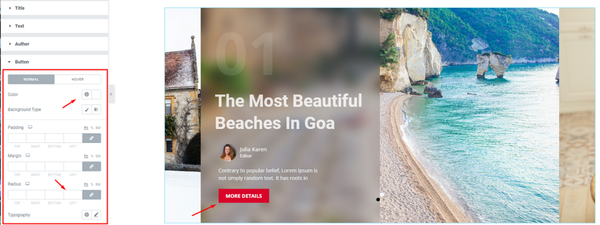
Go to Style> Button
Let’s customize the slider button by changing the color of the text, a solid background color, and some padding. Don’t forget to apply a hover color with a deeper contrast for the button.
Navigation System Customization
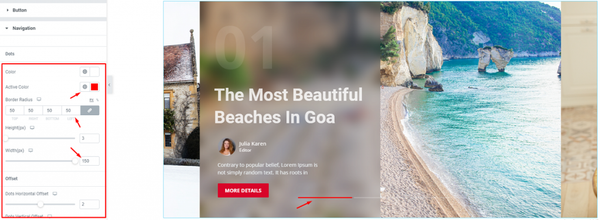
Go to Style> Navigation
Lastly, you can customize the navigation pointers in this section. Let’s make the dots more stylish by adding some padding, changing inner & outer color, and size. You can easily change the shape of the dots and make them into lines using the controls provided by the Ultimate Post Kit plugin.
This section displays different options for different types of navigation systems for the Slider for blogs.
Conclusion
Still, stuck?
Watch this quick video for visual instruction and see the demo page for more examples, provided by Bdthemes.