The Stacker widget is an interactive layout tool that allows you to display multiple sections or items in a stacked scrolling effect, fully integrated into Element Pack Pro. It enhances visual storytelling by layering content and revealing it progressively as users scroll, creating a smooth and engaging browsing experience. In this documentation, we will explore the customization options of the Stacker widget provided by Element Pack Pro for Elementor.
Enable The Stacker Widget
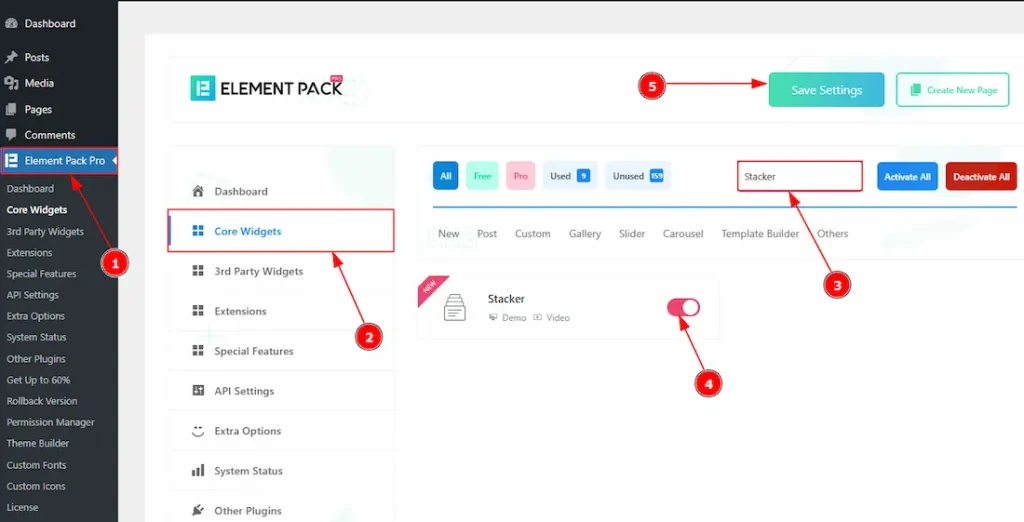
To use the Stacker widget from Element Pack Pro, first, you have to enable the widget.
- Go to WordPress dashboard → Element Pack Pro Plugin dashboard.
- Then, Click the Core Widgets Tab.
- Search the Stacker Widget Name.
- Enable the Stacker Widget.
- Hit the Save Settings Button.
Inserting The Stacker Widget
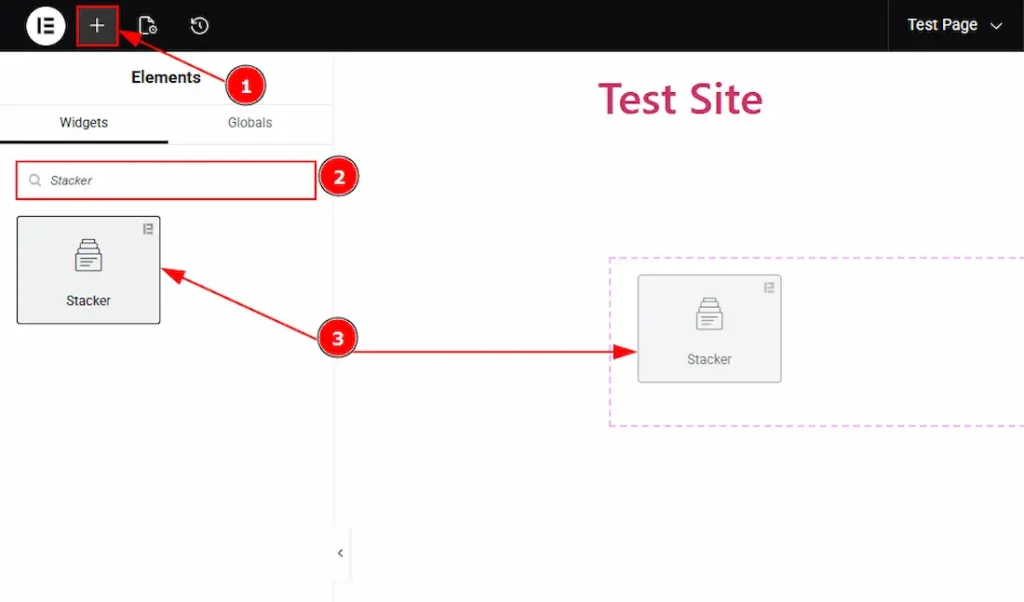
1. Go to the Elementor Editor Page and hit the “+” icon Button.
2. Search the Stacker name.
3. Drag the widget and drop it on the editor page.
Configure the Design for Stacker Widget Integration
To use the Stacker widget, you first need to create a design based on your layout requirements. This design must be built inside a Container or section, as the Stacker widget works by stacking containers/ sections.
In the example below, you can see a demo design created inside a container to help you understand how the Stacker widget is applied in a real layout.
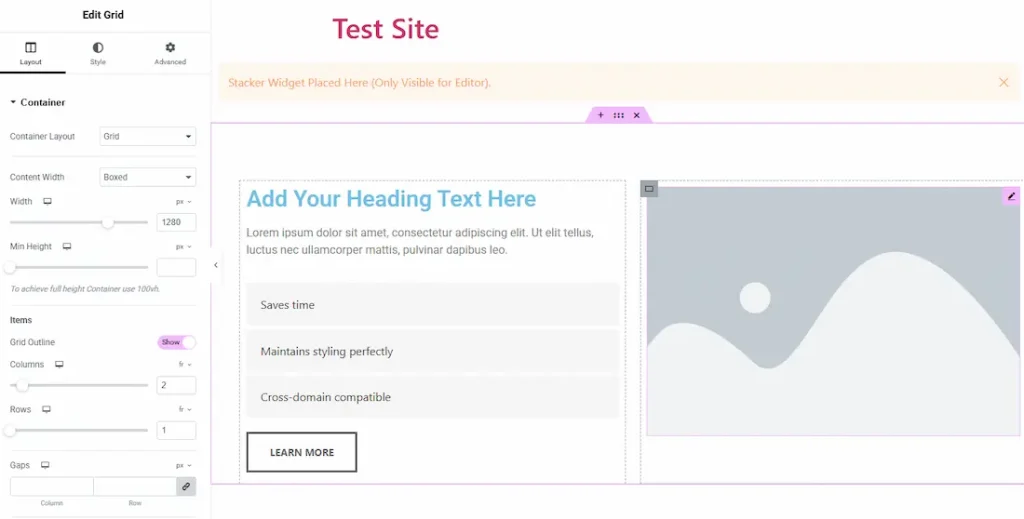
In this example, we use a container with a grid layout to display content in two sections. The left side shows the information, including the Name (Advanced Heading), Description (Text Editor), Key Features (Fancy List), and a Call to Action button (Advanced Button). The right side is used to display the image.
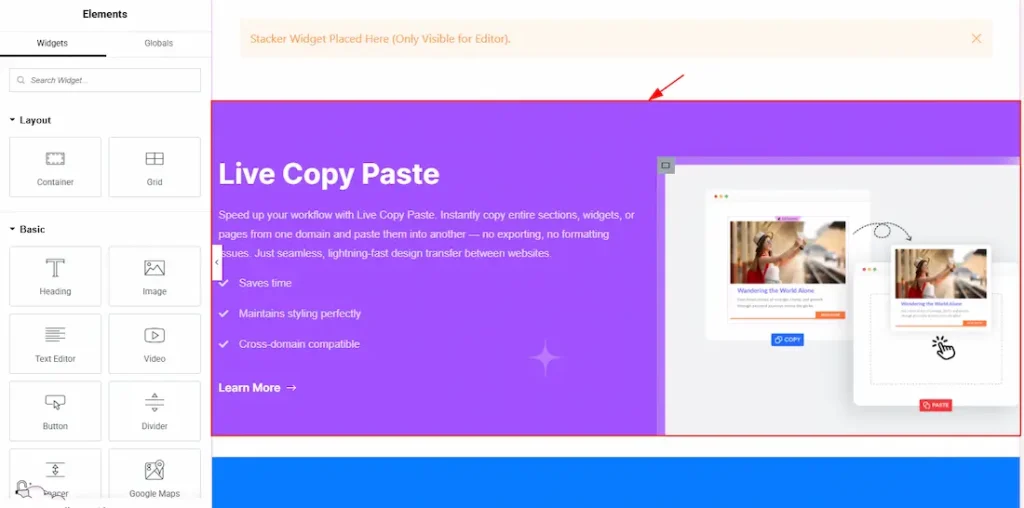
After setting up the layout, we added the required content and customized the design according to our needs. You can create multiple containers in the same way based on your requirements. In this example, we have created six containers and customized each of them accordingly.
Work With The Content Tab
Stacker Section
Go to Content → Stacker
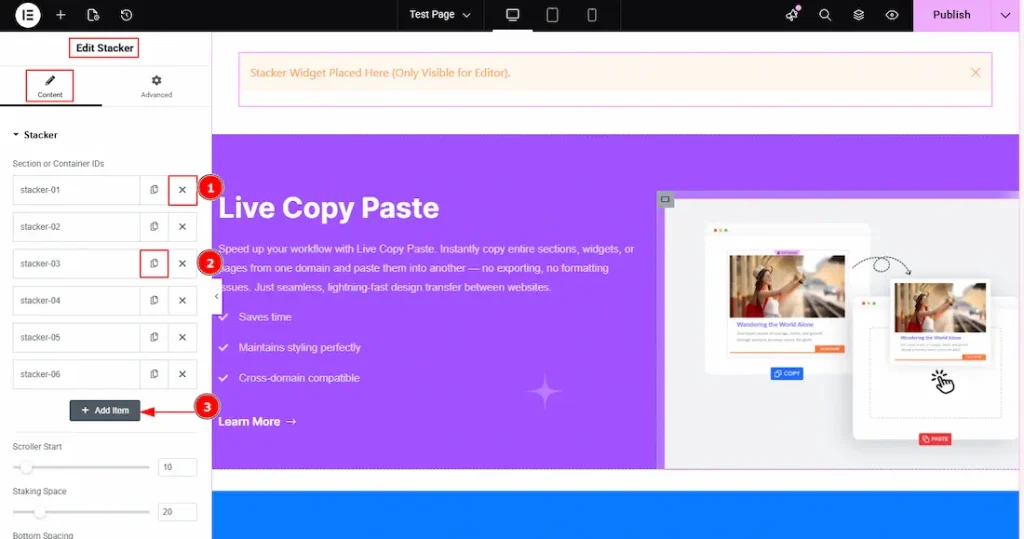
From this panel, you can add, duplicate, or remove stacker items. Create one stacker item for each container or section you want to integrate with the Stacker widget. For example, if you have created six containers or sections, you need to add six stacker items to properly link each one with the Stacker widget.
1. Close Item: You can delete the Slider item by clicking the Close icon button.
2. Copy Item: This option lets you copy the same item.
3. Add Item: You can add a new item by clicking the “+” Add Item button.
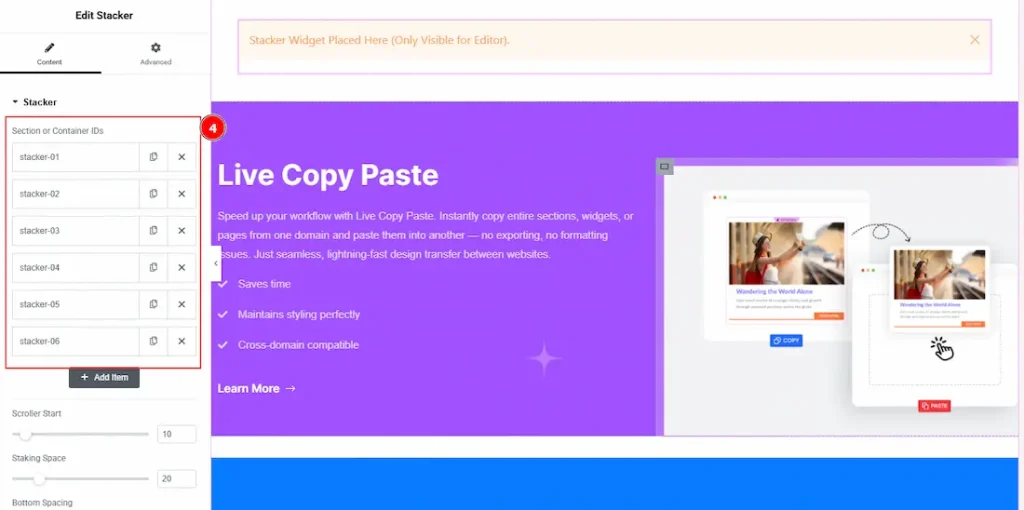
4. As we have designed 6 containers to integrate with the stacker items, we have taken 6 stacker items.
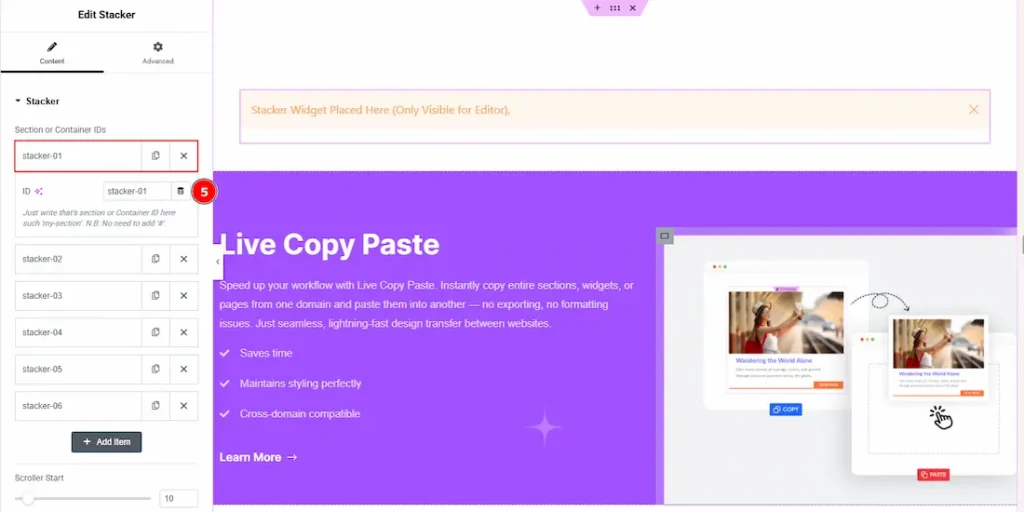
5. Select the Stacker widget, go to the inner option of the stacker items, and here you have to set the ID to connect with the container. (Please ensure that you use the same ID in both places.)
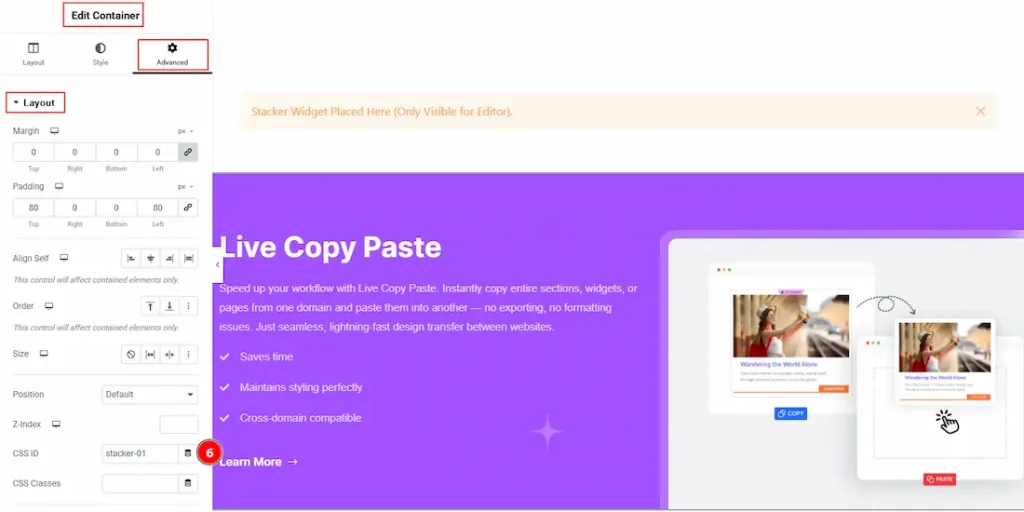
6. Select the container that you want to connect, then go to Advanced and paste the ID in the CSS Id field to complete the connection.
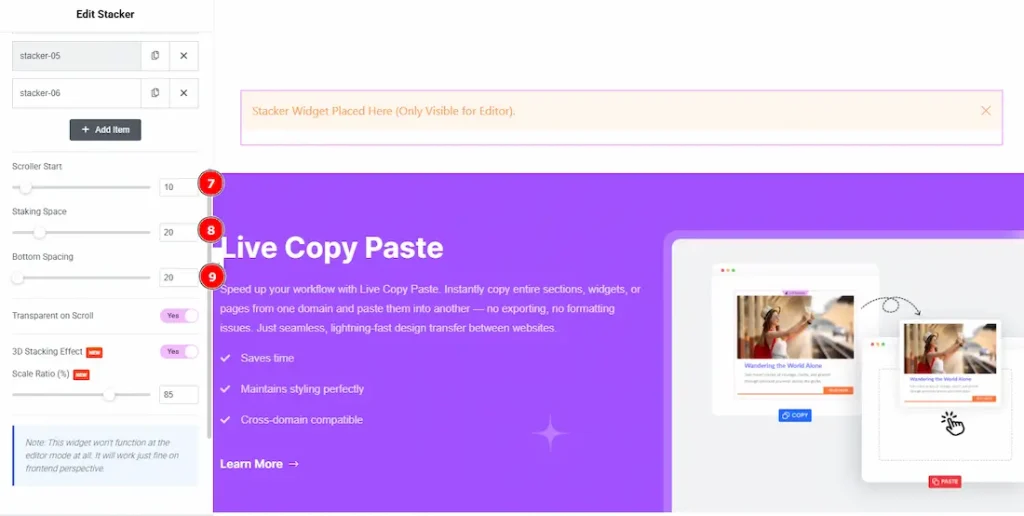
7. Scroller Start: This option defines the scroll position at which the stacking effect begins. Before this point, items scroll normally. Once the defined value is reached, the stacker effect becomes active.
8. Starting Space: You can control the vertical spacing between stacked items. Increasing the value adds more space between each stacked layer with this option.
9. Bottom Spacing: You can set the space below the stacked items after the stacking animation completes. This helps maintain layout balance and prevents content overlap.
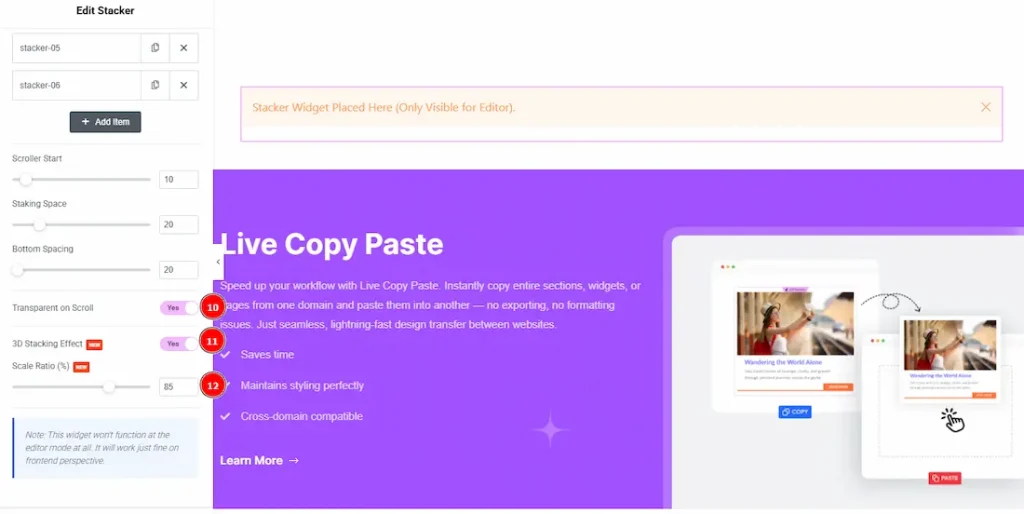
10. Transparent on Scroll: Enable the switcher to make the stacked items become transparent while scrolling, allowing underlying content to remain visible and enhancing the stacking effect.
11. 3D Stacking Effect: Enable the switcher for a three-dimensional stacking animation, adding depth and perspective to the stacked items during scroll interaction
12. Scale Ratio: You can adjust the scale of stacked items as they move backward in the stack. Lower values create a stronger depth effect by making items appear smaller.
Note: The widget does not function in the editor mode at all. It will work just fine from the frontend perspective. To see the preview of the changes that you have made, please click on the publish button in the top right corner and then preview the changes.
All done! You have successfully customized the Stacker widget on your website.
Video Assist
You can also watch the video tutorial to learn more about the Stacker widget. Please visit the demo page for examples.
Thanks for being with us.