

This documentation will cover the installation and customization of the Mailchimp For WordPress widget in Elementor.
To start-
- You should install the Mailchimp For WordPress plugin separately to use this widget in Elementor Editor.
- To create a Mailchimp Account.
- Then, generate Mailchimp API Key from the account you have.
So let’s go started.
How To Install The Mailchimp For WordPress Plugin in Elementor Editor
First, you should go to this link Mailchimp For WordPress, and download the plugin. Then you should Install and Activate the plugin Like installing other plugins in your Elementor Editor.

Mailchimp Account Creation
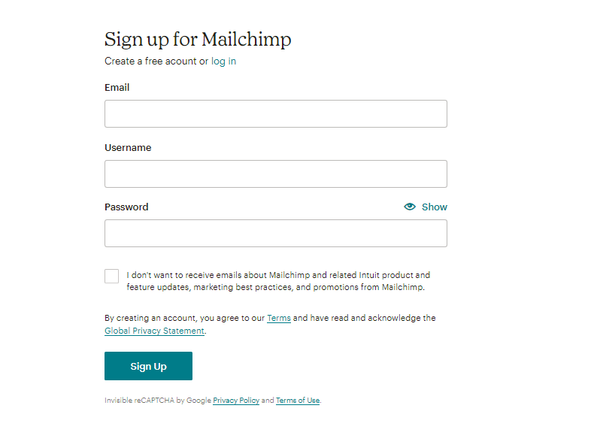
If you want to use our widget mentioned in the main title, you must have an account on the Mailchimp site URL. Fill up the Form and Sign Up then your Account will be Created (free account option available).
API Key Generation
API Key generation is important. Without the key, you’ll be unable to take the facilities of our widget.
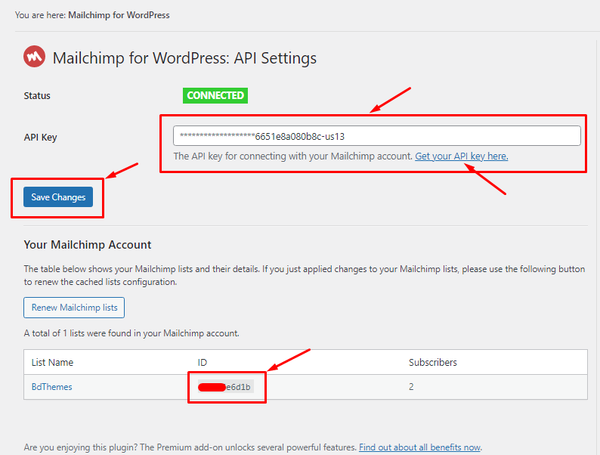
First, Go to WordPress dashboard > MC4WP > API Settings > then Click the Get your API key here link and generate the API key. After that, you will copy the API key and paste the key into the API key Field and Hit the Save Changes Button.
Inserting The Mailchimp For WordPress Widget
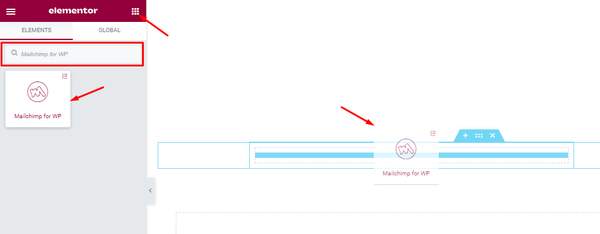
You can add the widget to WordPress by opening the page you want to use it on in Elementor and then dragging and dropping the Mailchimp For WordPress widget into that page.
Please note that you need both Elementor and Element Pack Pro installed before you can use this widget.
Work With The Content Tab
Layout section
Go to Content > Layout
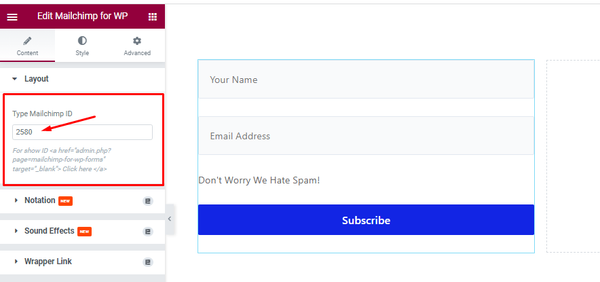
Step-1
Come to the Layout section, you will see the Type Mailchimp ID field. Here, you should type/paste your Mailchimp ID.
Step-2
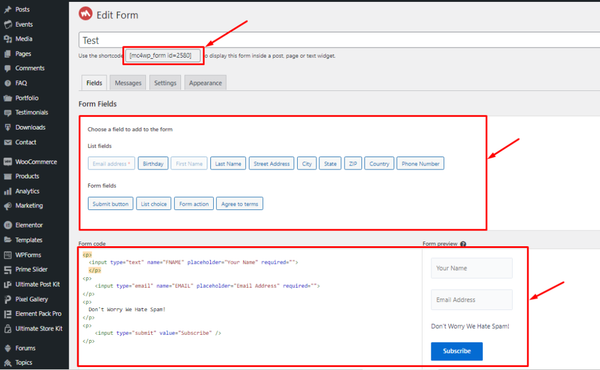
For getting the Mailchimp ID, you should go to WordPress dashboard > MC4WP > Form. Here, you will get your Mailchimp Form ID and you can also design your Form by using the Form Fields as your demand. After entering your Mailchimp Form ID in the field then your Mailchimp Form will appear on your Elementor Editor Page.
Work With The Style Tab
Input section
Go to Style > Input
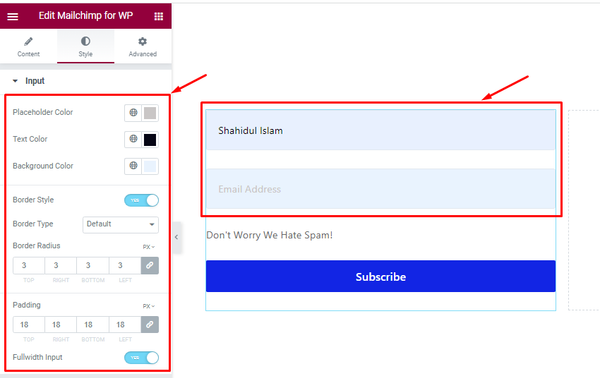
Come to the Input section, you can change the Placeholder Color, Text Color, and Background Color as your demand. Here, you can On/Off the Border Style switcher button and set the Border Style Type, Border Radius, and Padding as your need as I marked in the Screenshot. If you want you can On/Off the Fullwidth Input switcher Button for Fullwidth your input section.
Label section
Go to Style > Label
In this section, you can easily On/Off the Label Position Top Switcher Button. Here, you can change the Label Text Color, Margin, and Typography for better Label Design. please try it yourself for your demand.
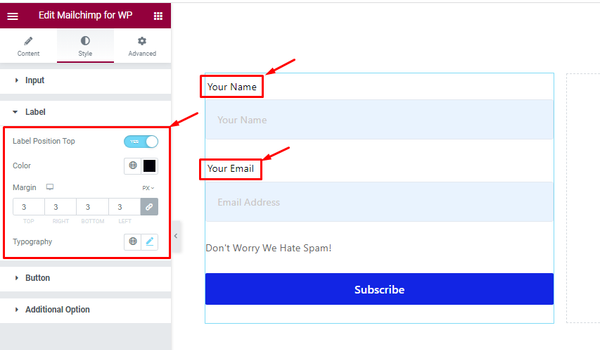
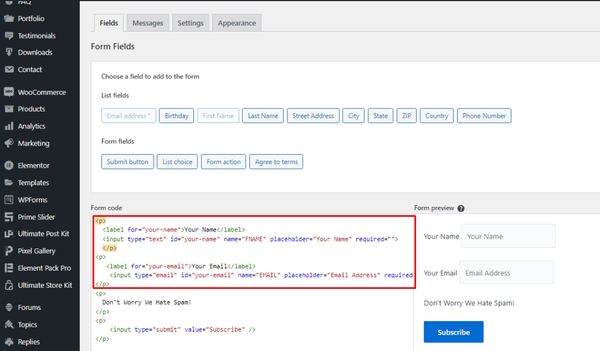
For Label, go to WordPress dashboard > MC4WP > Form and create code for Label and Hit the Save Changes button. After that, your Label will show on your Elementor Editor.
Button section
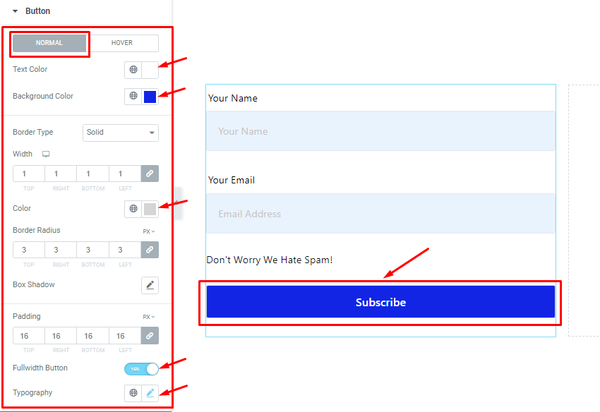
Go to Style > Button
Step-1
Come to the Button section, In Normal mode, you can change the Text Color, and Background Color as your wish. Here, you can set the Border Type and Width for highlighting the Button Border and also set a Border Color as your demand. you can also set the Border Radius, Padding, and Box Shadow to show your Button Text and Border More attractive. Here, you can On/Off the Fullwidth switcher Button for showing your Button Fullwidth and set the Typography to Make the best (Font, Size, Height, Width, Style, Various kinds of Spacing, etc.) design for your Button.
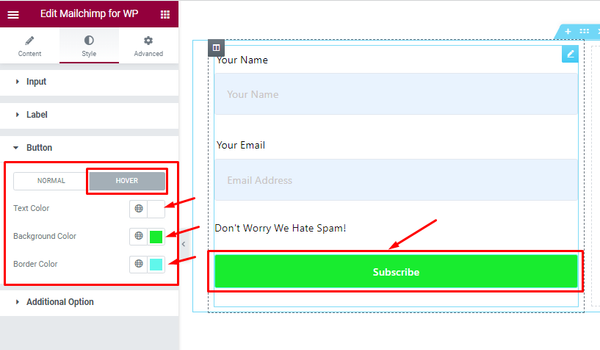
Step-2
In Hover Mode, you Set the Button Text Color, Background Color, And Border Color as your demand to Highlight your Button to the User.
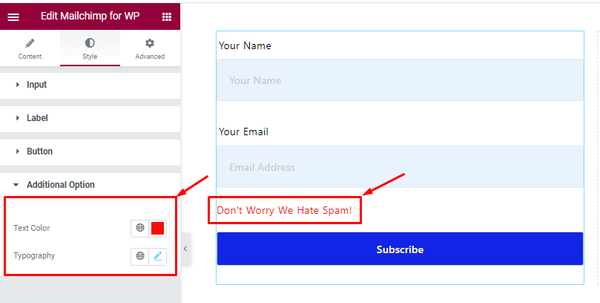
Additional Option section
Go to Style > Aditional Option
Come to the Additional Option Section, You can change the Text Color and Typography to your demand which I have marked in the screenshot.
All done! You have successfully customized Mailchimp For WordPress Widget on your website.
Video Assist
You can watch this video to learn about the Mailchimp widget. Don’t forget to visit the demo page for more examples.
Thanks for being with us.