The Newsletter widget helps you collect emails from your visitors and let you create mail lists easily. It’s one of the most important features for a blog site that you can get for free along with a customization interface at the Ultimate Post Kit plugin.
Let’s see how it works.
Inserting widget

Find the Newsletter widget from the widget menu in Elementor page editor and drag it inside your webpage.
Content tab
The Content tab holds the base settings for the widget and lays the foundation of the layout of the final content. It’s divided into two parts for the Newsletter widget.
Layout

Go to Content> Layout
The first section is divided into 3 segments where you will see a switcher on the top. By turning on the Before Icon switcher, you can display an icon on the left side of the email field. There are also fields for before & after texts. The Alignment option is for these two texts on the WordPress newsletter plugin.
You can put any word as the email field placeholder at the bottom.

Also, turning on the Fullwidth Email Field switcher will give you the Fullwidth Button switcher on the newsletter. Turning both on will make the email field and button cover the whole width of the section.
Signup Button

Go to Content> Signup Button
The Signup button is located on the right side of the email field on the newsletter for WordPress. You can edit the text and also place an icon alongside it. The icon can be positioned before or after the text as well as adjusting its spacing.
Style tab
The style tab allows you to change or customize the appearance of the Newsletter widget content layout. The options include color settings, borders, paddings, etc.
Before Icon

Go to Style> Before Icon
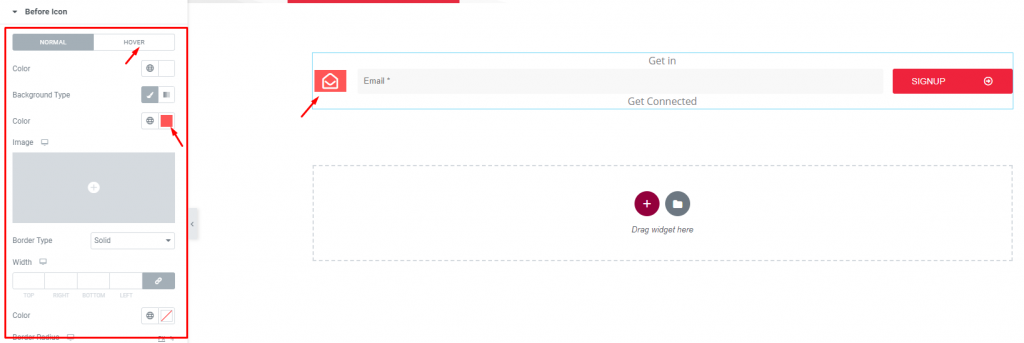
For the Before Icon, you will get color, border, padding, & radius options for customization. Let’s change the icon color to white & the background color to red.

To make the icon possess a similar height as the email field, increase the padding and adjust its size accordingly for the WordPress newsletter plugin.
Email Field

Go to Style> Email Field
There are a bunch of options to customize the email field of the Newsletter. You can toss some colors for the background, text, & border. Additionally, you can add padding, border radius, box-shadow, typography, or adjust the margin of the field of the newsletter for WordPress.
Sign Up Button

Go to Style> Sign Up Button
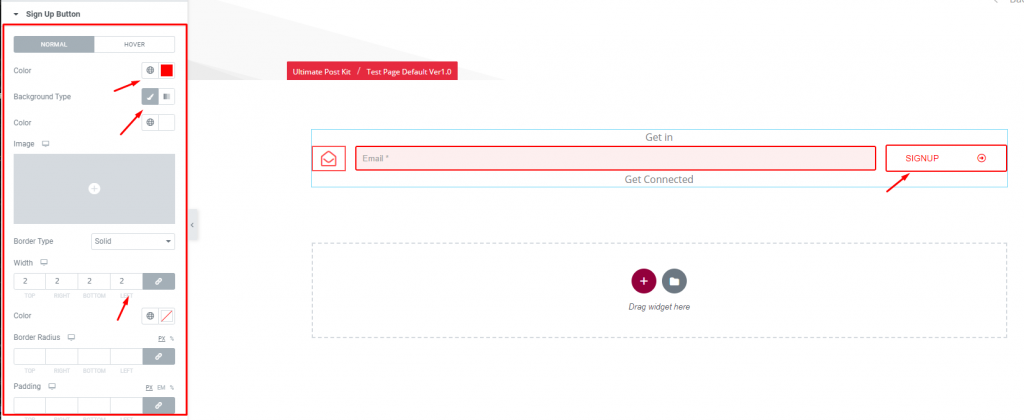
Let’s change the appearance of the signup button. Change the text color to red and the background to white. Set a minimum border width of 2. Don’t forget to reverse the colors in hover mode.
Sign Up Button Icon

Go to Style> Sign Up Button Icon
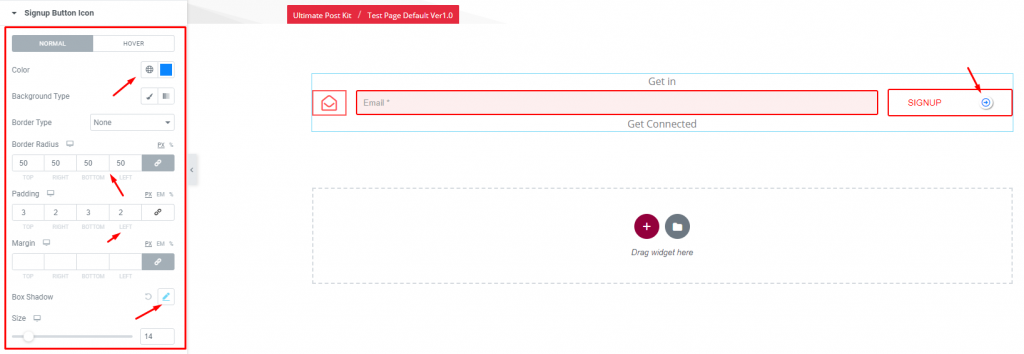
As for the icon on the signup button, let’s change the color of the icon, set the border-radius to 50, and make it into a circle. Adjust the padding to perfectly create the circle. Now, apply box-shadow and see the magic.
Before Text

Go to Style> Before Text
The Before/After Text has the same options for customization. So, you can play with the color, spacing & typography options.
Conclusion
Still, stuck?
Watch this quick video for visual instruction and see the demo page for more examples, provided by Bdthemes.
