

This documentation provides comprehensive insights into installing the Set up Wizard developed by Element Pack Pro.
First Install and Activate Elementor
To use our Element Pack Pro plugin you have to install the Elementor Builder. Follow the easy steps to install and activate it.
Search
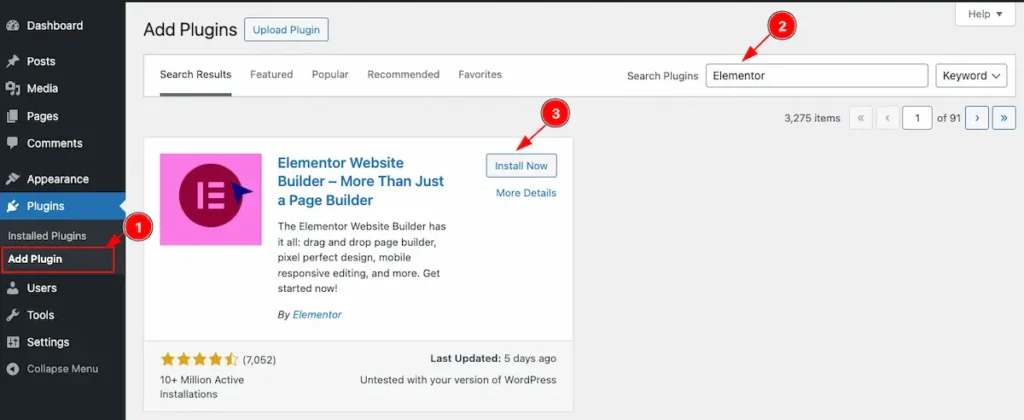
- Navigate to the Plugins > Add Plugin section from your WordPress dashboard.
- On the Search Bar, Search by the name ” Elementor ” , and The Elementor will appear with full info.
- Now click on the ” Install Now ” button to install the Elementor.
Activate
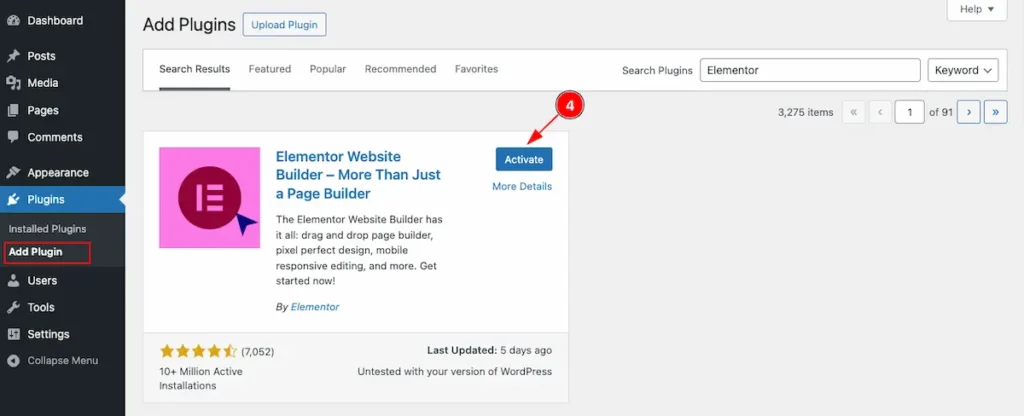
- Click on the “Activate” button activate the Elementor.
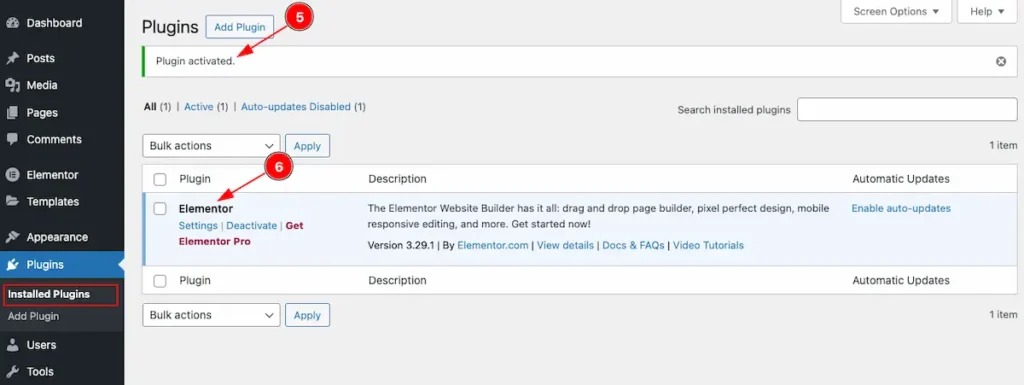
- Success message appear ” Plugin activated “.
- The Elementor plugin appear on Plugin section.
Setting up Set up Wizard
Upload Element Pack Pro
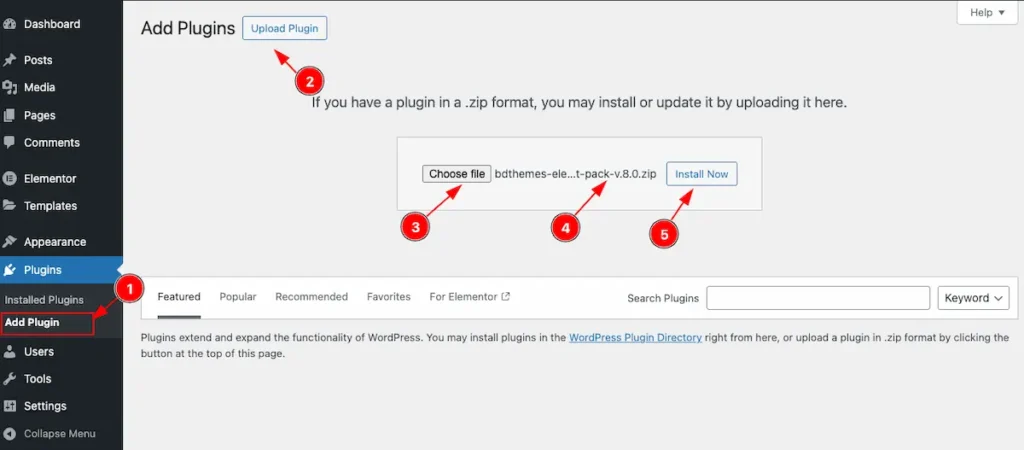
- Navigate to the Plugins > Add Plugin section from WordPress Dashboard.
- Click on the ” Upload Plugin ” button and it will appear a option for selecting the file.
- Choose file from computer local file where downloaded plugin store.
- The file name will appear there. e.g.: bdthemes-element-pack.zip
- Click on the ” Install Now ” button to install the Element Pack Pro.
Activate
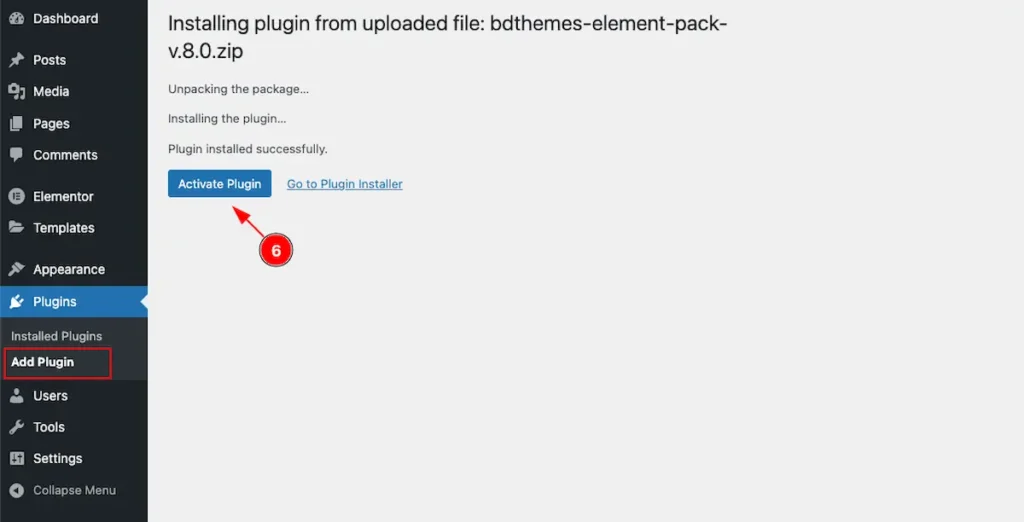
- Click on the ” Activate Plugin ” button to activate the Element Pack Pro. After install it will redirect to the Setting up wizard page. Follow the steps to setting it up.
Welcome
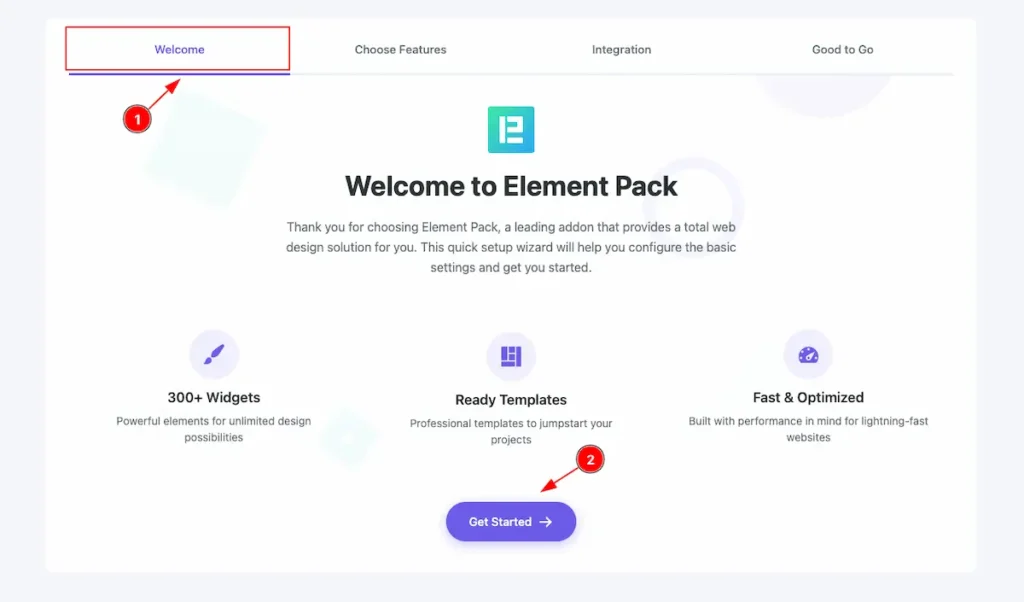
- Default the ” Welcome ” tab selected and It’s appear a welcome message of the Element Pack with basic features info.
- Click on the ” Get Started ” button to navigate to the Next Page.
Choose Features
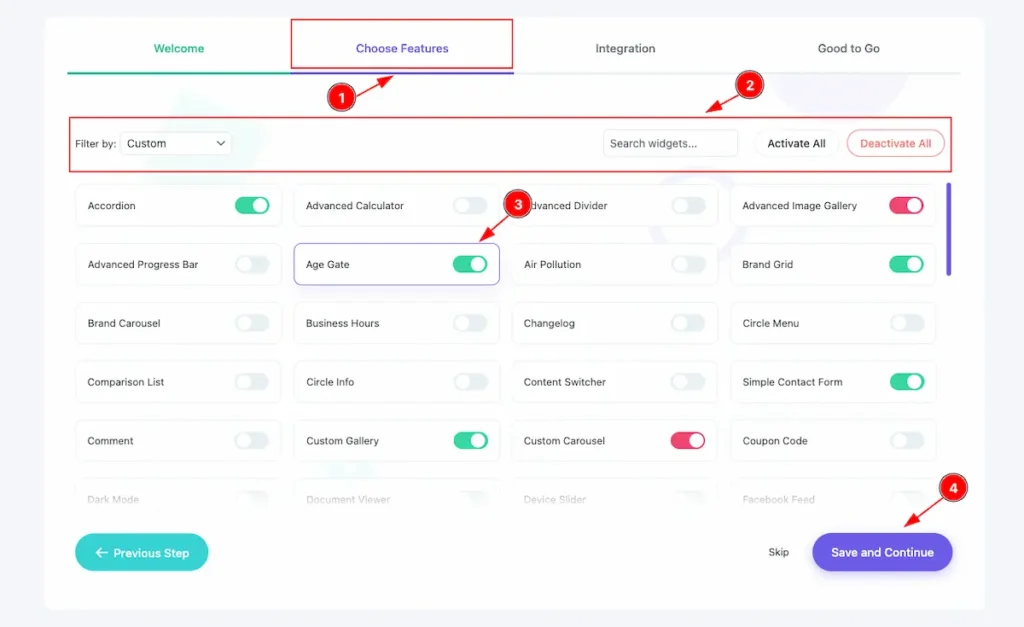
- Navigate to the ” Choose Features ” tab and her you can activate/deactivate your all the widgets available for the Element Pack Pro.
- Action Bar: This is very useful bar for activating and deactivating widgets.
- Filter By: Different filters are available for displaying all the widgets. e.g.: All, New, Post, Custom, Gallery, Slider, Carousel, Template Builder, Others.
- Search Widgets: Search by the widget name and it will appear the relevant widget.
- Activate All: It will activate all the widget at a time.
- Deactivate All: It will deactivate all the widget at a time.
- Choose any widget and turn on the switcher to activate the relevant the widget.
- Click on the ” Save and Continue ” to make changes and continue next page.
Integration
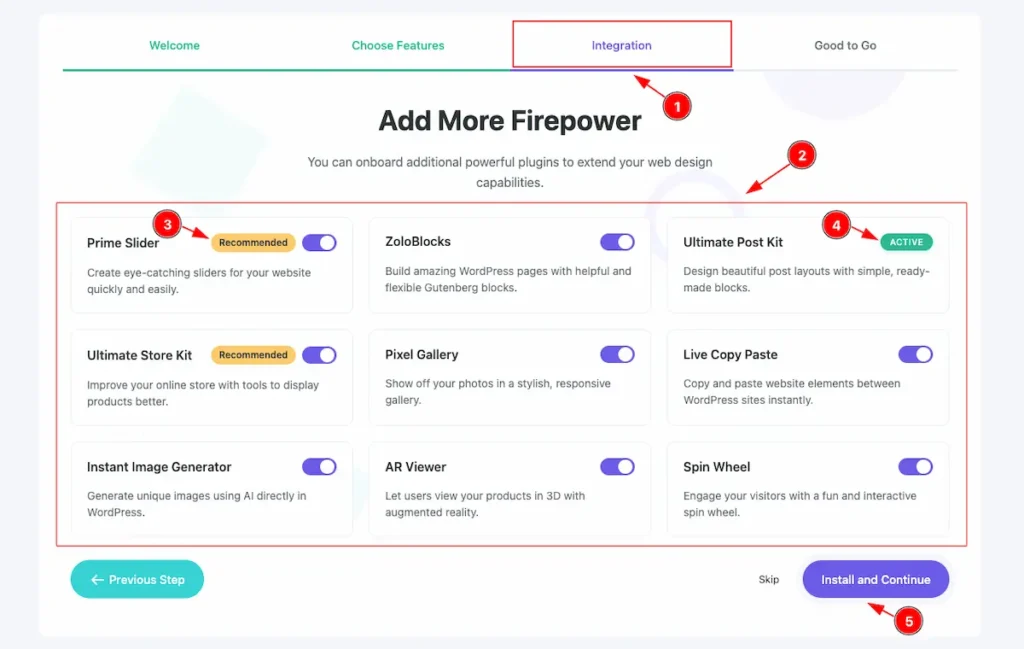
- Navigate to the ” Integration ” tabs all the integrate info from here.
- All the plugins named are appear here.
- Prime Slider: Create eye-catching sliders for your website quickly and easily.
- Ultimate Store Kit: Improve your online store with tools to display products better.
- ZoloBlocks: Build amazing WordPress pages with helpful and flexible Gutenberg blocks.
- Ultimate Post Kit: Design beautiful post layouts with simple, ready-made blocks.
- Pixel Gallery: Show off your photos in a stylish, responsive gallery.
- Live Copy Paste: Copy and paste website elements between WordPress sites instantly.
- Instant Image Generator: Generate unique images using AI directly in WordPress.
- AR Viewer: Let users view your products in 3D with augmented reality.
- Spin Wheel: Engage your visitors with a fun and interactive spin wheel.
- Recommended : The badge Recommended is for the mandatory plugin form your website.
- Activate: Already activate status appear here.
- Hit “ Install and Continue ” button to continue to next.
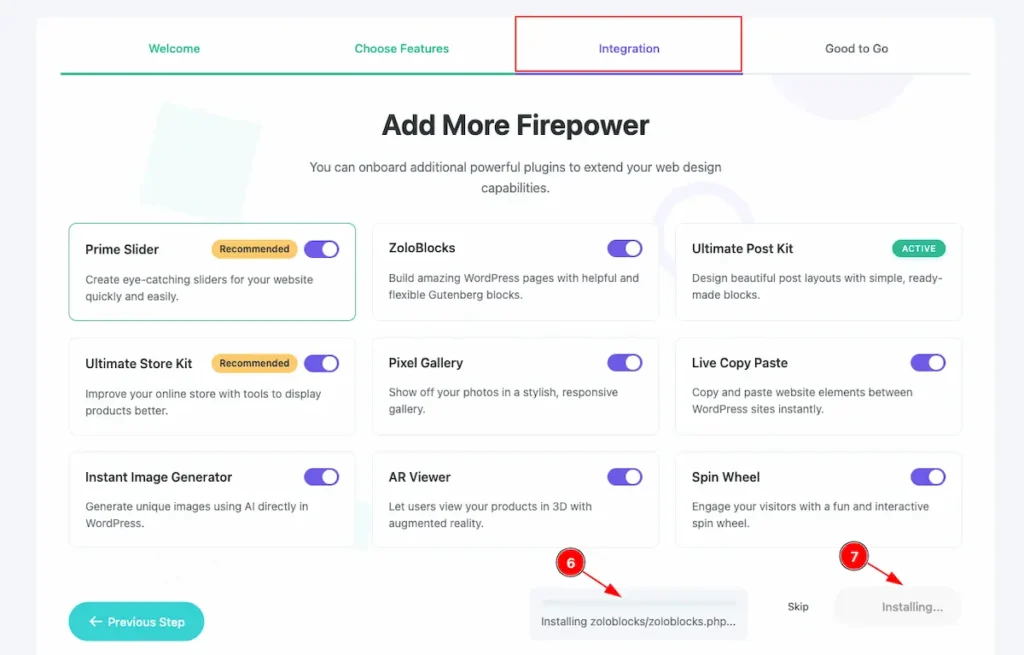
- The plugin installation process appear here.
- Until finish the Installation it will not allow to navigate.
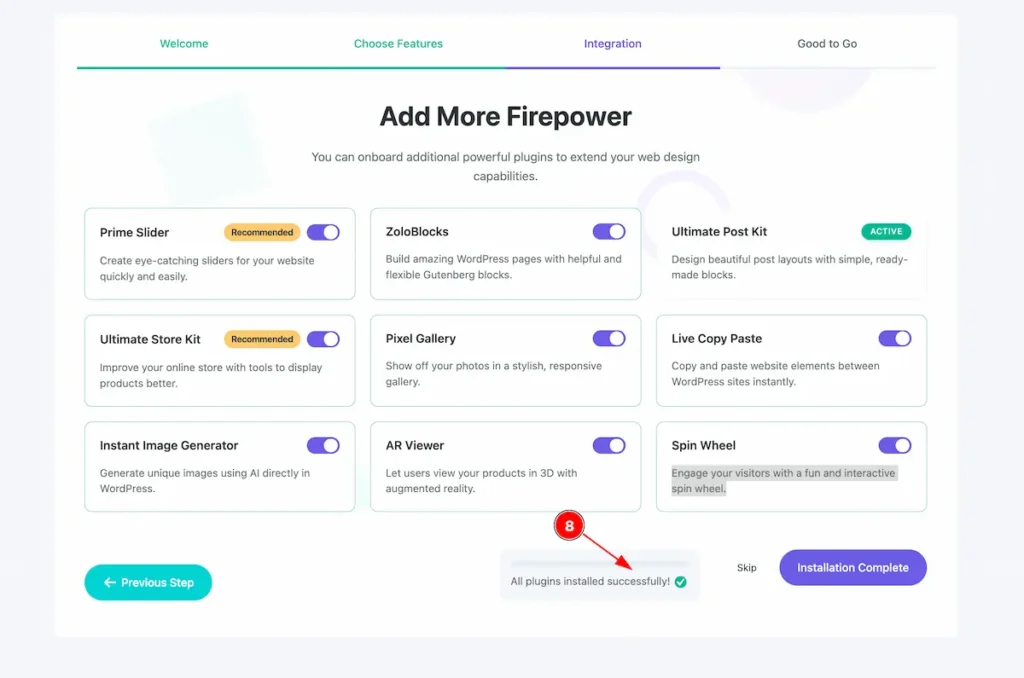
- After installing all the plugins it will a message “ All plugins installed successfully “.

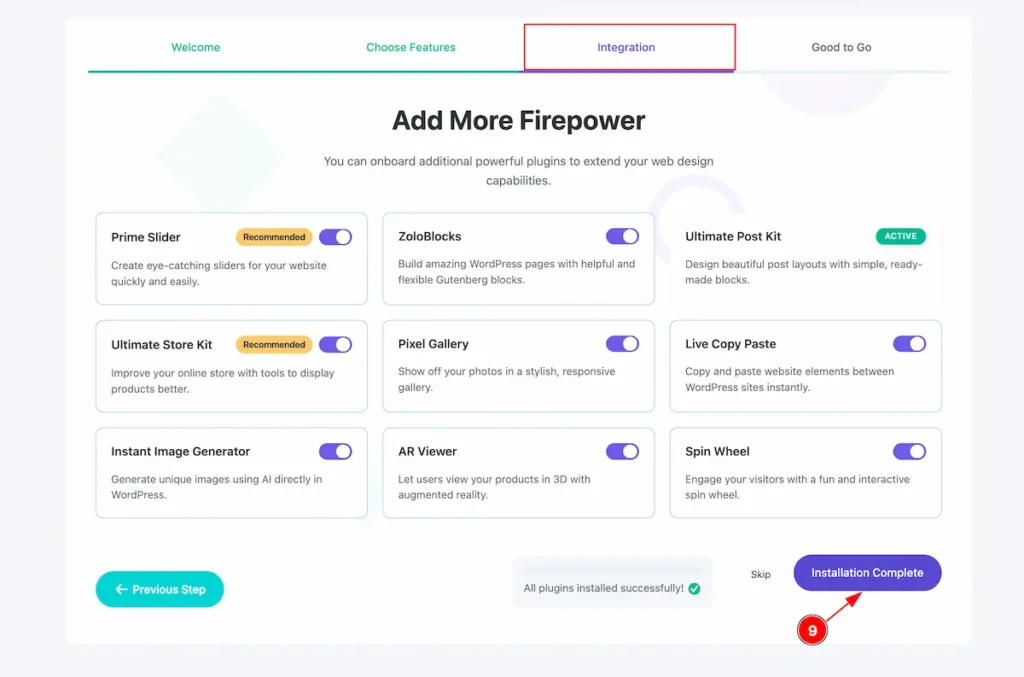
- After finishing the installation move forward , Click on the ” Installation Complete ” button.
Good to Go
Go to Element Pack Dashboard
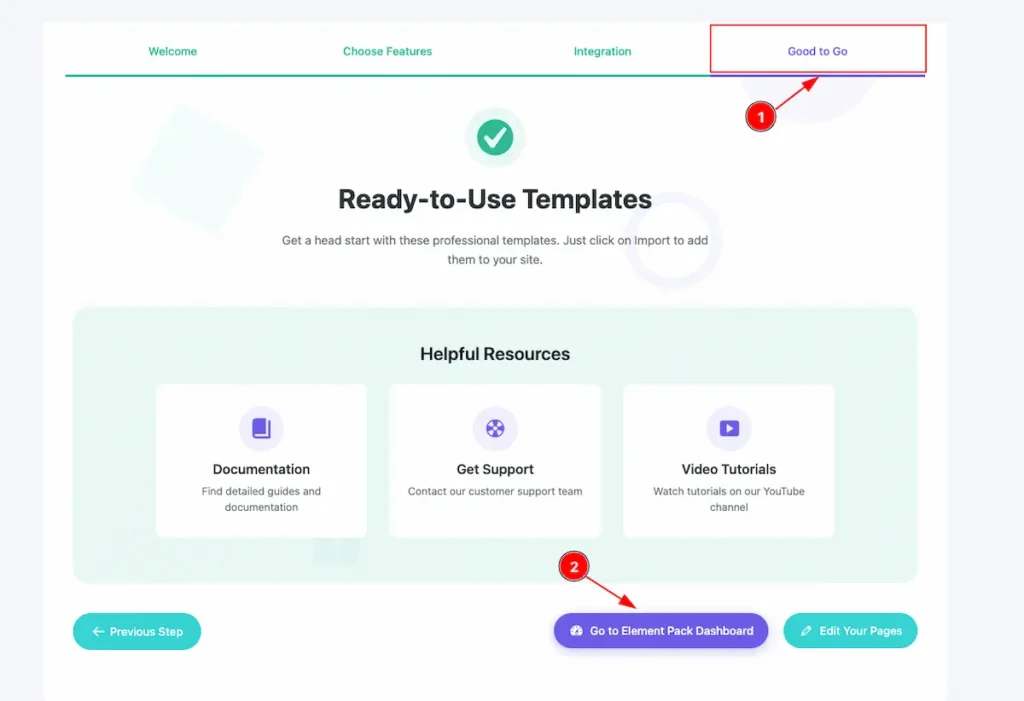
- Navigate to the ” Good to Go ” pages.
- Click on the ” Go to Element Pack Dashboard ” button. It will take to the Element Pack Pro Dashboard.
Element Pack Pro Dashboard.
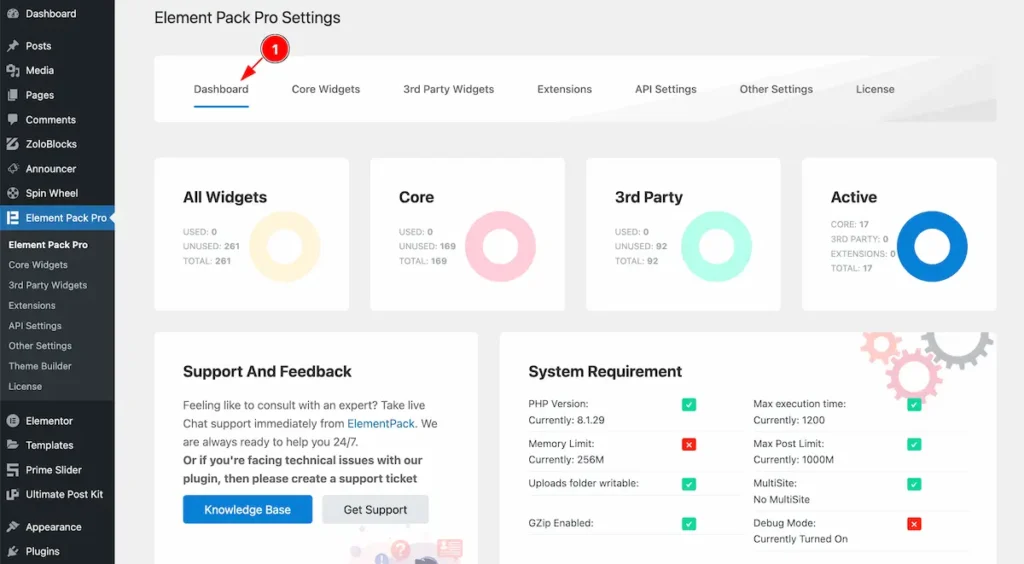
- All the info appear of the Element Pack Pro, Including the Widgets, Core, 3rd Party and Active. The system requirement info appear here also.
Learn about Activating the License key of Element Pack Pro.
Edit Your Pages
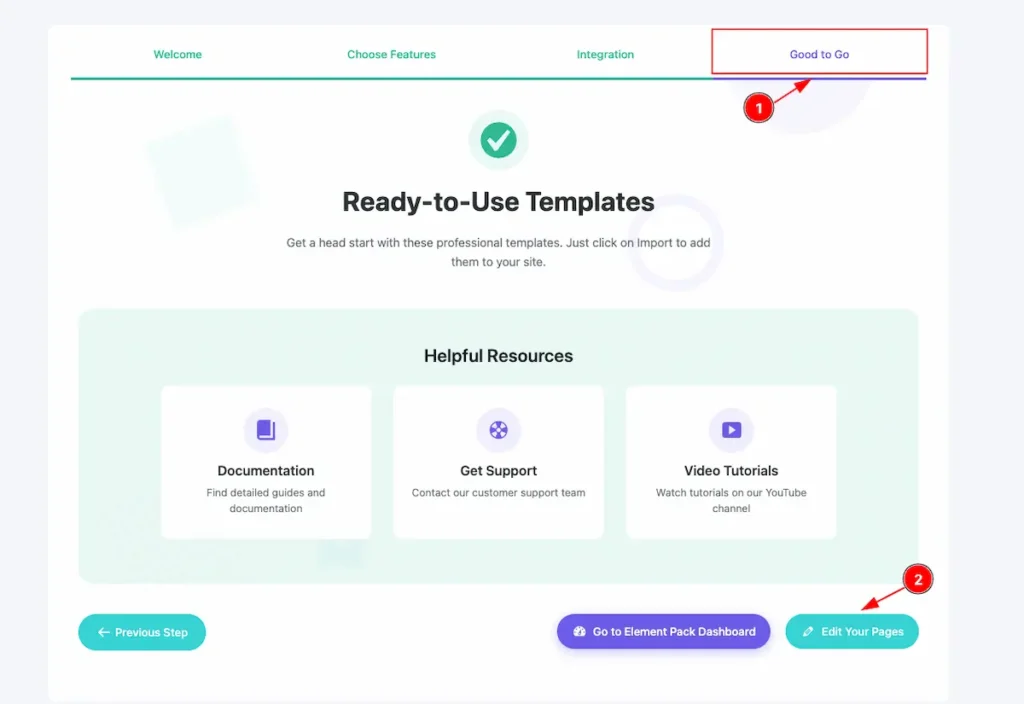
- Navigate to the ” Good to Go ” pages.
- Click on the ” Edit Your Pages ” button. It will take to Pages section where you can edit your pages.
This is the instruction of completing the set up the Wizard.
Video Assist
I hope the video will help you to learn more about the feature. Thanks for being with us.