

This documentation provides comprehensive insights into the using of Element Pack Pro Dashboard (Element Pack Pro).
Dashboard Tab
Go to Element Pack Pro > Dashboard
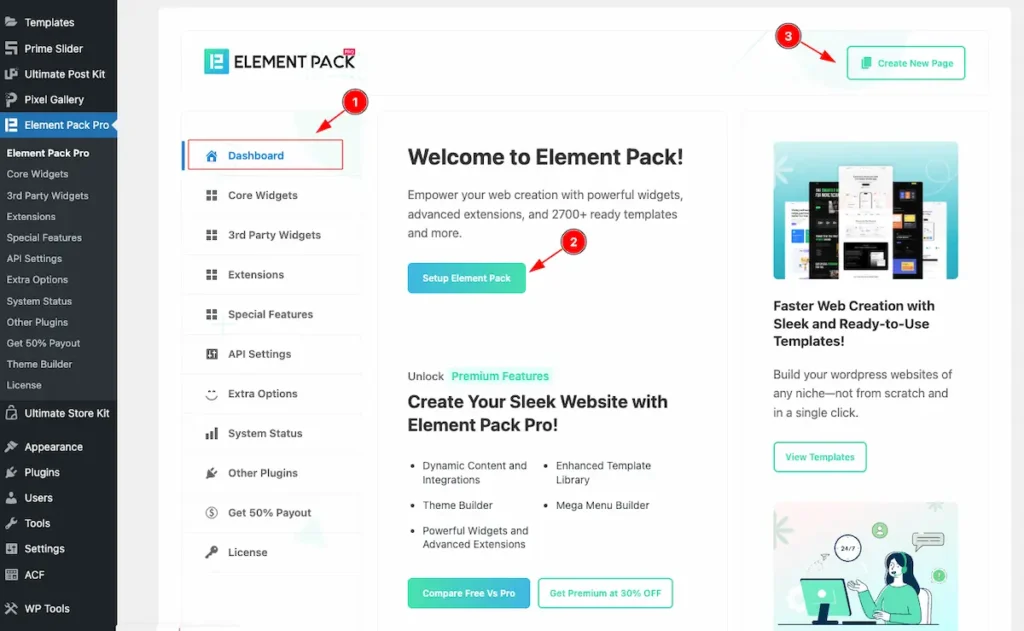
- Navigate to Dashboard tab on the left.
- Choose the ” Setup Element Pack ” button to navigate to the setup wizard.
- Click on the ” Create New Page ” button to create new page instantly.
Core Widgets
Go to Element Pack Pro > Core Widgets

- Navigate to Core Widgets tab on the left.
- Category: Widgets are categorized as follows. This is the main category.
- All: Demonstrate both Pro and Free Widget together.
- Free: The Free Widgets appear.
- Pro: The Pro widgets appear.
- Sub Category: Split with the sub category.
- New: New arrival widget will demonstrate by clicking on them.
- Post: Post widgets will demonstrate only.
- Custom: Custom widgets will appear.
- Gallery: Shows Gallery types widget.
- Slider: Show the all the slider available.
- Carousel: Show the carousel widgets.
- Template Builder: Show the template builder widgets.
- Others: Other types of widget will demonstrate.
- Search : Search by any widget name and the widget will appear here.
- Activate All: Activate all the widget together click on this button.
- Deactivate All: Deactivate all the widget together click on this button.
Activate Core Widget
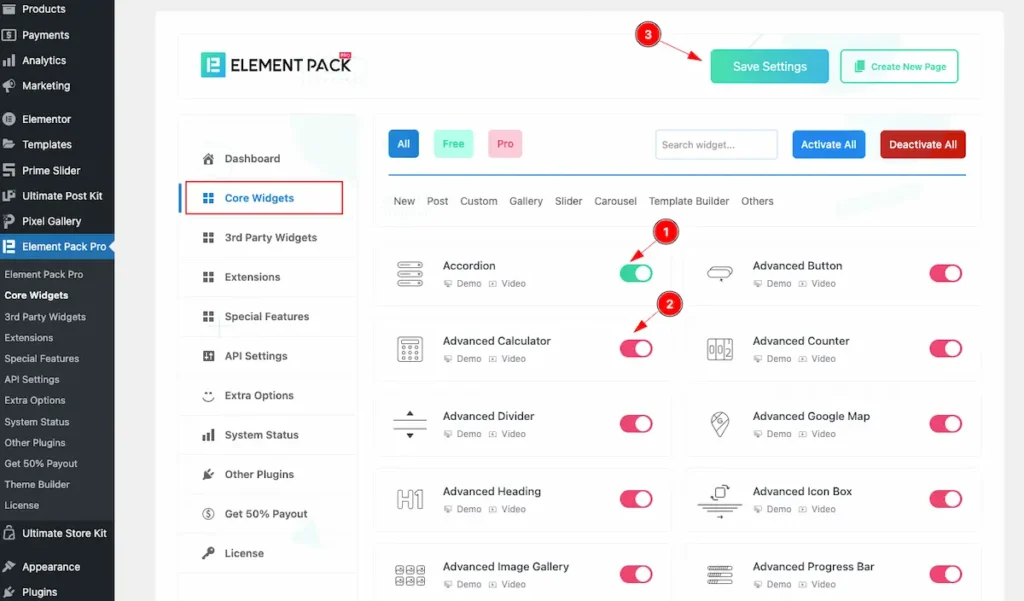
Activate any widget by turning on the Switcher of the widget.
- Free Widgets: The Free widgets refer to the Green button. Turn on the switcher to activate it.
- Pro Widgets: The Pro widgets refer to the Red button. Turn on the switcher to activate it.
- Save Settings: Click on the save settings button to save the widget.
3rd Party Widgets
Go to Element Pack Pro > 3rd Party Widgets
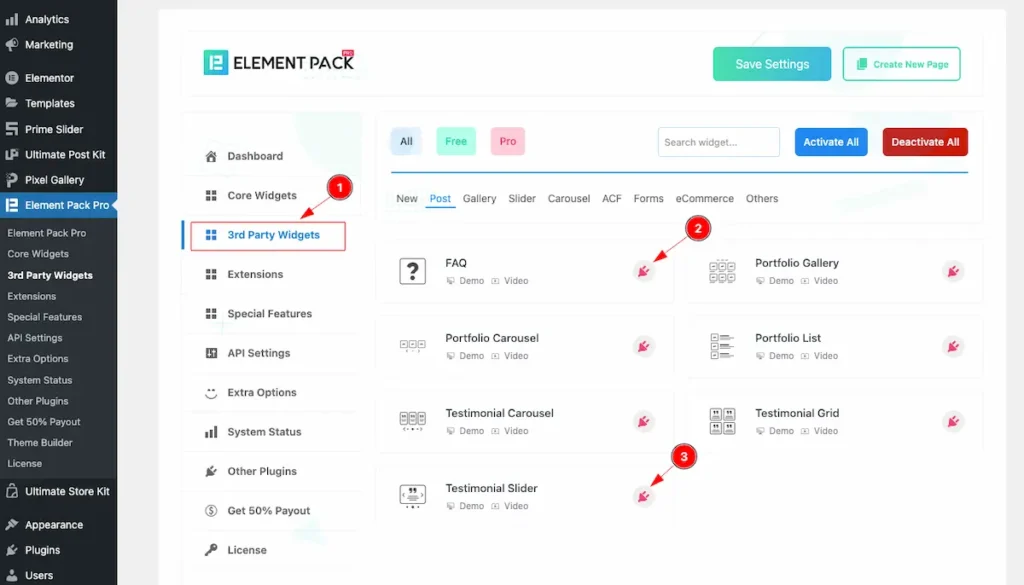
- Navigate to the 3rd Party widgets.
- Find the FAQ plugin and the ” Plugin ” icon appear on the right. It refer that you need to download the plugin and install it.
- Find the Testimonial Slider plugin and the ” Plugin ” icon appear on the right. It refer that you need to download the plugin and install it.
Note: Must activate the Plugin before using the 3rd Party Widget.
Activate 3rd Party Widget
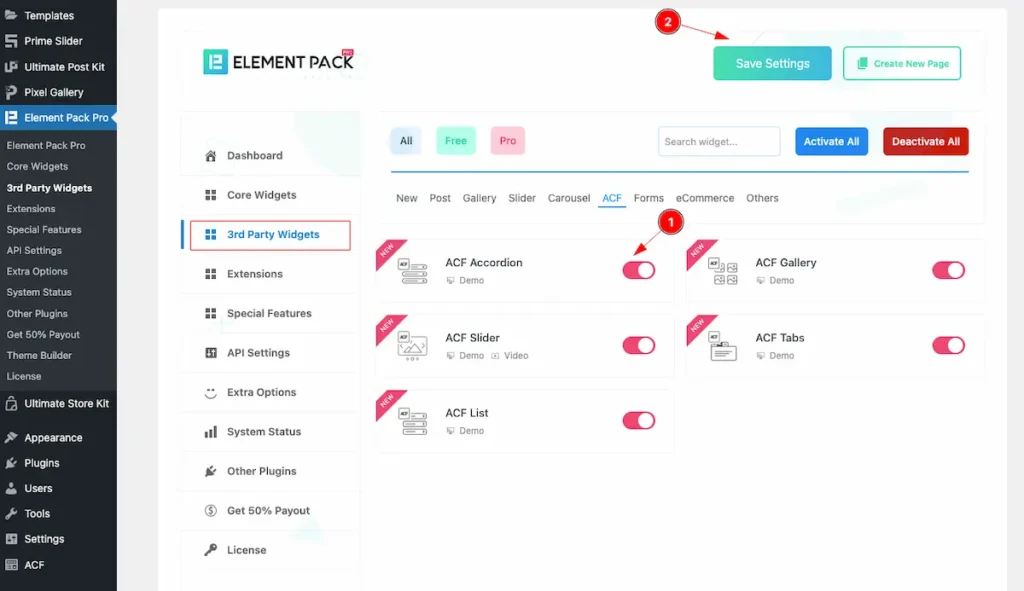
- Turn on the switcher of the 3rd party widget.
- Save Settings: Click on the save settings button to save the widget.
Note: The Widgets switcher button appear when the 3rd Party Widget activate.
Special Features
Go to Element Pack Pro > Special Features
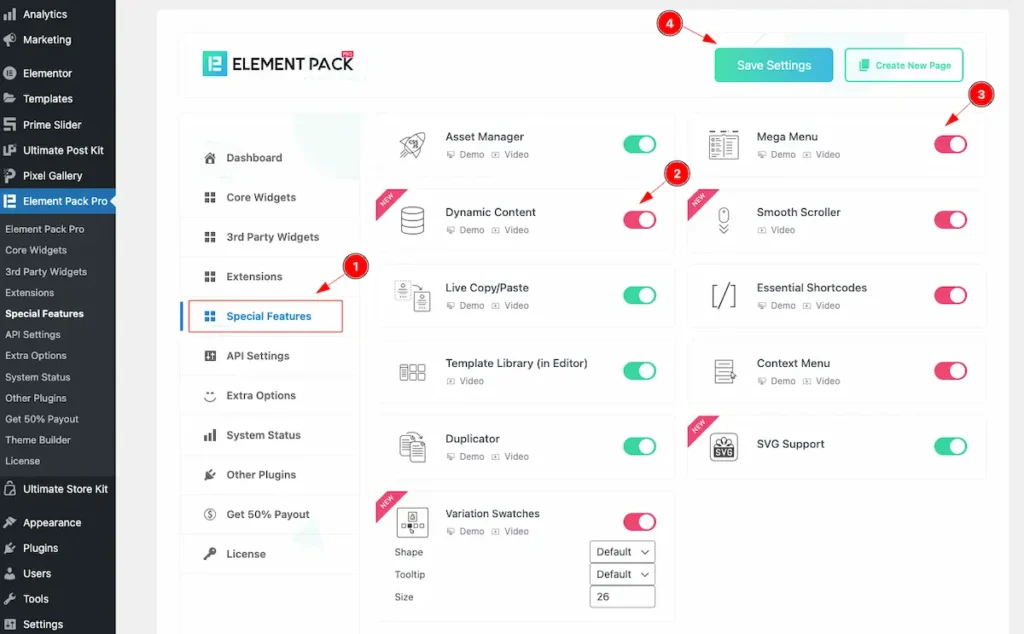
- Navigate to the Special Features section.
- Activate the extension e.g.: Dynamic Content.
- Enable the switcher the extension e.g.: Mega Menu.
- Save Settings: Click on the save settings button to save the widget.
API Settings
Go to Element Pack Pro > API Settings
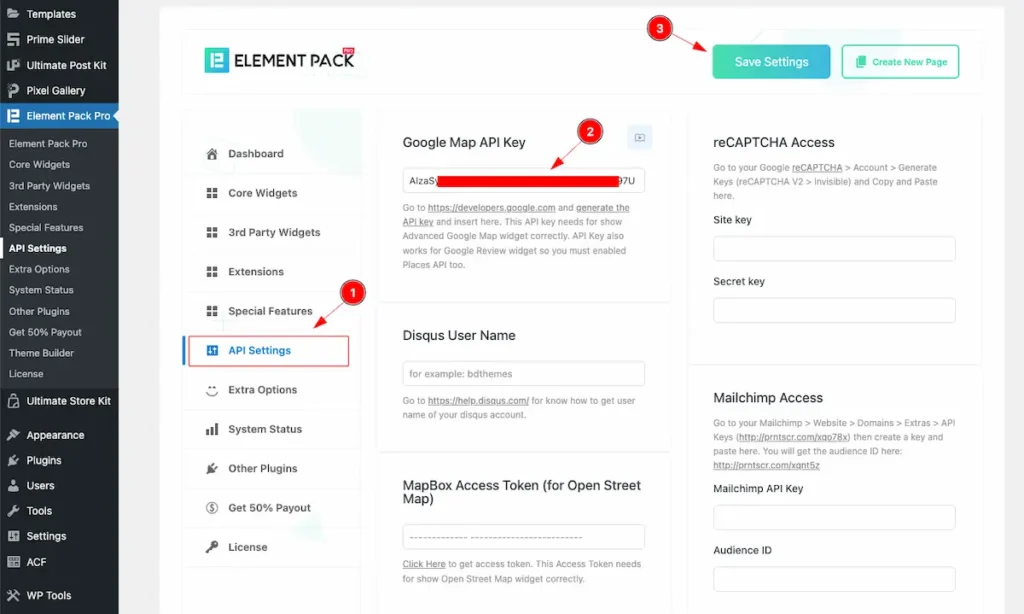
- Navigate to the API Settings section.
- Set the API Key on the section where need the key. e.g.: Google Map API Key.
- Save Settings: Click on the save settings button to save the API Key Settings.
Extra Options
Go to Element Pack Pro > Extra Options

- Navigate to the Extra options tab.
- Navigate to the Custom CSS & JS tabs. Here all the custom CSS and JS are available.
Custom Header Code Injection
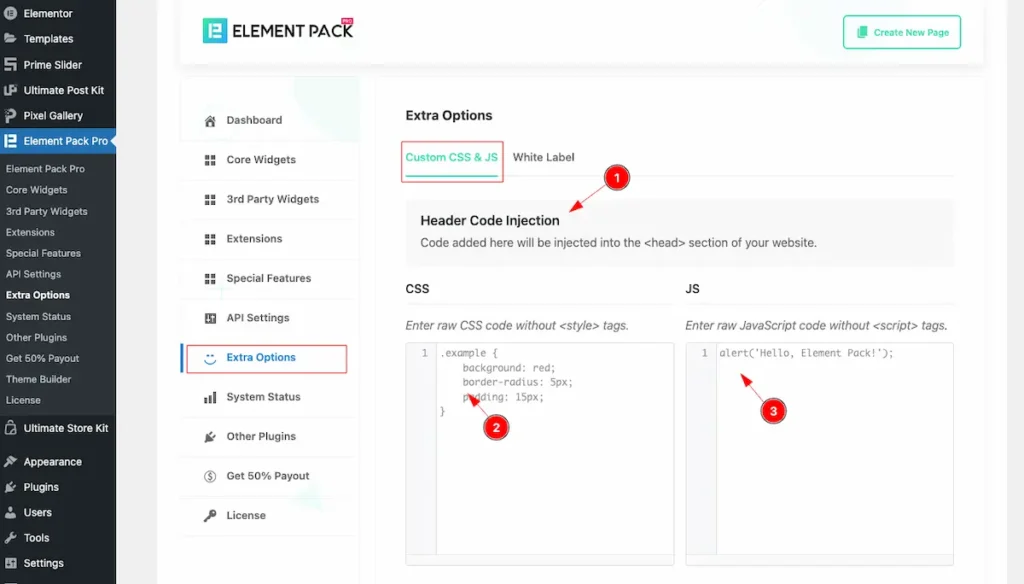
- Inject code for the Header section.
- Write the custom CSS on this fields. No need to add the style tag on there.
- Write the custom JS on this fields. No need to add the Script tag on there.
Custom Footer Code Injection
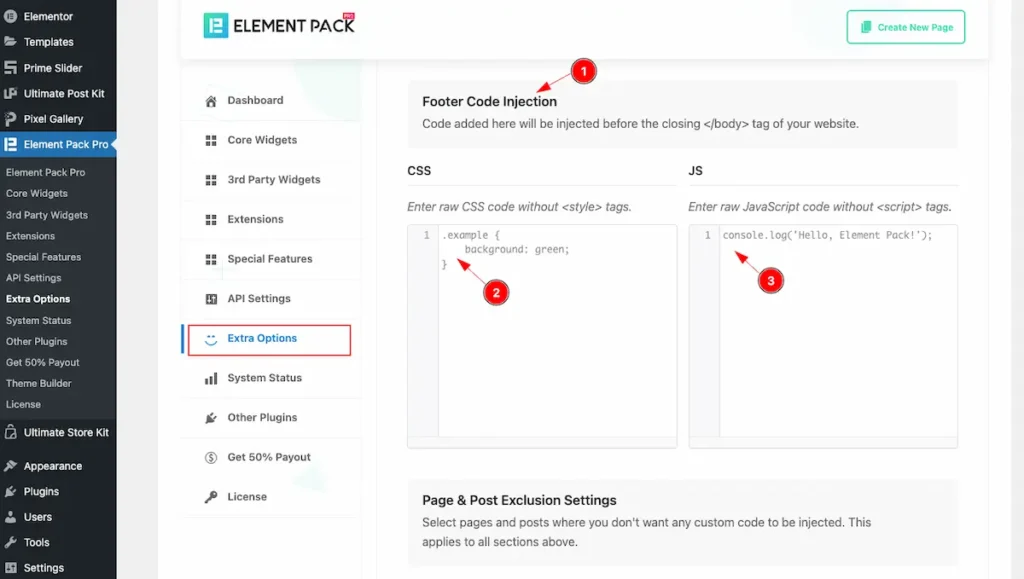
- Inject code for the Footer section. The change will appear on footer section.
- Write the custom CSS on this fields. No need to add the style tag on there.
- Write the custom JS on this fields. No need to add the Script tag on there.
Exclude Page & Post Settings
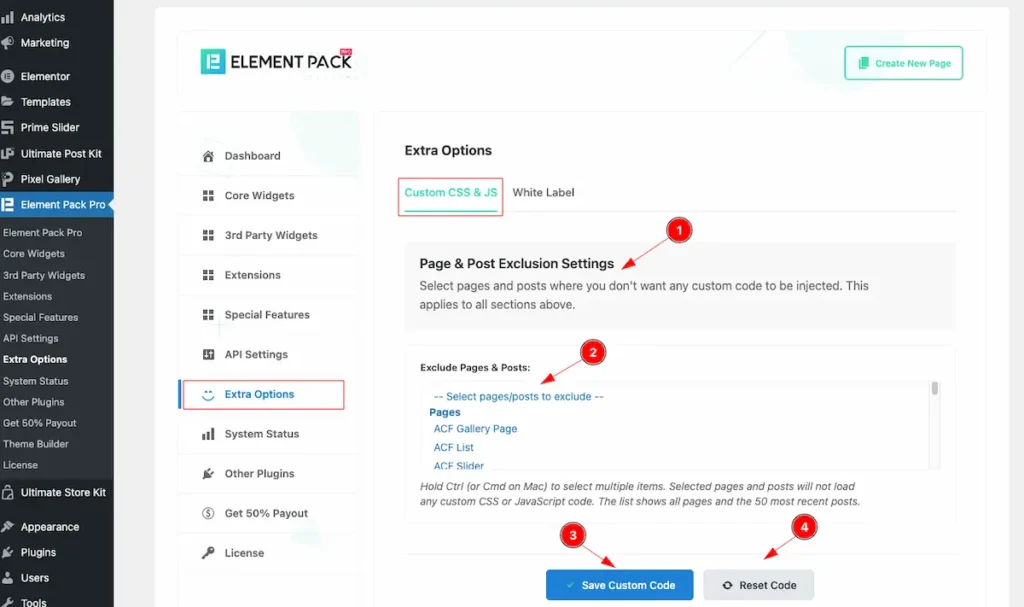
- Page & Post Exlclusion settings: Select pages and posts where you don’t want any custom code to be injected.
- Choose the Posts or Pages from there.
- Hit the ” Save Custom Code ” button to save it.
- Click on the ” Reset Code ” button to reset the custom code.
System Status
Go to Element Pack Pro > System Status
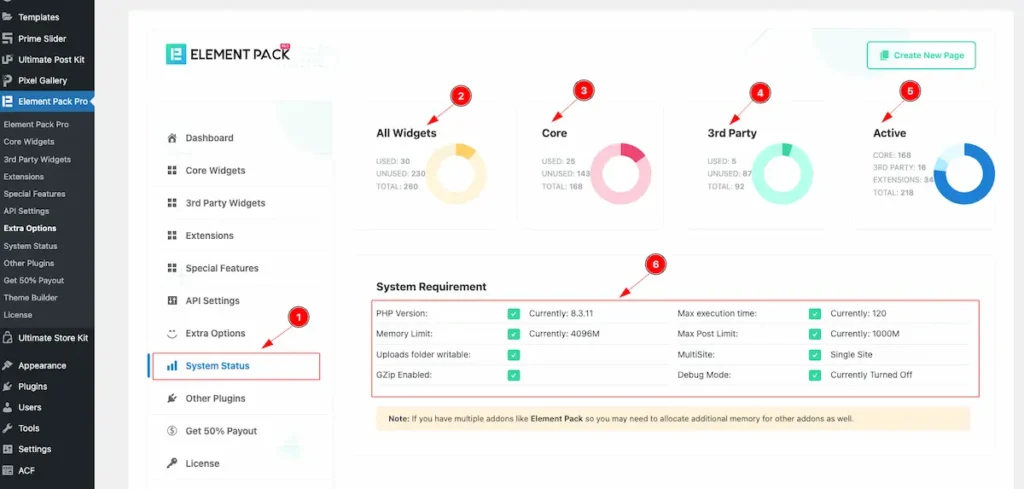
- Navigate to the System Status tabs.
- All Widget: It will appear all the widgets status. Used, Unused, Total.
- Core: The status for the Core widgets.
- 3rd Party: Appear all the 3rd party widgets status.
- Active: It demonstrate how many widget are Active, Like Core, 3RD Party, Extensions, Total.
- System Requirement: It appears the system requirements of the WordPress.
- PHP Version: Show the current PHP Version of the WordPress Dashboard.
- Memory Limit: Set the limit of the memory. e.g.: Currently-4096M.
- Uploads folder writable: Show the Uploaded folder writable status.
- GZip Enabled: Show the status if the GZip is enabled.
- Max execution time: Set the maximum execution time. e.g.: Currently 120
- Max Post Limit: Set the memory limit for the post. e.g.: Currently: 1000M
- Multisite: Show the status of multisite activation. e.g: Single Site, or Multi site.
- Debug Mode: It demonstrate the Debug mode are activate or not. e.g.: Currently Turned Off.
Other Plugins
Go to Element Pack Pro > Other Plugins
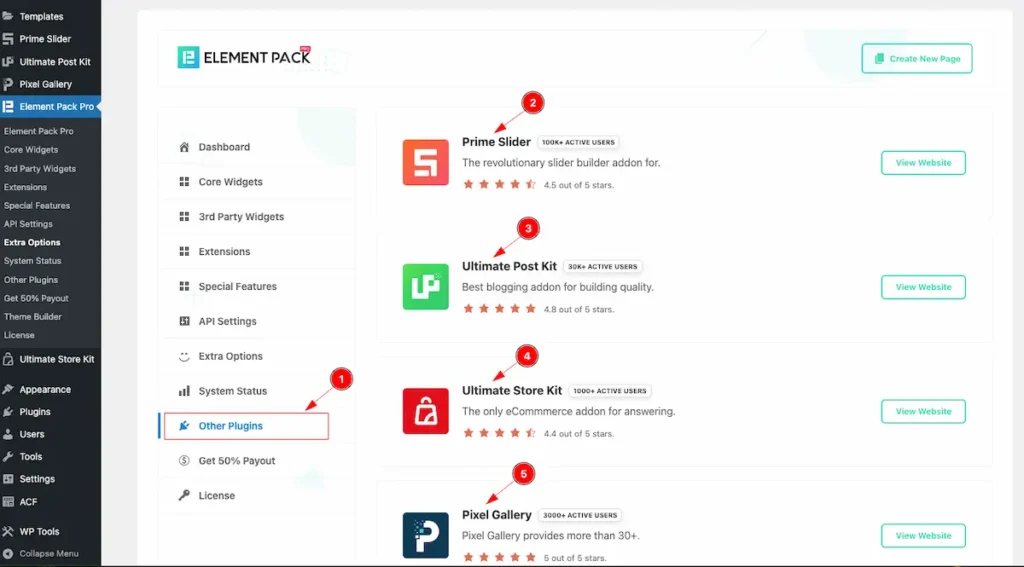
- Navigate to the Other Plugins section.
- Prime Slider: The Revolutionary slider builder addons.
- Ultimate Post Kit:Best blogging addons for building quality website.
- Ultimate Store Kit: The only eCommerce addons for website.
- Pixel Gallery: The Ultimate Gallery Solution for the website.
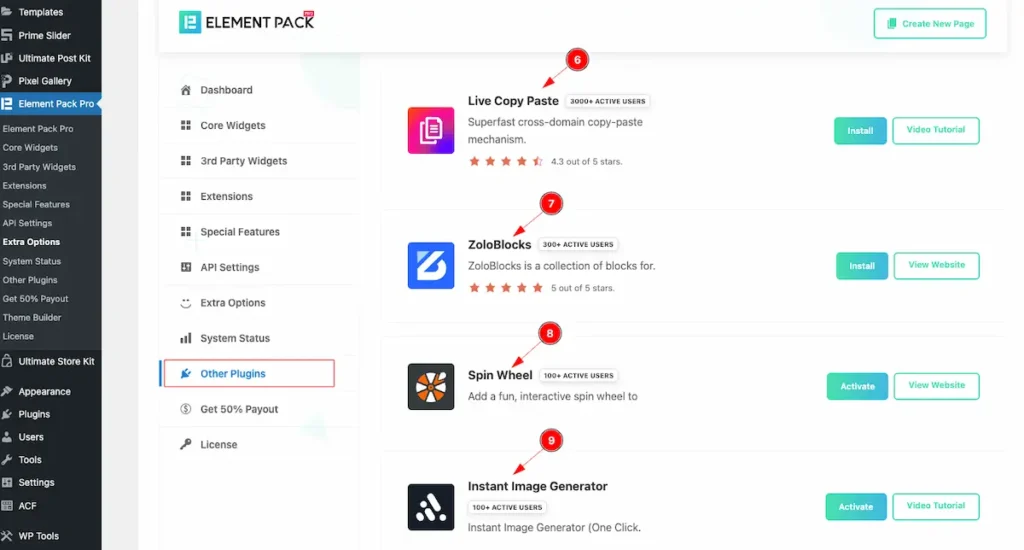
- Live Copy Paste: Super fast cross domain copy paste. Magic of copying any design.
- Zoloblocks: It’s a interactive collection of block, Most interactive Gutengburg plugin.
- Spin Wheel: A Fun and interactive spin wheel for win surprise.
- Instant Image Generator: An amazing AI powered by Image generator according to prompt.
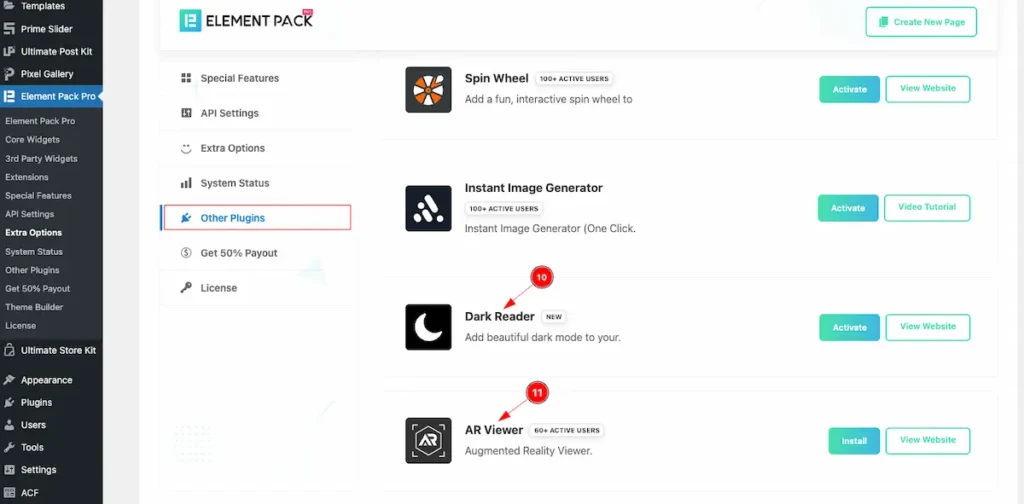
- Dark Reader: A beautiful dark mode for website.
- AR Viewer: Augmented Reality viewer.
Get 50% Payout
Go to Element Pack Pro > Get 50% Payout

- Navigate to the Get 50% Payout tab.
- Click on the ” Join Our Affiliate Program ” button to join our affiliate program.
License
Go to Element Pack Pro > License
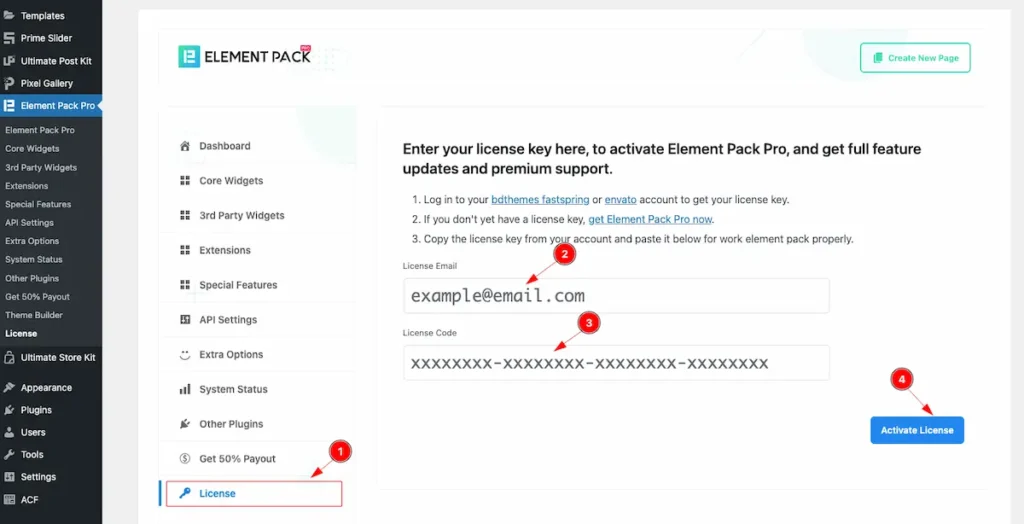
- Navigate to the License tab.
- License Email: Enter the Purchase email.
- License Code: Enter the License code in this license fields.
- Hit on the ” Activate License ” button to save the
This the New Dashboard Introduction. Follow this and let us know.
Video Assist
I hope the video will help you to learn more about the dashboard.
Thanks for staying with us.