

The SVG Blob widget from Element Pack Pro lets you create unique, organic-shaped visuals using scalable vector graphics. It’s ideal for adding creative backgrounds or design elements with customizable shapes, colors, and animations. This documentation explains how to use and customize the SVG Blob widget in Elementor.
Enable The SVG Blob Widget
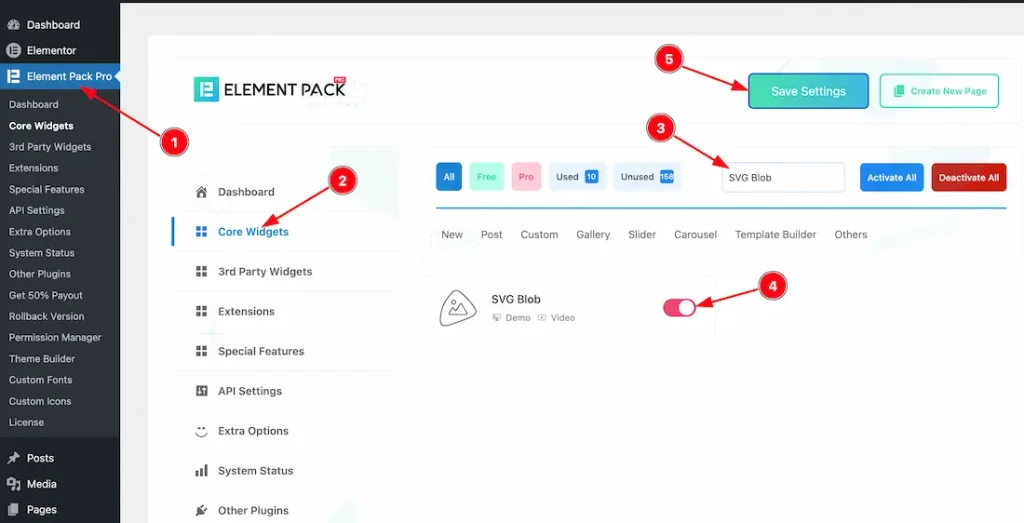
To use the SVG Blob widget from Element Pack Pro, first, you have to enable the widget.
- Go to WordPress dashboard → Element Pack Pro Plugin dashboard.
- Then, Click the Core Widgets Tab.
- Search the SVG Blob Widget Name.
- Enable the SVG Blob Widget.
- Hit the Save Settings Button.
Inserting the SVG Blob widget
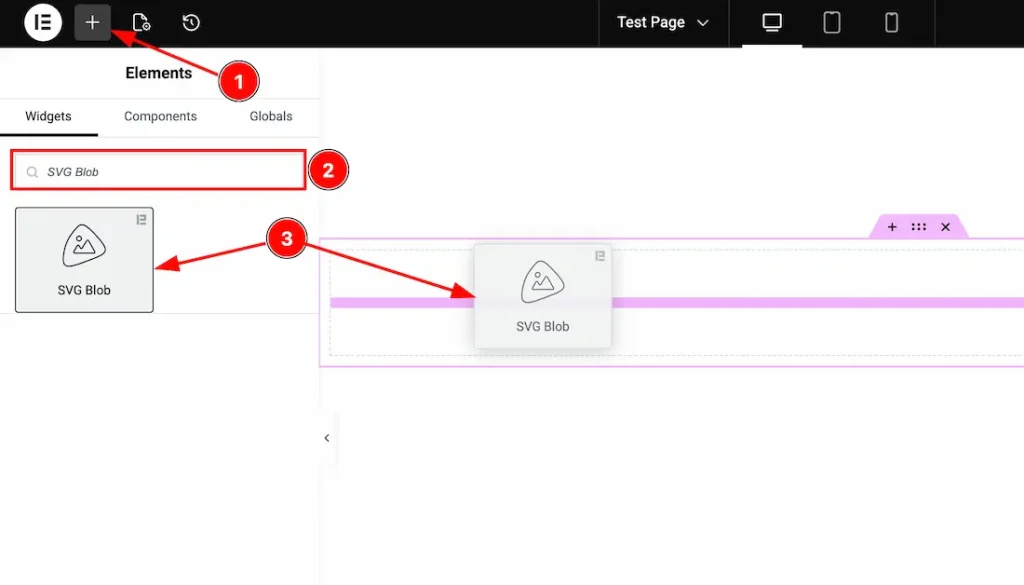
1. Go to the Elementor Editor Page and hit the “+” icon Button.
2. Search the SVG Blob name.
3. Drag the widget and drop it on the editor page.
Work With Content Tab
Blob Content section
Go to Content > Blob Content
When Select Type- Image
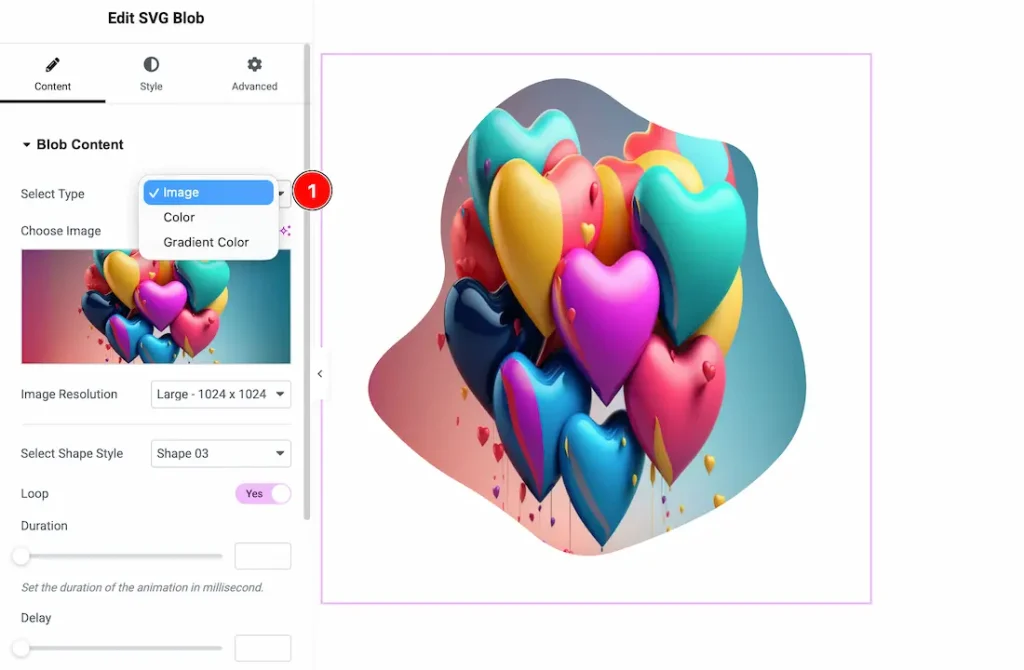
1. Select Type: From here, you can choose the Blob Content type- image, Color, and Gradient Color. Here, we select the first image to explore the feature.
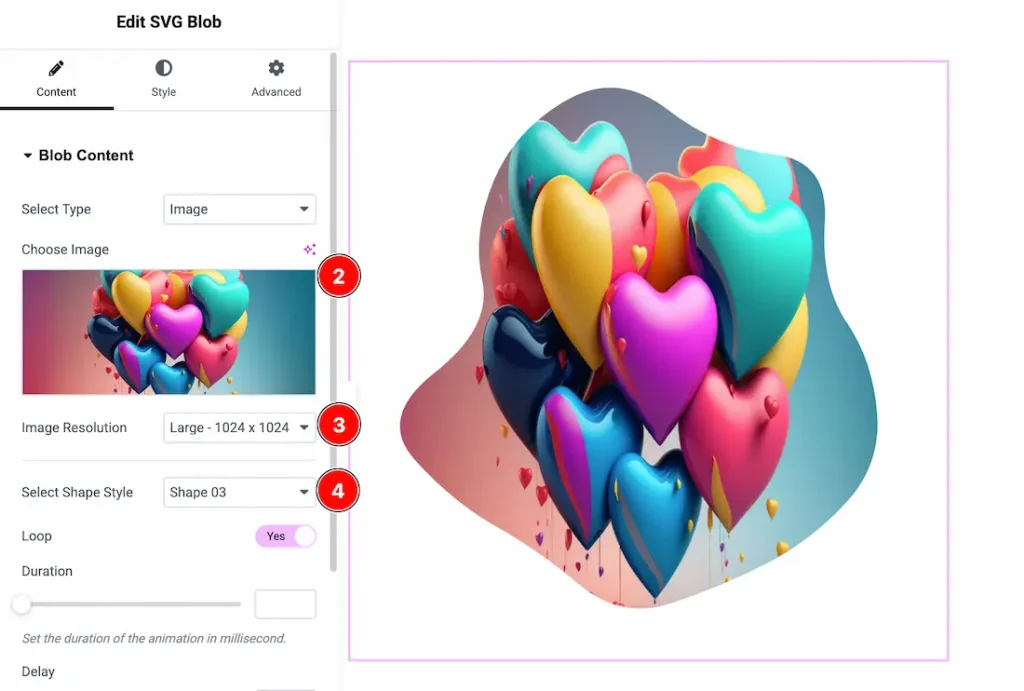
2. Choose Image: You can choose your SVG blob image from here.
3. Image Resolution: You can set the image resolution from here.
4. Select Shape Style: Here, you will get some SVG shapes, and you can choose your preferred shape from here.
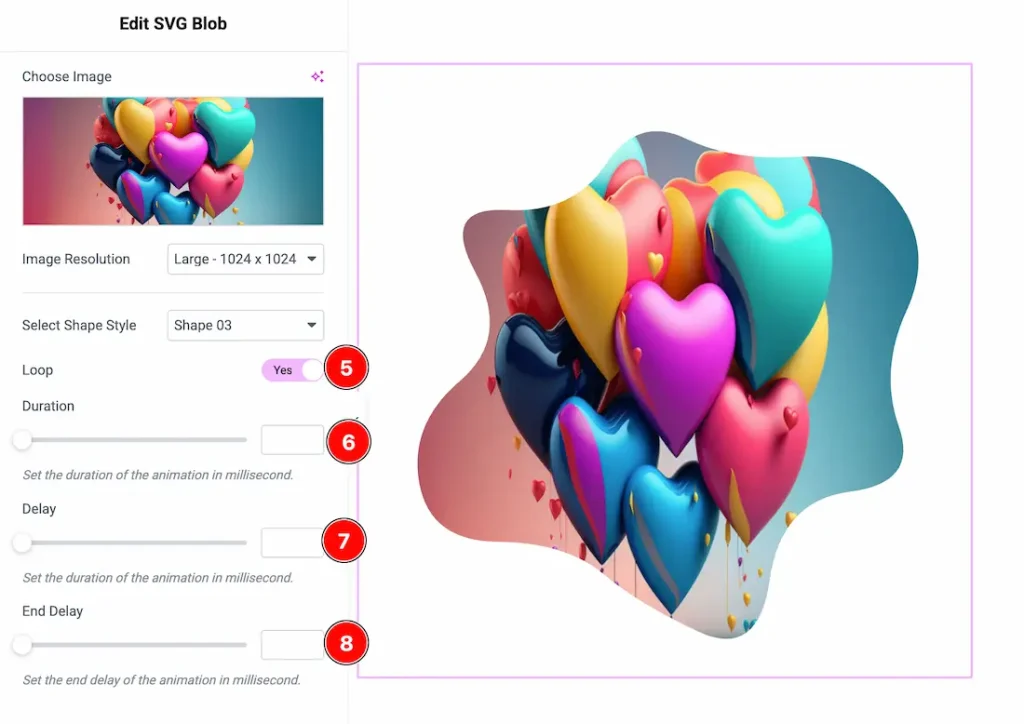
5. Loop: Enable this option to continuously repeat the SVG blob animation.
6. Duration: Set the total time (in milliseconds) for one complete animation cycle.
7. Delay: Define the waiting time (in milliseconds) before the animation starts.
8. End Delay: Set the pause time (in milliseconds) after the animation completes before it restarts (when the loop is enabled).
When Select Type- Color
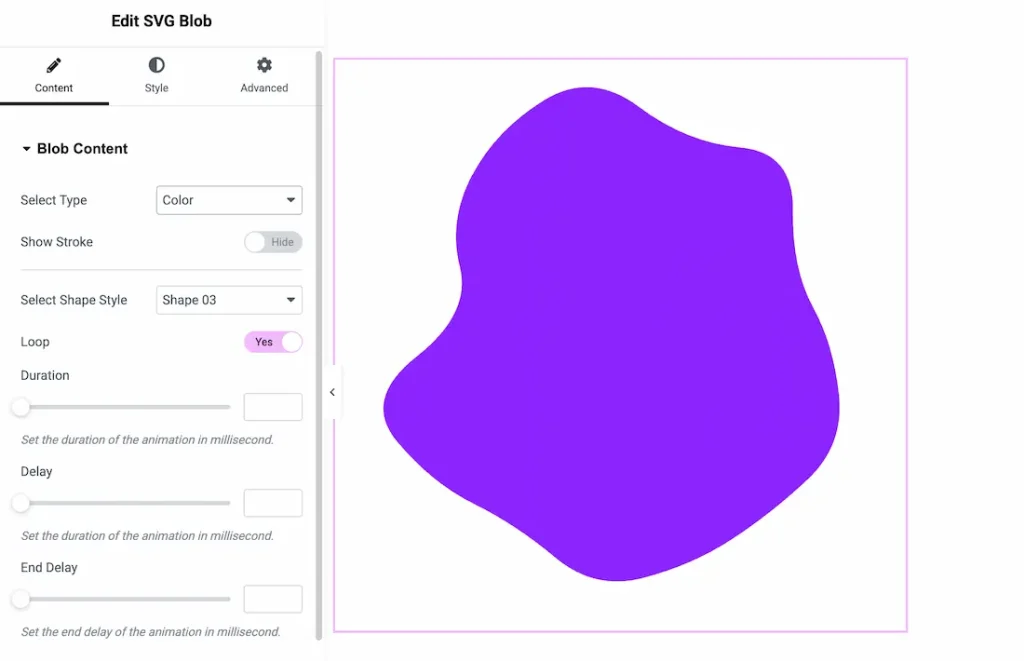
After selecting the type- color, you will get the same customization options as the image.
When Select Type- Gradient Color
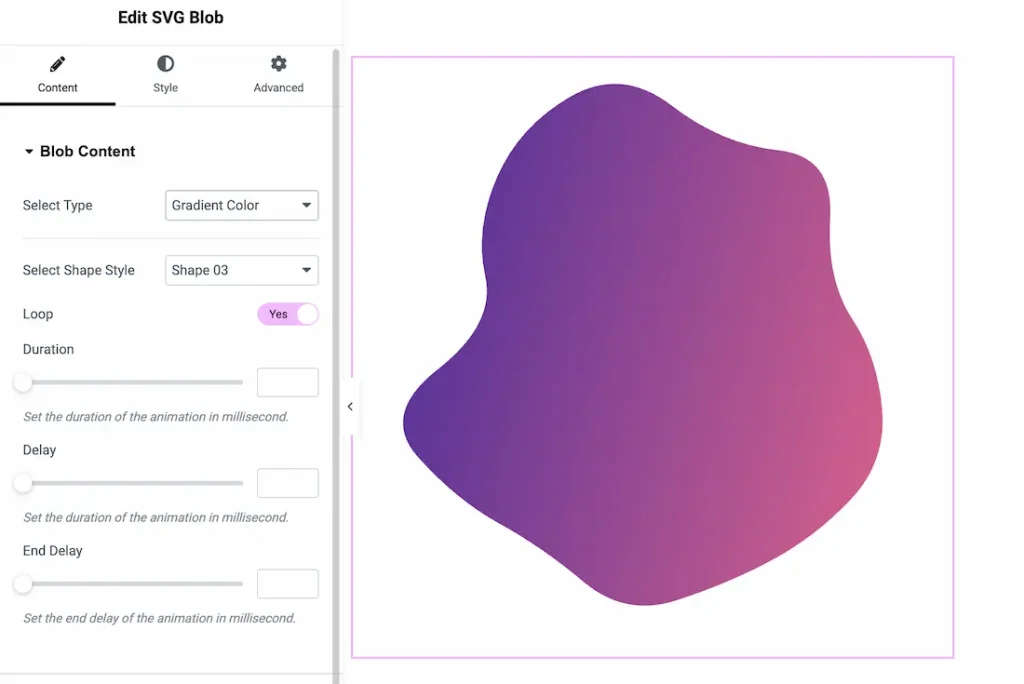
After selecting the type- Gradient color, you will get the same customization options as the color.
Work with The Style Tab
Blob Style Section
Go to Style → Blob Style
Blob Style for Image
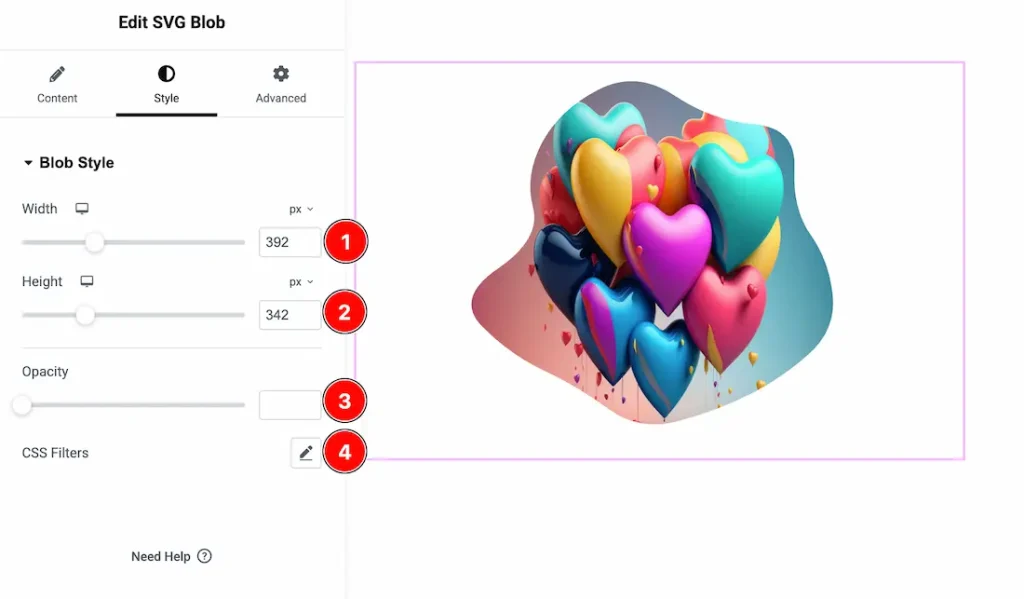
1. Width: This option lets you set the SVG Blob width.
2. Height: This option lets you set the SVG Blob height.
3. Opacity: You can change the opacity level from here.
4. CSS Filters: CSS filters are used for images to enhance their appearance directly in the browser without editing the original file. They allow you to quickly adjust effects like blur, brightness, contrast, and color to match your design, create interactive hover effects, and improve visual focus.
- Hue – Shifts the color spectrum of the image, allowing creative color transformations without changing the original asset.
- Blur – Softens the image by reducing sharp edges, creating depth or background focus effects.
- Brightness – Adjusts the overall lightness or darkness of the image to enhance visibility or mood.
- Contrast – Controls the difference between light and dark areas, making visuals appear sharper or flatter.
- Saturation – Increases or decreases color intensity to make images more vibrant or muted.
Blob Style for Color
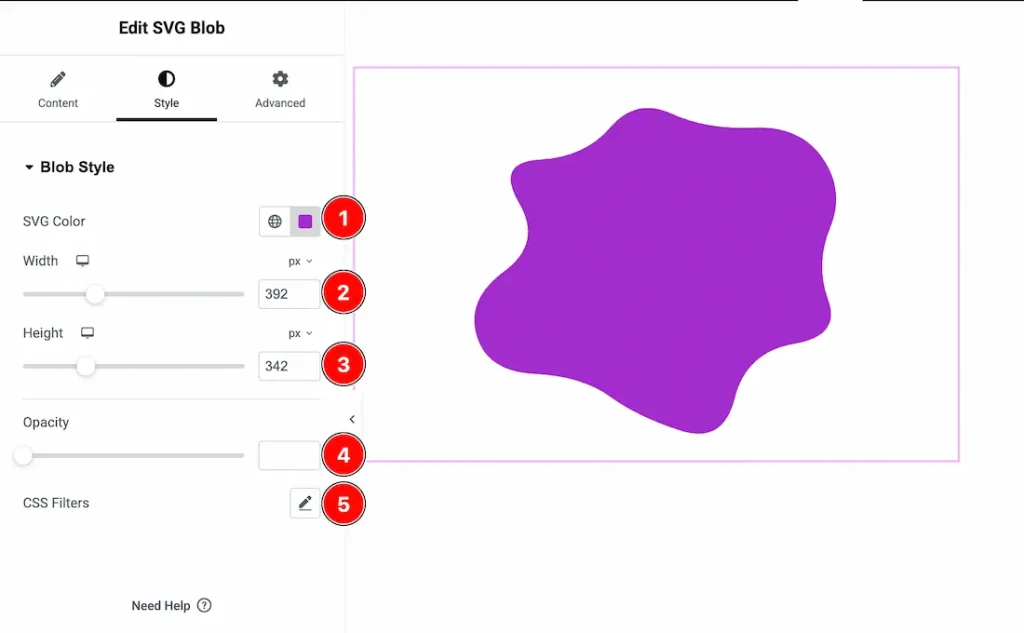
1. SVG Color: This option lets you change the SVG color.
2. Width: This option lets you set the SVG Blob width.
3. Height: This option lets you set the SVG Blob height.
4. Opacity: You can change the opacity level from here.
5. CSS Filters: You can customize the CSS filter from here.
Blob Style for Gradient Color
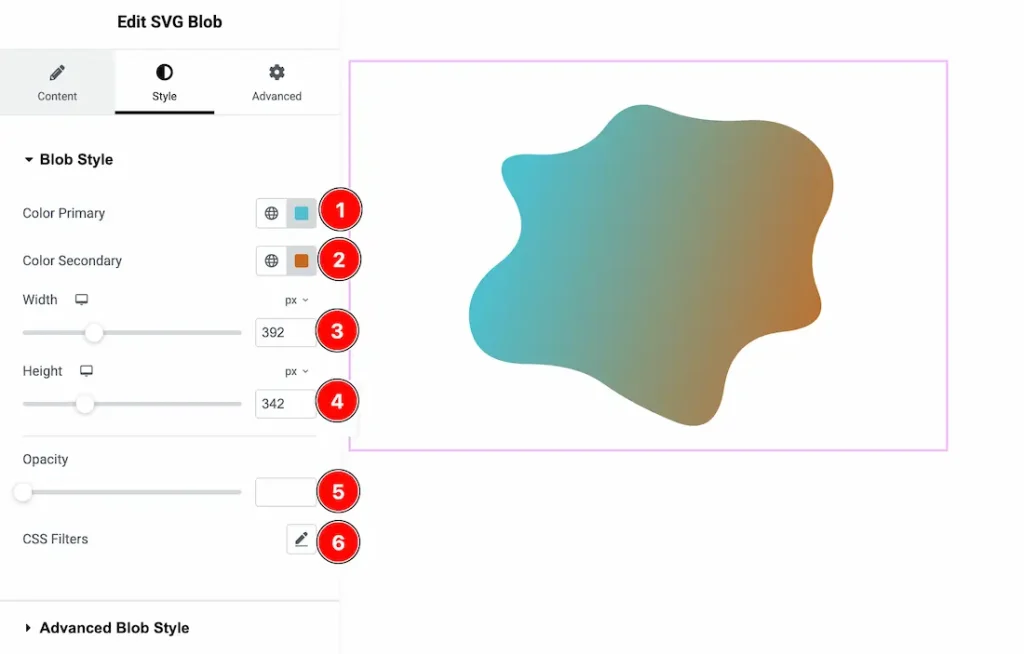
1. Primary Color: This option lets you change the primary color of the SVG blob.
2. Secondary Color: This option lets you change the secondary color of the SVG blob.
3. Width: This option lets you set the SVG Blob width.
4. Height: This option lets you set the SVG Blob height.
5. Opacity: You can change the opacity level from here.
6. CSS Filters: You can customize the CSS filter from here.
Advanced Blob Style Section
Go to Style → Advanced Blob Style
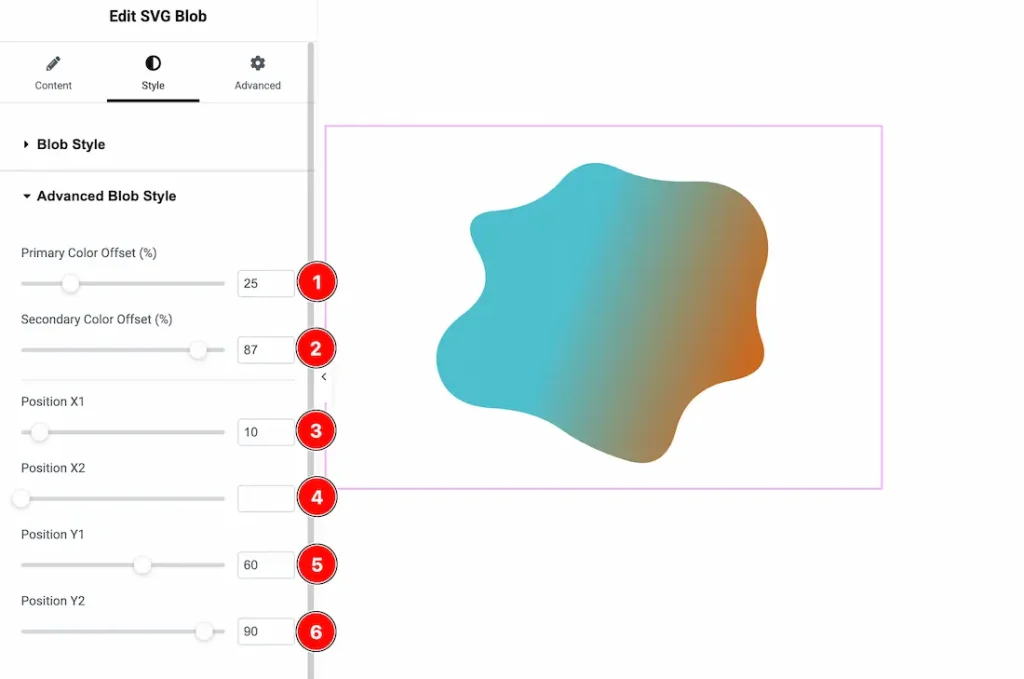
1. Primary Color Offset (%): Adjusts the starting position of the primary color in the gradient.
2. Secondary Color Offset (%): Controls where the secondary color appears within the gradient blend.
3. Position X1: Sets the horizontal starting point of the gradient.
4. Position X2: Defines the horizontal ending point of the gradient.
5. Position Y1: Sets the vertical starting point of the gradient.
6. Position Y2: Defines the vertical ending point of the gradient.
All done! You have successfully customized the SVG Blob widget on your website.
Video Assist
You can also watch the video tutorial to learn more about the SVG Blob widget. Please visit the demo page for examples.
Thanks for being with us.