

The SVG Maps widget from Element Pack Pro allows you to display interactive and customizable vector maps on your website. It helps you highlight locations, regions, or data visually with scalable graphics while maintaining performance and clarity. In this documentation, we will guide you on how to use and customize the SVG Maps widget.
Enable The SVG Maps Widget
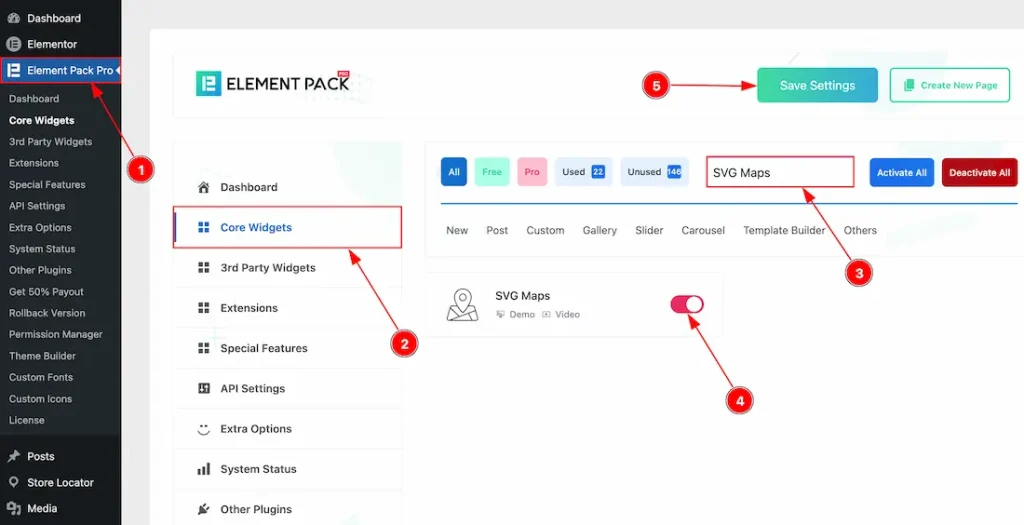
To use the SVG Maps widget from Element Pack, first, you have to enable the widget.
- Go to WordPress dashboard → Element Pack Plugin dashboard.
- Then, Click the Core Widgets Tab.
- Search the SVG Maps Widget Name.
- Enable the SVG Maps Widget.
- Hit the Save Settings Button.
Inserting The SVG Maps Widget
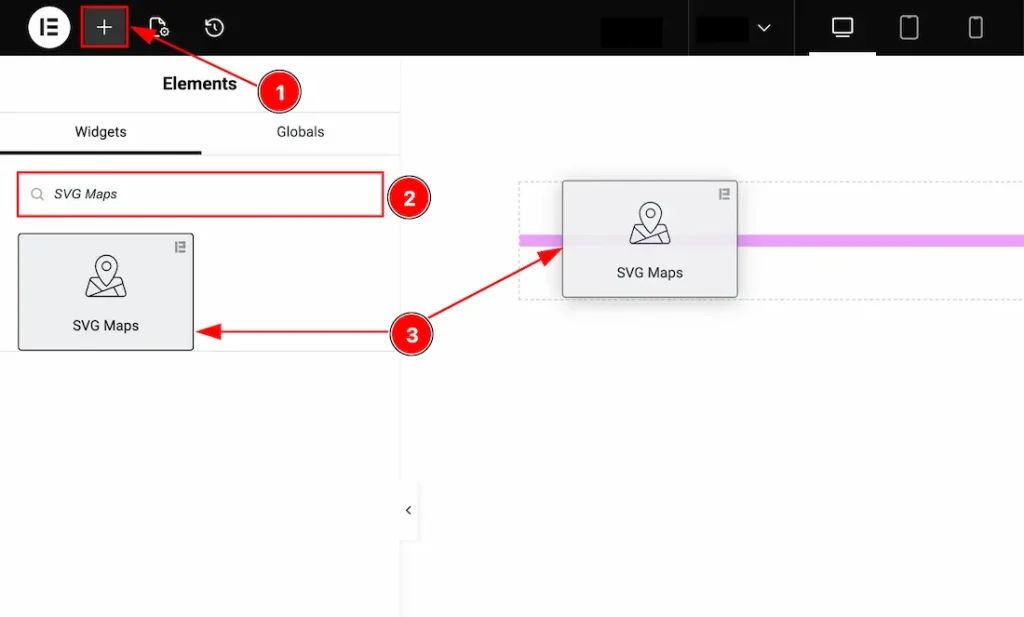
1. Go to the Elementor Editor Page and hit the “+” icon Button.
2. Search the SVG Maps name.
3. Drag the widget and drop it on the editor page.
Work With The Content Tab
Map Settings Section
Go to Content → Map Settings
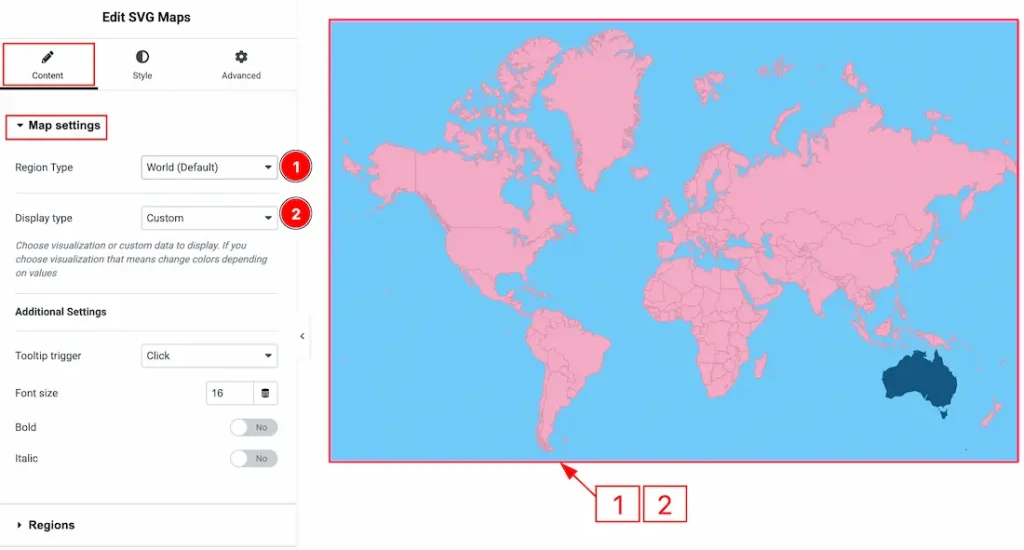
1. Region Type: You can select the region type between Word Default, Continent, Sub Continent & Countries with this option.
2. Display type: You can choose the map’s visualization or custom data to display with this option. If you choose visualization, that means changing color depending on values, but if you choose custom, then you can make changes to the color manually.
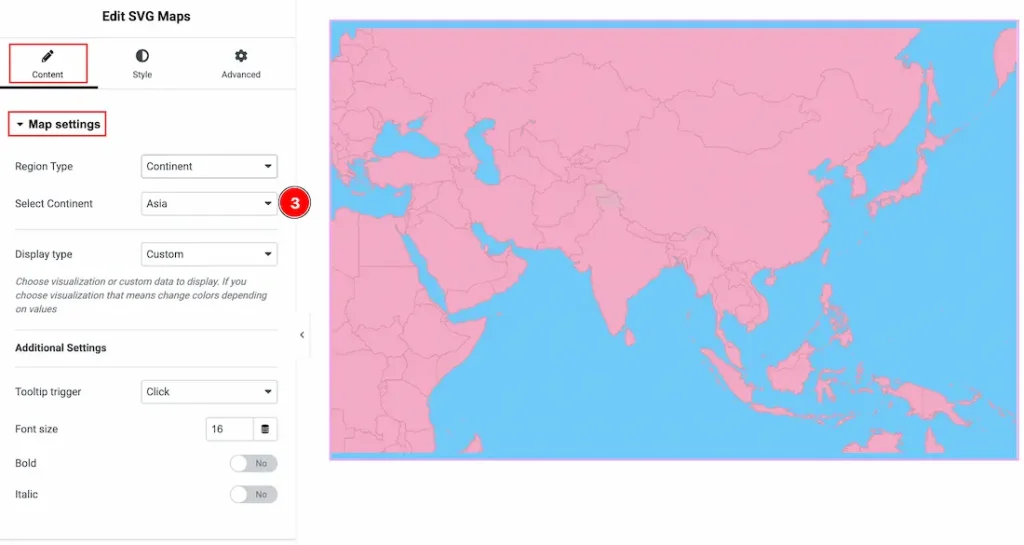
3. Select Continent: By default, the map is set to the World region type. If you change it to Continent, Subcontinent, or Country, an additional option will appear below. This allows you to choose the specific area to display. For example, when a continent is selected, you will see an option to choose a continent.
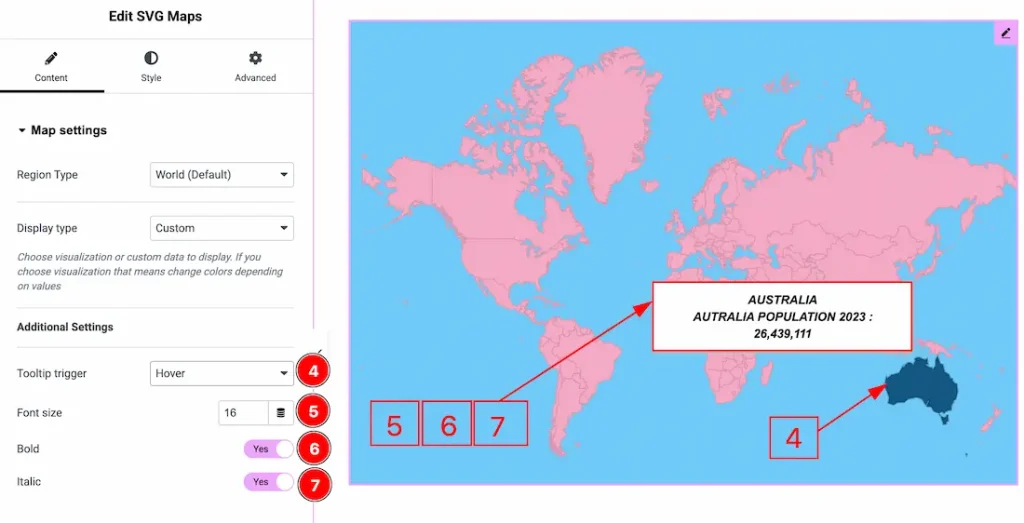
4. Tooltip trigger: You can select the option for how the tooltip will trigger with this option. You can choose between Click, Hover & None. Here we have selected the option as Hover.
5. Font Size: You can select the tooltip text font size with this option.
6. Bold: Enable the switcher to make the tooltip text bold with this option.
7. Italic: Enable the switcher to make the tooltip text italic with this option.
Regions Section
Go to Content → Regions
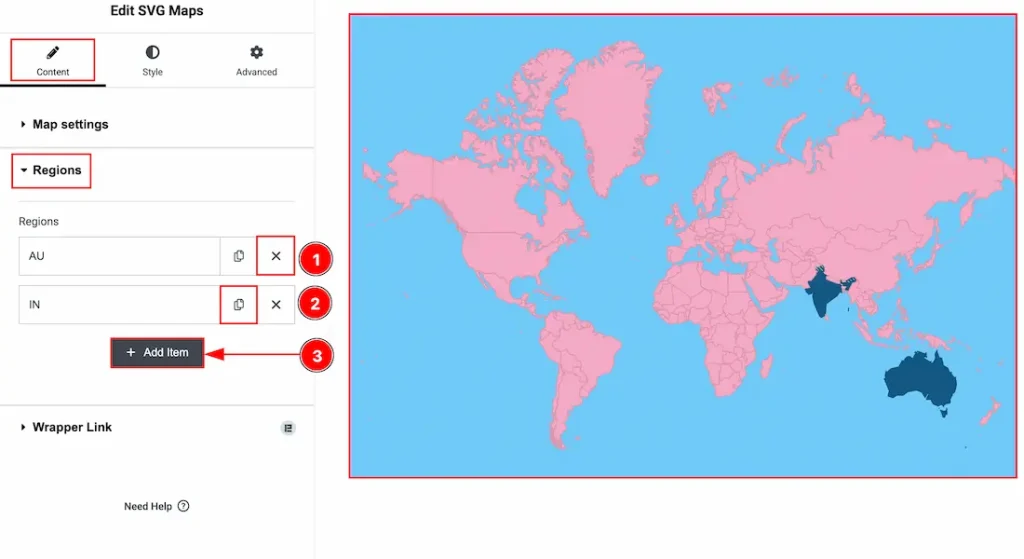
1. Close Icon: You can click on the close icon to close the region items.
2. Copy Icon: You can click on the copy icon to duplicate the region’s item.
3. Add Item: You can click on this button to add more items to the input region information.
In each item of the Regions, you will get more options where you can add information to show to your audience. Let’s explore those now –
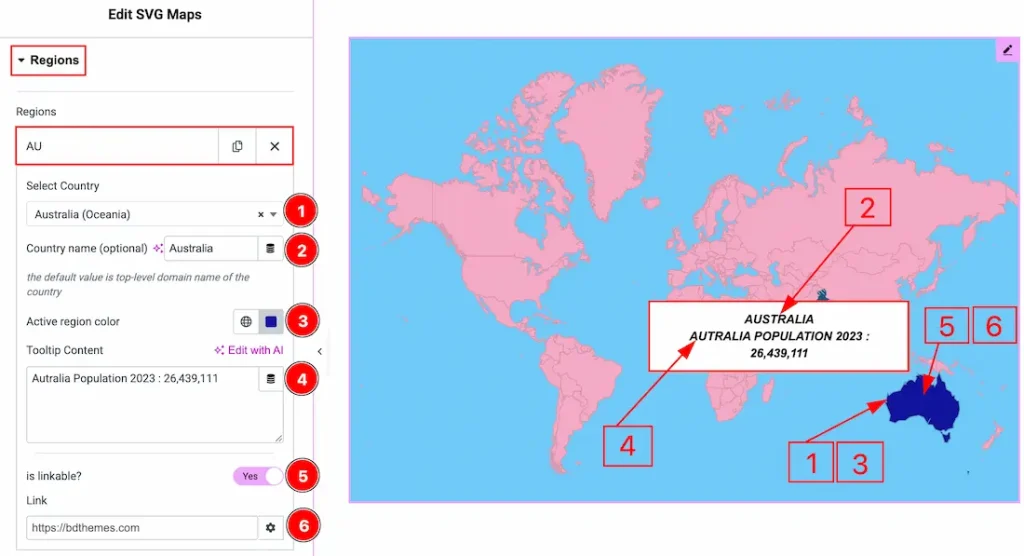
1. Select Country: You can select the country from this option.
2. Country Name: You can add the country name in this field.
3. Active region color: You can make changes to the active region color with this option.
4. Tooltip Content: You can add content to the tooltip in this field.
5. Is Linkable: Enable the switcher to get the option to add a link to the region field with this option.
6. Link: You can input the link in this field.
Work with The Style Tab
Map Style Section
Go to Style → Map Style
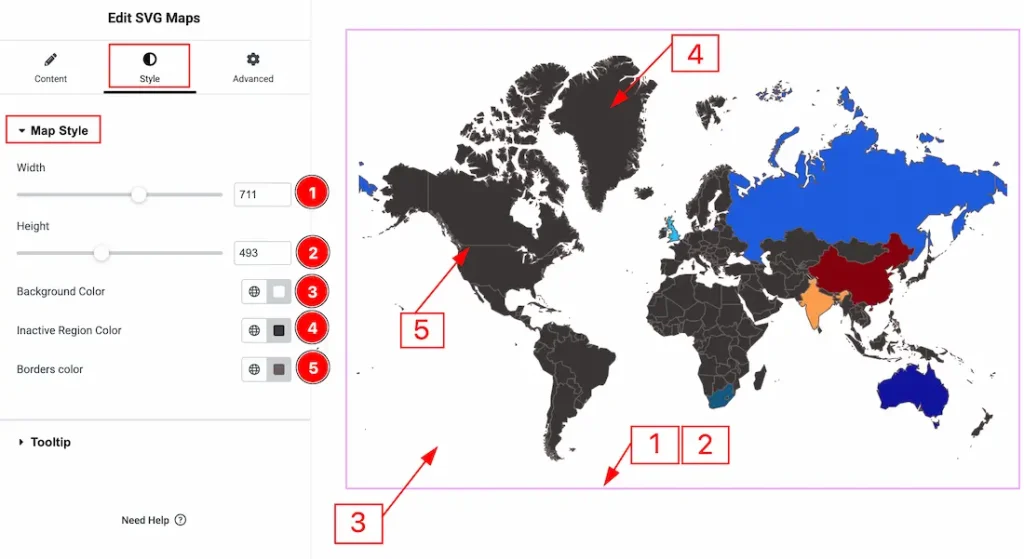
1. Width: You can adjust the width of the map layout with this option.
2. Height: You can adjust the height of the map layout with this option.
3. Background Color: You can make changes to the map layout background color with this option.
4. Inactive Region Color: You can make changes to the inactive region color with this option.
5. Border Color: You can make changes to the border color with this option.
Tooltip Section
Go to Style → Tooltip
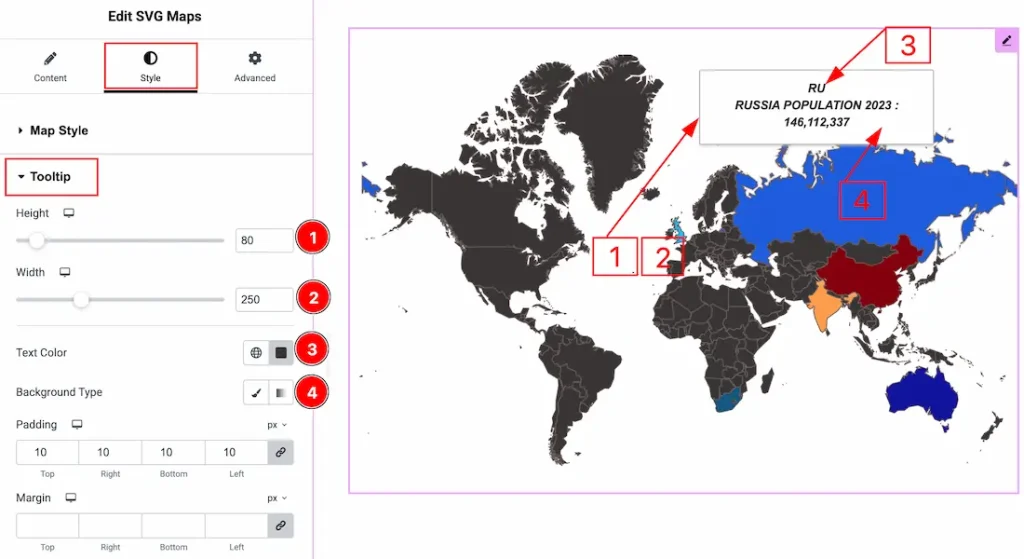
1. Height: You can adjust the height of the tooltip layout with this option.
2. Width: You can adjust the height of the tooltip layout with this option.
3. Text Color: You can make changes to the tooltip text color with this option.
4. Background Type: You can choose the background type to be classic or gradient with this option. Here, we have selected the background type as classic.
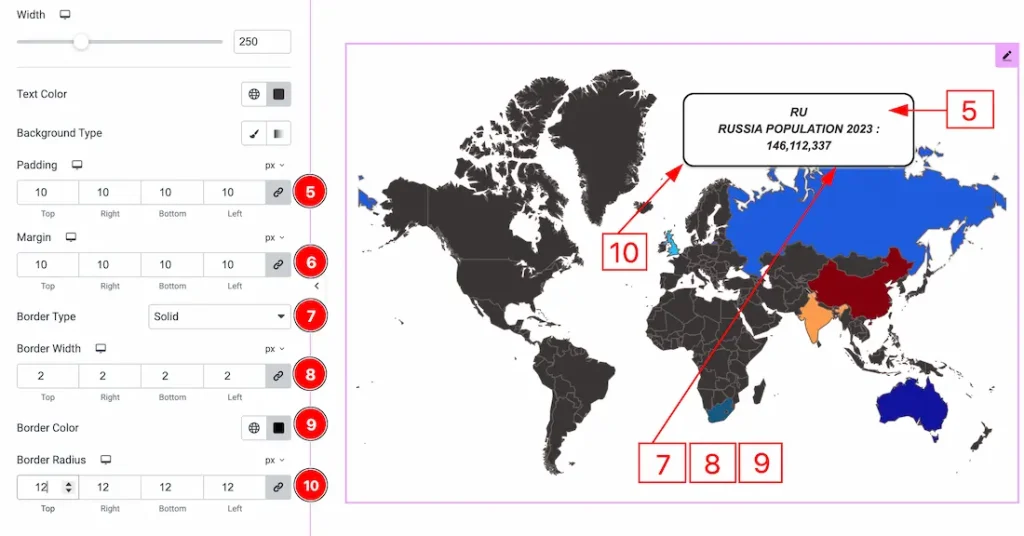
5. Padding: You can adjust the inner space of the tooltip field with this option.
6. Margin: You can adjust the outer space of the tooltip field with this option.
7. Border Type: You can add and change the border types with this option.
8. Border Width: You can set the thickness of the border with this option.
9. Border Color: You can change the border color with this option.
10. Border Radius: You can control the roundness of the border with this option.
All done! This is how you can use the SVG Maps widget on your site.
Video Assist
You can also watch the video tutorial to learn more about the SVG Maps widget. Please visit the demo page for examples.
Thanks for being with us.