In this documentation, we will explain how to customize the EDD Register widget brought to you by Element Pack Pro.
To use the EDD Register widget, you need to install the EDD. Follow the “How to use Easy Digital Download plugin” documentation for instructions.
Inserting The EDD Register widget

Open your page in Elementor editor, search by the EDD Register widget name, and then drag-drop it on the page.
The default view of the widget
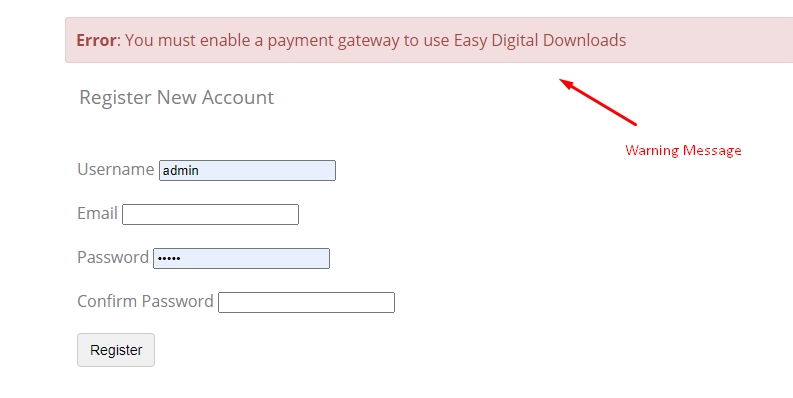
The widget displays fields to take input for username, email, password, and register button. A warning message on top is visible due to no payment gateway linked.
Layout section Customization
Go to Content > Layout
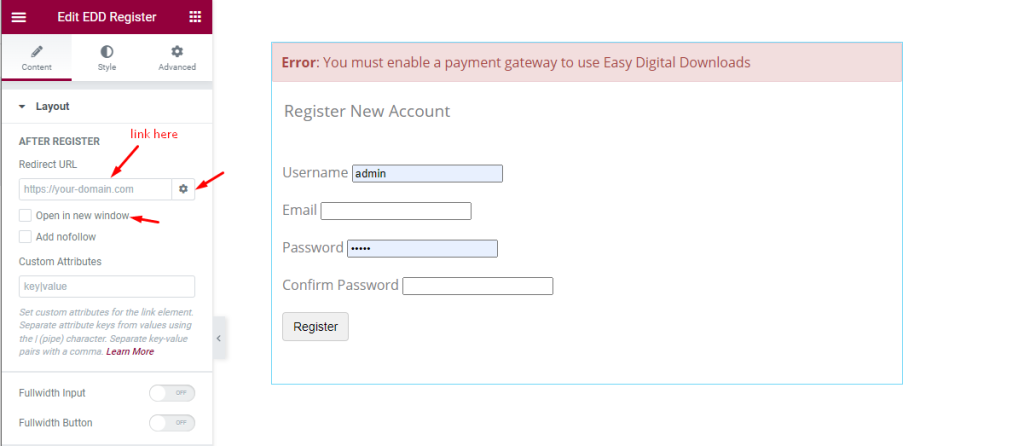
Find the Redirect URL field (for inserting URL), Settings icon > open page in new window, and Add nofollow options.
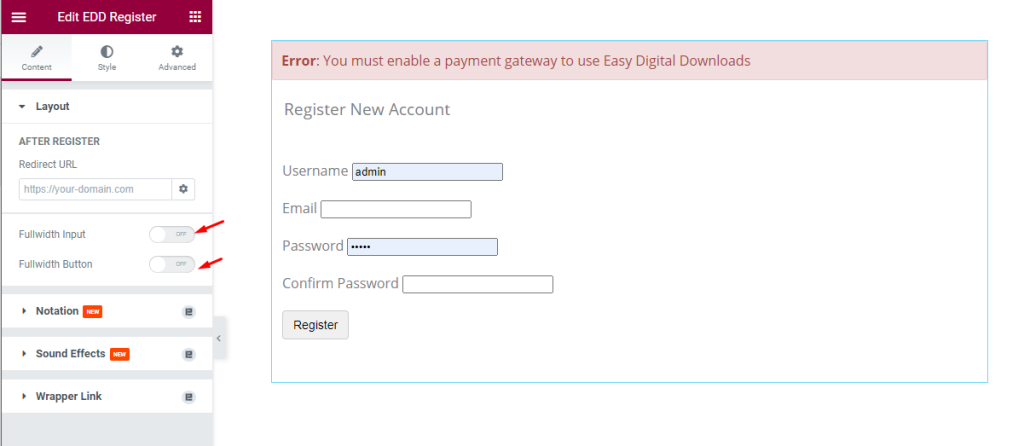
Also, find two switchers; Fullwidth input and Fullwidth Button.
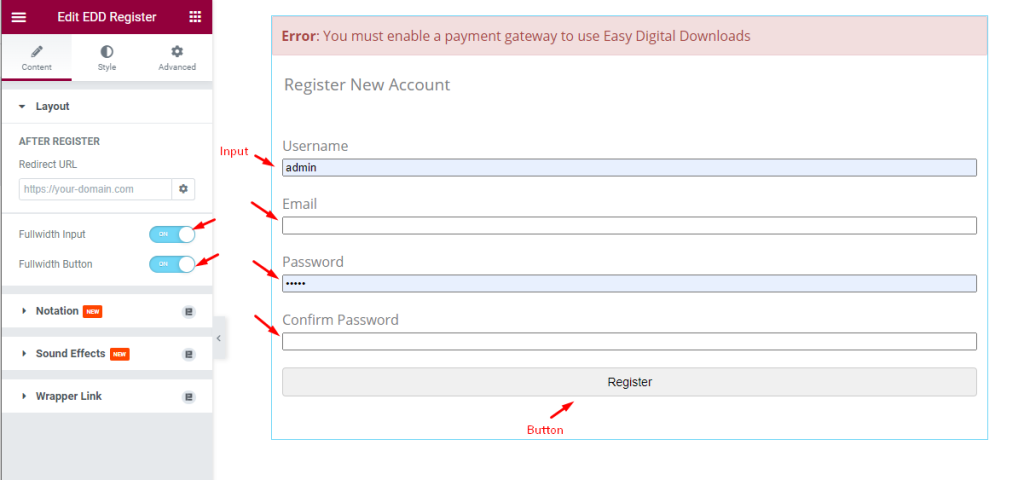
Enabling the switchers for full-width fields and button.
Customization of Style Tab
Form style customization
Go to Style > Form Style
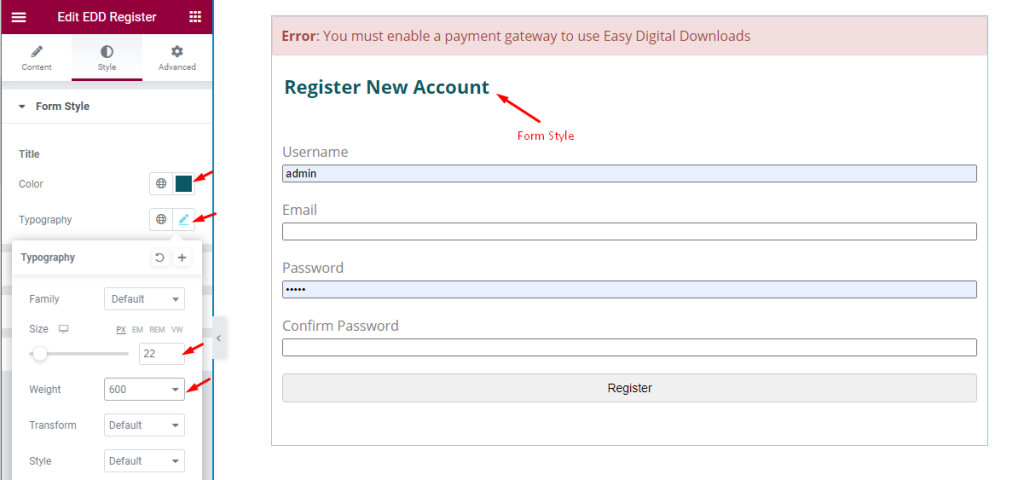
Find the Title Color and Typography options.
Form Label Customization
Go to Style > Form Label
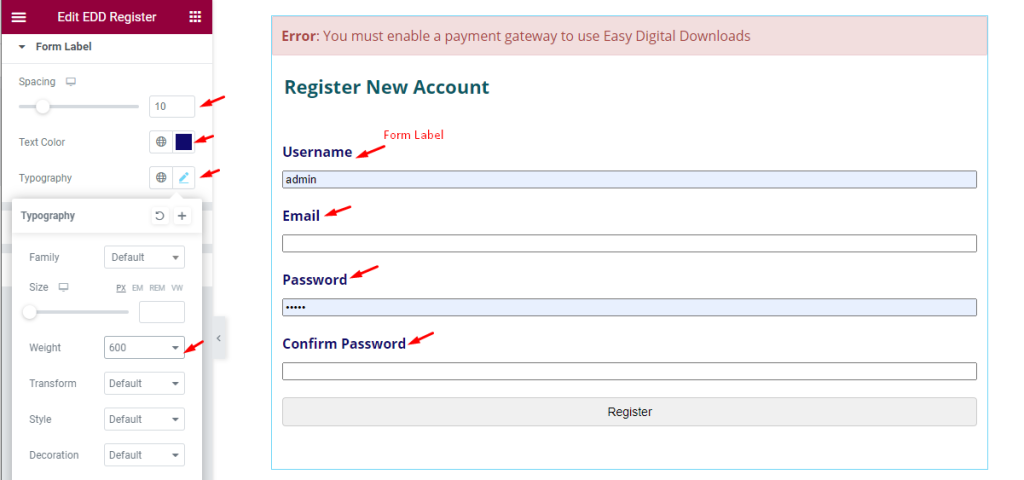
Find the Spacing, Text Color, and Typography options.
Form Fields Customization
Go to Style > Form Fields
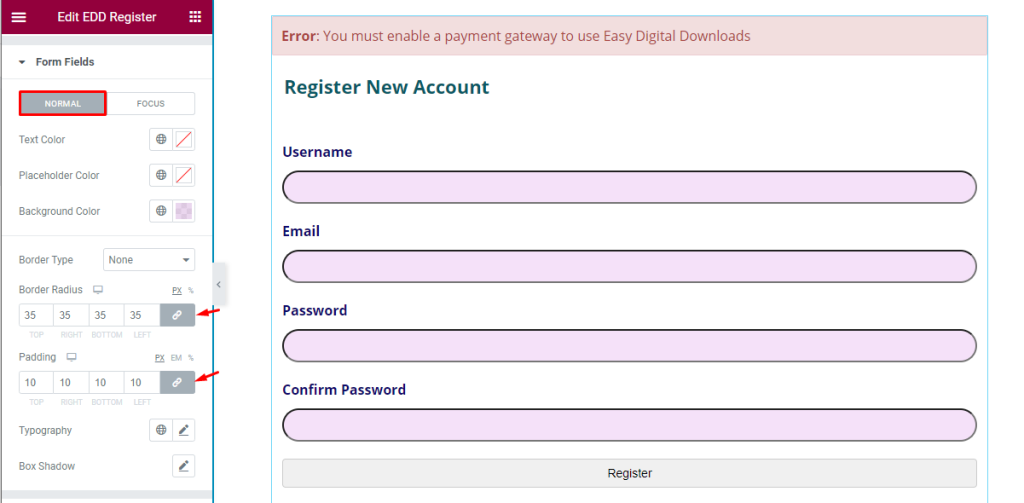
Find the Text Color, Placeholder Color, Background Color, Border Type, Border Radius, Padding, Typography, and Box Shadow options in the Normal mode.
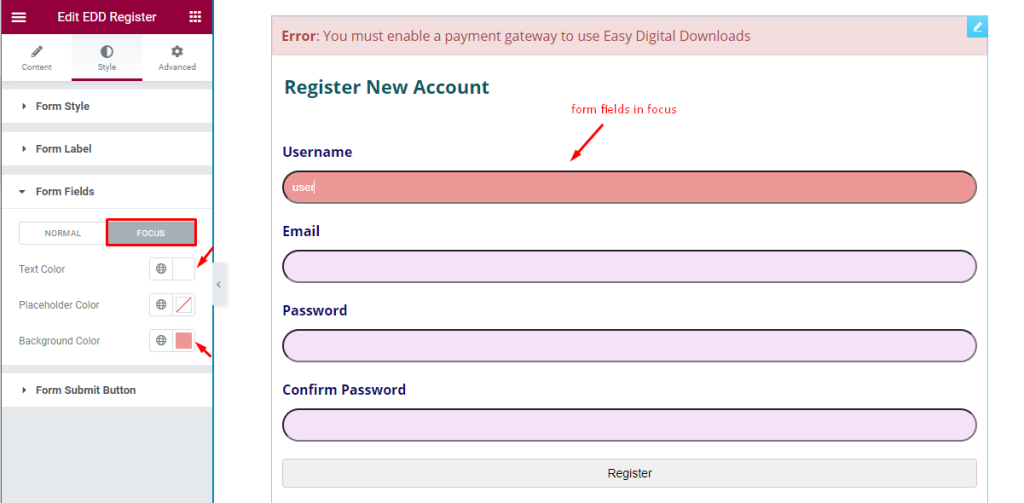
Find the Text Color, Placeholder Color, and Background Color options in Focus mode.
Submit Button Customization
Go to Style > Form Submit Button
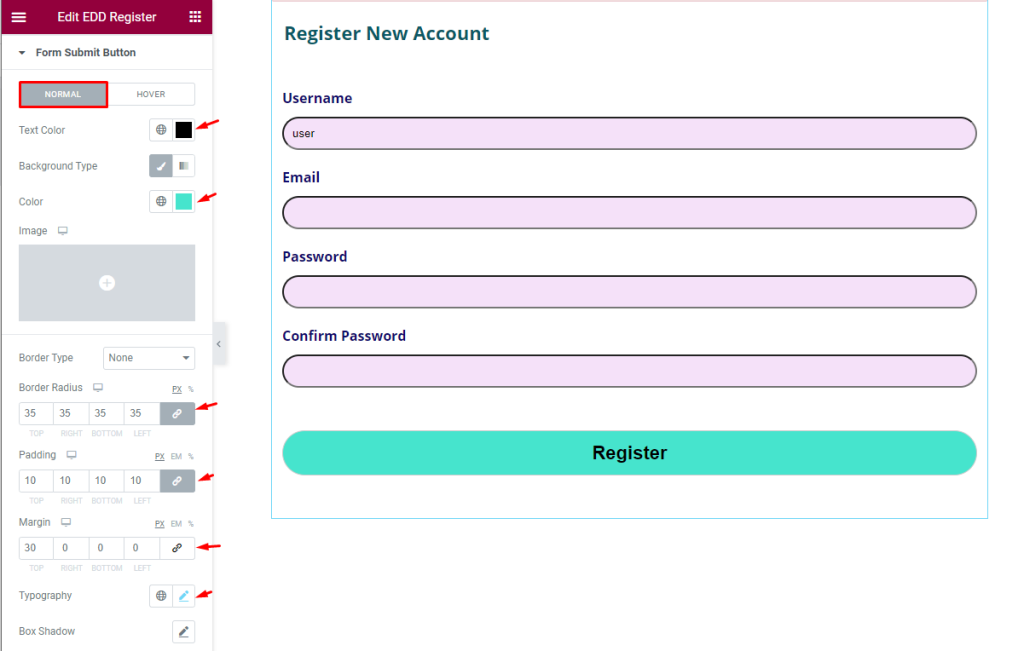
Find the Text color, Background Type, Color, Border Type, Border Radius, Padding, Margin, Typograhpy, and Box Shadow options in Normal mode.
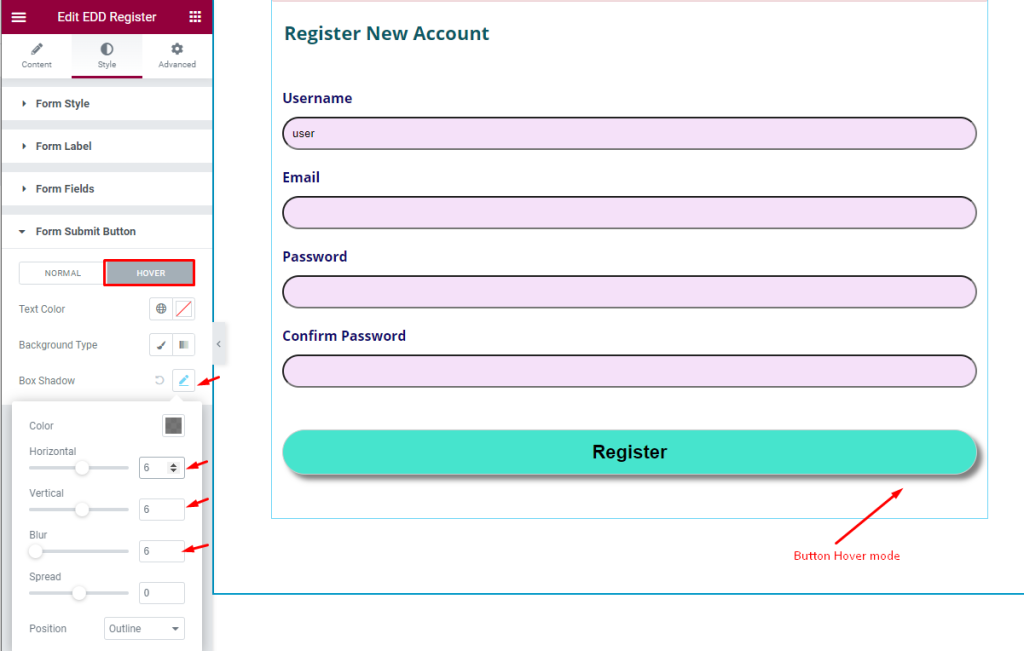
Find the Text Color, Background Type, and Box Shadow options in Hover mode.
This way you can change the default appearances of the EDD Register widget.
Video Assist
The EDD Register widget video tutorial coming soon. Please visit the demo page for examples.
Thanks for being with us.