

In this documentation, we will show you how to customize the Creative Image Widget presented by Element Pack Pro.
Enable the Creative Image Widget
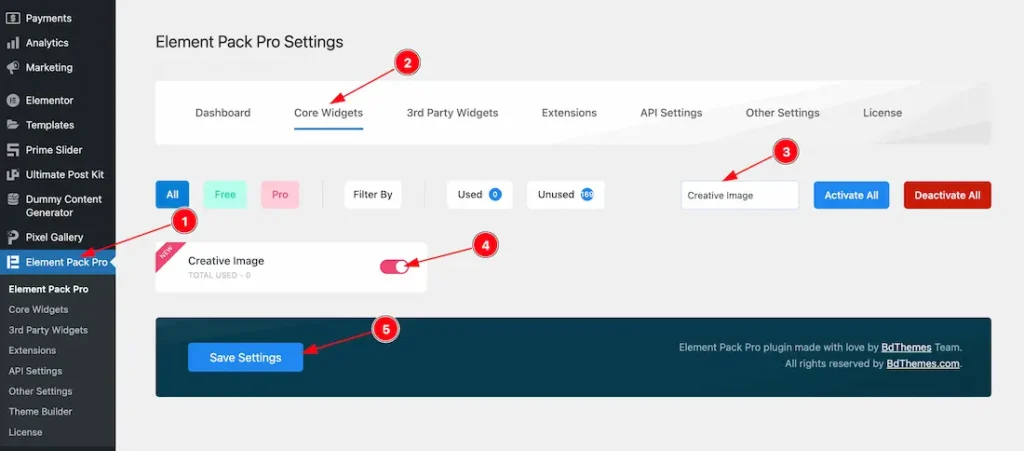
To use the Elementor Creative Image widget from Element Pack, you must first enable the widget.
- Go to WordPress Dashboard > Element Pack Plugin dashboard.
- Then Click the Core Widgets Tab.
- Search the Creative Image Widget Name.
- Enable the Creative Image Widget.
- Hit the Save Settings Button.
Inserting The Creative Image widget
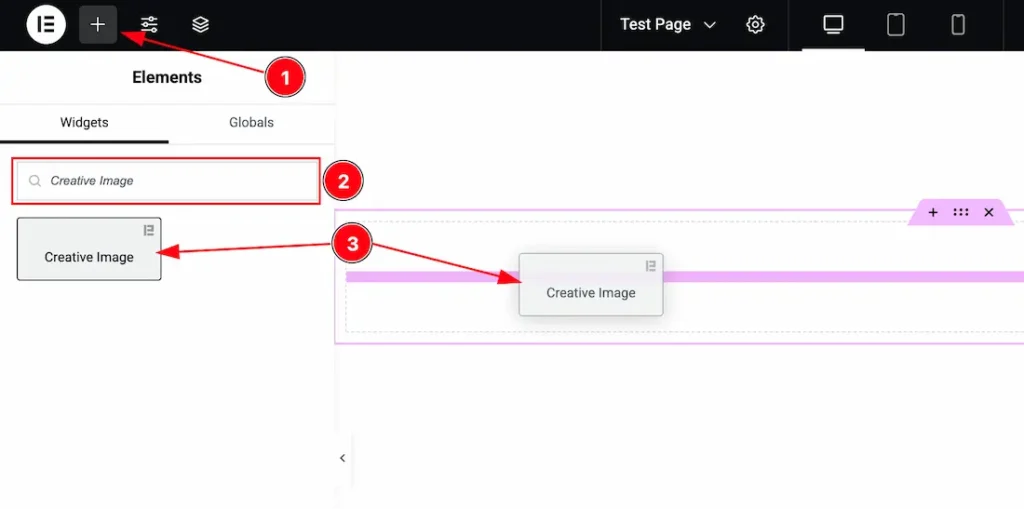
- Go to the Elementor Editor Page and Hit the Get Back To Button.
- Search the Creative Image widget.
- Drag the widget and Drop it on the editor page.
Work With The Content Tab
Layout Section
Go to Content > Layout
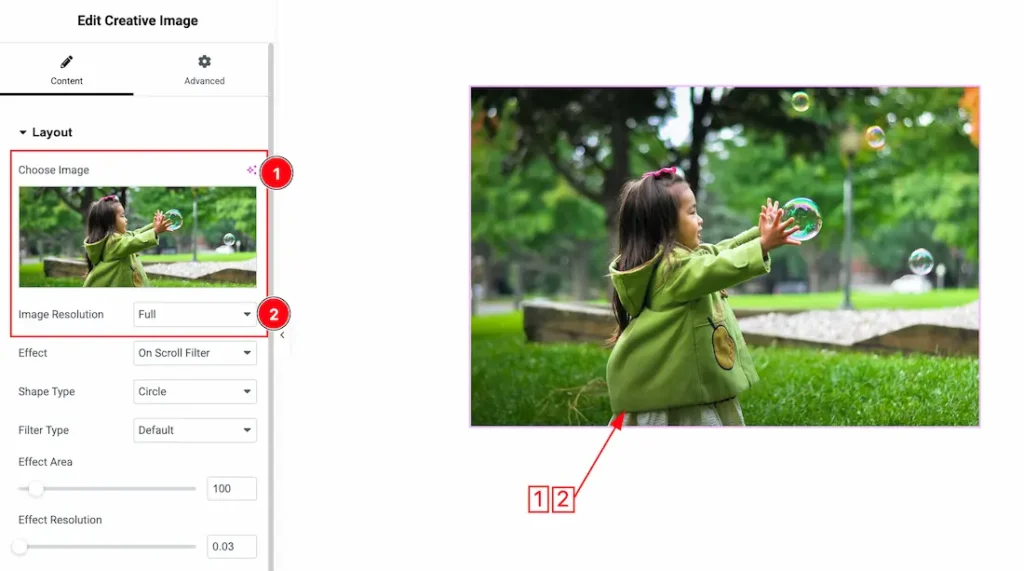
1. Choose Image: This option lets you select an image for the widget. Here you can choose any image from your media library.
2. Image Resolution: This option lets you set the image resolution to your working demand. Here we set the image resolution type- Full.
Effect Type On Scroll Filter
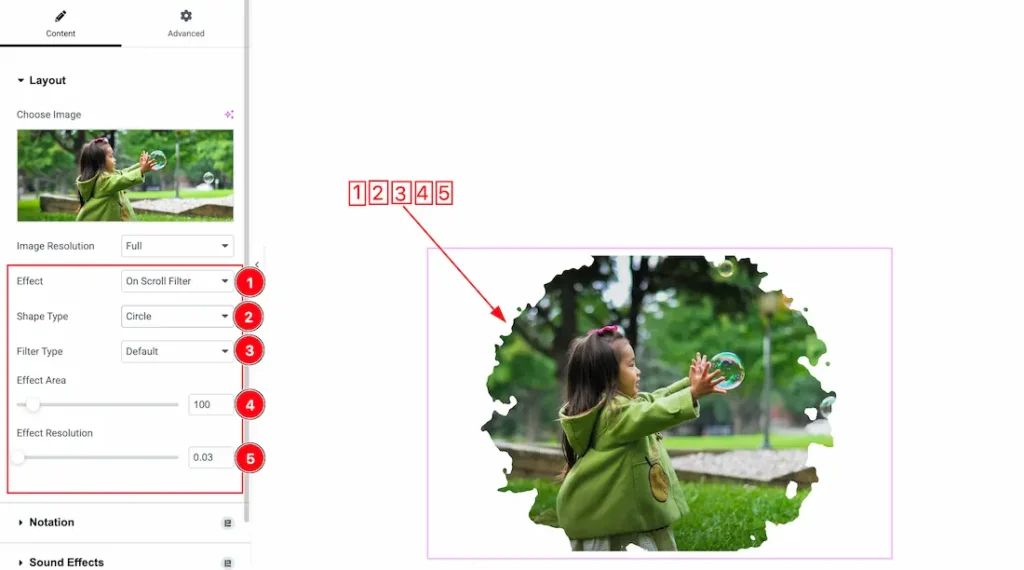
1. Effects: From here, you will get the effects types- On Scroll Filter, On Load Reveal, and On Hover Glitch. Here we select the On Scroll Filter first to explore the feature. After selecting the On Scroll Filter option, you will get the below options.
2. Shape Type: Here you will get the Shape type- Circle, and Eye. Here we select the shape type Circle first to explore the feature. After selecting the shape type- circle, your creative image looks like above the screenshot.
3. Filter Type: Here you will get the Filter type- Default, and Blur. Here we select the Filter type Default.
4. Effect Area: Controls how much of the image is covered by the visual effect.
5. Effects Resolution: Adjusts the sharpness and quality of the effect area — lower values give a blurrier effect, higher values make it crisper.
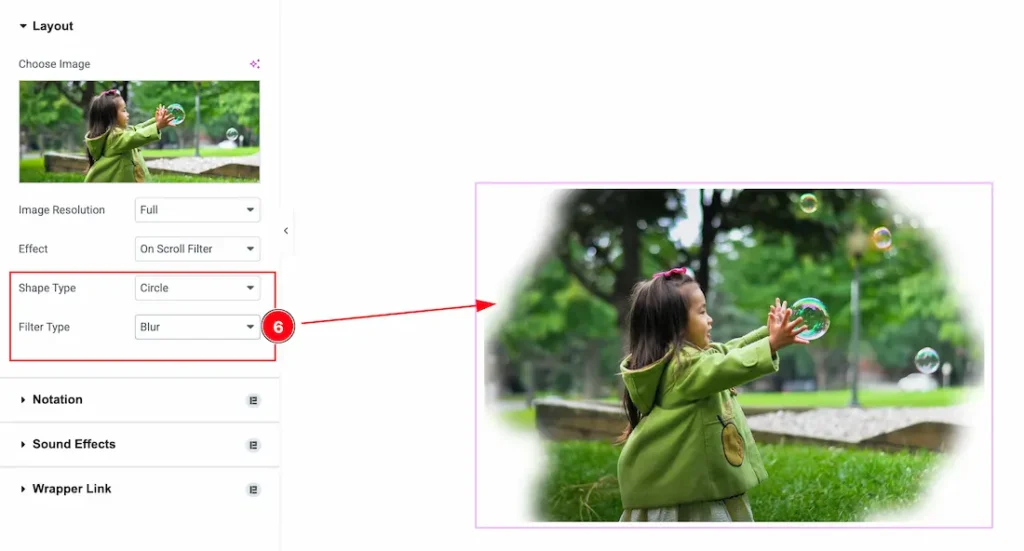
6. Filter Type(Blur): When you select the Filter type Circle and also select the Filter type- Blur then your creative image circle will shows blur as like in the above screenshot.
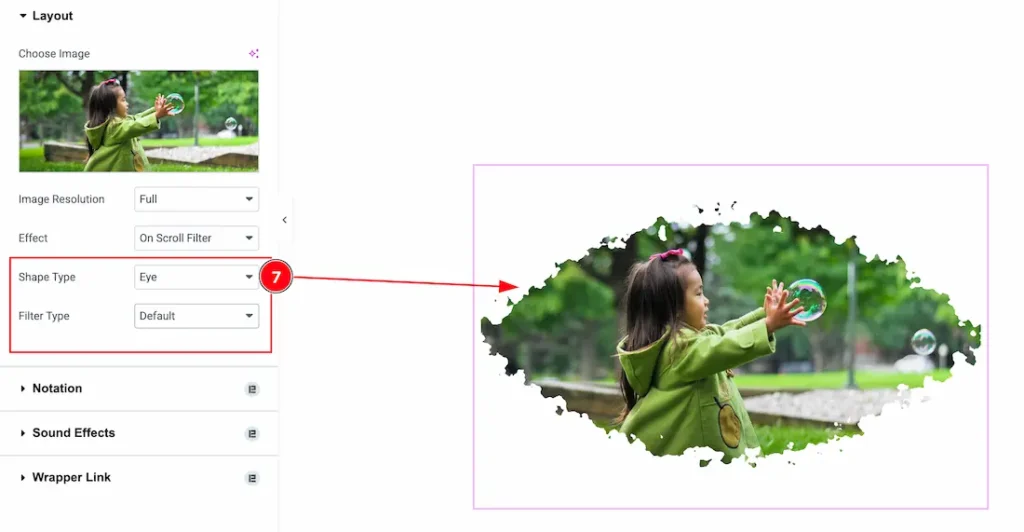
7. Shape Type(Eye): When you select the shape type- Eye then your creative image will appear as like in the above screenshot.
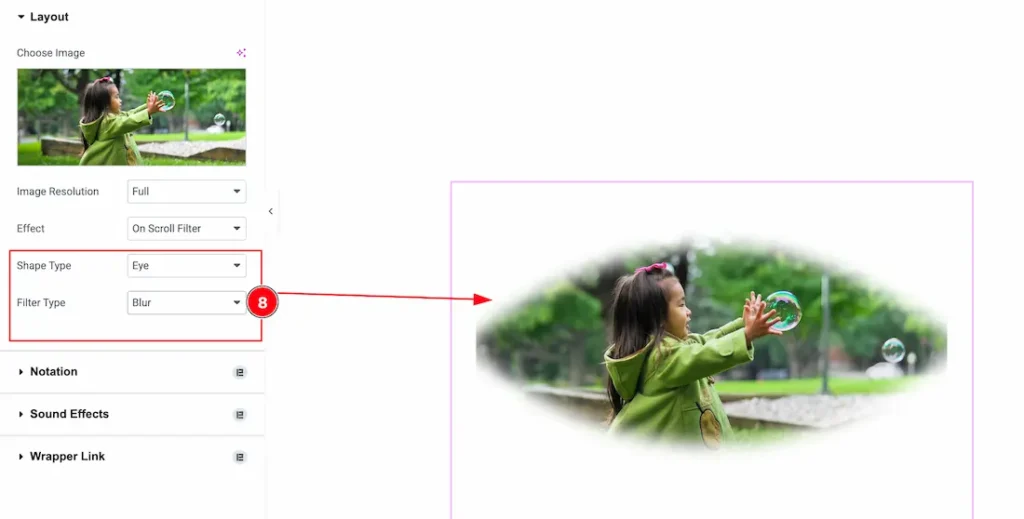
8. Filter Type(Blur): When you select the Filter type Eye and also select the Filter type- Blur then your creative image will shows blur as like in the above screenshot.
Effect Type On Load Reveal
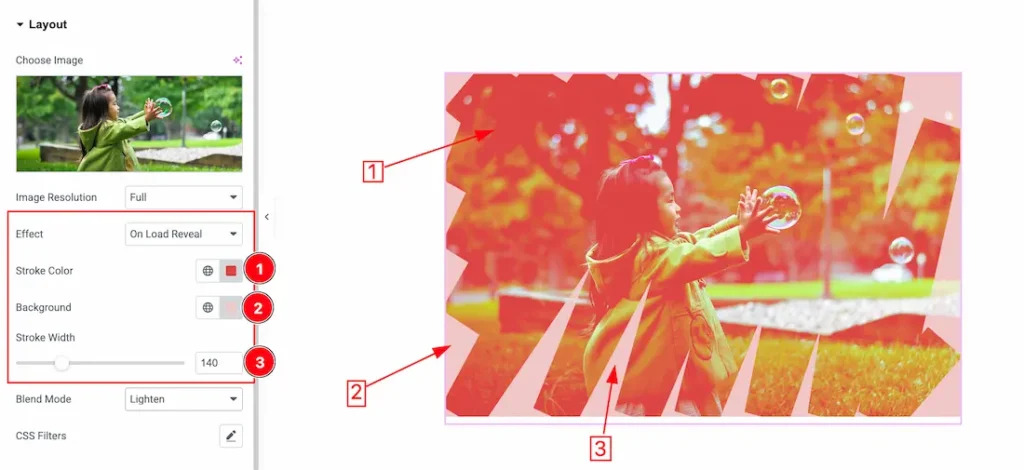
After selecting the Effects type- On Load Reveal then you will get the below customization options-
1. Stroke Color: This option lets you set the Stroke Color of the creative image.
2. Background Color: This option lets you change the background Color of the creative image.
3. Stroke Width: This option lets you set the Stroke width of the creative image.
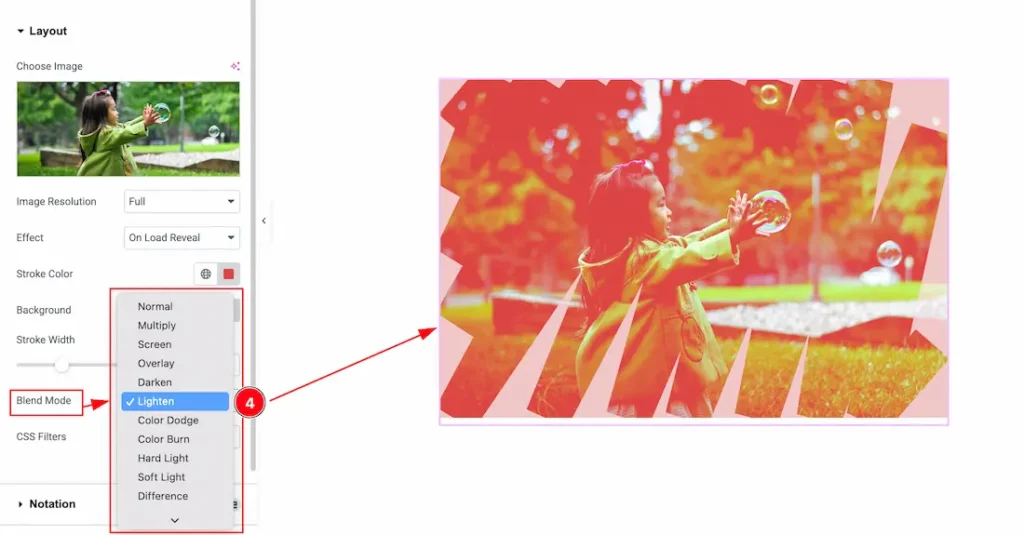
4. Blend Mode: Blend mode controls how one image or element visually interacts with another underneath it. Here you will get many types of blend mode and select one of them that you prefer.
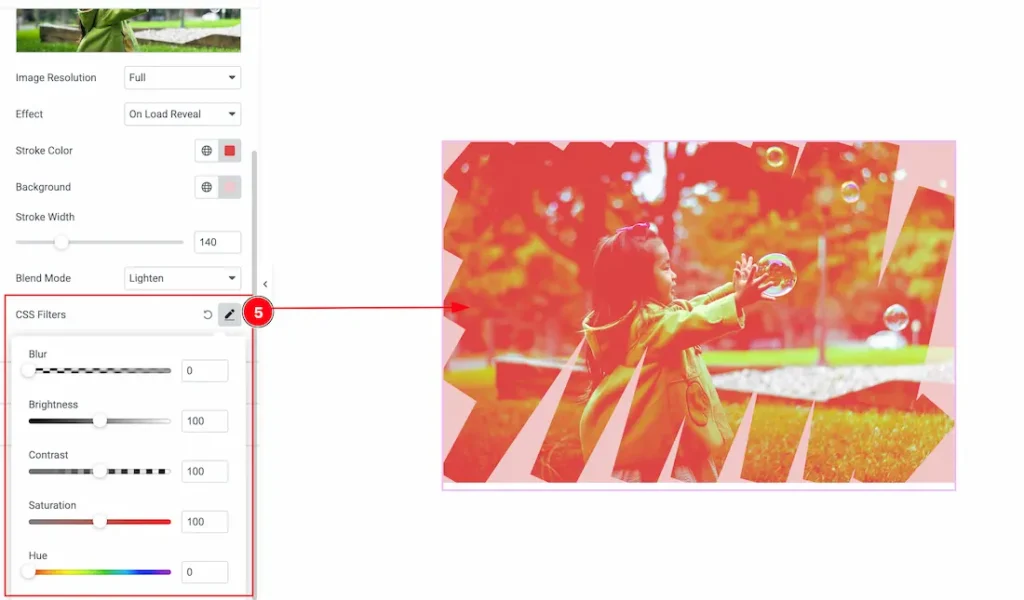
5. CSS Filter: CSS filters let you add effects like blur, brightness, contrast, and grayscale to the image.
- Blur: Applies a soft blur to the image; higher values create a stronger blur effect.
- Brightness: Modifies how light or dark the image appears; 100 is the original level, higher brightens, lower darkens.
- Contrast: Adjusts the difference between the light and dark parts of the image; increasing it makes details more defined.
- Saturation: Changes the intensity of the colors; higher values make colors more vivid, lower values make them more muted.
- Hue: Rotates the color values around the color wheel to give the image a different color tone.
Effect Type On Hover Glitch
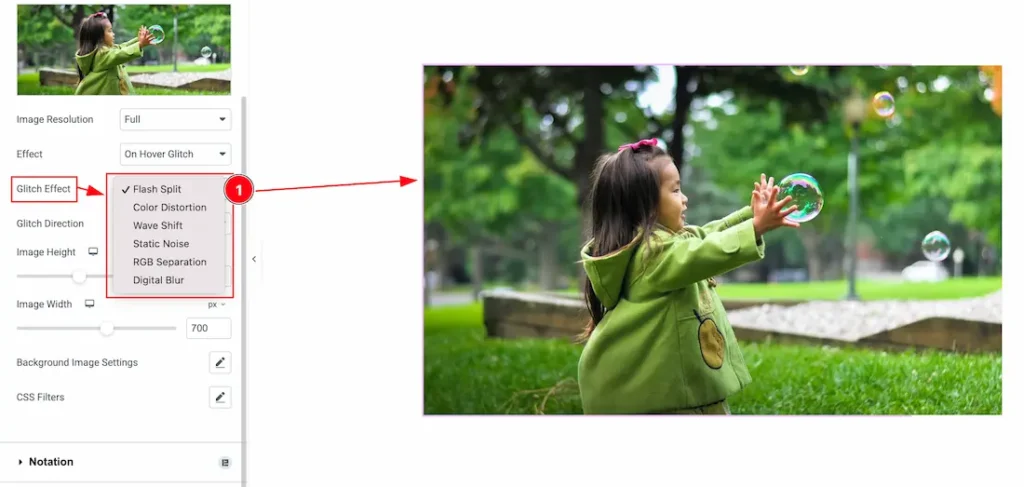
1. Glitch Effect: If you select the effect type- On Hover Glitch then some of glitch effects will appear like the screenshot and you can easily select one of them.
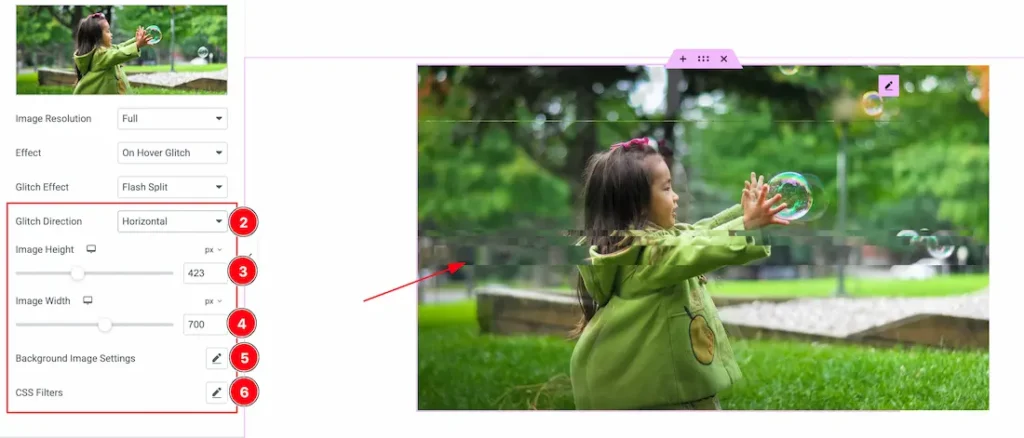
2. Glitch Direction: You can set the glitch direction – Horizontal and Vertical. Here we set the glitch direction Horizontal.
3. Image Height: This option lets you set the image height.
4. Image Width: This option lets you set the image width.
5. Background Image Settings: The Background Image Settings panel allows you to customize how the background image behaves within the element. It includes the following options:
- Position: You can set the Background image position – Default, Center Left, Center Center, Center Right, Top Center, Top Left, Top Right, Bottom Center, Bottom Left, and Bottom Right.
- Repeat: You can set the Bakcground image Repeat type- Default, Repeat, No repeat, Repeat X, and Repeat Y.
- Size: You can set the Background image size as – Default, Auto, Cover, and Contain.
6. CSS Filter: CSS filters let you add effects like blur, brightness, contrast, and grayscale to the image.
- Hue: Rotates the color values around the color wheel to give the image a different color tone.
- Blur: Applies a soft blur to the image; higher values create a stronger blur effect.
- Brightness: Modifies how light or dark the image appears; 100 is the original level, higher brightens, lower darken.
- Contrast: Adjusts the difference between the light and dark parts of the image; increasing it makes details more defined.
- Saturation: Changes the intensity of the colors; higher values make colors more vivid, lower values make them more muted.
All done! You have successfully customized the Creative Image widget on your website.
Video Assist
The demo and video will come soon. Thanks for staying with us.