The Live Copy Paste is an Elementor exclusive feature that helps Elementor copy section to another page while retaining all the design and modification. This action requires a very deep dive into the main structure of a page builder which Live Copy Paste has achieved.
Thanks to that, it takes only 5 clicks and 5 seconds to copy any web design and paste it into your own website. In technical terms, the plugin provides cross domain copy features for WordPress users.
To help you familiarise yourself with this brilliant Elementor copy page feature, we wrote this article in steps starting from installation to the last of its capabilities. Stay with us to learn the whole process from below.
Understanding Cross Domain Live Copy Paste
Websites stores data for any kind of modifications in their database. For a WordPress website, it’s easy to access specific data from the database using standard plugin protocol, which all integrated plugins naturally do. The cross domain live copy paste also works similarly to copying Elementor page to another site.
The plugin integrates with Elementor to provide users a super fast copy and paste cross domain feature. If you have a ready design at one Elementor-based website, you can use Live Copy Paste to initiate Elementor copy section to another page with only 5 clicks.
The plugin reads the whole data for the section or design including the used media files and customizations (color, border, font, etc.), and lets you copy paste cross domain to your target page. No codes are required, only click to copy paste websites.
Downloading & Installing Live Copy Paste Elementor Addon
Type Elementor Live Copy Paste or Just Live Copy Paste in the browser’s search bar and you will see the following link on your page.

Just click on the link and get inside. Or you can click here to enter into the plugin page.
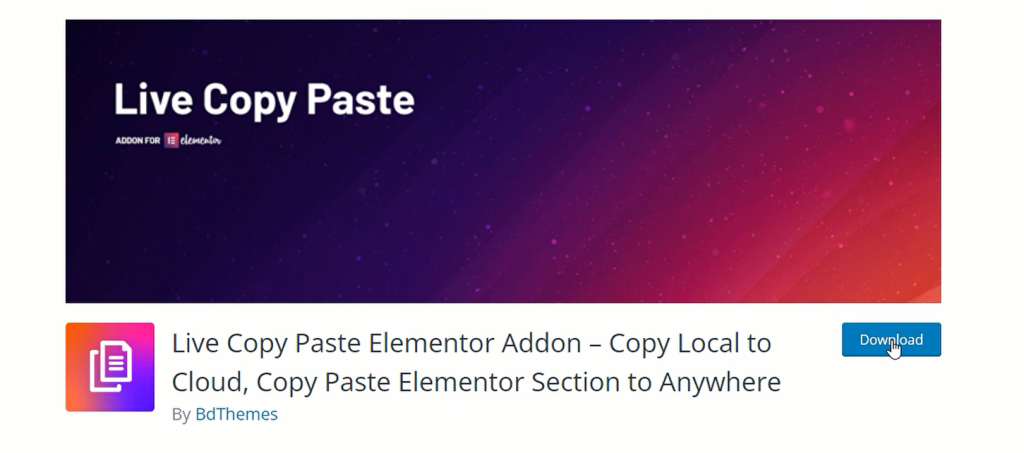
Once you are inside the plugin page, you will see the plugin logo and a download button just beside the title. The page contains a detailed introduction to our plugin with video guidelines telling what to do with it. You can take your time reading the content to understand the functions better.
Now, click on the download button to download the plugin from the WordPress directory.
Plugin Installation
Step-1
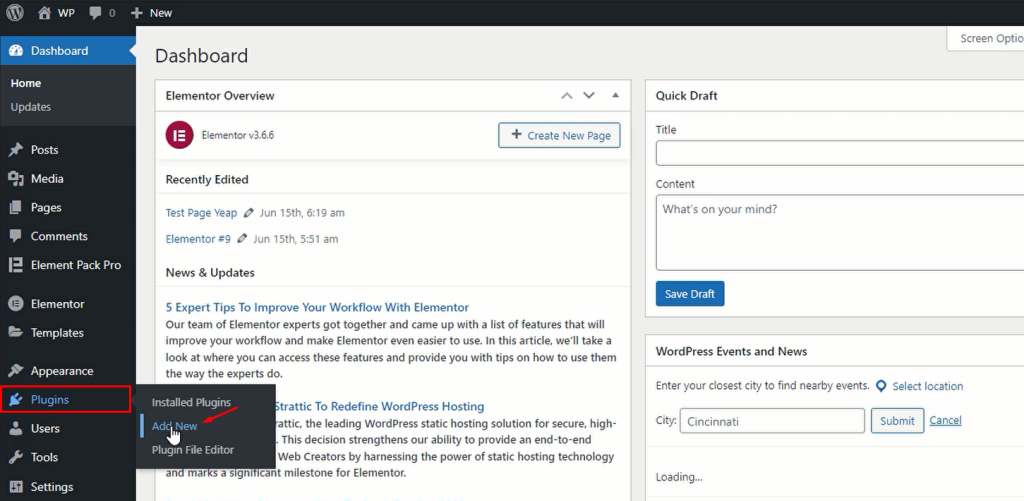
Now we will install our design copy paste plugin manually. Just go to your WordPress dashboard and hover over the Plugins option, and then click on the Add New button.
Step-2
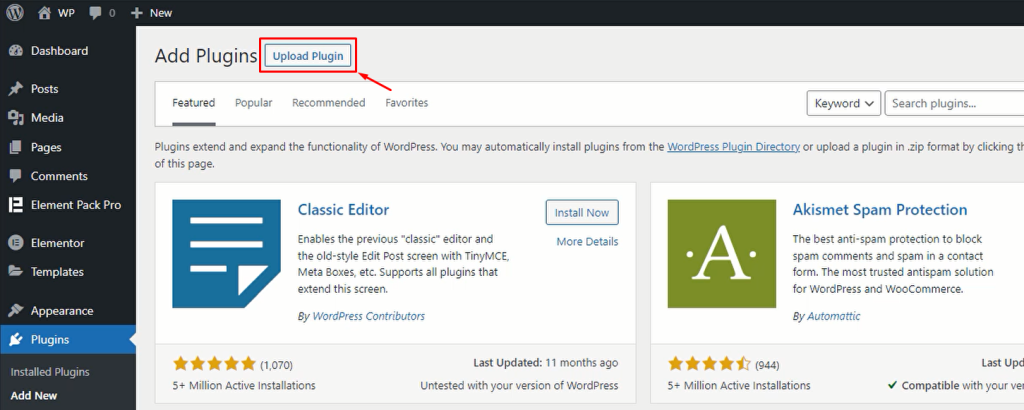
On the new window, you need to click on the Upload Plugin button from the top. Note that we are manually uploading the plugin so make sure to keep the downloaded zip file inside your local drive.
Step-3
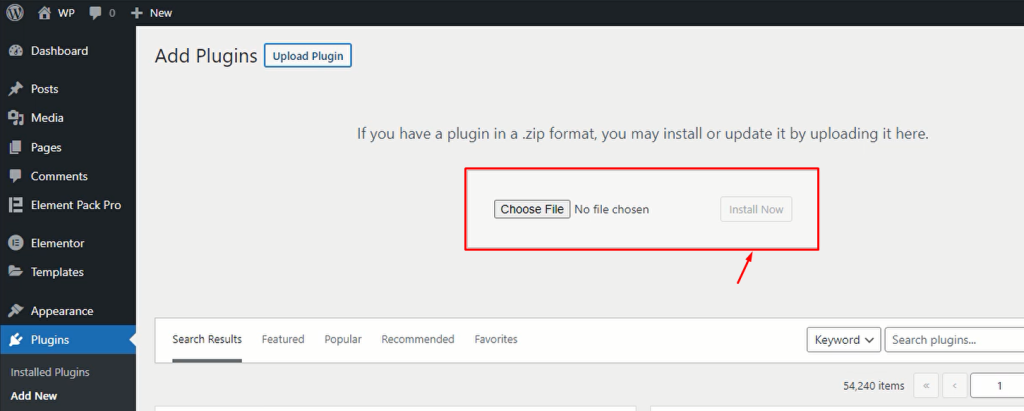
Next, you will see a box telling you to Choose File. This is where we will drop our plugin that will do the Elementor copy section to another page to copy website design in seconds.
Step-4
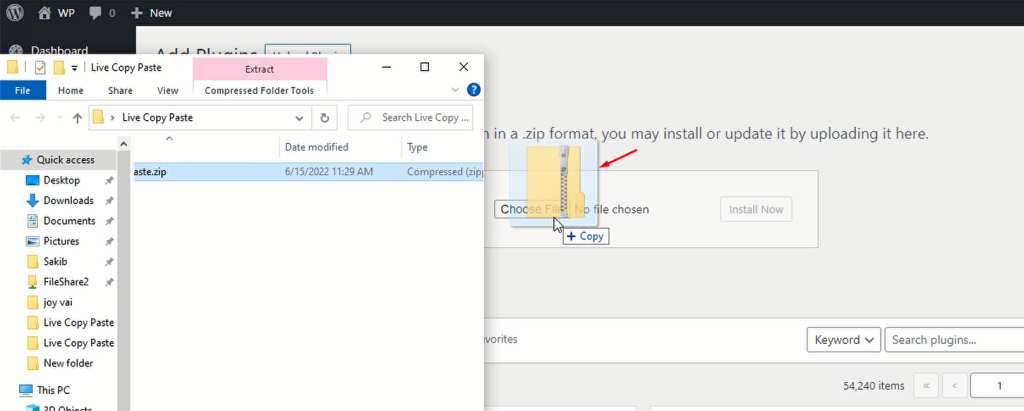
Now, open your local drive and trace the plugin. Then drag and drop it inside the box here.
Step-5
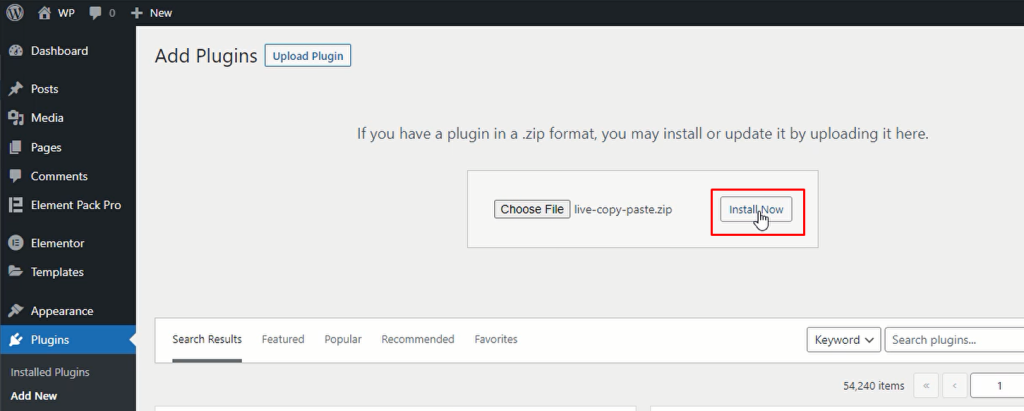
Next, click on the Install Now button to install the plugin inside your WordPress system.
Step-6
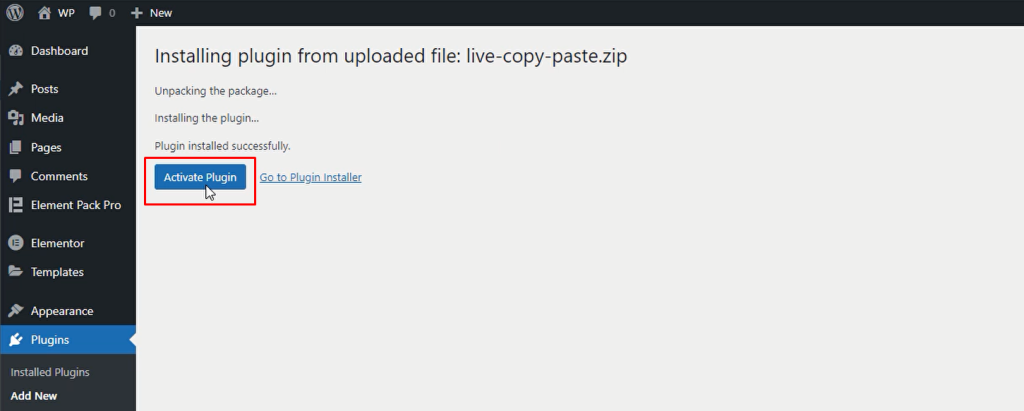
In the next window, the system will install and integrate the new plugin. Just hit the Activate Plugin button in order to make the cross-copy-paste plugin usable.
Step-7
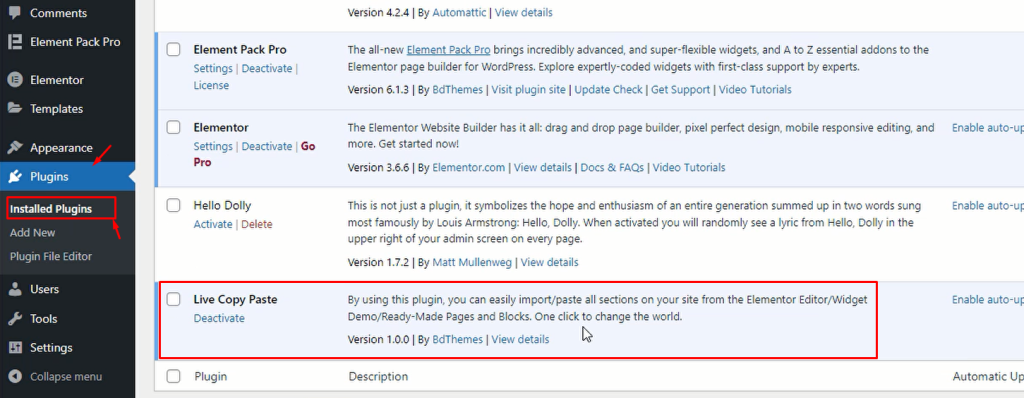
Then you will automatically see the installed plugins window where the Live Copy Paste plugin just got listed.
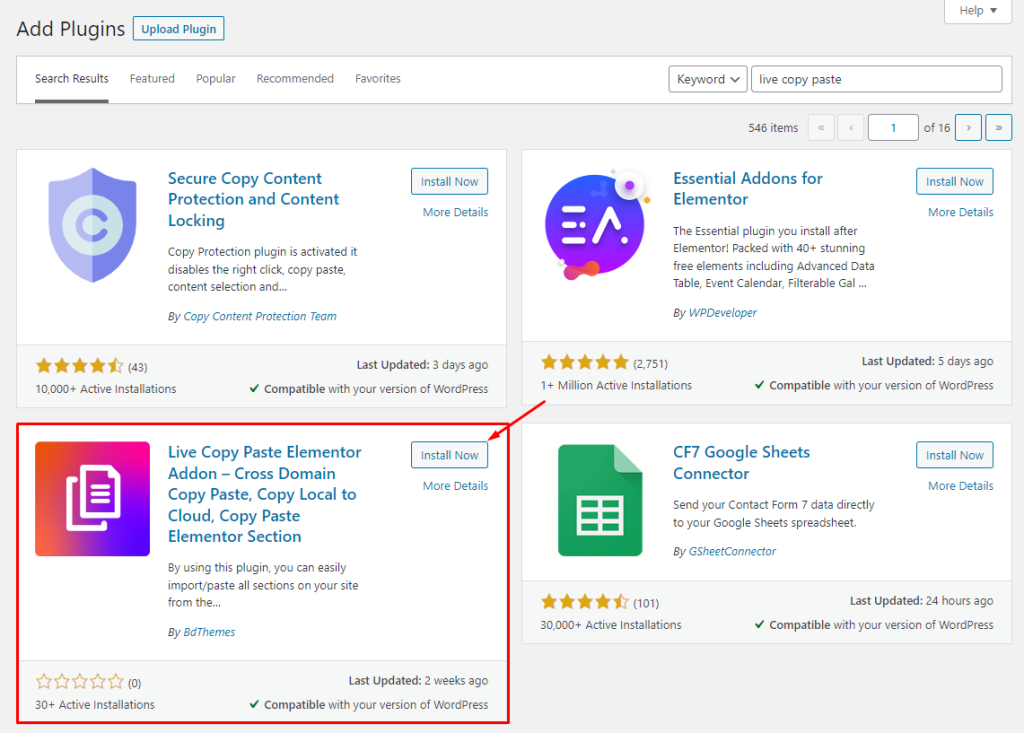
Or, you can skip the whole process and search for the plugin in the widget search console in WordPress. Then just click on the install button and follow step 6 to activate it.
Configuring Test Page For Copy and Paste Cross Domain
Once the plugin installation is complete, let us show you how to use the plugin to Elementor copy page to another website. As this is about a plugin that lets you copy and paste web design, there has to be a design that you want to copy. In order to have something to copy and export, we are going to use an Elementor copy template made on the existing domain.
Let’s do that.
Step-1
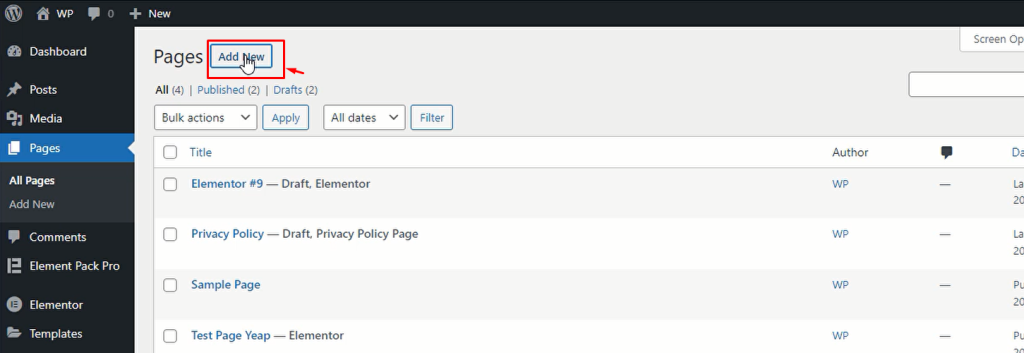
First of all, we will create a new page in the current domain using by clicking the Add New button on the page dashboard.
Step-2
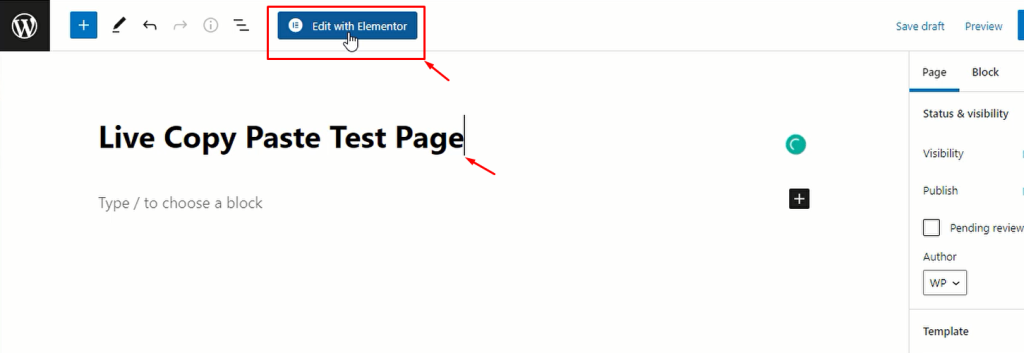
After that, give a name to the page in the Gutenberg editor and then proceed to Edit with Elementor.
Step-3
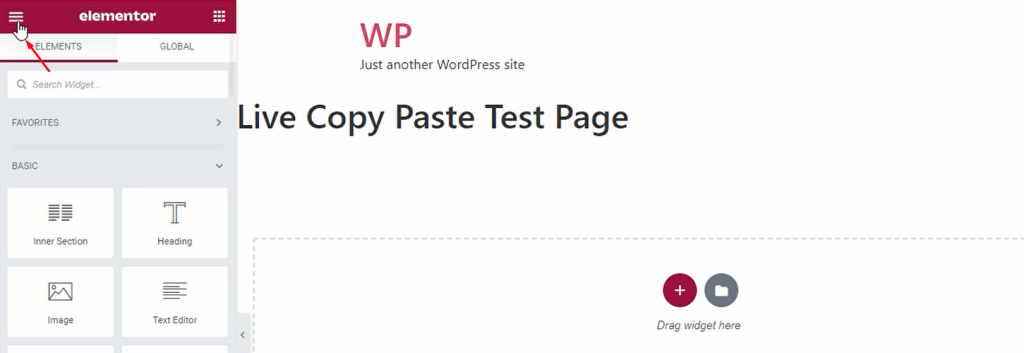
Now, on the opened editor page, click on the page settings hamburger menu in the top-left corner.
Step-4
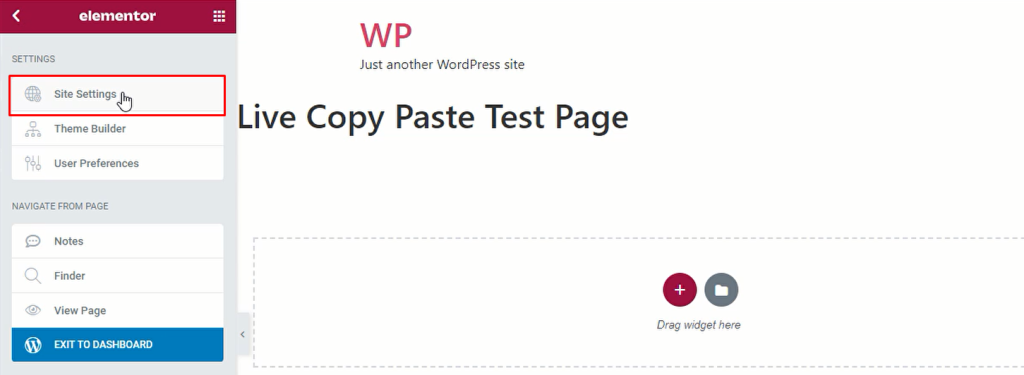
Then click on the Site Settings option from there.
Step-5
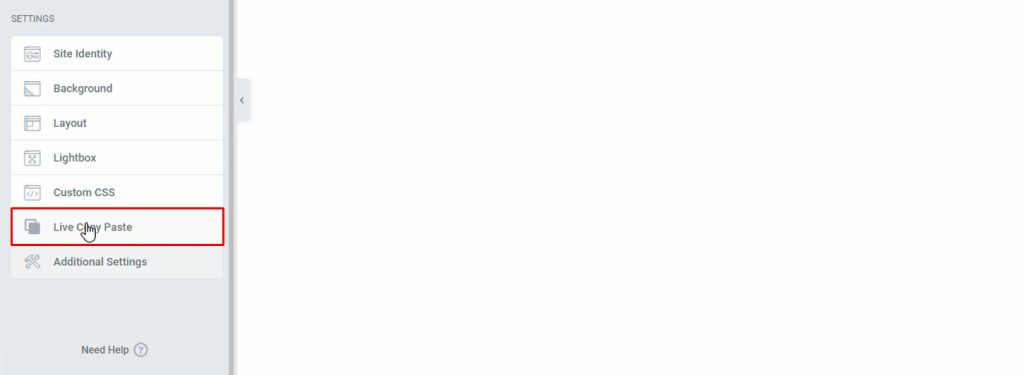
At the bottom, you will see the Live Copy Paste section there. Just click on it.
Step-6
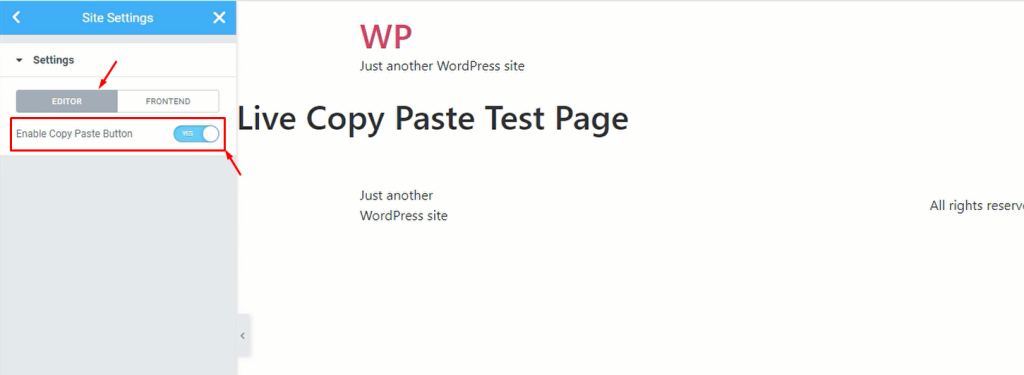
After clicking, you will see the Editor subsection and the Enable Copy Paste Button there. Now turn on the switcher and save changes on the current page.
Live Copy Paste In Action
To show you how easy it is to copy website design from one domain to another with the Live Copy Paste widget. In order to do so, we will work with a page template by inserting it into the current page we opened.
Step-1
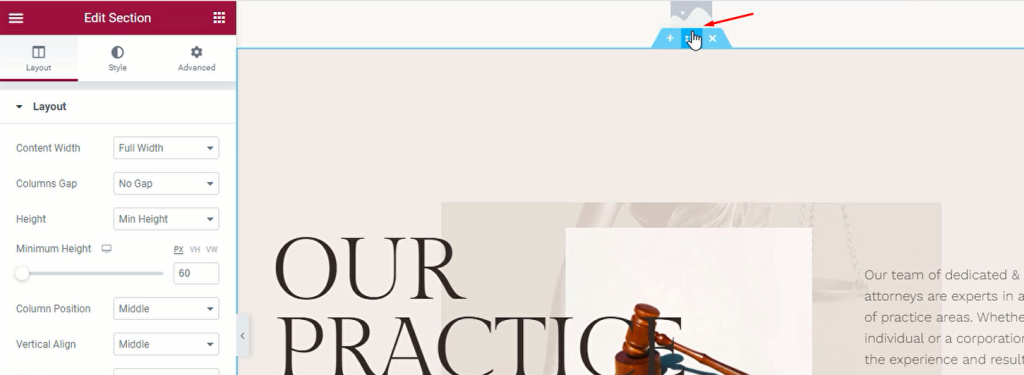
On the page, you can already see the template. Now, place your cursor on the section settings icon and then right-click on it.
Step-2
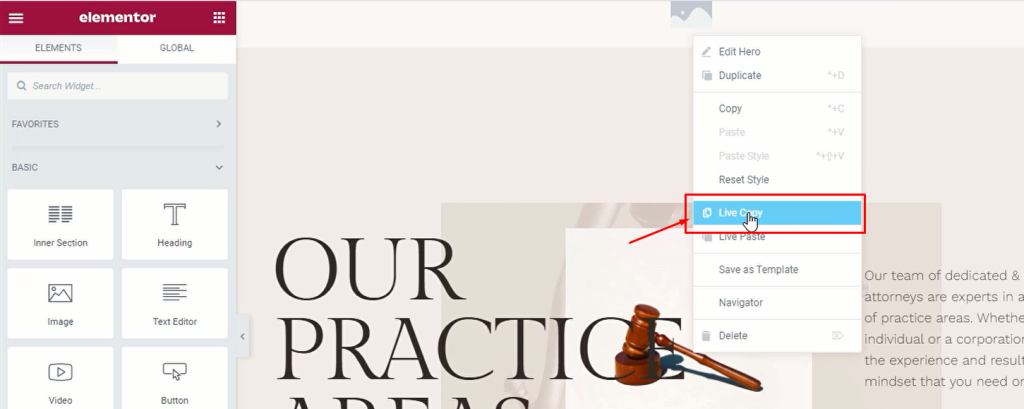
From the options, you have to click on the Live Copy option. Note that the option will only be visible if the plugin is activated and the editor copy-paste switcher is on.
Step-3
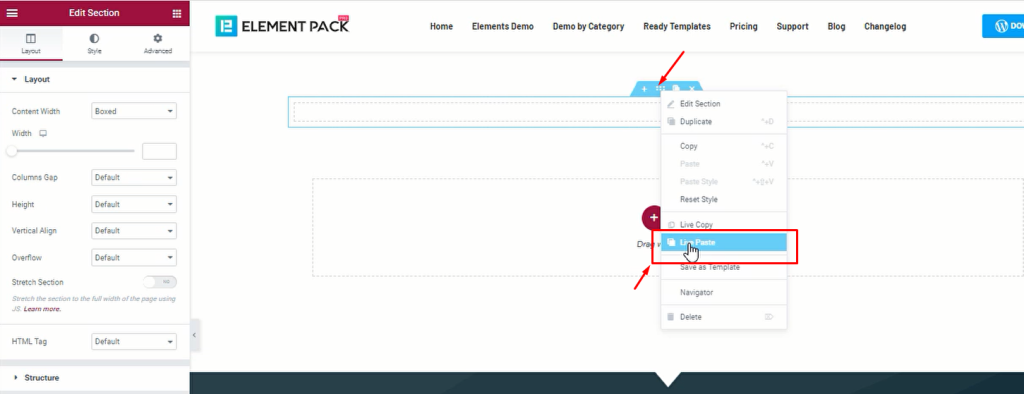
Now, move to the target webpage on a different domain and then open the target page in Elementor. Then create a new section here and right-click on the section settings icon. There, you have to click on the Live Paste option.
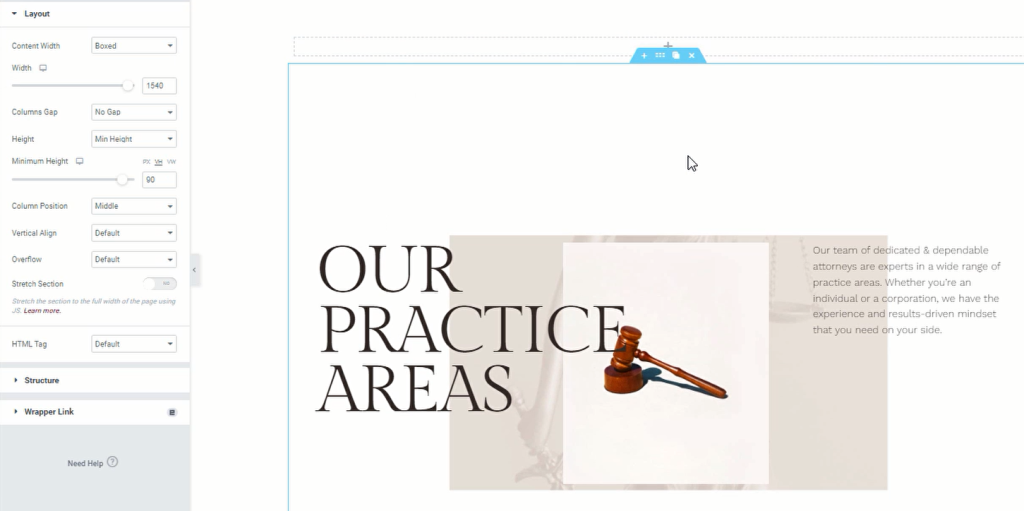
Just as you click it, you will see the section being exported along with all the graphical elements and column settings. All you have to do is change the page color from the settings to match the exact design.
This way, you can copy paste web design super fast without breaking any sweat. This is the magic of the Live Copy Paste addon for Elementor.
Live Copy Hidden Feature – The Magic Copy
The plugin for Elementor copy section to another website, the Live Copy Paste addon can do more than just let you copy web design from the editor page. There is another feature that enables a frontend copy interface to let you steal designs from another website without peeking into the backend of theirs.
That is the Magic Copy option. When your target website has this option enabled, you will be able to copy the web design from the site’s front end. Here, we are taking the Element Pack website as the reference site or the target website.
Let’s see how.
Step-1: Enable the Magic Copy Option

Same as before, go into the site settings on your target website and enable the Magic Copy switcher from there. It’s the 2nd sub-section under the Live Copy Paste option.
Step-2: Get Into the Frontend
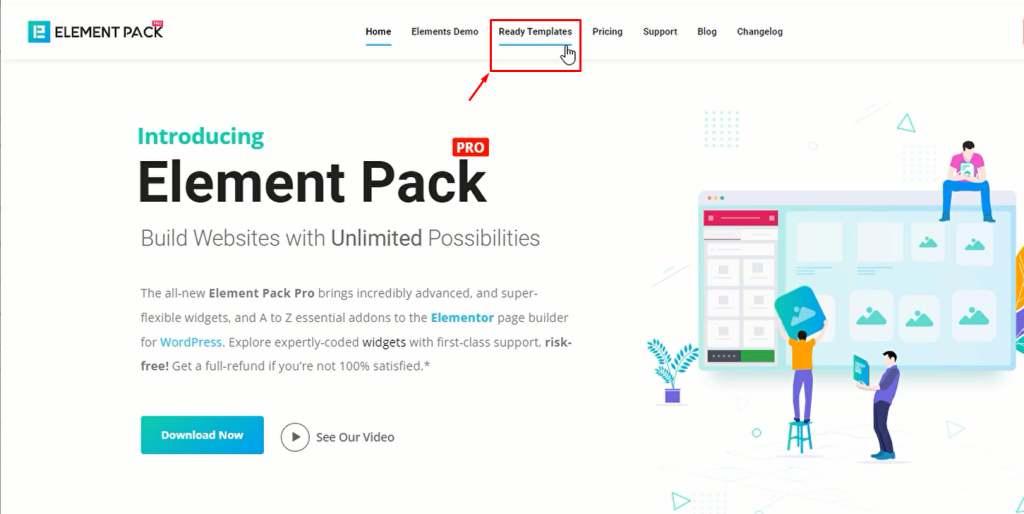
Now, on the target site, Element Pack, go to the front end and click on the Ready Templates option from the menu. As an addon for Elementor, Element Pack provides lots of demo content for its users to take advantage of them to polish their web designing experience.
Step-3: Scroll and choose your template
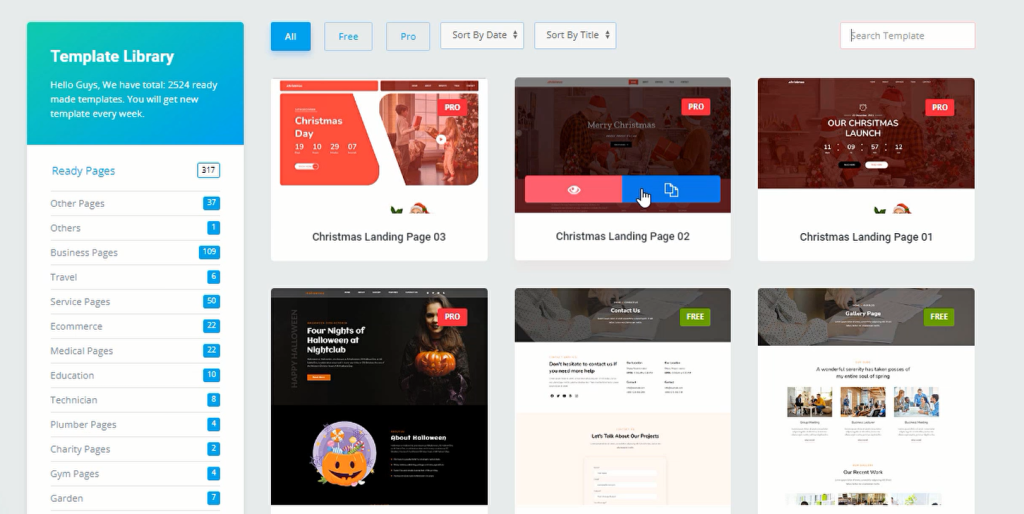
Element Pack has one of the biggest template libraries containing more than 2200 assets. This includes full page templates, blocks, header & footer templates. You can select any from them or use filters on your left for finding the specific ones.
Just for you, all these templates have the Live Copy function enabled so you can grab the templates anytime you want.
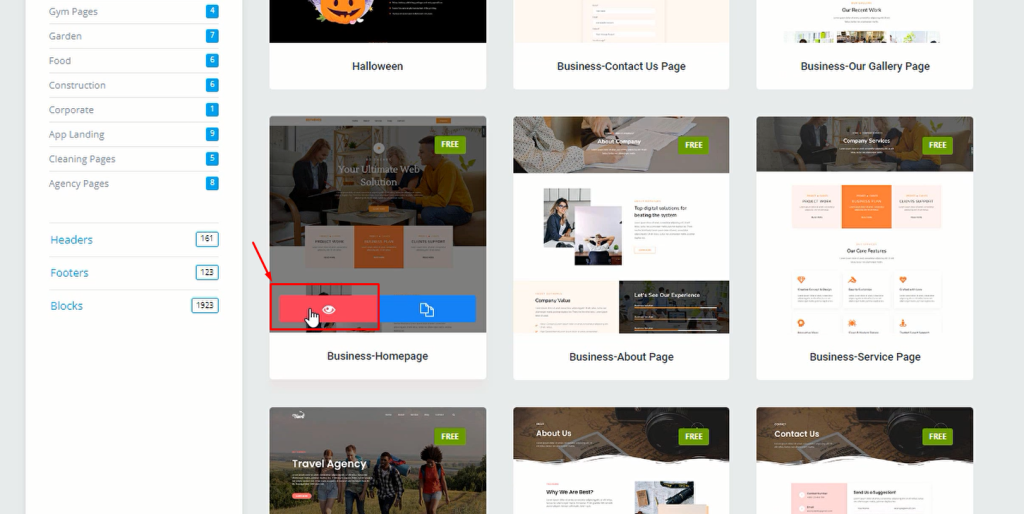
Once you find your template, go ahead and click on the quick view button to see the whole page in detail.
Step-4: Use the Magic Copy button

Now that you are viewing the full page template, you will see a floating button saying Live Copy on every section of the template page.
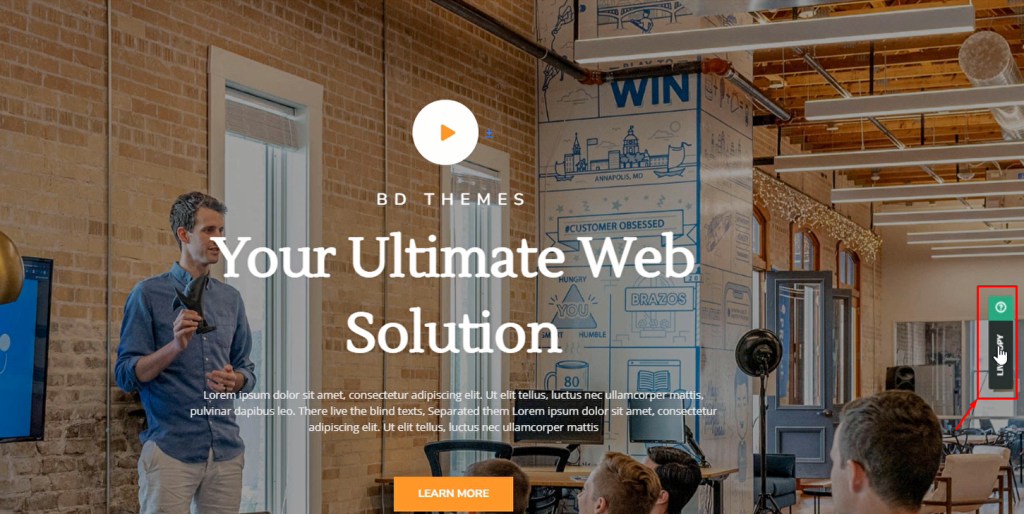
Clicking on the button will activate a loading sequence that indicates that all assets belonging to that particular section are being copied.
Step-5: Live Paste the copied section
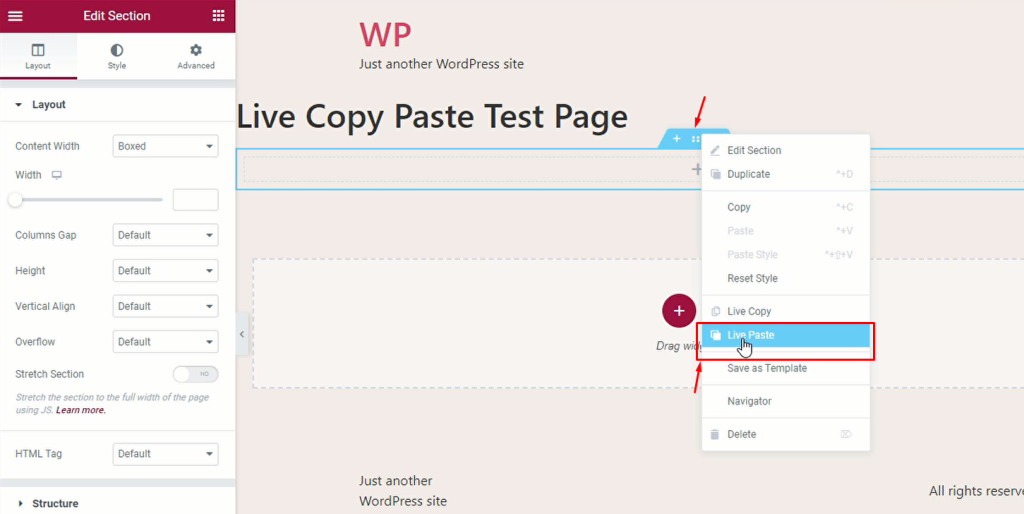
Now go back to your previous domain where you will import the designs. Then create a section and right-click on the section settings icon. From the list, select the Live Paste option.
Step-6: Finalize
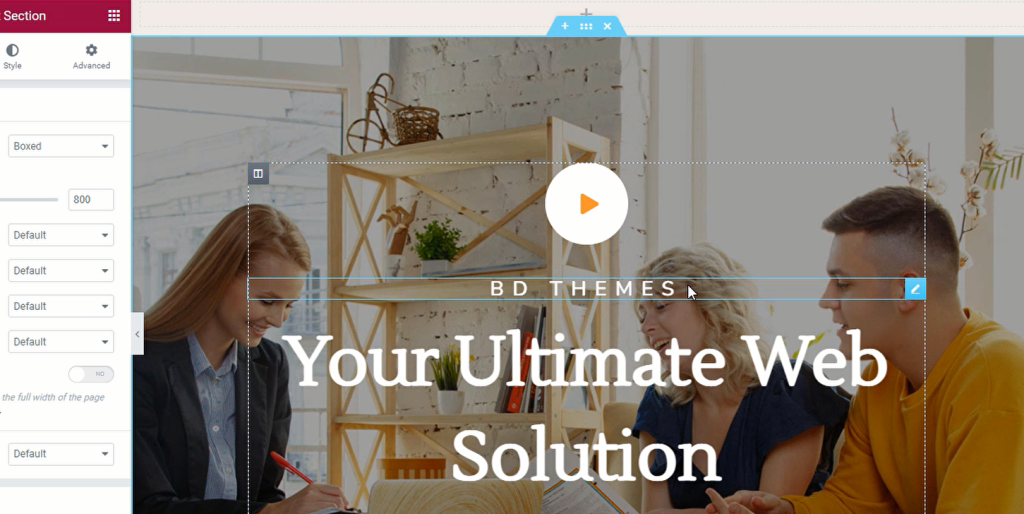
Once you do that, you will see the copied design being pasted on the current page with all settings and media preserved. From this point on, you can customize the imported design to make unique pages easily.
Like this, you can copy pages, posts, and even templates from one domain to another. These are the full range of applications of the Live Copy Paste addon for Elementor.
Magic Copy – Additional Features
The recently updated Live Copy Paste plugin has two more features to offer you. These additions work on the Magic Copy feature of the plugin.
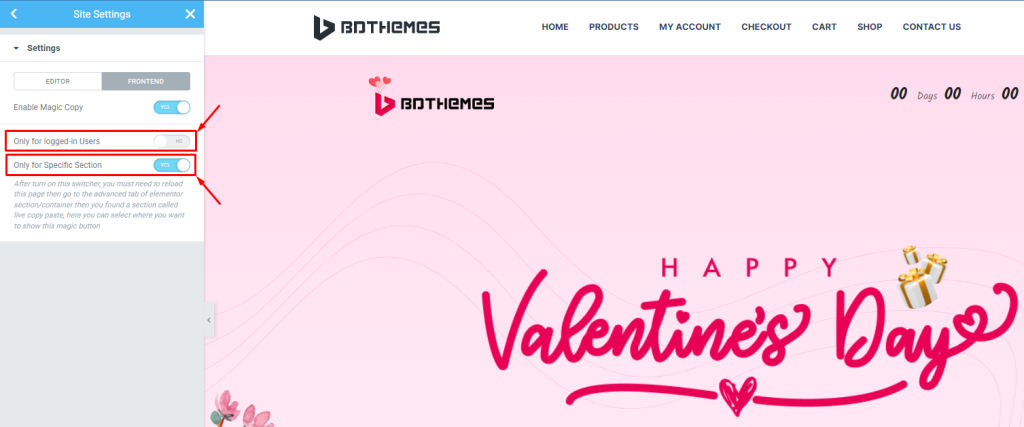
- Only For Logged-in Users :- Enabling this switcher will make the magic copy button (on the page frontend) only appear before the logged-in users. Common visitors who have not logged in won’t see the magic copy button.
- Only For Specific Section :- Enabling this switcher will let you choose specific sections on the page (for frontend usage) and only make the Magic Copy button available for those specific sections.
Use ‘Only For Specific Section’ option
Step-1

First, go to Site Settings> Live Copy Paste> Settings> turn on the Only for Specific Section switcher.
Now save the page and reload it one time. Do this to let the option manifest.
Step-2

From the editor page, click on the section Settings icon for the target section (for which you want to show the magic copy button. From the Advanced tab, click on the Live Copy Paste section and turn on the switcher.
Now, save the settings or update the page.
Result
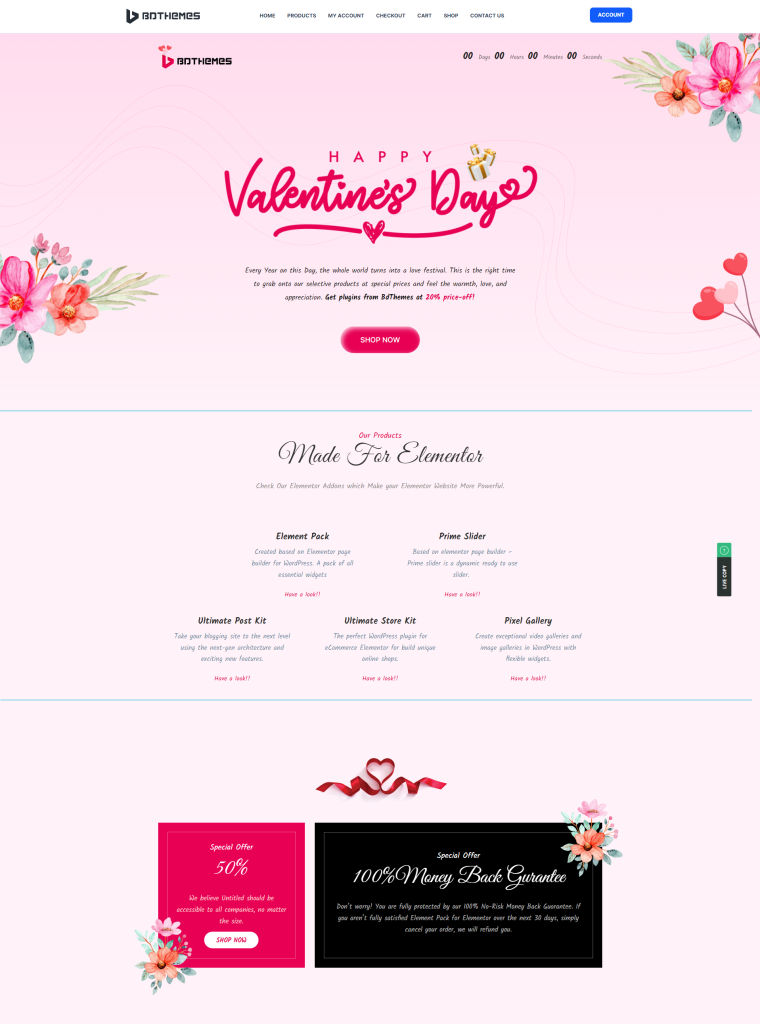
Then, your visitors will see the floating Live Copy (aka Magic Copy) button for that target section only and nowhere else on that page.
Learn Everything Written From This Video
The Live Copy Paste addon is free to use. Take advantage of this amazing plugin to speed up your web design projects and add more value to your time.
Please give feedback on how much this plugin helped you achieve.
Thanks in advance!

