Elementor Tiny List widget is a list-type tool, made for blogging sites, to display a large number of posts in a list formation. The Ultimate Post Kit plugin developed this widget to assist in your blog page by adding an easy-to-use blog navigation layer.
Let’s see how it works.
Inserting Elementor Tiny List Widget

Find the Tiny List widget from the widget menu in the Elementor page editor and drag it inside the section you need for making a webpage.
Content tab
The Content tab holds the base settings for the widget and lays the foundation of the layout of the final content. It’s divided into two parts for the Tiny List widget.
Layout
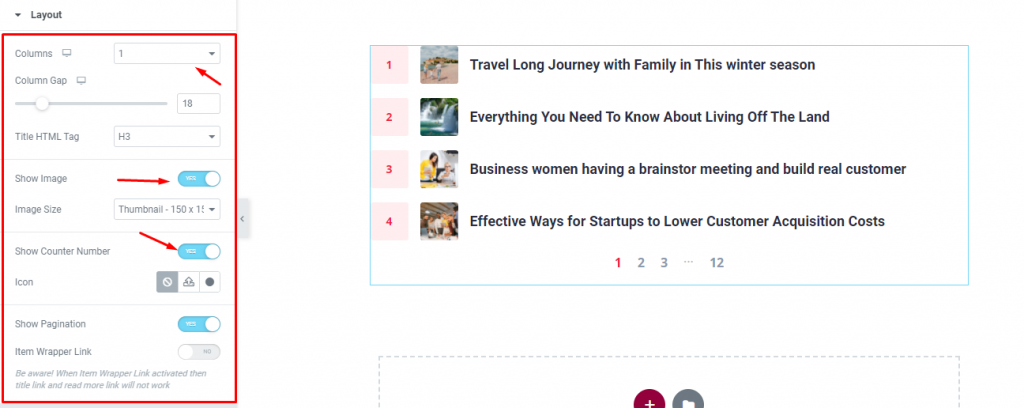
Go to Content> Layout
At the first look, all you will see are sentences on the screen upon dragging the Tiny List widget into your page. Once you turn on the Show Image & Show Counter Number switchers, you will have something like the image above.
You can set the number of columns and the column gap for the list in the layout section. Change the title HTML tag if necessary. Although you can use icons/SVGs alongside the counter numbers, it is best to use them in topic-specified blogs for the small post list.
Turn on the Show Pagination switcher to give the users more room to look for.
Query
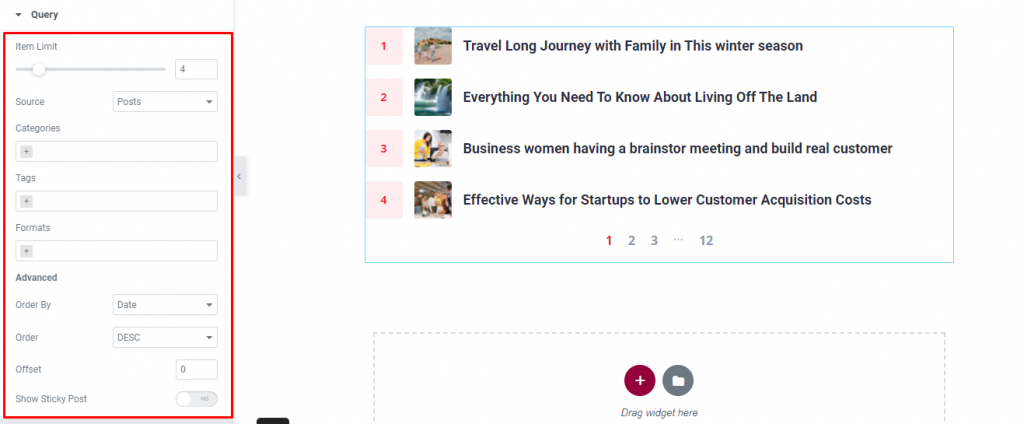
Go to Content> Query
Here, you need to define the number of posts shown on the display by the option named Item Limit. By the way, you can select the source of display from category, tags, & events throughout different post sections. Use the filter options (i.e. categories, tags, formats) as well as order numbers for ease of access.
Style tab
The style tab allows you to change or customize the appearance of the Tiny Listing Widget content layout. The options include color settings, borders, paddings, etc.
There are several sections on this tab.
Items
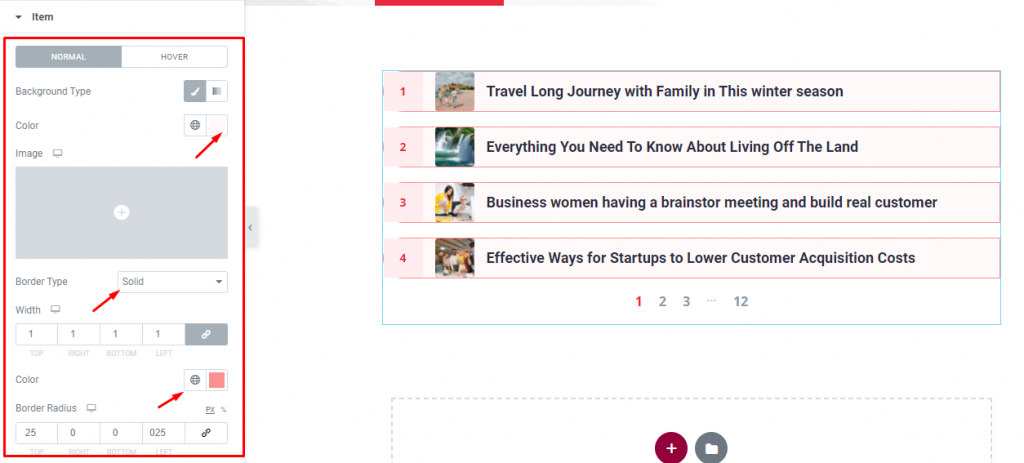
Go to Style> Items
This section has settings for the items in general. You can add background types/colors, borders, paddings, & box-shadow around the whole small post list. The color option changes the color of the content area.
Image
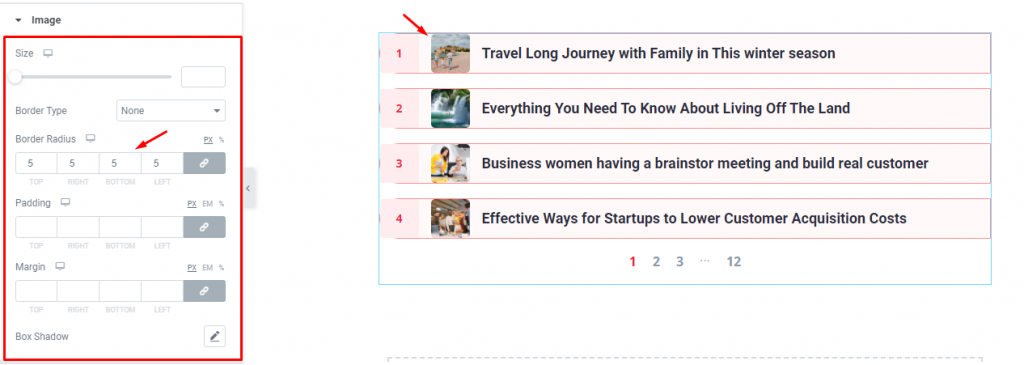
Go to Style> Image
The images are customizable by size, border, radius, padding, margin, & shadow. By the way, increasing the image size to the maximum will extend the total dimension of the tiny list.
Title

Go to Style> Title
The titles of the Tiny List widget are clickable. You can set a hover style for them. Also, there are typography & text-shadow options available that are best for displaying content.
Counter Number
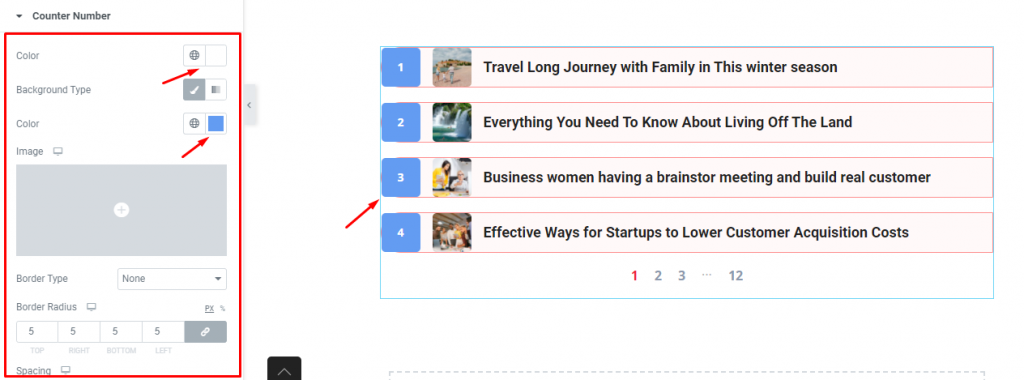
Go to Style> Counter Number
The counter number on the right side of the bullet list is where you want your visitors to keep looking. It helps readers to trace the current number of blogs they are going through. So, you must add a decent color to the counter along with a border if necessary.
Pagination
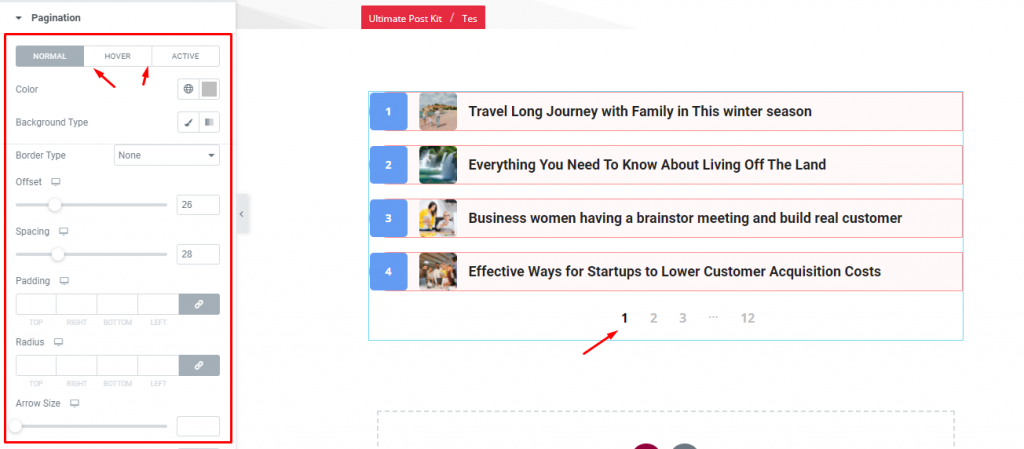
Go to Style> Pagination
Customize the paginations located below the list by color, background, border, and size. Also, you can set the offset value & spacing to adjust its position on the display. The color option works for normal, hover, & active modes.
Video Assist:
If you are still not clear about the use of a list in WordPress, check out this youtube video made on Elementor Tiny List Widget. The step-by-step explanation will help you a lot to display any blog content on the site you have.
Conclusion
Finally, this combined effort of doc and video will definitely keep you forward. No doubt about one of the best widgets! After this resource on Elementor Tiny List Widget, by Bdthemes, if you have any doubt yet, you’re open to knock us on support.
Thank you for taking your time.

