The Give Form widget is a popular donation form widget that helps you display a fine piece of form in front of the donors. This is a 3rd party widget at our bay. It needs to be set up from the dashboard in order to work inside your webpage.
Let me show how to operate the Give Form widget in this tutorial.
Set up Give Form

As the Give Form widget is a third party integration, you need to install it from inside your dashboard.
Go to Plugins> Add New> type GiveWP in the search bar and install it. Once installed, click on the activate button.

Once it’s onboard, navigate the Donations tab inside your dashboard and click on All Forms.
This section will show all the running campaigns in a list manner. To create a new campaign, click on the Add Form button.
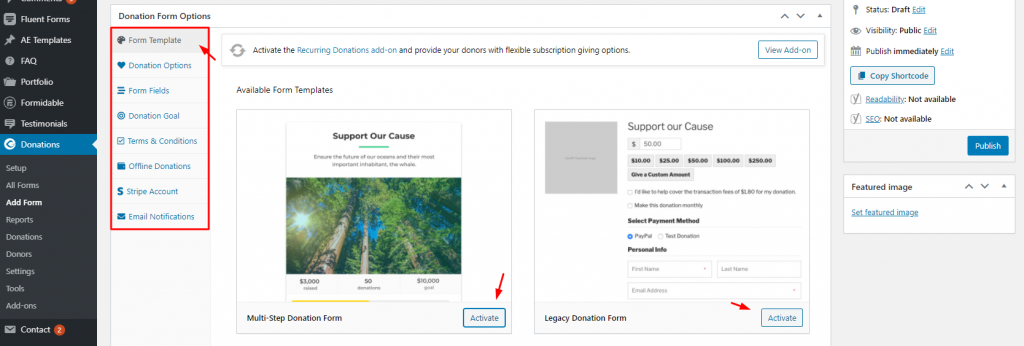
Now, this part is important. There is a bunch of sections to design your campaign. First, you need to choose a template for the WordPress form builder. There are two types to select from.
The multi-step template will create a unique donation form having 3 active slider tabs, each having relevant content. The legacy style follows the simplest pattern of a donation form.
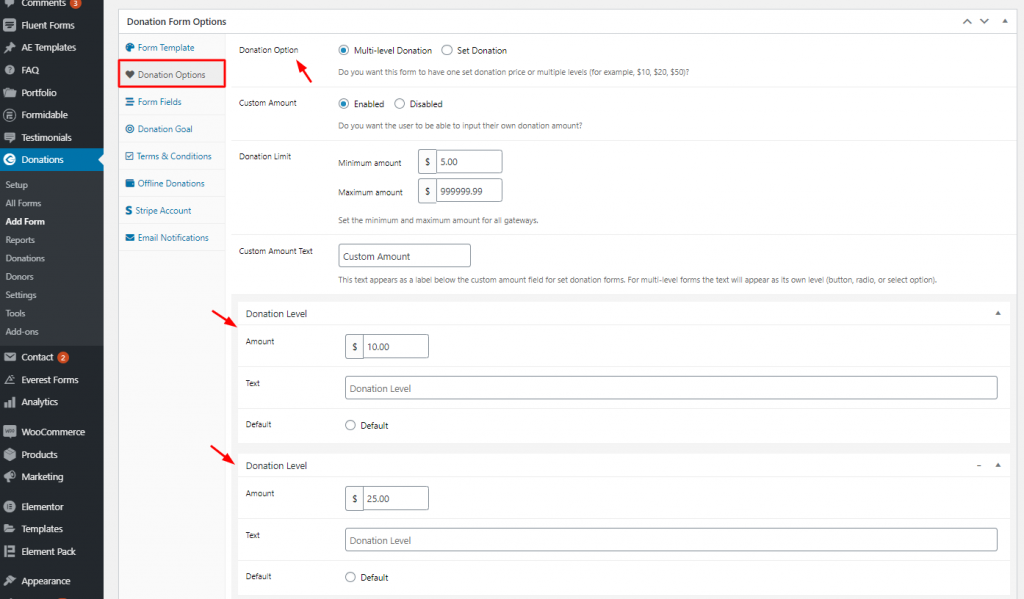
In the next section, you will find options for choosing your donation style. You can either choose one donation field with a range, or multiple donation fields having a different set of ranges. Both styles include a custom donation field for the Elementor donation forms.
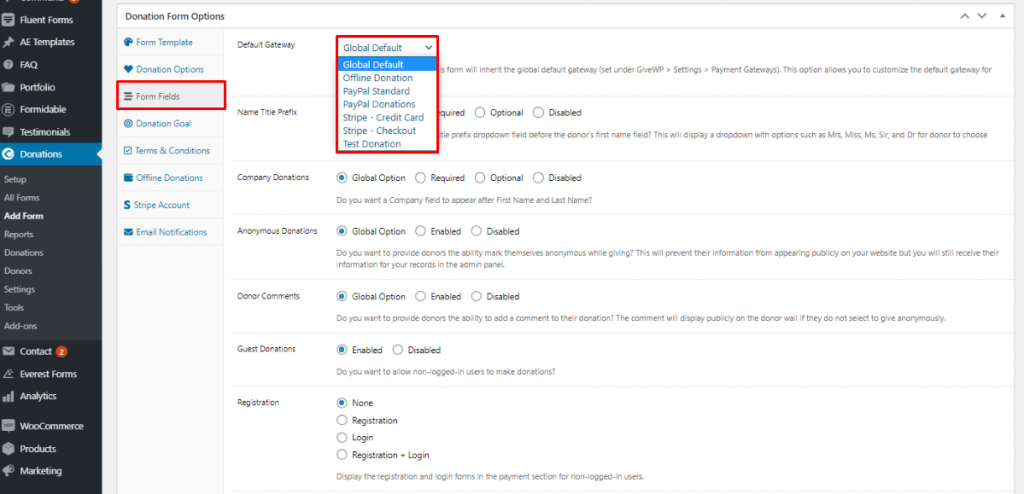
You need to choose a payment gateway from the Form Fields section. Notice that there are a bunch of options under the gateway option. Make sure to check them all.
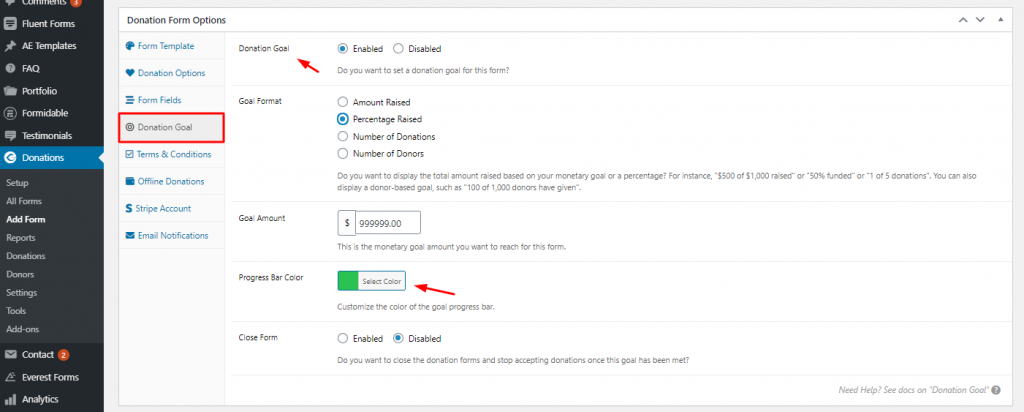
Next, you have to define your donation goal amount. This option can be enabled or disabled. It’s your choice. But we suggest that having a goal amount will impact positively on the donors of the Give Form widget.
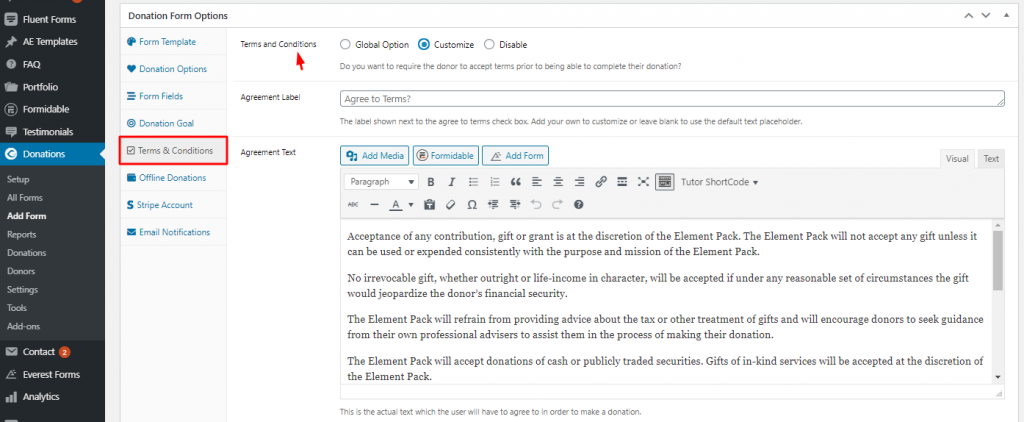
After that, in the next section, you can input the terms and conditions related to your campaign. The option for this will be disabled by default. You can choose between custom text or global standard terms and conditions.
There are three more sections left below. You can navigate them yourself and see what they do.
Now, let’s see how the charity form builder looks inside your webpage.
Insert Give Form

Find the Give Form within the widget menu and drag-drop it inside your page.

You can see two options on the Content tab which has all the basic settings. The form requires you to choose a form id before showing it on the screen.
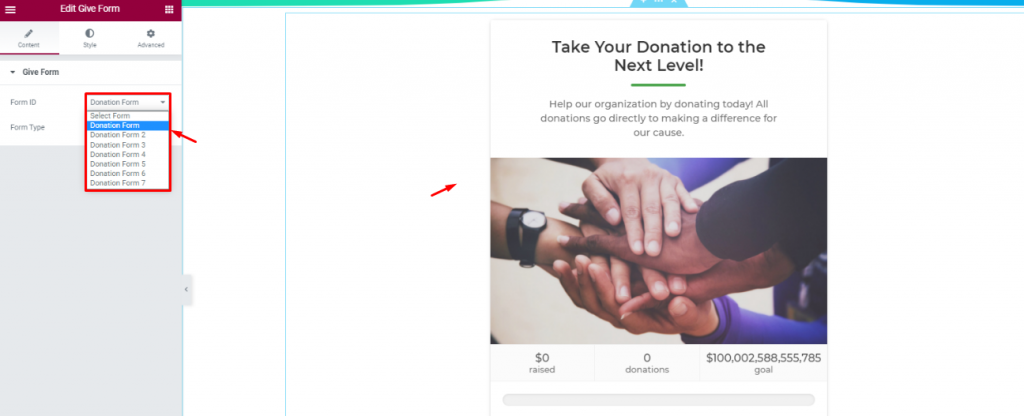
Once you select a form ID, it will show up on the display. Note that each form on the list was created by our designers.
One more thing! As the form is custom made through the dashboard, there is no styling option for it.

But if you want to choose a Donation Button instead of the Full Form, you can do that in the second option. Clicking the donate button will eventually reveal the full form.

The Style tab works in the case of the button.
Conclusion
Watch this video for more visuals on the Elementor donation forms and visit this demo page, by Bdthemes, for more examples. If you have any questions, please state them in the comment section or use live chat.
Thanks for staying up.

