Business Hours widget is a user-friendly tool, used in your websites to show active hours to the visitors. This widget is mainly built for industry and workplace that needs to let people know about their activity times and weekends.
To use this easy-to-use widget effectively made by Element Pack, you need to know how it works. Let me give you a complete guide to it!
To Insert Widget

Inserting widget is just a matter of drag and drop. However, click and hold on the widget icon from the menu and drag it to the drop point. Follow the picture above.
Content Tab
Using the Content tab, you can basically make a layout of a particular part of the website.
Layout

Go to Content Tab> Layout
The first section Layout gives you an option and a switcher. This is the basic layout of the Business Hours widget when you chose Static as Style.
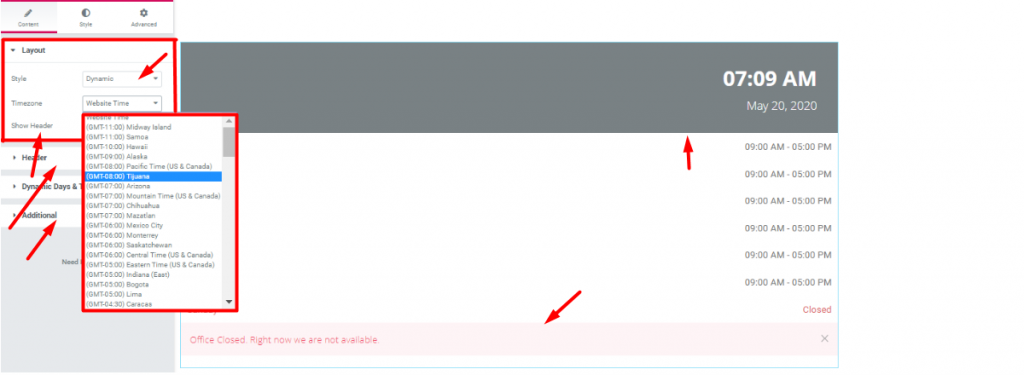
However, when you change the Style option to Dynamic, you will get the Additional section in the Content tab. Also, a new option Timezone will appear in the Layout section. Again, turning on the Show Header switcher will show the Header section both in the Content tab and Style tab. Even, the Business Days and Times section will change to Dynamic Days and Times.
Header

Go to Content Tab> Header
In this section, you can turn on/off the clock and date on the Header of the WordPress business hours plugin. You can also align it as well.
Dynamic Days and Times
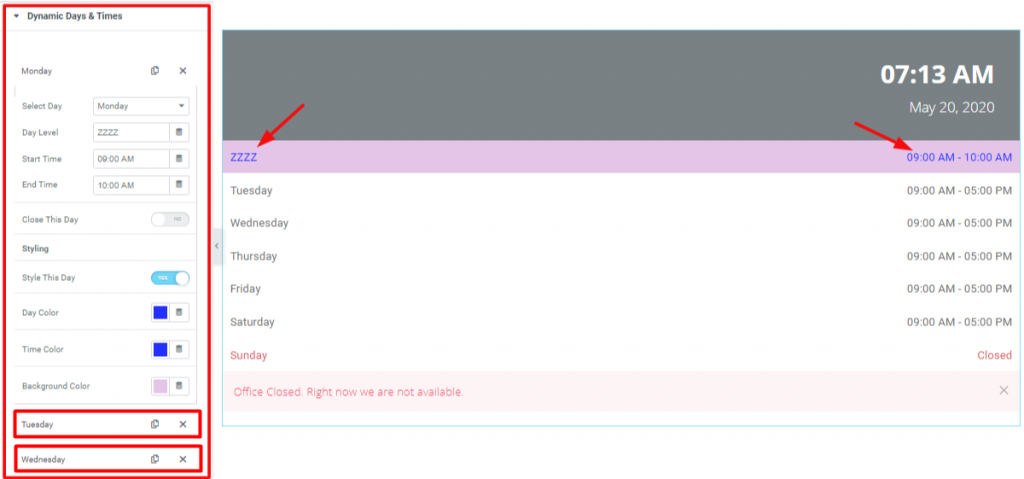
This section mainly contains repeaters to control the days. You can add more repeaters or remove previous ones simply. You will get more options to edit inside a repeater. When you turn on the Style This Day switcher, you will get additional options to edit the colors of the Business Hours widget.
Go to Content tab> Dynamic Days and Times> and see all options.
Additional
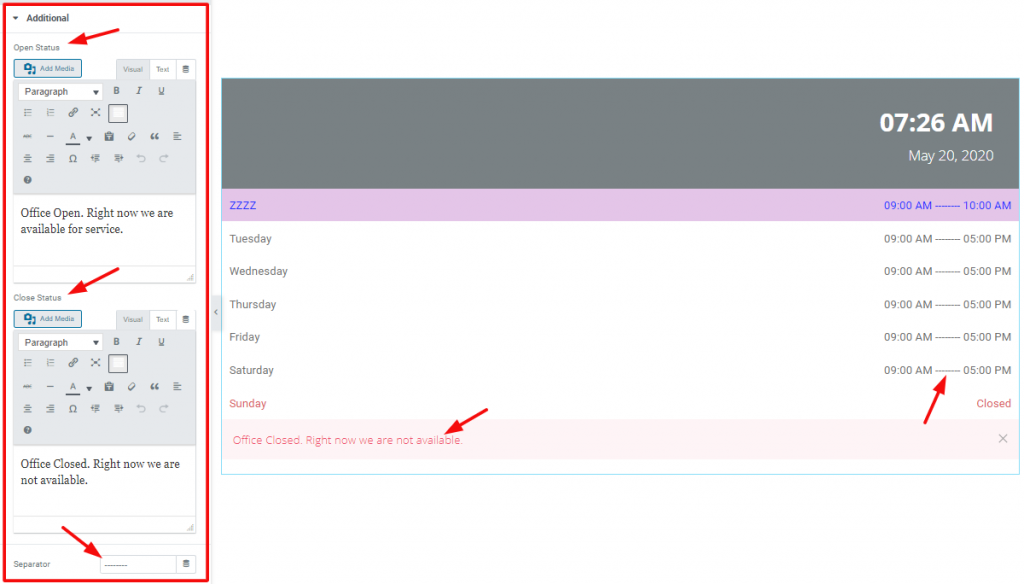
Go to Content Tab> Additional
This is the last part section of the Content tab of the WordPress business hours plugin. You can add open/close time notification from this section. Also, you can make any custom separators from here.
Style Tab
Now, time for some Style. In this Style tab, you will have more options to create your unique Business Hours widget as you like. Let’s have a look.
Header
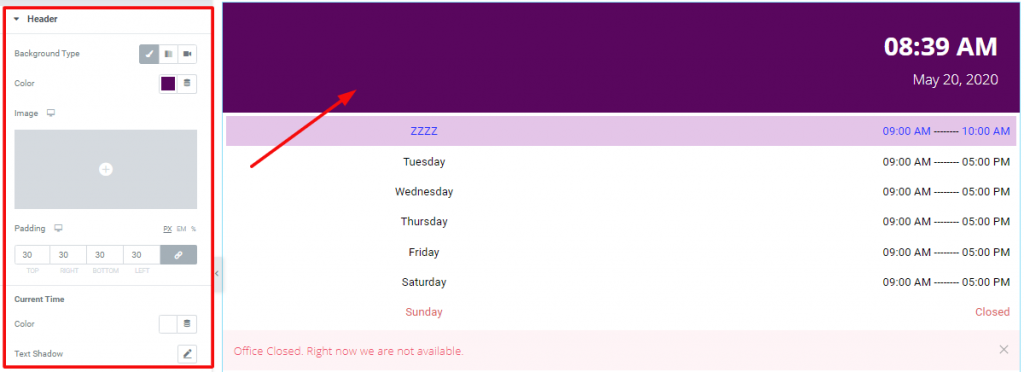
Go to Style Tab> Header
You can customize the header area from this section easily.
General

Go to Style Tab> General
With this section, you may add spacing and padding as you like.
Divider

The Divider section lets you put dividers into the line spaces. To make it work, you need to turn on the Divider switcher first.
Go to Style tab> Divider> and see the options.
Day and Time
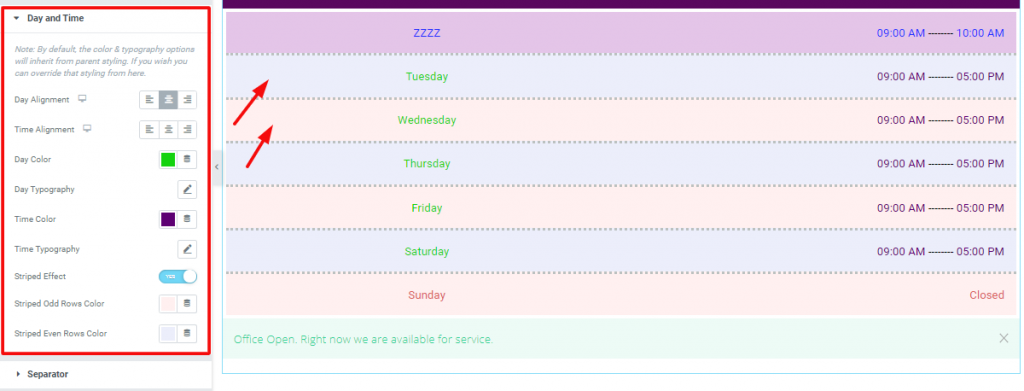
You can change all day and times color from this section. Also, you can add a striped effect as the marked arrows. You may notice that you can change the time and day color from Dynamic Days and Times section in the Content tab. However, those were individual options. This section does the coloring action for all.
Go to Style tab> Day and Time> and see for yourself.
Separator

Go to Style Tab> Separator
Lastly, you can change the color of the separator bar (marked in red).
Video Assist
Well done. Seems you have learned the whole thing and how it works. It is easy and fun. Watch Video Assist and to get more in-depth ideas about the usage of the Business Hours widget, developed by Bdthemes, take a tour to the demo page.

