The bbpress Topic Form widget lets you customize the topic creation form of bbpress by Element Pack integration. This article will guide you about the usage and customizations.
Inserting the Widget

First, find the bbpress topic form on the Elementor editor, drag it, and drop it on the page. Then, we can start using this widget.
Default view of bbpress Topic Form
After inserting the widget, it will give a default view of the Form. Let’s get into the details of the form.
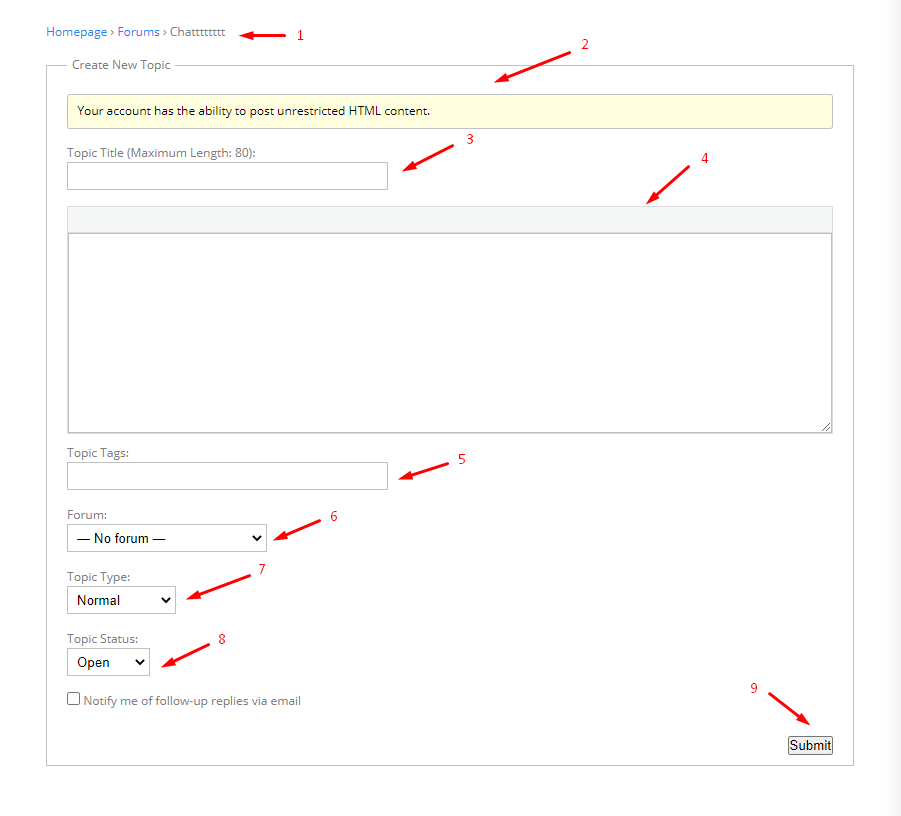
1. Breadcrumbs
Navigational links that appear at the top of a post or page. They show users the higher-level categories that led them to the content they’re currently viewing and also enable easy navigation back to previously-viewed pages.
2. Notice
A notice board for important messages as notice.
3. Topic Title
Here you can provide the Topic Title.
4. Textarea
Textarea is used for short or long descriptions about the topic. We can create a description of that related topic so that we can understand it better.
5. Topics Tag
Tag is one of the pre-defined taxonomy in WordPress. Users can add tags along with categories. You can select a tag for the relevant topics.
6. Forum
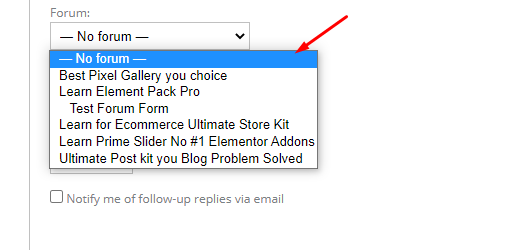
Forum has select options. You can choose a forum and the topic will be created under the selected forum (need to create a forum beforehand to show).
7. Topic Type
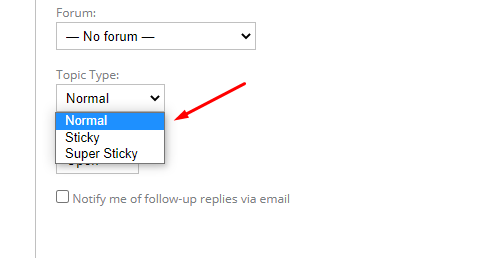
It has three options: Normal, Sticky, and Super Sticky. You can choose any of them.
8. Topic Status
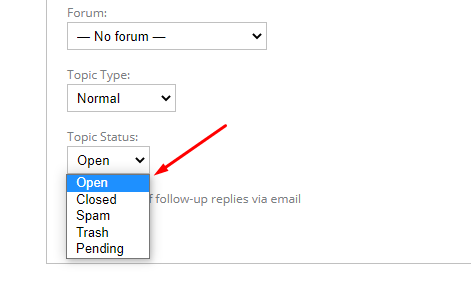
It has Five options Open, Closed, Spam, Trash, and Pending.
Open: used it to open the status.
Closed: If the topic is closed or ended you can use this.
Spam: For isolating anonymous or suspicious topics.
Trash: Deleted topic storage.
Pending: Topics will be kept to be approved by a moderator.
*There is a checkbox, It will be used to reply through email.
9. Submit Button
By clicking on the button the form will be submitted for creating a new topic.
Usage of the Content Tab
Layout
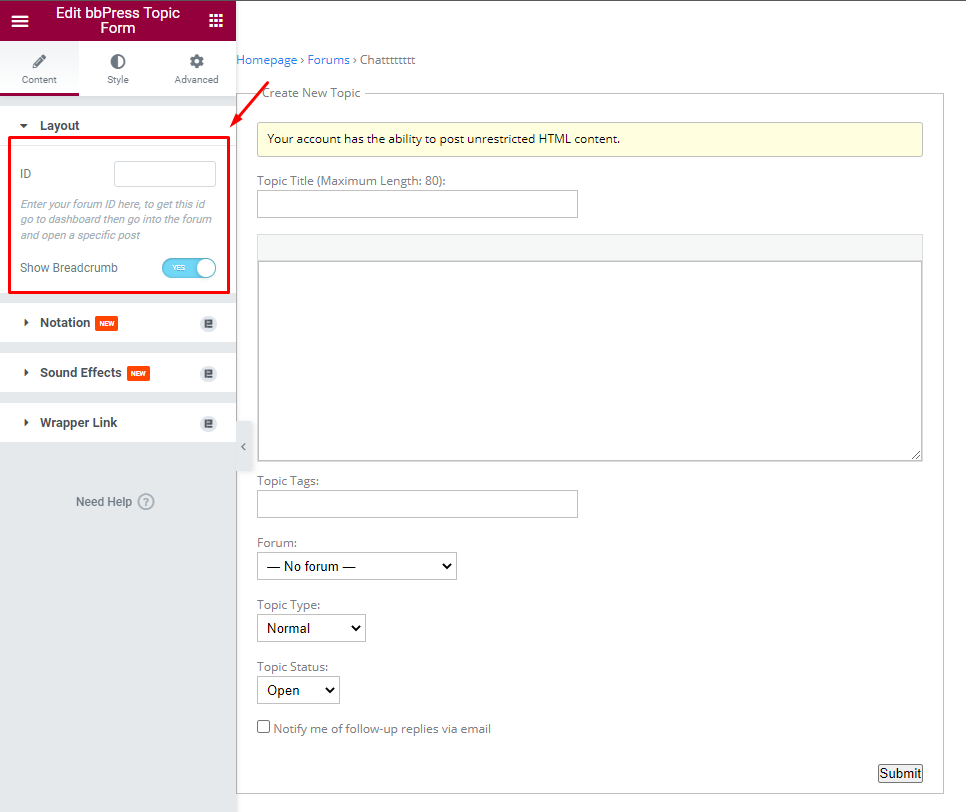
In the layout section, you will see an ID field where you have to add a Form ID that you have created in bbpress. And, there is a Show Breadcrumb switcher at the bottom.
Let’s customize the Style Tab
Customize Breadcrumbs
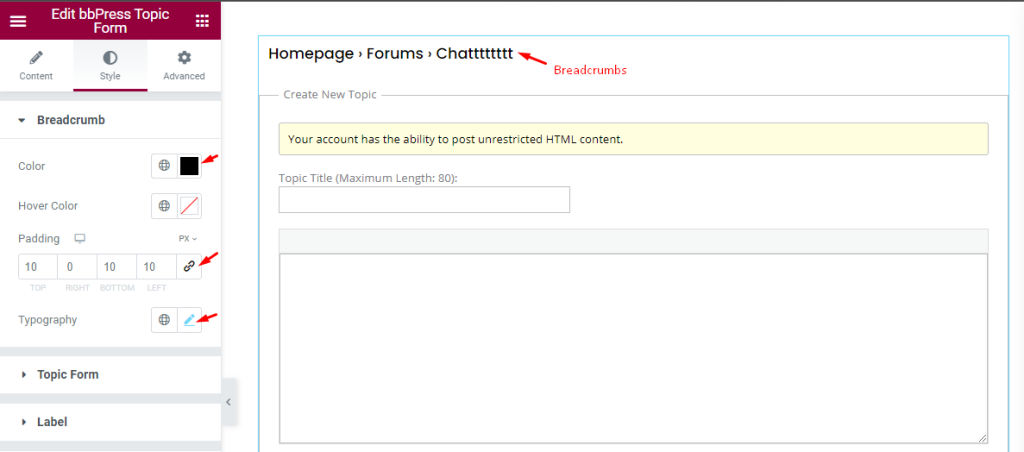
Go to Style > Breadcrumbs
Here in breadcrumb section we can make it stylish. We will add Color, Padding and Typography.
Forum Form options
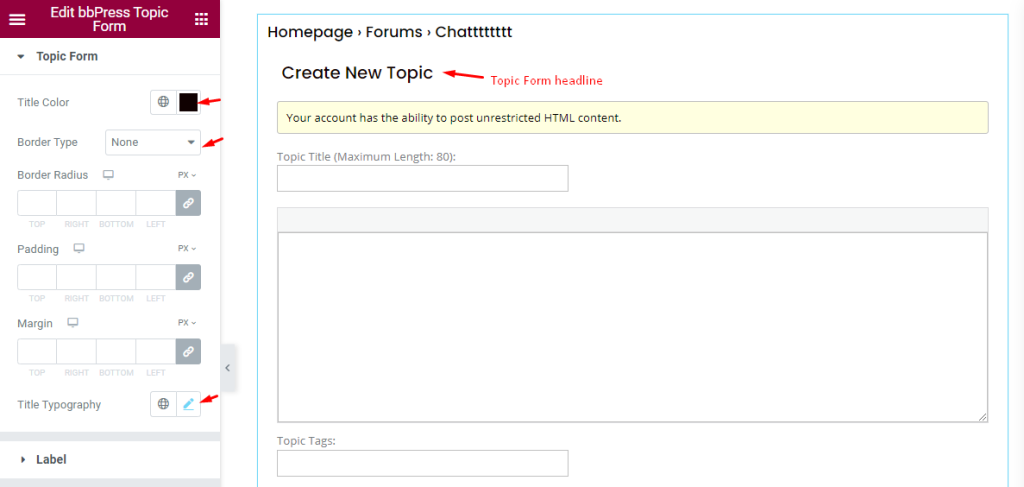
Go to Style > Forum Form
In the section we will make the topic form heading. Here we will set Title Color, Border Type none, And Typography.
Notice Customization
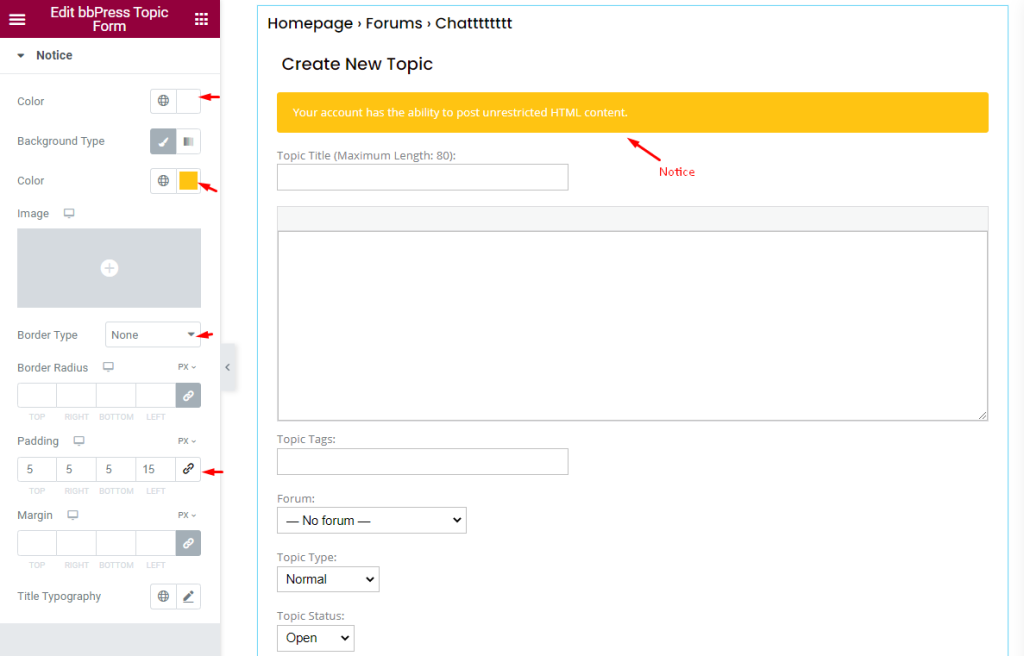
Go to Style > Notice
As you demonstrate there is a notice message showing. We can make it good looking. Just follow this. Here we will set Color, Background Color, Border Type None, and Padding options.
Edit the Label
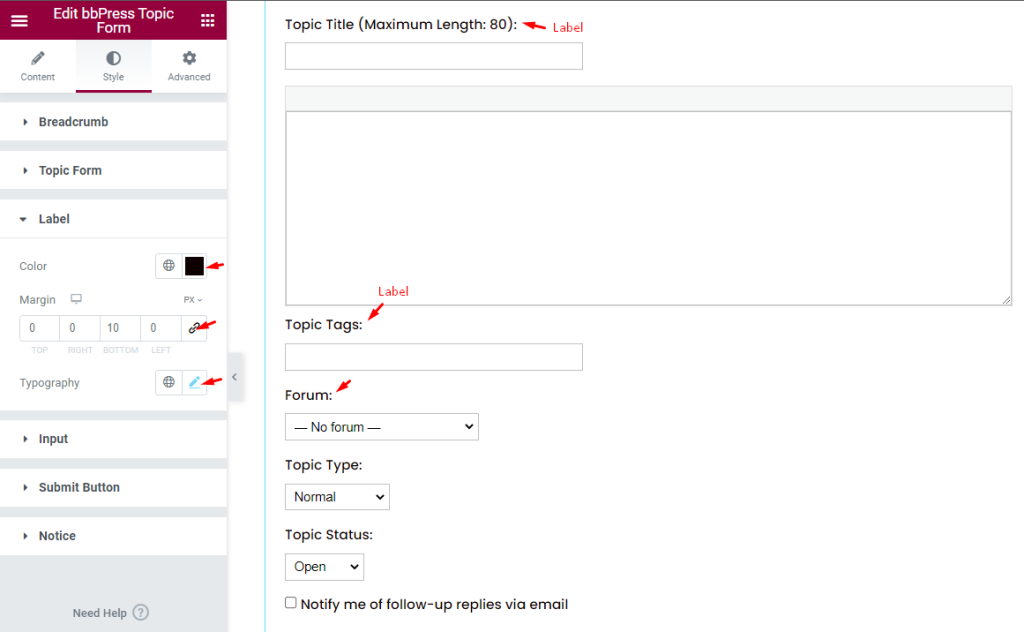
Go to Style > Label
For the label, We will set Color, Margin and Typography options. And it’s looking good.
Customize The Input
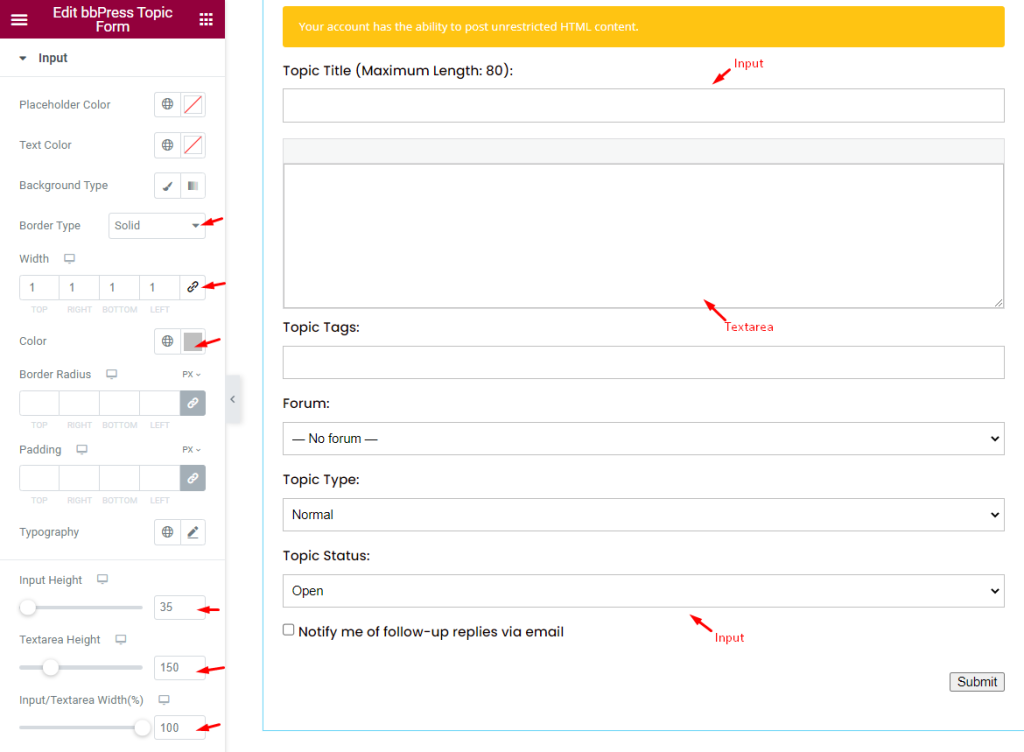
Go to Style > Input
We will change the default view of the Input. Here will set Border, Border width and Color for Input. We will set Height for input form. For the Textarea we will also set height. Input and Textarea width will set 100%. Now its looking good.
Edit Submit Button
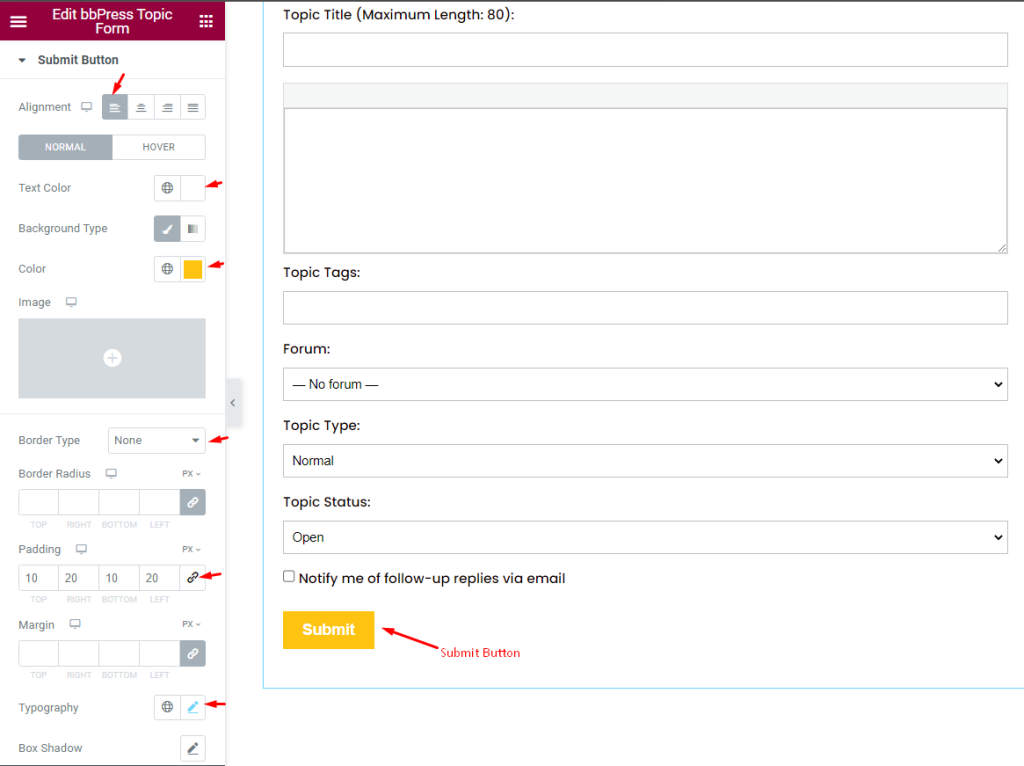
Go to Style > Submit Button
In this section, you will find an Alignment option for the submit button which you can use to align the button within the form. Below, you will get two subsections or modes; NORMAL AND HOVER. For both, you will get a similar set of options to create a diverse effect on the frontend, for the button.
First, you can go for a Text Color for the button. Then, you can set the button background Background Type as color, gradient, or image.
After that, we will set Border Type None and then set the padding, and Typography. Now the button looking cool.
That’s all the style customizations that you can take advantage of to make your bbpress form more appealing.
See the demo page for examples.
