In this documentation, we will show you how to customize the Iframe widget presented by the Element Pack Pro add-on.
Insert Iframe Widget
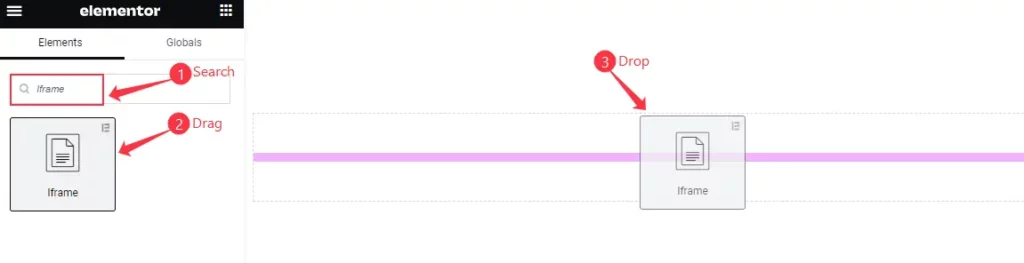
- Search by the Iframe widget name.
- The widget will appear, Check the Element Pack Pro logo on top right corner.
- Select the widget then Drag and Drop it on the editor page.
The default view of the Iframe widget
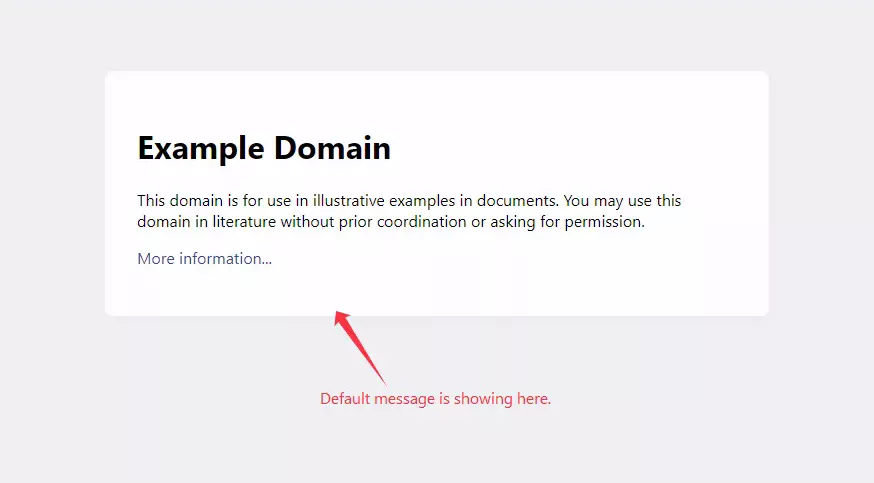
The default view displays the message.
Content Tab Customization
Layout Section
Go to Content > Layout
Set Any URL
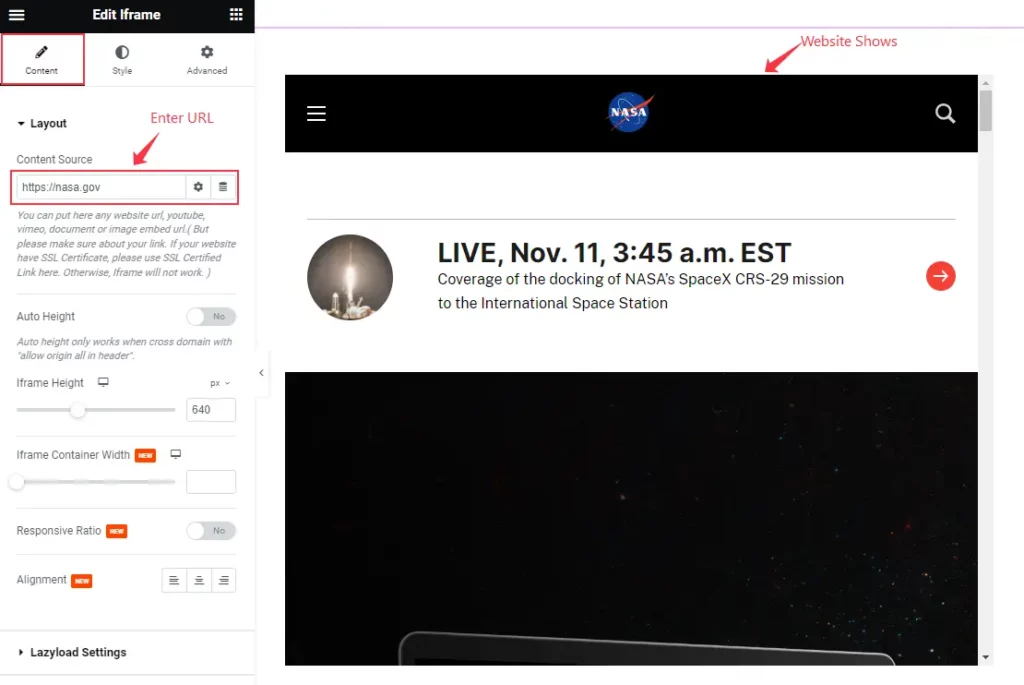
- Find the Content Source URL box and put any URL the website will be visible on the iframe.
Google URL Set
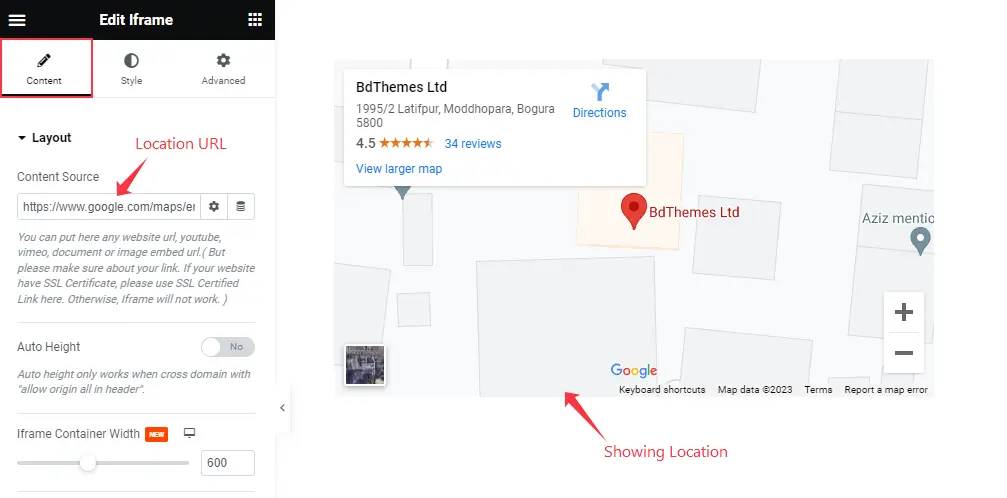
- Set the URL of google map and it will demonstrate the Place on Google Map. Easy to embed any location.
Show Statistics ( Crypto )
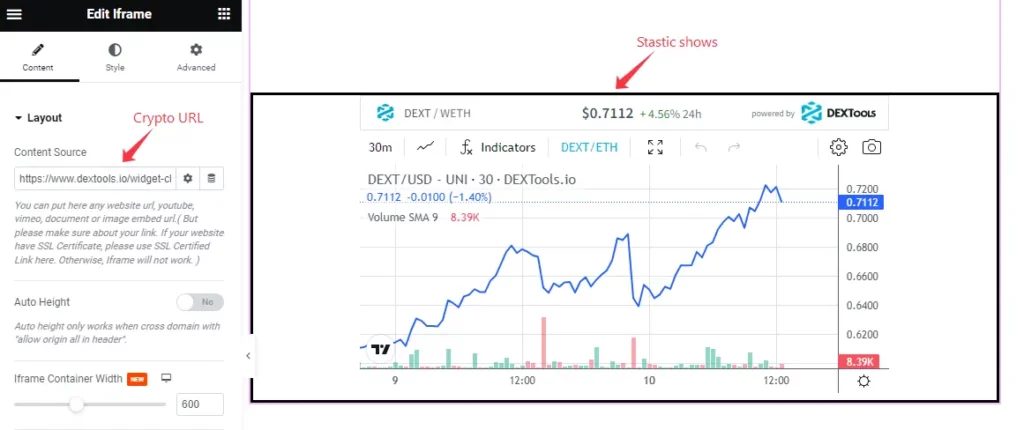
- Set the URL of the Crypto and it will demonstrate the static of Crypto.
Layout Controls

- Auto Height: Enable the switcher to adjust the height automatically.
- Iframe Height: Set the height for the display the Custom height of the Iframe.
- Iframe Container Width: Set the width for the container.
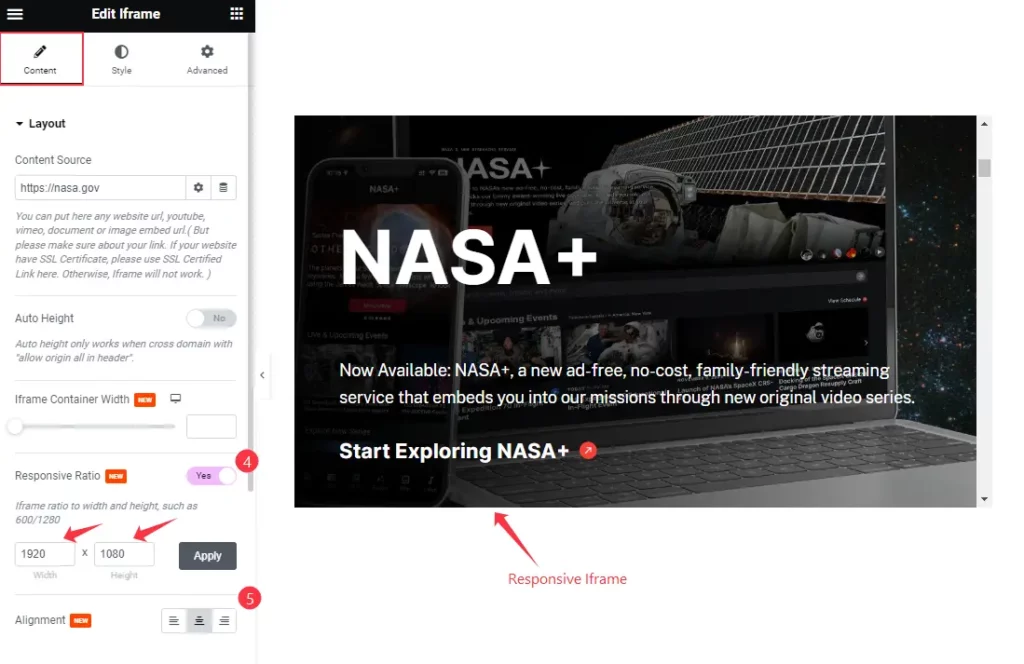
- Responsive Ratio: Enable the switcher to show the responsive ration of the iframe. It will allow to set the Width x Height of the Layout.
- Alignment: Set the position of the layout. It will be Left , Center, Right.
Lazyload Settings Section
Go to Content > Lazyload Settings
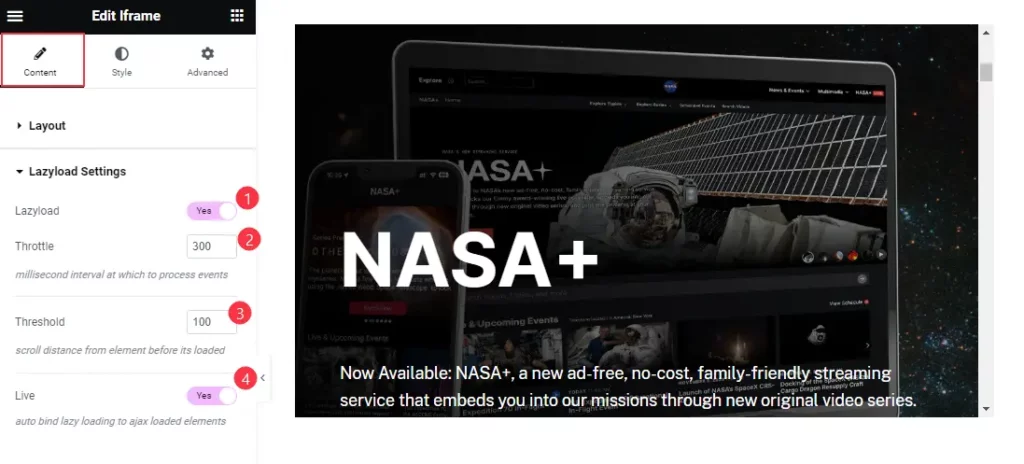
- Lazy load: Enable the switcher to allow the lazy load for the Iframe.
- Throttle: Set the Throttle time for interval of the process events.
- Threshold: Set the Threshold for scroll distance form element before it’s loaded.
- Live: Enable the switcher to bind automatically lazy loading to ajax elements.
Additional Settings Section
Go to Content > Additional Settings
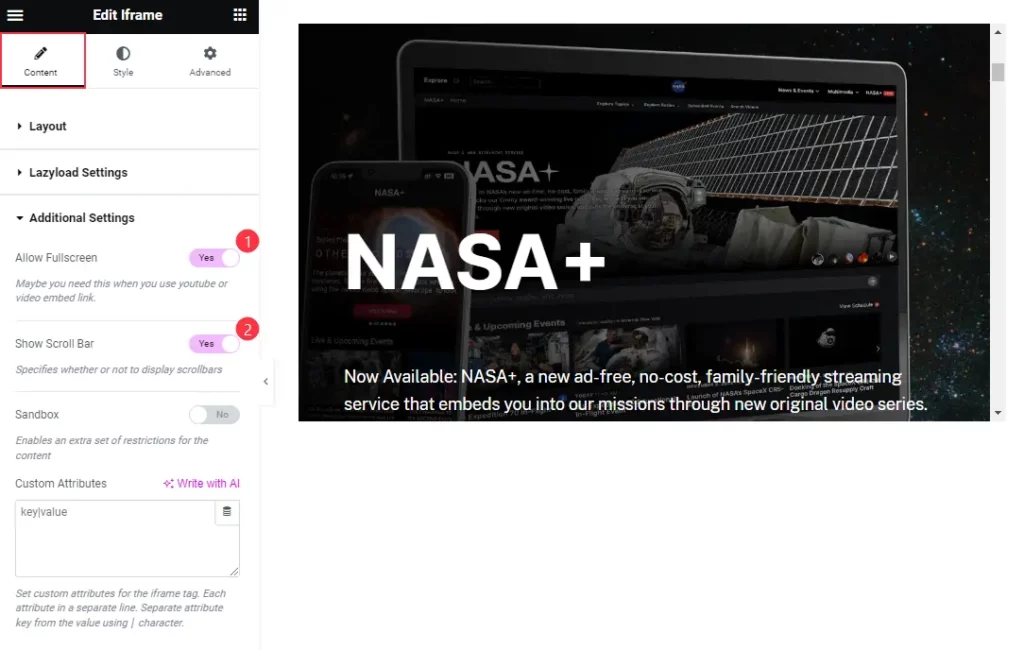
- Allow Fullscreen: Enable the switcher to allow the Fullscreen.
- Show Scroll Bar: Enable the switcher to show the Scroll Bar.
Iframe Devices Section
Go to Content > Iframe
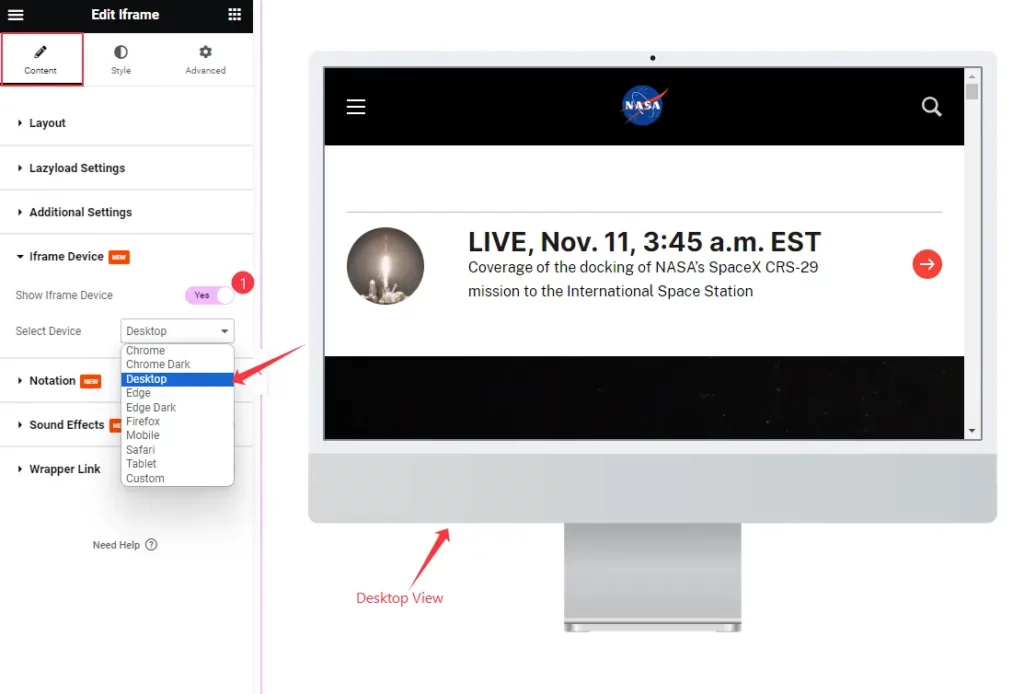
- Show Iframe Device: Enable the switcher to show the iframe devices.
- Select Device: Different devices are available here, Chrome, Chrome Dark, Desktop, Edge, Edge Dark, Firefox, Mobile, Safari, Tablet, Custom.
Select Device Custom
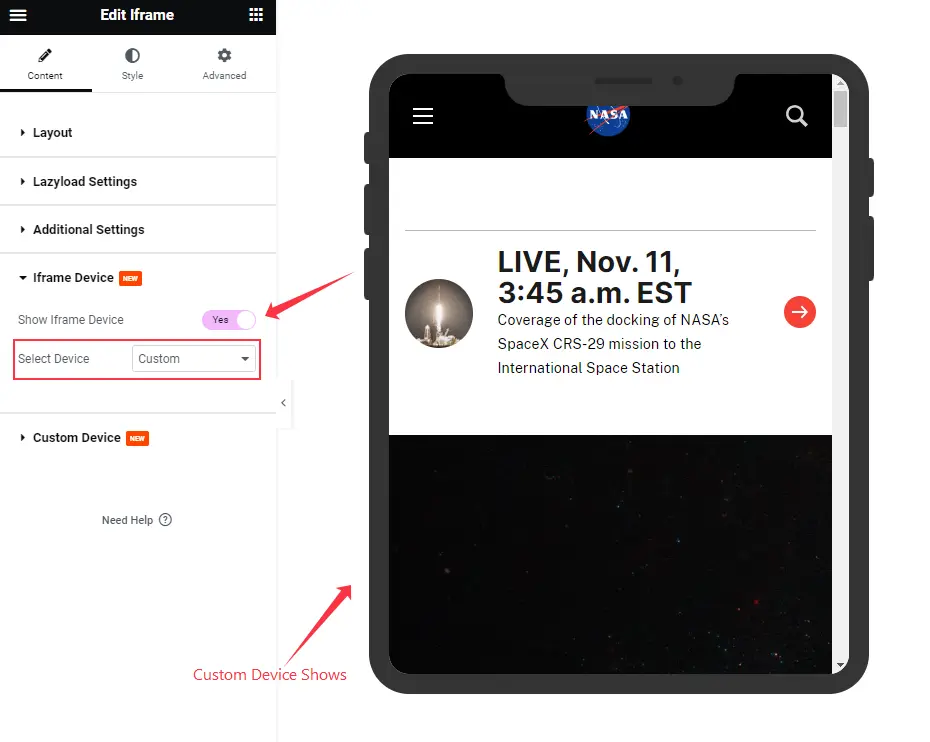
Select the Custom Device will appear a new style Frame. and New section on Content.
Custom Device Section
Go to Content > Custom Device
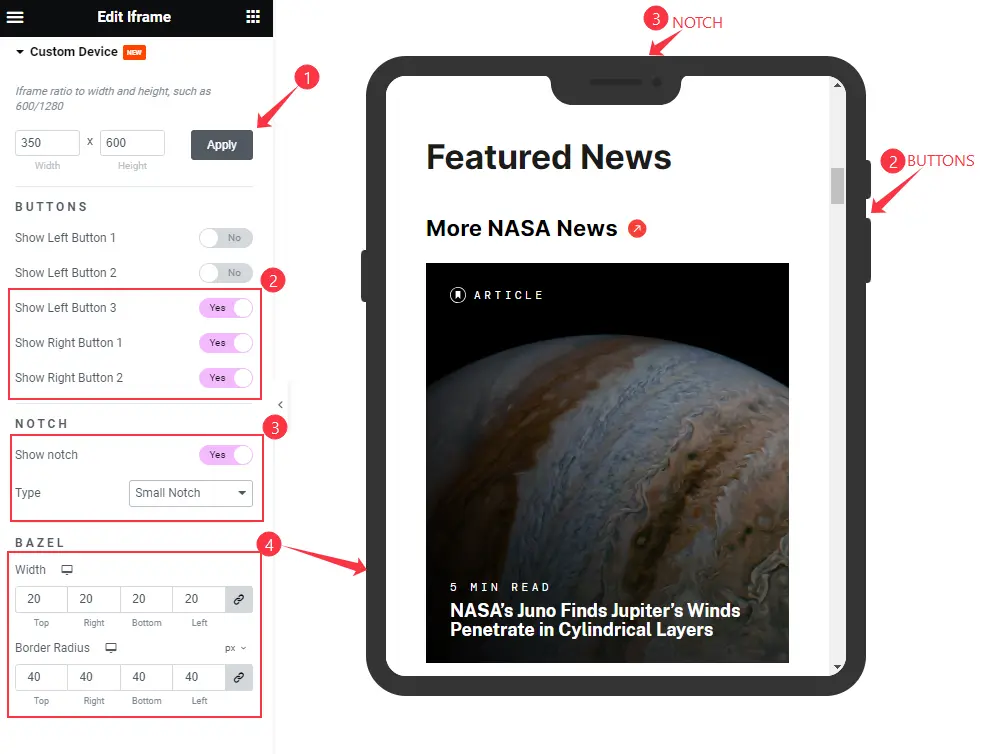
- Set the Width x Height for the custom devices and click on the ” Apply ” button to apply the style.
BUTTONS
- Show Left Button 1: Enable the switcher to show the Button on the Left side.
- Show Left Button 2: Enable the switcher to show the Button on the Left side.
- Show Left Button 3: Enable the switcher to show the Button on the Left side.
- Show Right Button 1: Enable the switcher to show the Button on the Right side.
- Show Right Button 1: Enable the switcher to show the Button on the Right side.
NOTCH
- Show Notch: Enable the switcher to show the Notch of custom device.
- Type: Choose the type of Notch, Different size are available Small Notch, Big Notch etc.
BAZEL
- Width: Set the width for the bazel.
- Border Radius: Make a border radius.
Style Tab Customization
Device Section
Go to Style > Device
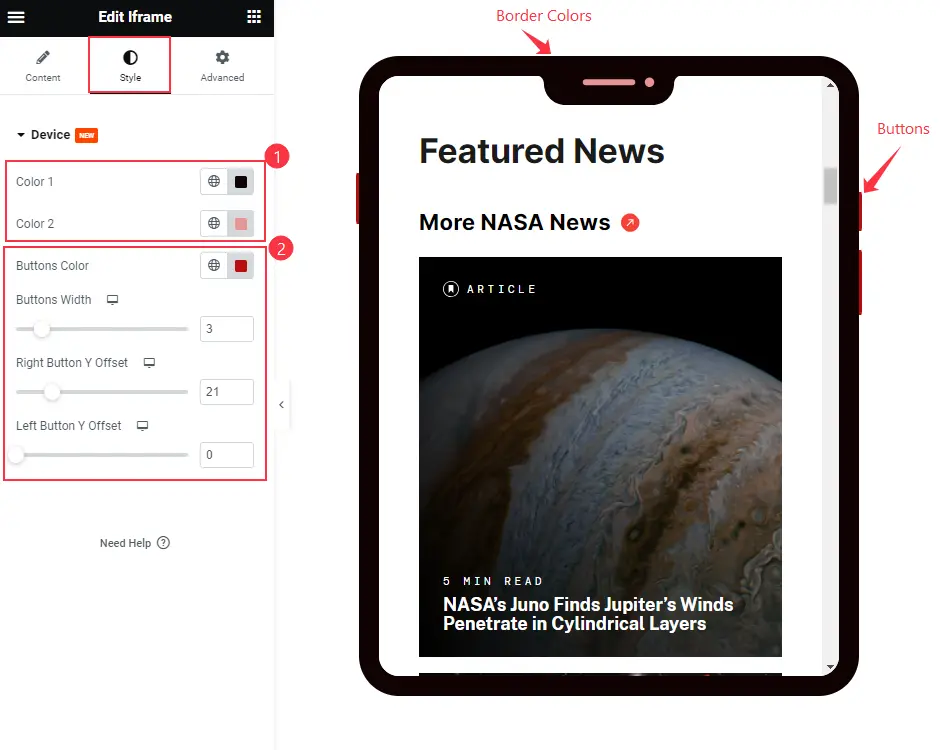
Color:
- Color1: Choose the for the device Bazel.
- Color2: Choose the color for the notch.
Buttons:
- Buttons Color: Set the color for the buttons.
- Buttons Width: Set the width of the buttons.
- Right Button Y Offset: Choose the offset for the Right side button in vertical position.
- Left Button Y Offset: Choose the offset for the Left side button in vertical position.
Video Assist
Thanks for watching the Iframe widget Video Tutorial. Please visit the demo page for examples.
Thanks for being with us.