
The Charitable Donation Form widget lets you easily create a form for collecting donations. Users can fill in the required info to pay the donation fee. When you create a charitable campaign on your webpage, a form against the campaign will auto-generate.
Let’s see how you can customize this donation form widget, by Element Pack, in this tutorial.
Inserting widget
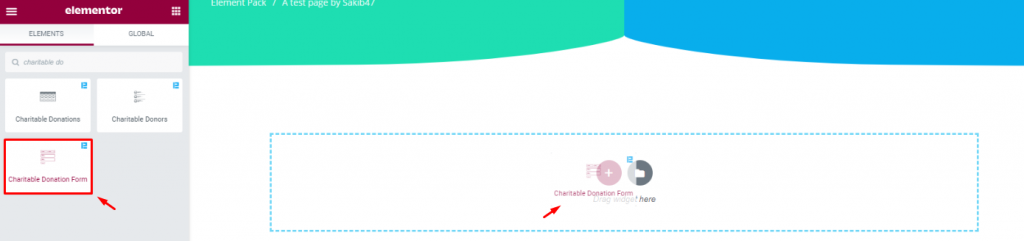
Find the Charitable Donation Form from the widget menu and drag-drop it inside your page.
Content tab

The Content tab basically gives you an empty field for choosing your campaign.
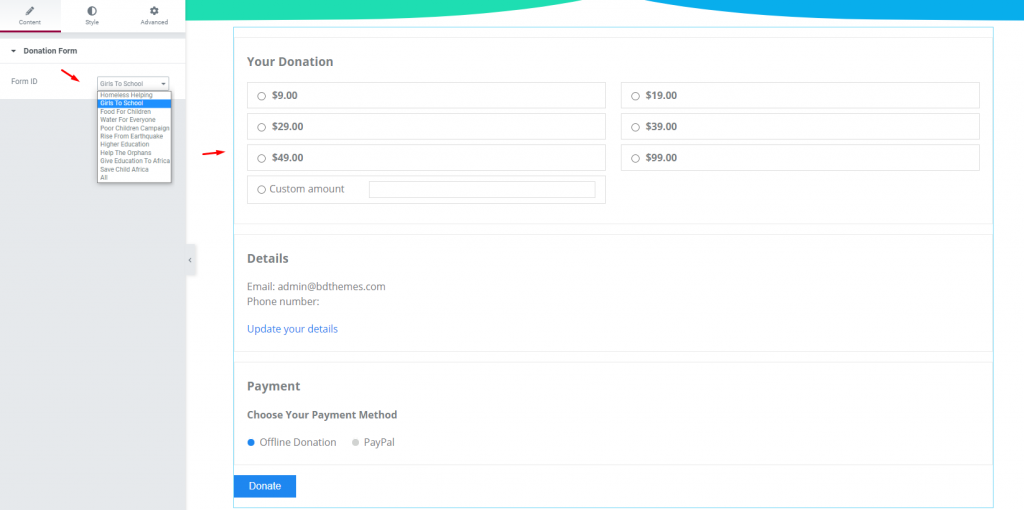
Just click on the Form ID field and choose your desired form from the drop-down menu. Remember, each campaign in the image above had been manually created from the dashboard for the Elementor donation forms.
Now, there’s nothing more to do here. Let’s jump into the style option.
Style tab
The Style tab lets you customize the contents of the Charitable Donation Form widget by changing their color, border, padding, typography, etc. This tab has a bunch of sections.
Form Fields
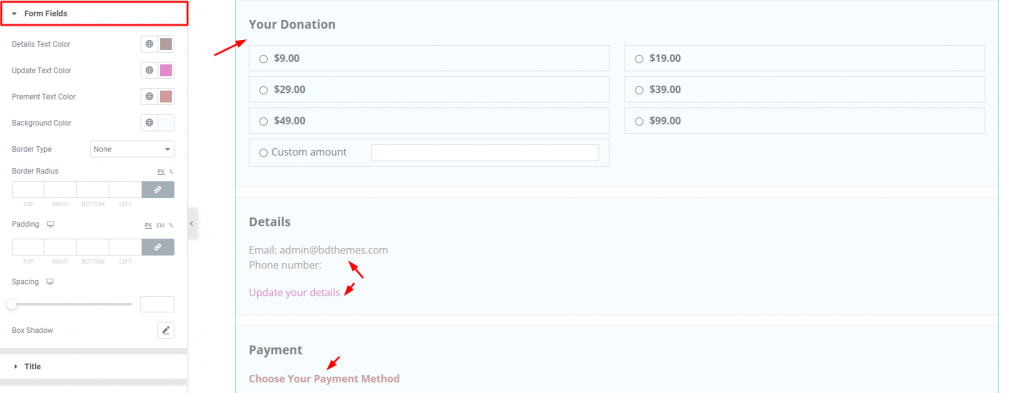
Go to Style> Form Fields
This section lets you change the color for the whole form field as well as some elements in it (marked by arrow). Except for the border and padding, you can also apply a box-shadow effect on the form.
Title

Go to Style> Title
Simply customize the titles of the form.
Label

Go to Style> Label if you want to change the color, typography, or spacing of the label above the button below the form.
Donation Fields
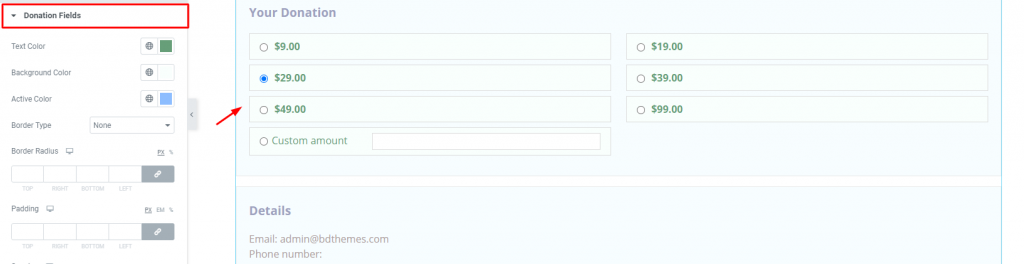
Go to Style> Donation Fields
This section is dedicated to customizing the donation amount field. As you can see, you can change the active color, background color, and text color from here.
It’s interesting that there are also settings for customizing the blank field of the Custom Amount option in this section.
Input Fields

Go to Style> Input Fields
Generally, this part of the form is hidden until you click on Update your details. When it’s revealed, you can see input fields for filling up your details.
The Input Fields section lets you customize the appearance of these input fields. The options are easy to use.
Checked

Go to Style> Checked
Change the color of the check mark under the Payment option here.
Submit Button
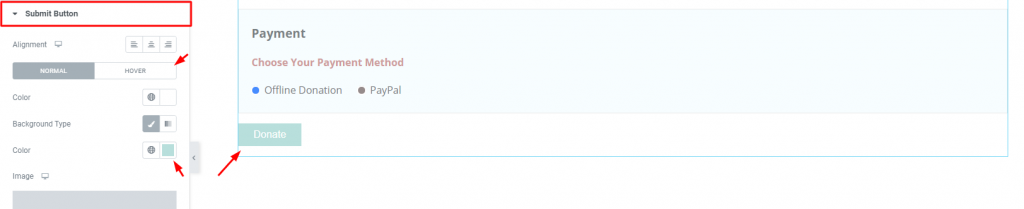
Go to Style> Submit Button
Lastly, you can customize the button color, typography, and border with this section.
Conclusion
Watch this video to get more visuals on the Charitable Donation Form widget, developed by Bdthemes, and check out this demo page for more examples.