Element Pack‘s Coupon Code widget helps you display coupon or promo codes on your webpage with customizable designs. Now you can display click-to-copy coupons with Hide functionality and lots of conditions added to it with our widget.
Let’s explore the widget interface customizations.
Inserting The Coupon Code widget
You can add the widget to WordPress by opening the page you want to use it on in Elementor and then dragging and dropping the Coupon Code widget into that page. Please note that you need both Elementor and Element Pack Pro installed before you can use this widget.
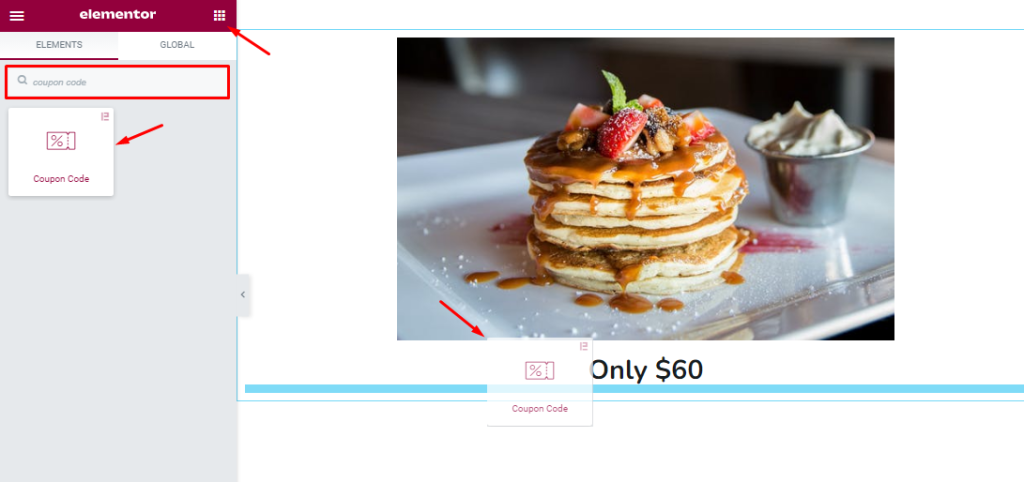
You may drag and drop the widget inside an existing page and start customizing it like how we did it in the image above.
Work With The Content Tab
The content tab is the foundation for your widget, much like a frame of a house. Using the content tab, you’ll be able to make a layout of a particular part (Coupon Code) of a website. And in this regard, some handy sections in the tab will assist you a lot.
Customizations of Coupon Code Section
Go to the Content tab > Coupon Code
Step-1
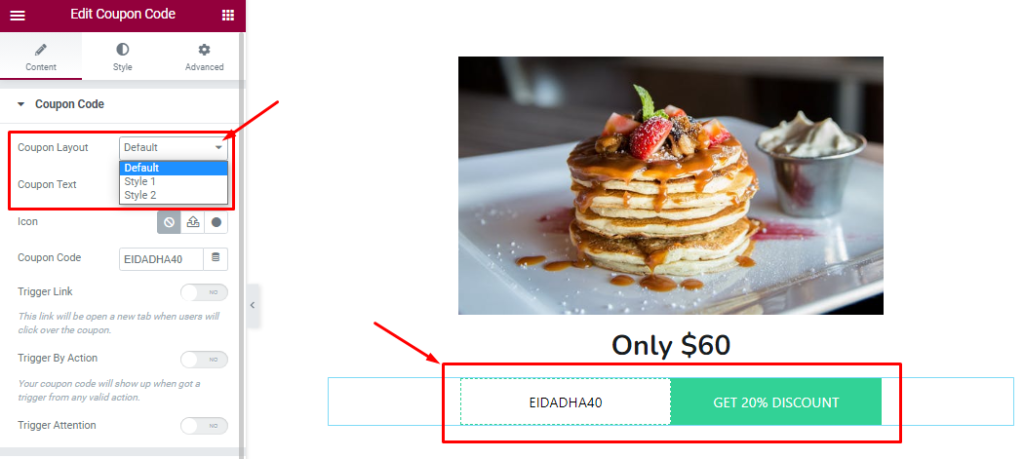
In the first section, you can find three Coupon Layouts and the Default one stays active as of the start. You can switch between the layouts to choose the right one for your website.
Step-2
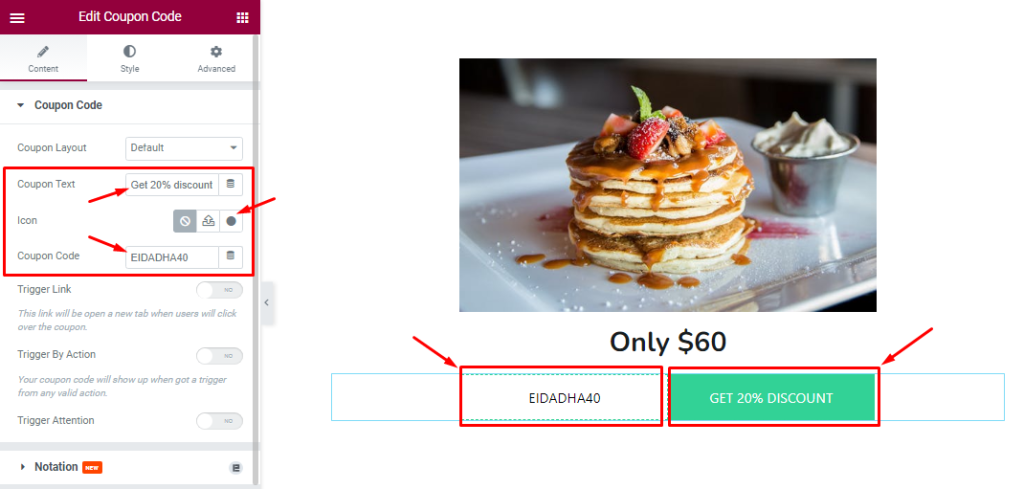
Right below, you can change the Coupon Text which is the copy button beside the coupon code. Also, you can set an Icon inside the text part. The Coupon Code field is where you will need to insert your coupon code.
Step-3
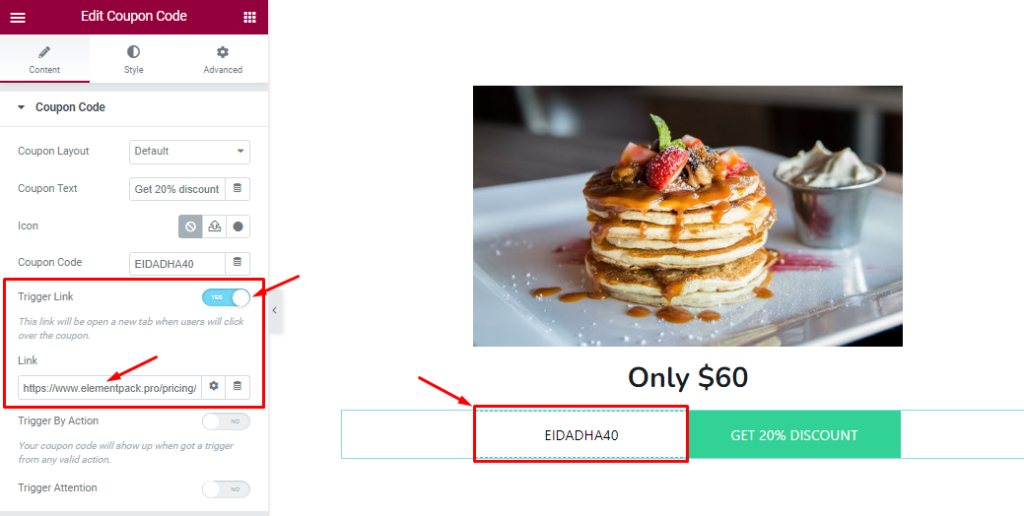
After that, you can enable the Trigger Link switcher to send your customers/visitors to a new window by providing a link in the Link field. Clicking on the Coupon Text (copy button) will trigger the link for the user.
Step-4
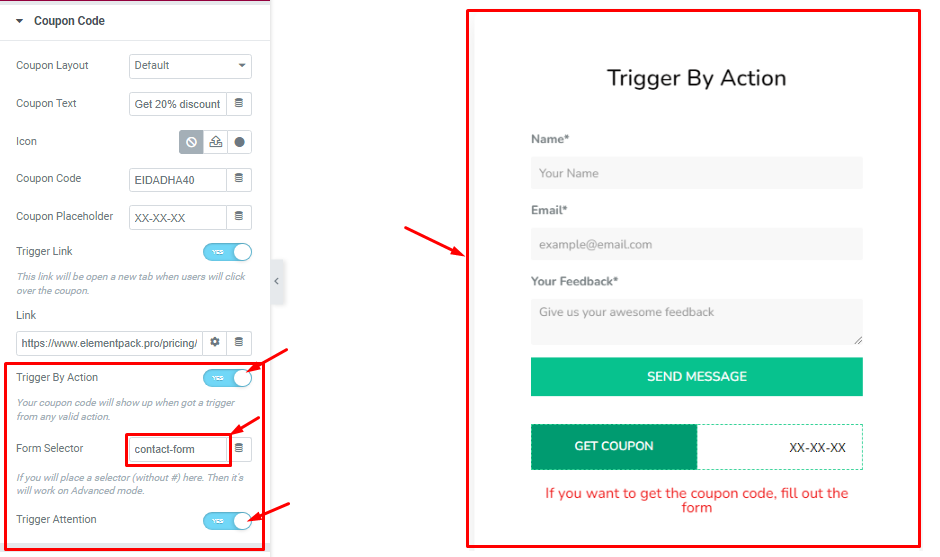
Turning on the Trigger By Action button lets you link up the coupon code widget with any action element (i.e. button) on your website. To link, you will need to provide a CSS ID of the action element and place it inside the Form Selector field. Also, there will be a new Coupon Placeholder field below the Coupon Code field.
The Placeholder text will hide the coupon code and will only reveal the code when the required action by the action element is done by the visitors/users.
Enabling the Trigger Attention switcher will add an animation effect to the coupon code widget and highlight it more within your web page.
For instance, we can link the Trigger Action feature with a form widget.
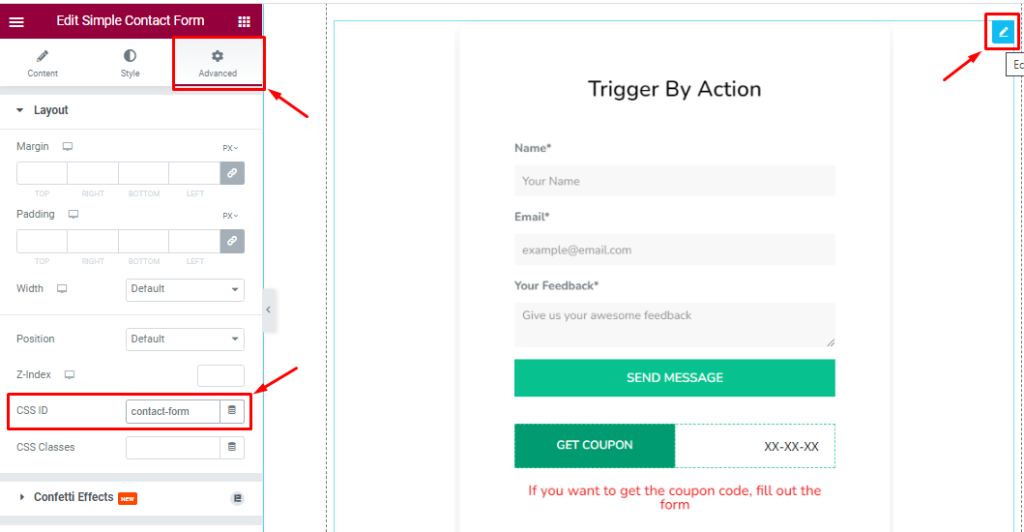
First, go to Form > Advanced > CSS ID and insert ID text.
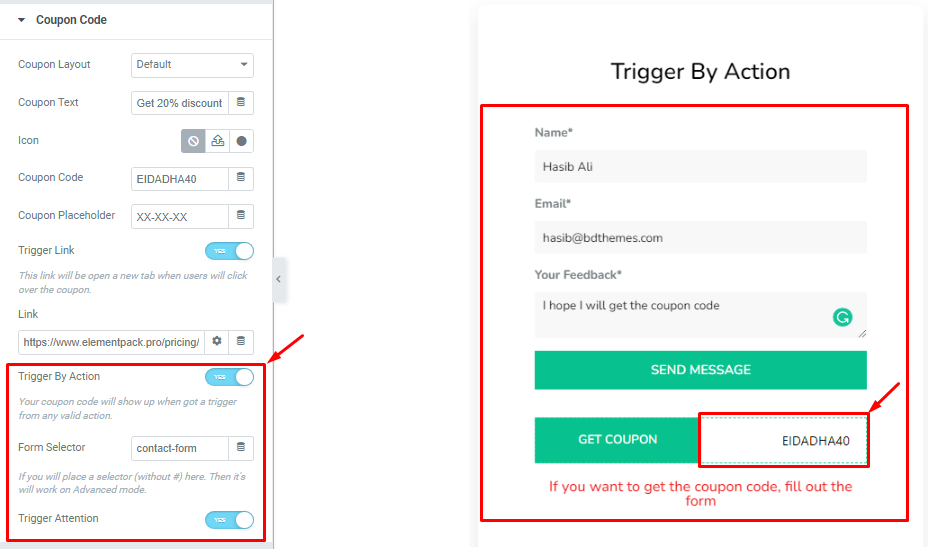
Then paste the CSS ID inside the Form Selector field on the Coupon code widget. Now, the coupon will only be visible once the form is filled submitter using the Send Message button.
Let’s Work With Style Tab
The tab will easily have you style the web content (text, image, video, etc.) of the page you require to design. Styling with the tab in Elementor will always give you a wonderful experience.
Let’s go down into the details.
Coupon Reveal Section
Go to Style > Coupon Reveal
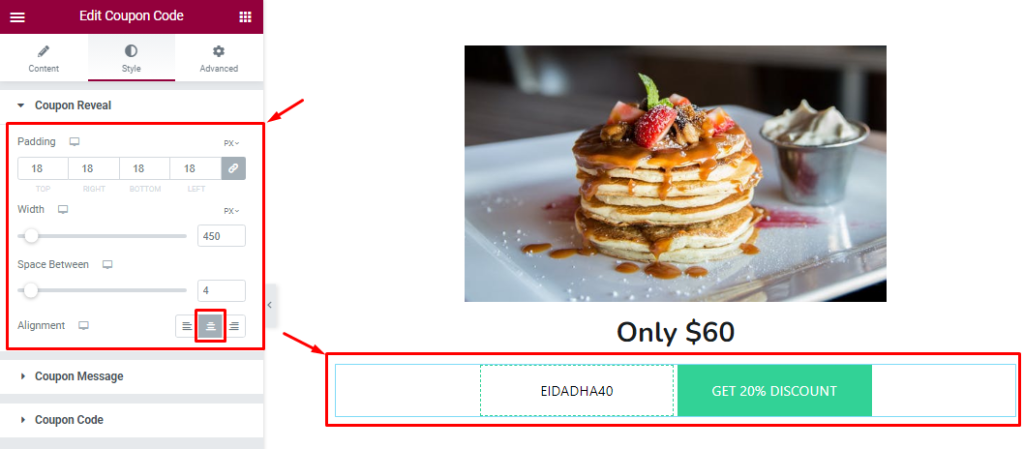
In the first section, you can change the Coupon Padding, Width, Space Between, and Alignment to your demand. Using the width scrollbar, it is possible to enlarge the coupon code field to the full width of your page.
Coupon Message Section Customizations
Go to Style > Coupon Message
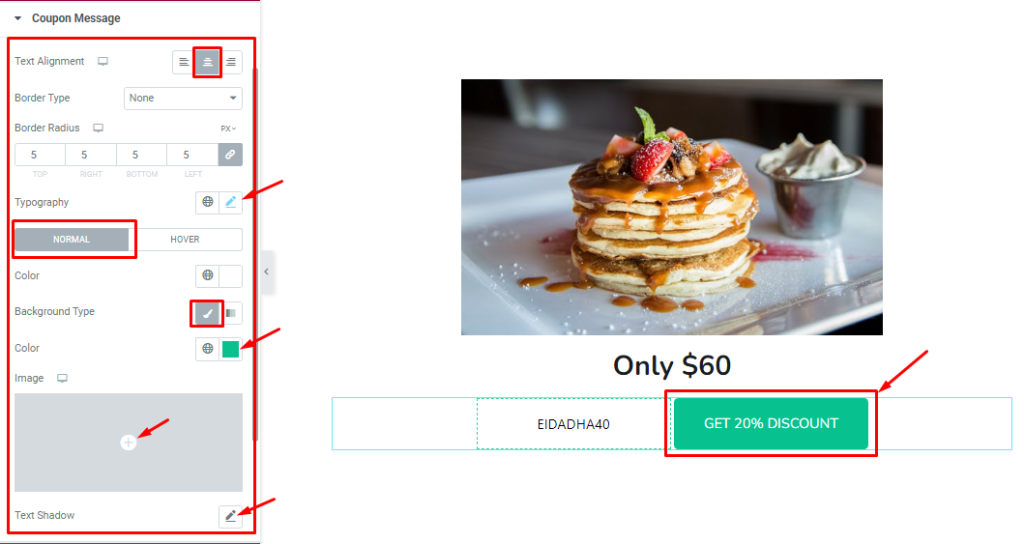
This section specifically applies customizations to the coupon text.
Here, you can change the Text Alignment, Border Type, Border Radius, and Typography for the text.
Then the settings break into Normal and Hover subsections. In the Normal mode, you can change the Text Color, Background Color, Background Type(Classic, Gradient, image), and Text Shadow to the coupon text.
In Hover mode, you will get the exact same settings as the Normal mode to set up a hover effect.
Coupon Code Section
Go to Style > Coupon Code
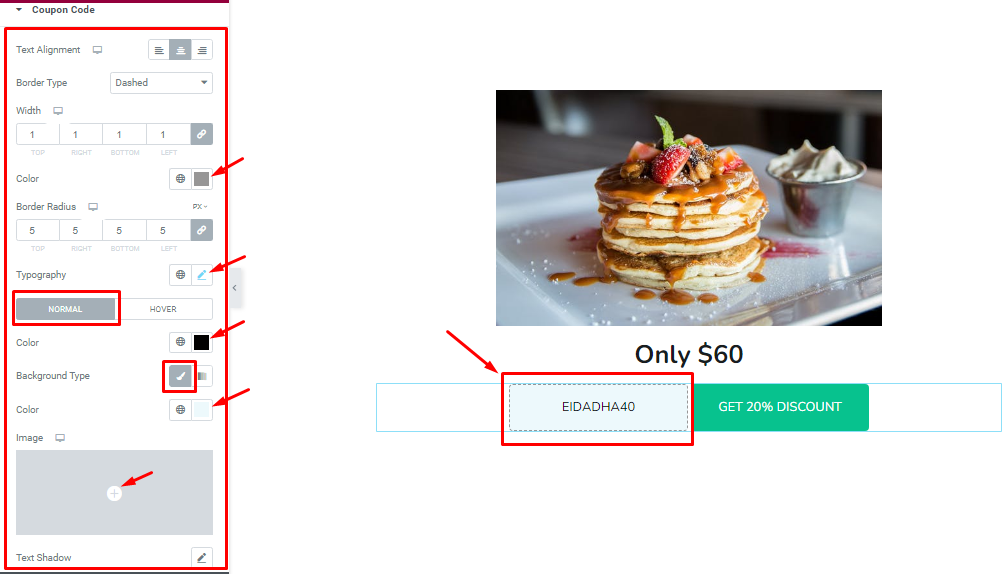
For the code part, you will get the same set of controls as the text.
Here, you can change the Text Alignment, Border Type, Border Width, Border Color, Border Radius, Typography, Text Color, Background Color, Background Type(Classic, Gradient), and Text Shadow, and you can set an image as a Background as your need.
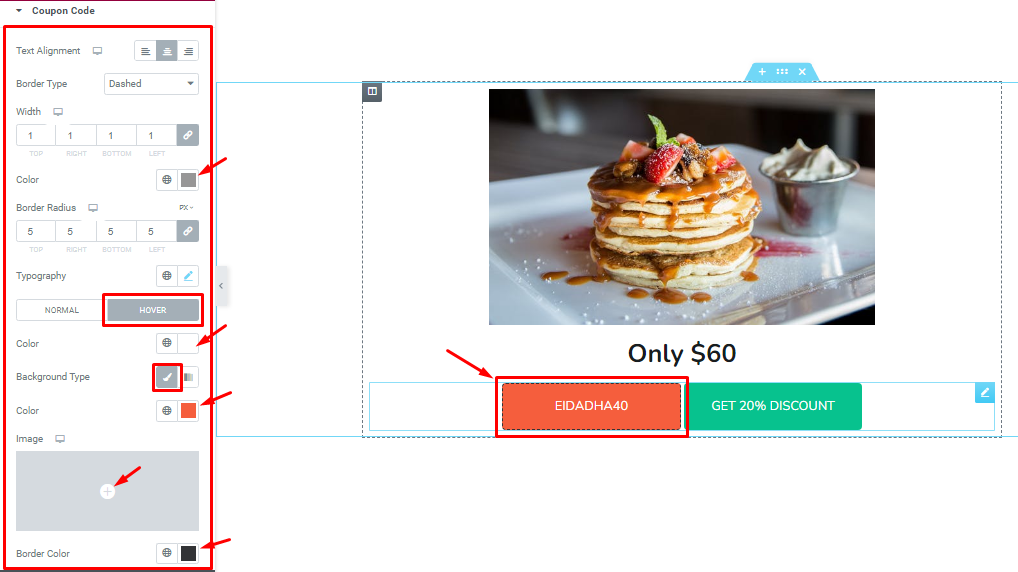
The Hover mode also has identical controls.
Once you are done with the settings, you have successfully customized the widget on your website.
Video Assist
You can watch this quick video to learn more about the Coupon Code widget.
Thanks for staying with BdThemes.