Dynamic Grid widget is important to grow a business and to attract more visitors. Using this widget on the website, you can display your items in grid view. I’ll show you how you can use the Dynamic Grid widget for your business purpose.
Let’s proceed.
Create Single Post Elementor Template
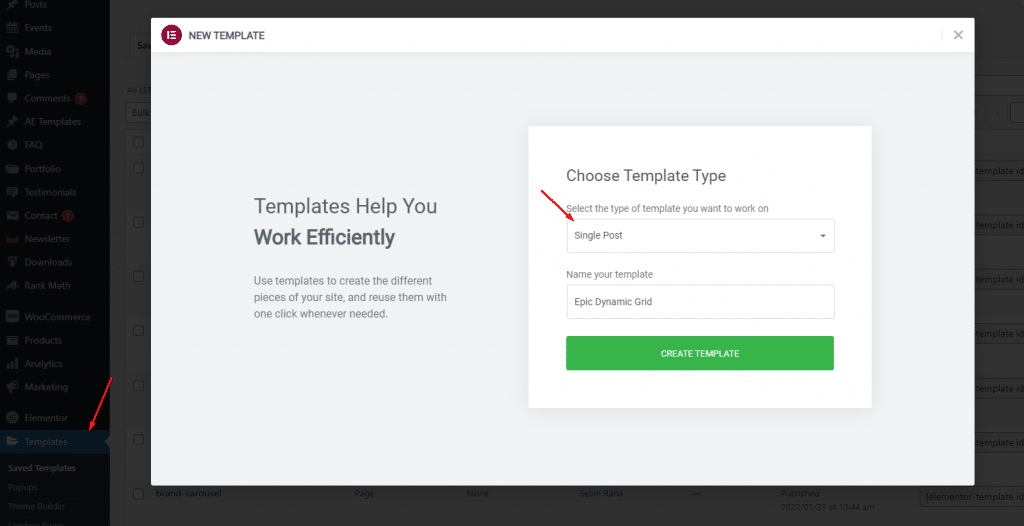
The Dynamic Grid widget is a template-based widget that shows custom-made post-template inside a custom grid. So first, go to the WordPress dashboard and hit on Templates under Elementor Page Builder, and click New Template. After that, select Single Post and hit the Create Template button.
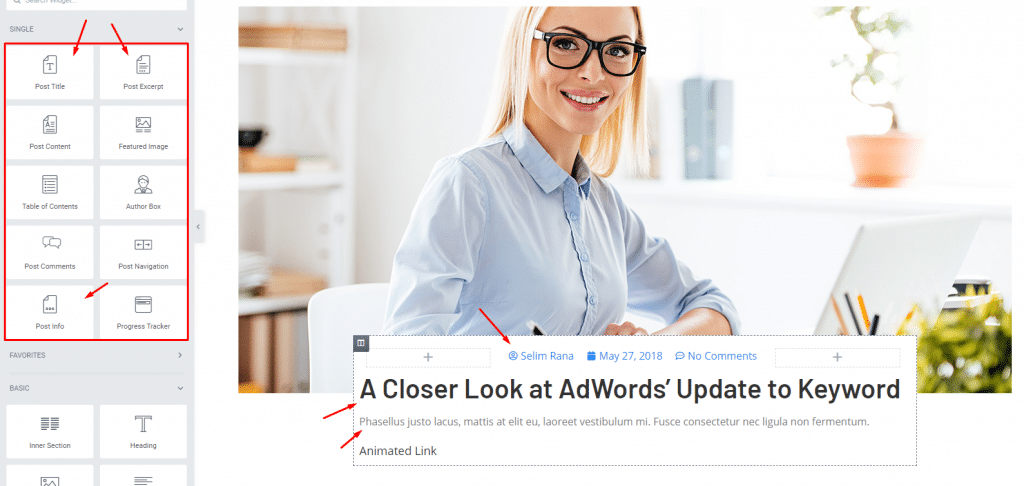
Now, Add Post Title, Post Excerpt, Post Info in the sub-section, and everything you need for creating your own custom post layout. There is no fixed pattern here, just go as you wish.
Inserting the Widget
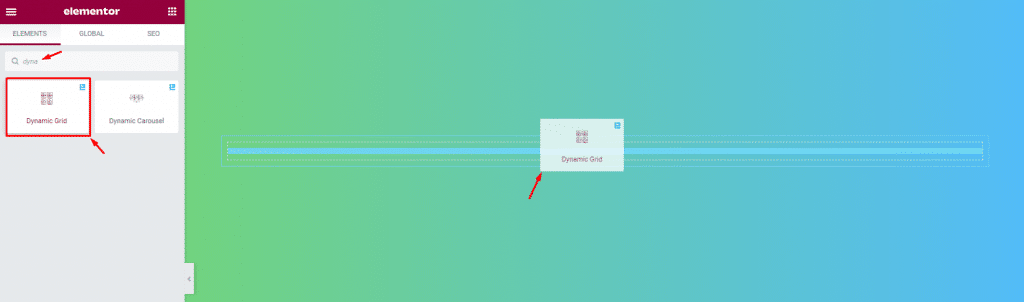
On the Elementor page editor, drag and drop the Dynamic Grid widget inside the page. It’s very simple and easy.
Time for the Action
Step-1
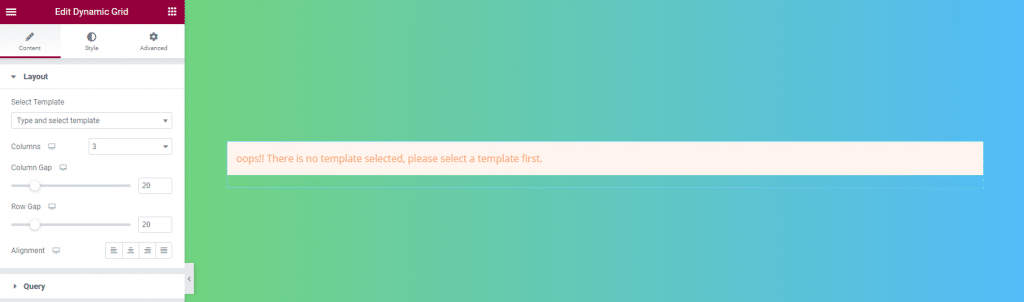
Once the widget is inserted, you will see nothing going on inside the display. You will have to insert a single post template to make it work.
Step-2
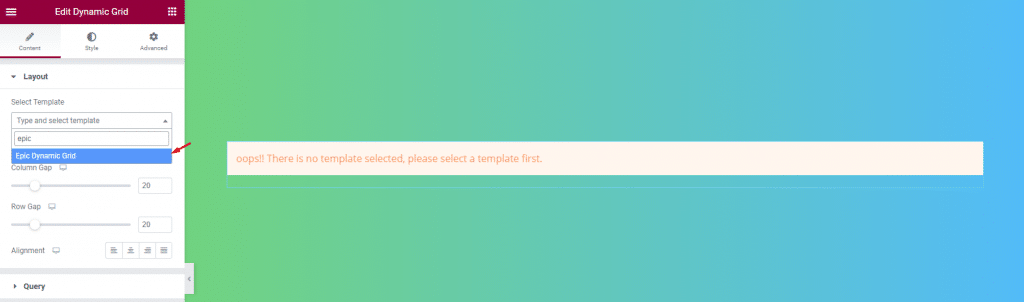
Now, select the custom template from the drop-down option from the Select Template menu.
Step-3
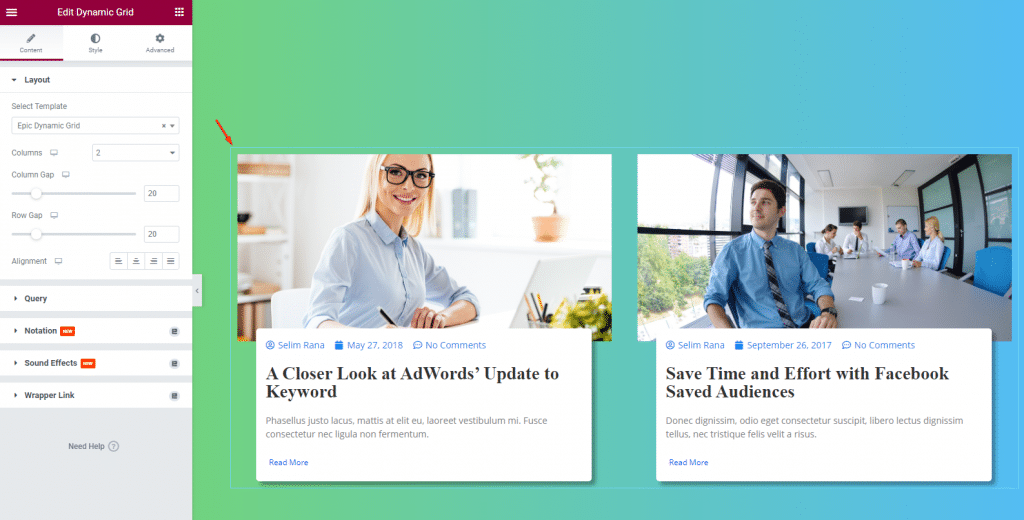
Now, you will see the custom post layout displayed over a grid formation. Here, you will get to enjoy customizing options for the grid. Like the column numbers, column gap, row gap, and alignment.
Customize the Query
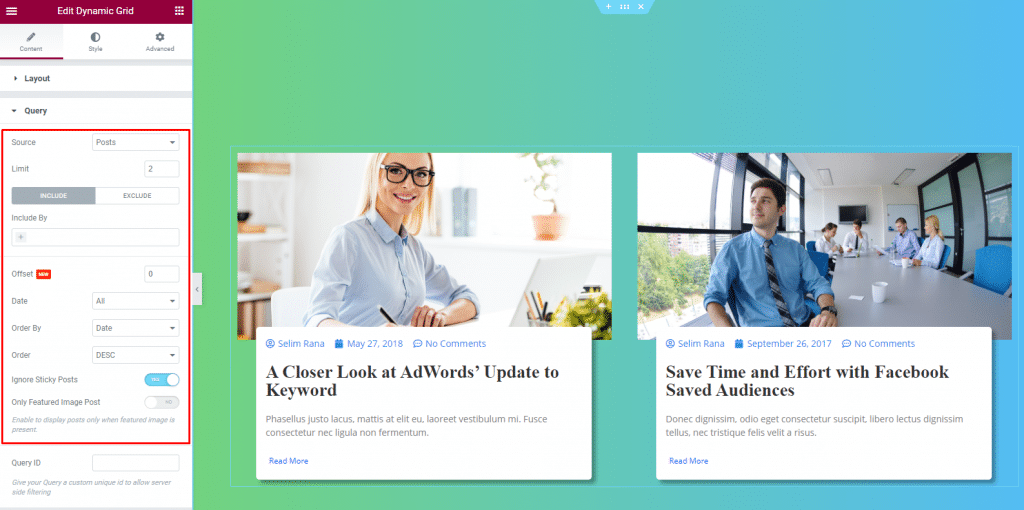
Now, go to the Query section. Here, you can change the Source of the grid, set the item Limit on the displayed items as well as use the Include or Exclude Item fields. You can also change the Offset.
You can further arrange the grid items by using Date, Order By, Order. You can enable or disable Ignore Sticky Posts and Only Featured Image Post switchers.
Customize it with the Style tab
Now that we are done with the layout, it’s time to customize it with the Style tab.
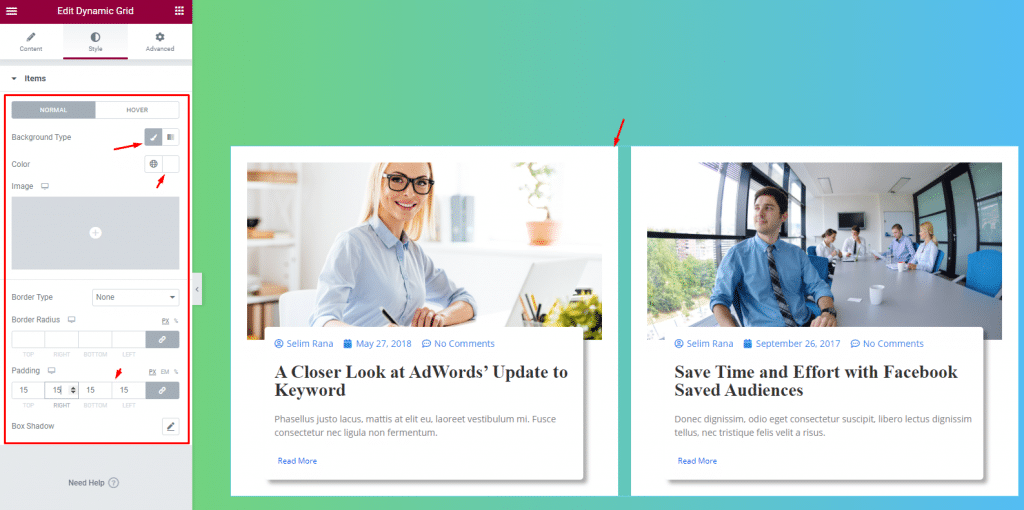
To do that, just go to the Style tab, select the Background Type, then change the color. You can also add a Border with a custom Border Radius, and add some Padding. Also, you can give Box Shadow if you want to make it gorgeous.
All done! Just relax and let the visitors enjoy your custom post grid.
Video Assist
Please watch this video tutorial to learn more about the Dynamic Grid widget and visit the Demo page for examples.
This tutorial is backed by BdThemes.