In this Doc demonstrate of using the Launch Guard which is a lightweight guard plugin for protecting a WordPress site before release or while it’s in maintenance mode. It’s built for speed, flexibility, and ease with interactive templates, custom Templates, Mailchimp Embedding, Social Links, Visitor-email analytics, and Password Protection. You can also bypass the guard for specific user roles (Admin, Editor, Author, Contributor, Subscriber) so your team can access the site while visitors see the guarded page.
Key Features
- Maintenance / Pre-launch Protection — Protect your entire site before launch.
- Interactive Templates — Ready-made templates you can enable and configure quickly.
- Custom Templates — Add Custom Template with Custom Logo, Text, Background Design.
- Mail chimp Embedded Forms — Collect emails directly into your Mail chimp list.
- Social Links — Add social icons and links to the guard page.
- Visitor Email Analytics — Track collected emails and basic analytics (submissions, timestamps).
- Password Protection — Protect the preview page with a password for selected users/guests.
- Role Bypass Controls — Bypass the guard for selected WP roles (Admin, Editor, Author, Contributor, Subscriber).
- Lightweight & Secure — Minimal overhead and built with best practices for admin access control.
Install Launch Guard Plugin
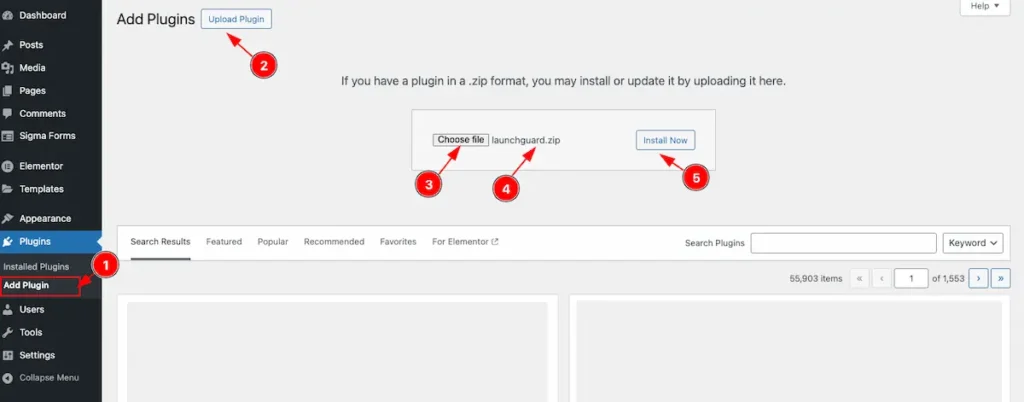
- Navigate to Plugins Section and Click on the ” Add Plugin “. It will appear the section for adding the plugin.
- Upload Plugin button top left corner and click on it to open the upload file.
- Click on the “Choose file ” button and select the Plugin from the Local File.
- Check the Plugin name appears correctly. e.g.: launchGuard.zip
- Click on the ” Install Now ” button and The installation process will start.

- Now click on the “Activate Plugin” button to activate the plugin.
Check Installed Plugins
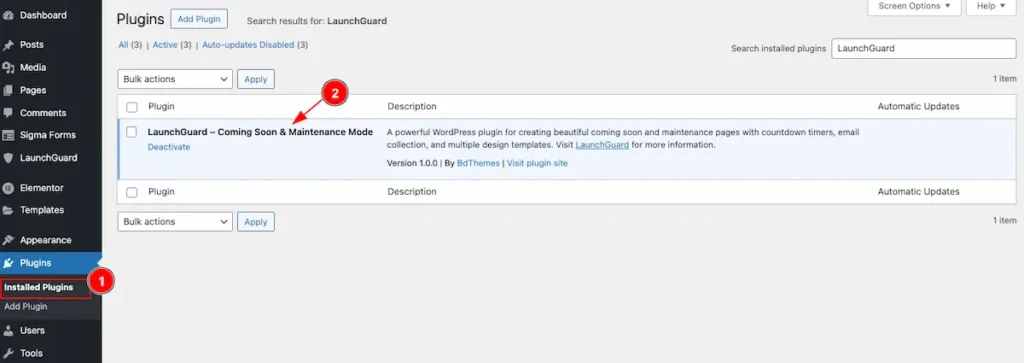
- Navigate to the “Plugins” > ” Installed Plugins ” section. All the installed page appear.
- Check the ” Launch Guard ” plugin Avtivated.
License Activation
Navigate to Launch Guard > License
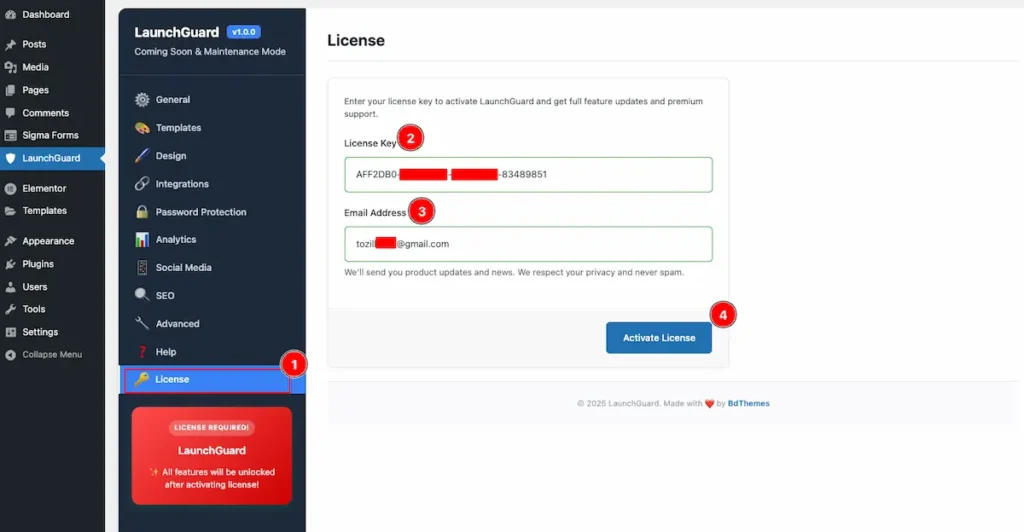
- Click on the License tab and it will appear the license section.
- License key: Input the license key.
- Email Address: Set the email address.
- Activate License: Click on the ” Activate License “button to activate it.
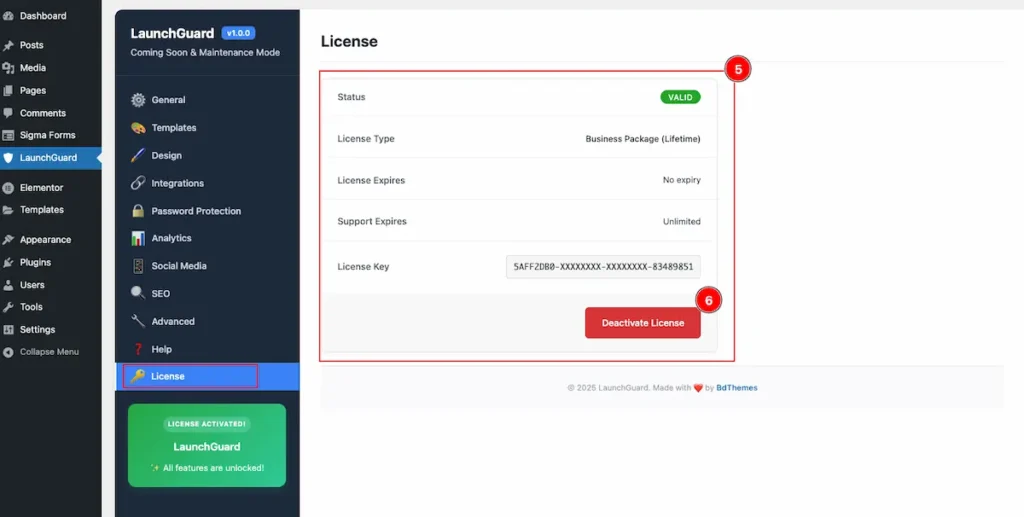
- After activating the license key it will provide these info.
| Status | Valid |
| License Type | Name of the license type. Business Package( Lifetime) |
| License Expires | Show the Expire the Date. e.g.: No Expiry |
| Support Expires | Show support limited. e.g.: Unlimited |
| License Key | Show the license key. |
6. Deactivate Button: To deactivate the license key click on it.
Launch Guard Configuration
General
Navigate to Launch Guard > General
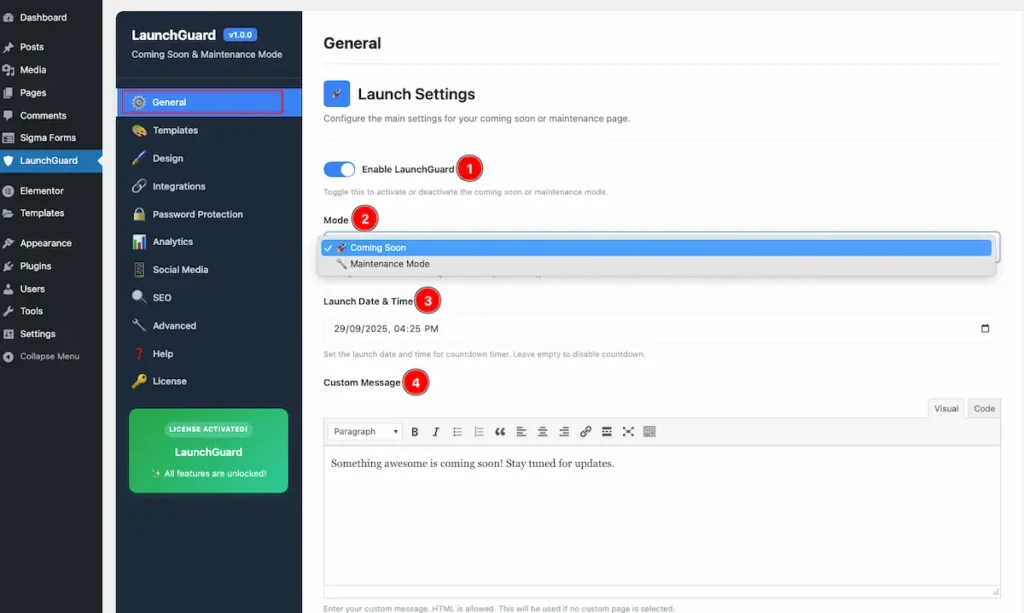
- Enable Launch Guard: Enable the Toggle switcher to activate or deactivate the coming soon or maintenance mode.
- Mode: Two Modes are available. Select one of them.
- Coming Soon: This mode is for the launch previous message to User and Coming Soon allows search engines to index (200 status).
- Maintenance Mode: This mode is for while maintaining the website. While Maintenance Mode returns 503 status.
- Launch Date & Time: Set the launch date and time for countdown timer. Leave empty to disable countdown.
- Custom Message: Enter the custom message for the audience who visit website while to mode is activate. Enter your custom message. HTML is allowed. This will be used if no custom page is selected.
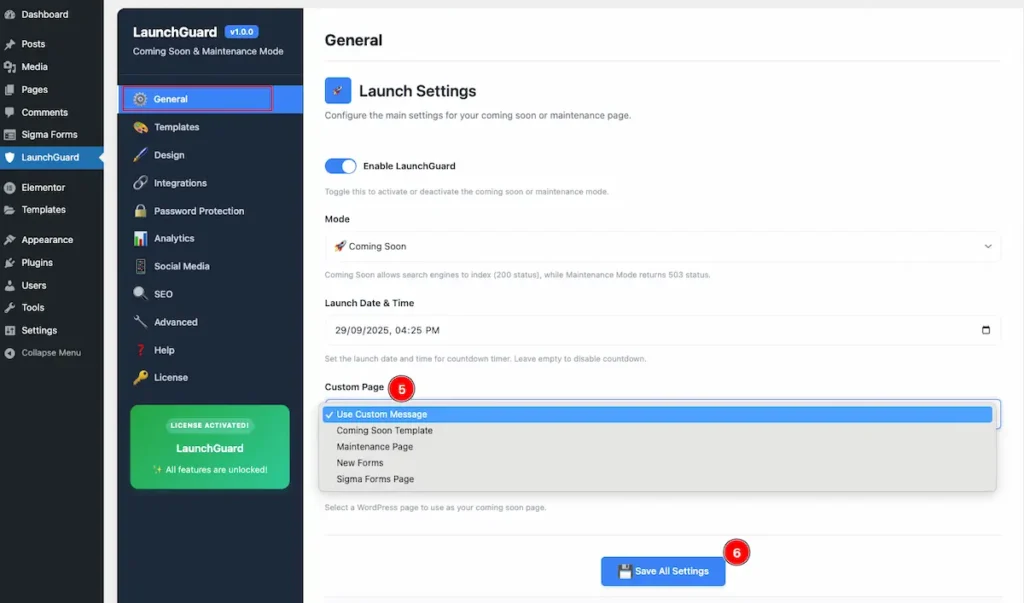
- Custom Page: Select the any custom page for demonstrating the while to mode is on. The ” Use Custom Message ” and All the created pages appear on the list.
- Now click on the ” Save All Settings ” button to make the changes.
Templates
Navigate to Launch Guard > General
Choose Ready Templates
Select from our professionally designed templates or create your own custom design.
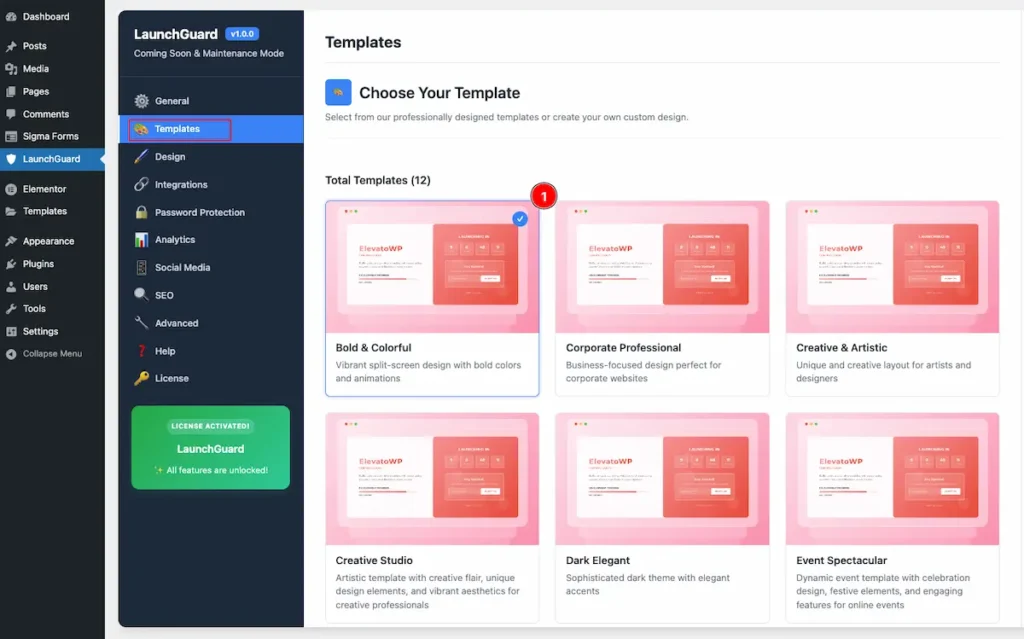
- Choose template from the section. Total 12 Templates are available. Choose based on your preferences.
- Bold & Colorful: Vibrant split-screen design with bold colors and animations
- Corporate Professional: Business-focused design perfect for corporate websites
- Creative & Artistic : Unique and creative layout for artists and designers
- Creative Studio : Artistic template with creative flair, unique design elements, and vibrant aesthetics for creative professionals
- Dark Elegant: Sophisticated dark theme with elegant accents
- Event Spectacular: Dynamic event template with celebration design, festive elements, and engaging features for online events
- Executive Suite: Professional corporate design with elegant typography and sophisticated layouts perfect for business launches
- Fashion Elite: Luxury fashion template with elegant design, sophisticated style, and premium aesthetics for fashion brands
- Modern Gradient: Extraordinary 3D gradient design with holographic effects and particle systems
- Modern Minimal: Clean and minimalist design with elegant typography
- Tech & Digital : Modern tech-focused design with digital elements
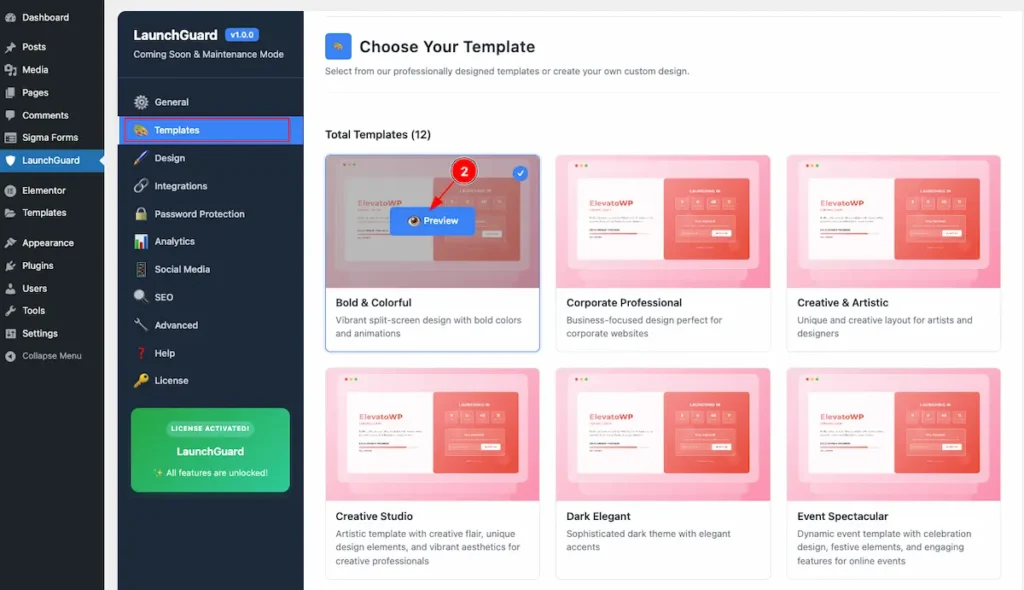
- Hover over any Template and Find the ” Preview ” button. Click on it to check the Preview.
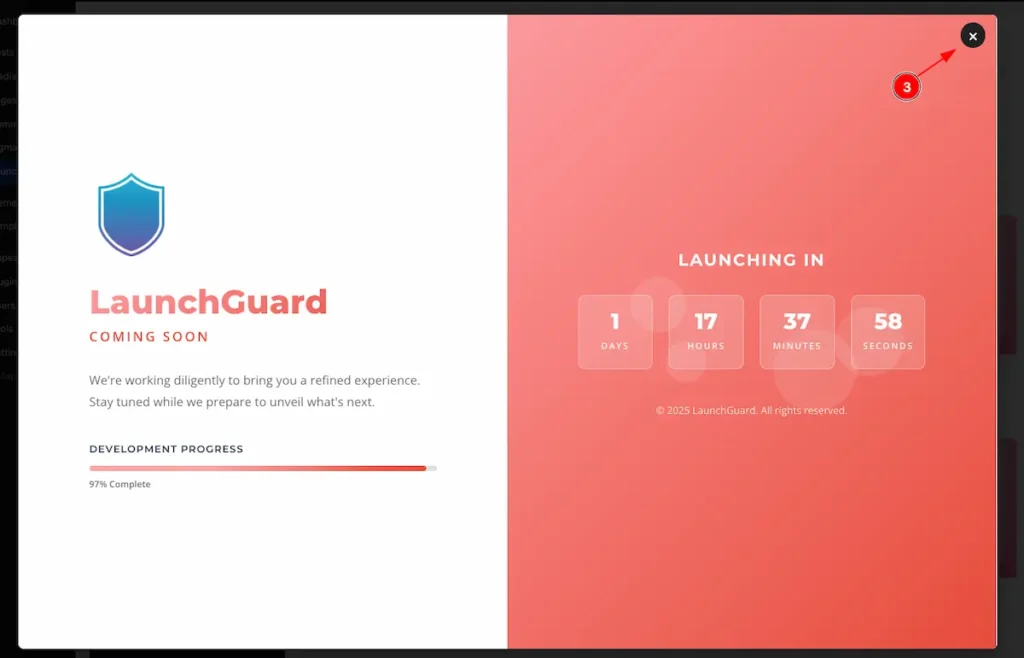
- Now Template preview appear. Click on the ” X ” icon to close it.
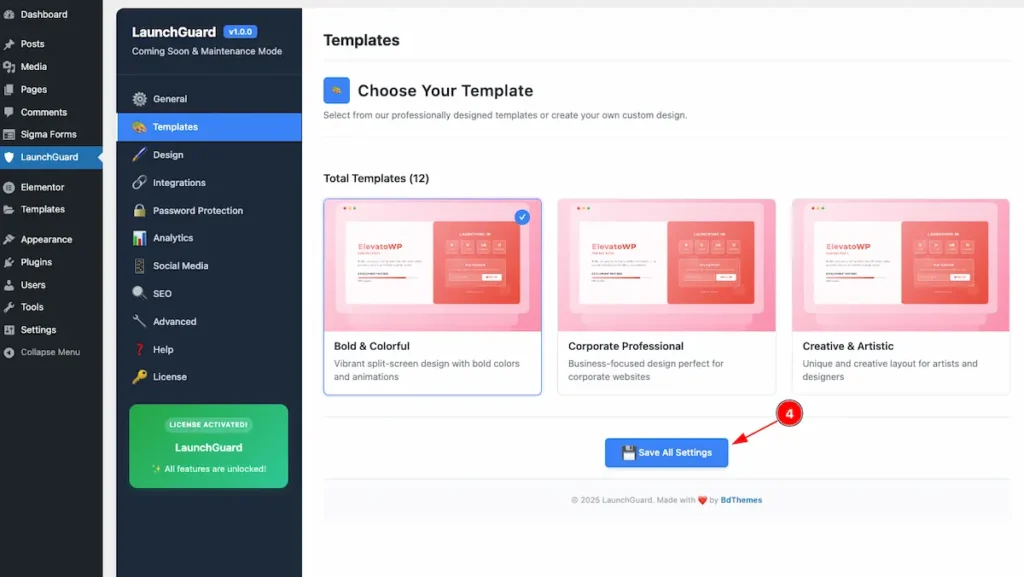
- After choosing the Template Don’t forget to click on the ” Save All Settings ” button.
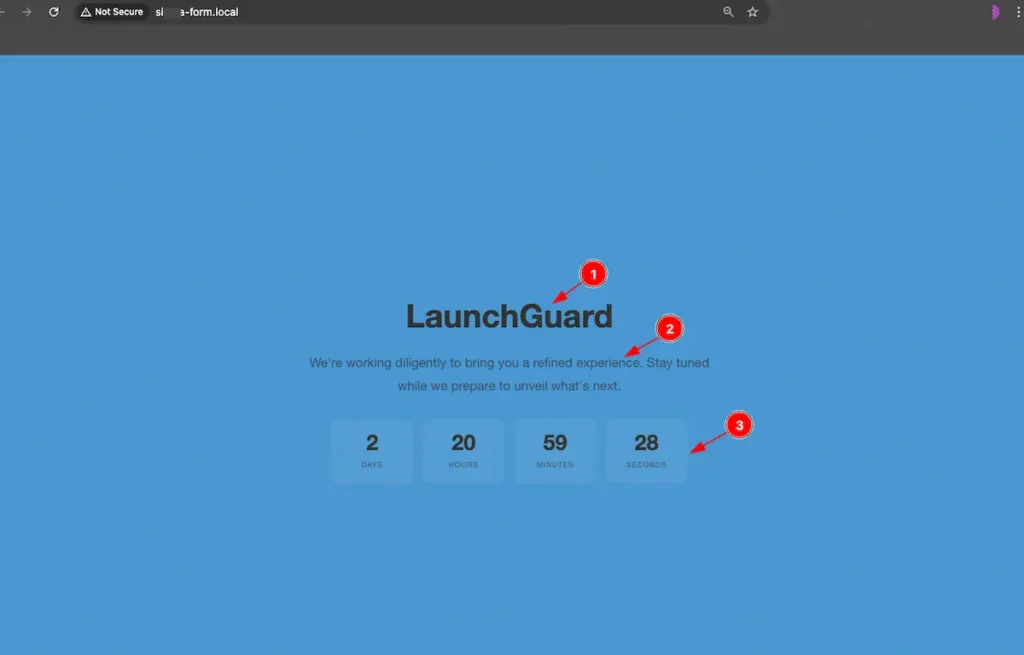
Preview Selected Template ( On the Website )
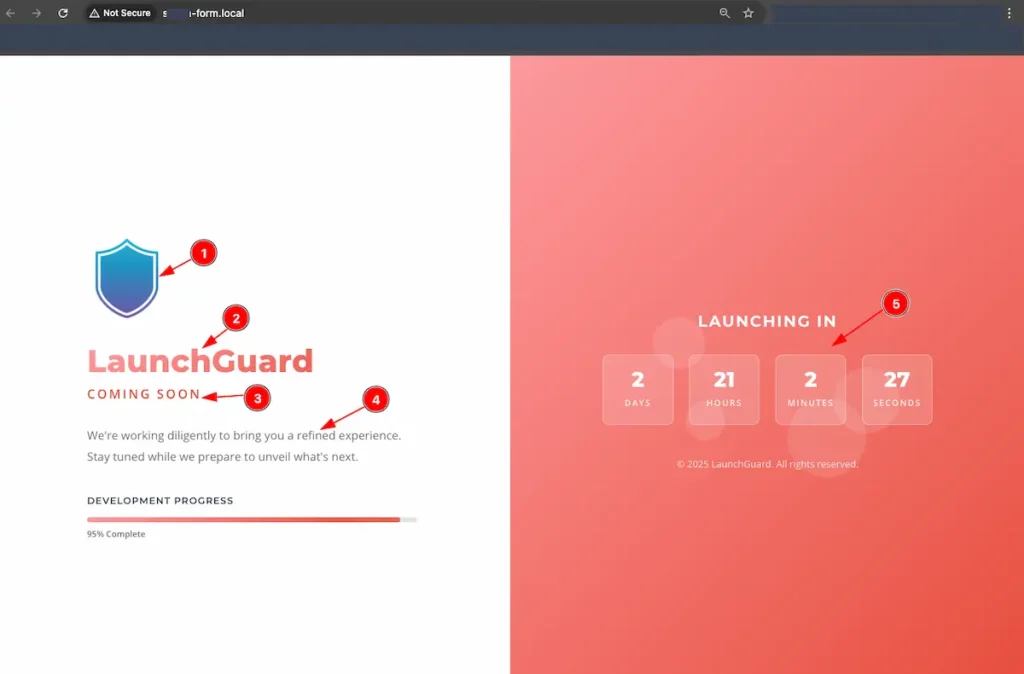
- The Template Preview appears, first showcasing the Website Logo.
- The Site Name is displayed to the right of the logo.
- The selected mode is shown — in this case, Coming Soon mode.
- A custom message is displayed for the audience.
- The Launch Timer appears, counting down to the launch time.
Choose Custom Template
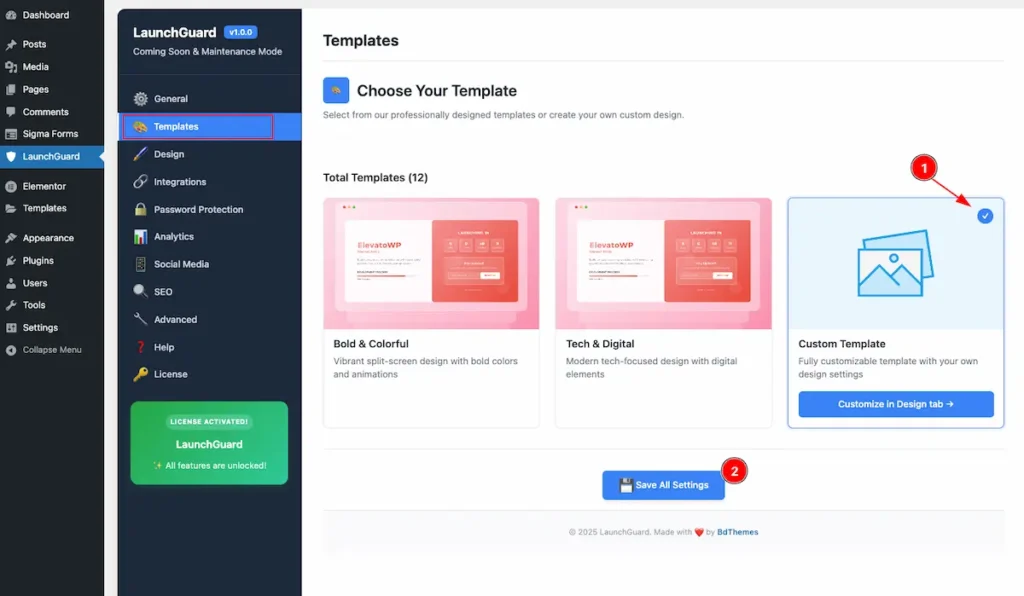
- Select the ” Custom Template ” and it will allow to customize the template.
- Now click on the ” Save All Settings ” button to save it.
Preview Custom Template
- The Site Name appears at the top, displayed in the default color.
- The custom message is shown beneath it.
- The Launch Timer appears below, demonstrating the countdown to launch.
Design ( Custom Template )
Navigate to Launch Guard > Design
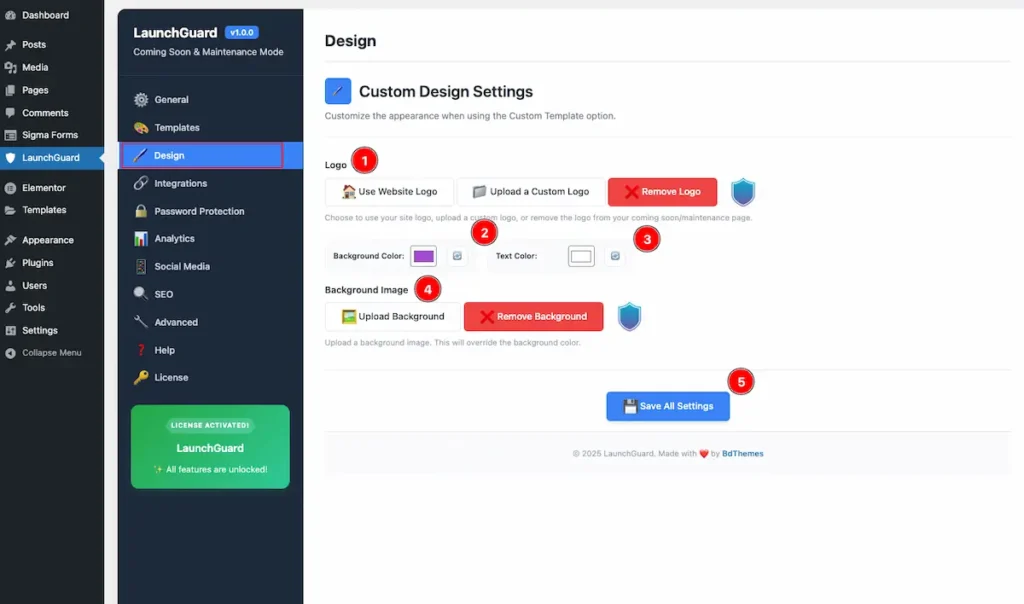
- Logo: Choose the logo to display on the Mode page.
- Use Website Logo: Click this option to use the site’s default logo.
- Upload a Custom Logo: Upload a logo from local files.
- Remove Logo: After selecting a logo, a Remove button will appear. Click it to remove the logo.
- Background Color: Select a background color for the logo area.
- Text Color: Select the Text Color.
- Background Image: Set a background image for the mode page.
- Upload Background: Choose a background and upload it from local sources.
- Remove Background: Once a background is selected, a Remove button will appear. Click it to remove the background.
- To apply all modifications, click on the “Save All Settings” button.
Custom Design Preview
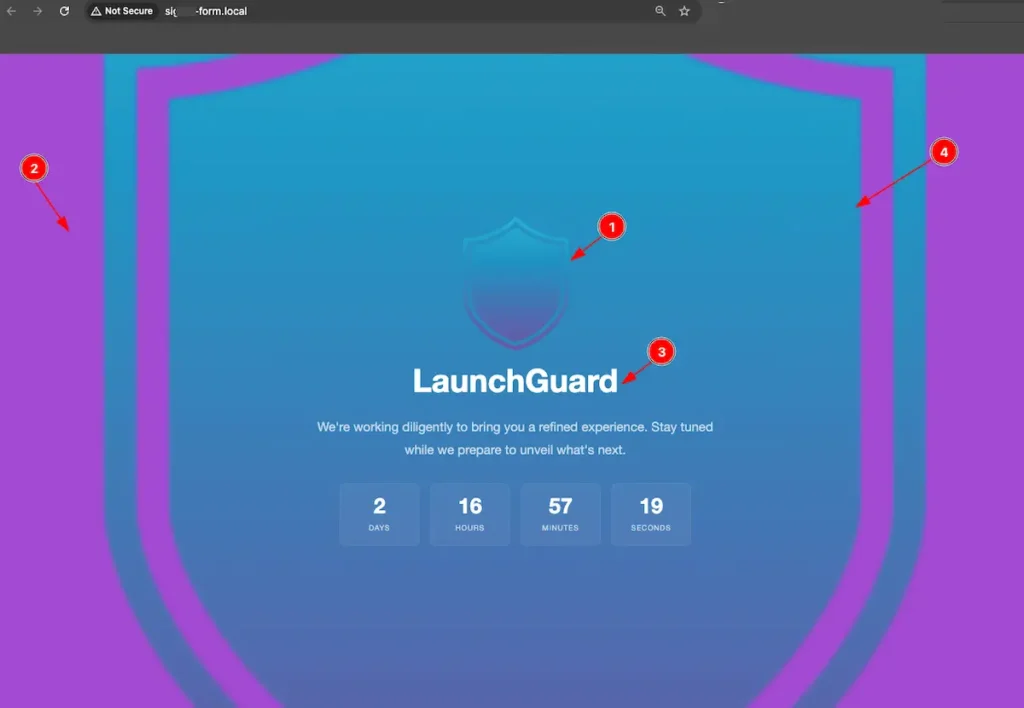
- Logo: Selected logo appear on the top.
- Background: The chosen background color is displayed.
- Text Color: Select the text color appear on the Text.
- Background Image: The uploaded background image is shown on the page.
Integrations
Navigate to LaunchGuard > Integrations
Connect with Mail chimp to collect email subscriptions from your visitors.

- Mailchimp API Key: Enter your Mailchimp API key to enable email subscriptions. Get your API key
- Mailchimp List ID: Enter your Mailchimp list/audience ID. Find your list ID
- After completing the input form click on the ” Save All Settings ” button to make changes.
Email Preview
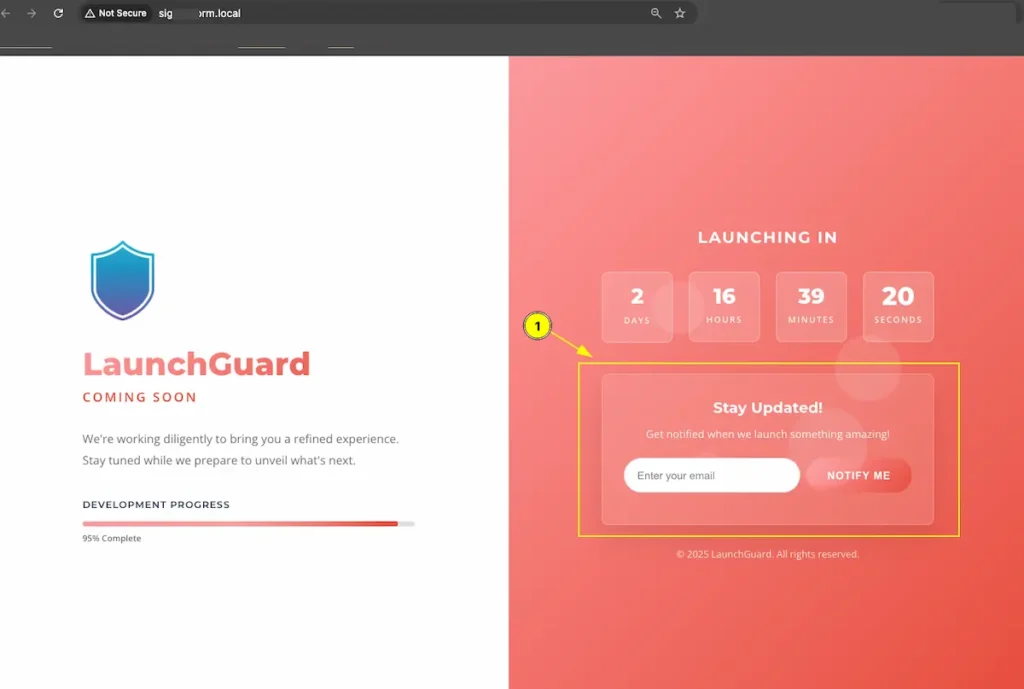
- Now the Email subscription form appear. User can get Notify mail.
Password Protection
Navigate to LaunchGuard > Password Protection
Add an extra layer of security by requiring a password to access your site during maintenance or coming soon mode.
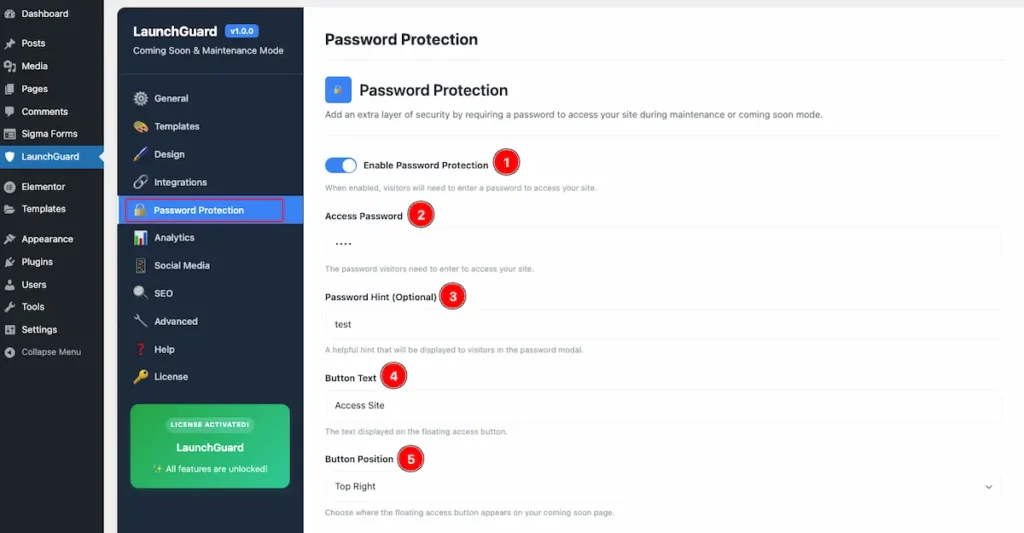
- Enable Password Protection: When enabled, visitors will need to enter a password to access your site.
- Access Password: Set the Password. The password visitors need to enter to access your site.
- Password Hint ( Optional ): A helpful hint that will be displayed to visitors in the password modal.
- Button Text: Set the Text for the Button. The text displayed on the floating access button.
- Button Position: Choose where the floating access button appears on your coming soon page. Positions are Top Right, Top Left, Bottom Right, Bottom Left.
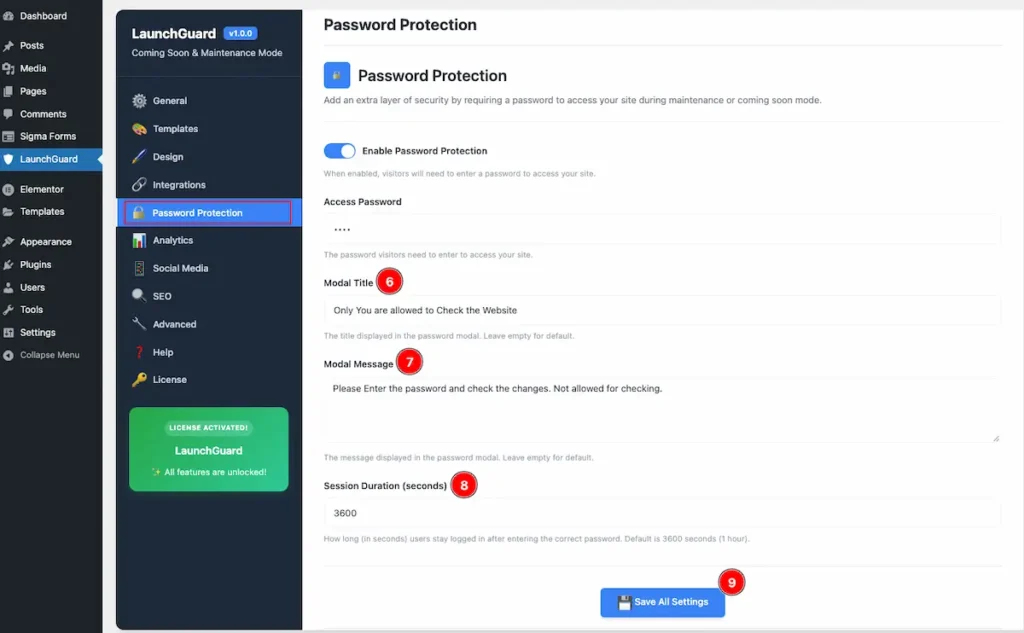
- Modal Title: The title displayed in the password modal. Leave empty for default.
- Modal Message: The message displayed in the password modal. Leave empty for default.
- Session Duration ( Seconds ): How long (in seconds) users stay logged in after entering the correct password. Default is 3600 seconds (1 hour).
- After completing click on the button ” Save All Settings ” Button to save it.
Check the Preview of Password Protection
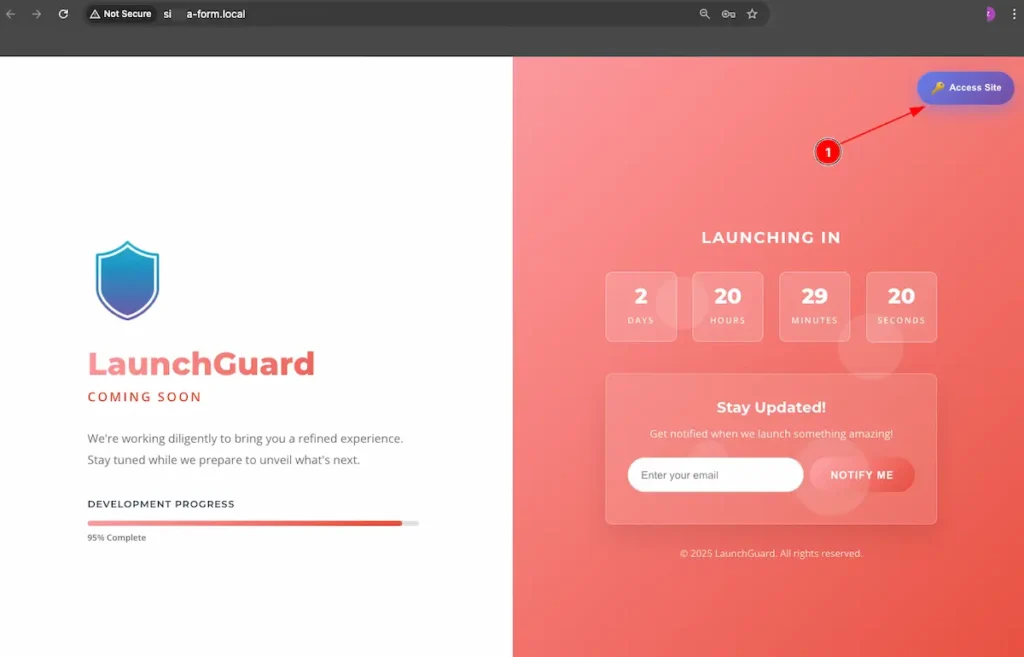
- The Password Protection button appear on the as Button. Click on it and it will appear a modal.
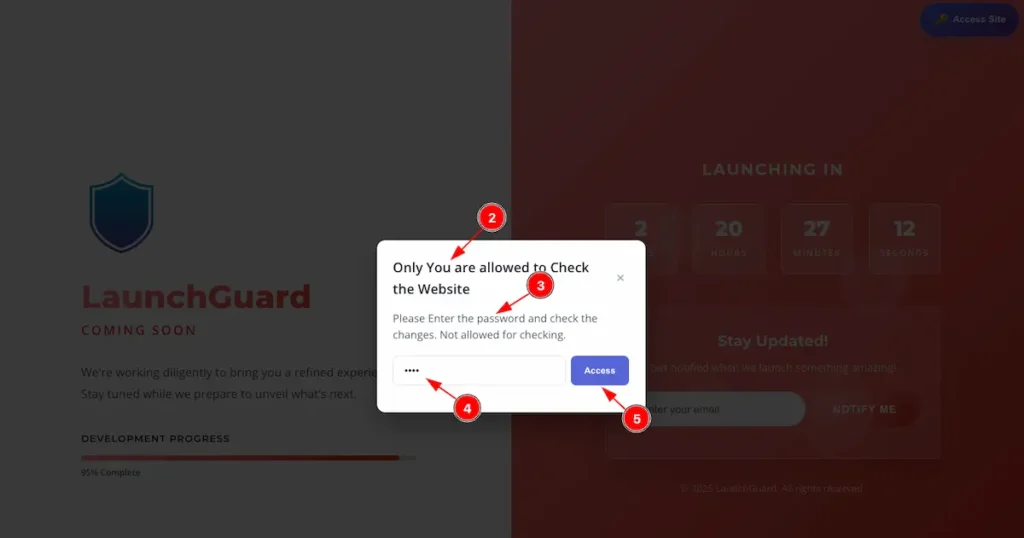
- Showing the Heading for the modal Text.
- Show the modal message appear.
- Enter the Password that have been set.
- Click on the “Access” button to save it.
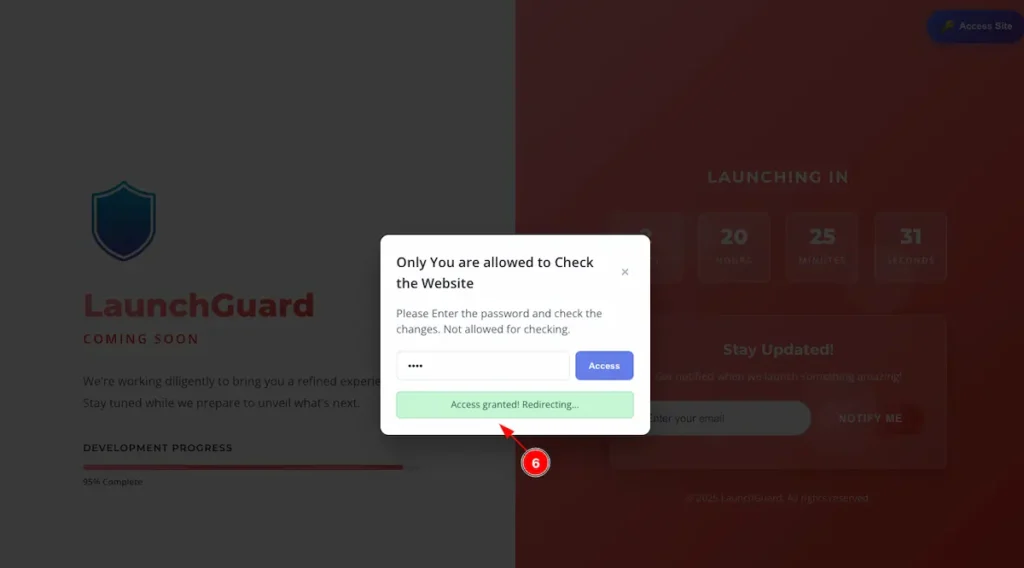
- When the password is correct, a message appears: “Access granted. Redirecting…” The user will then be redirected to the page.
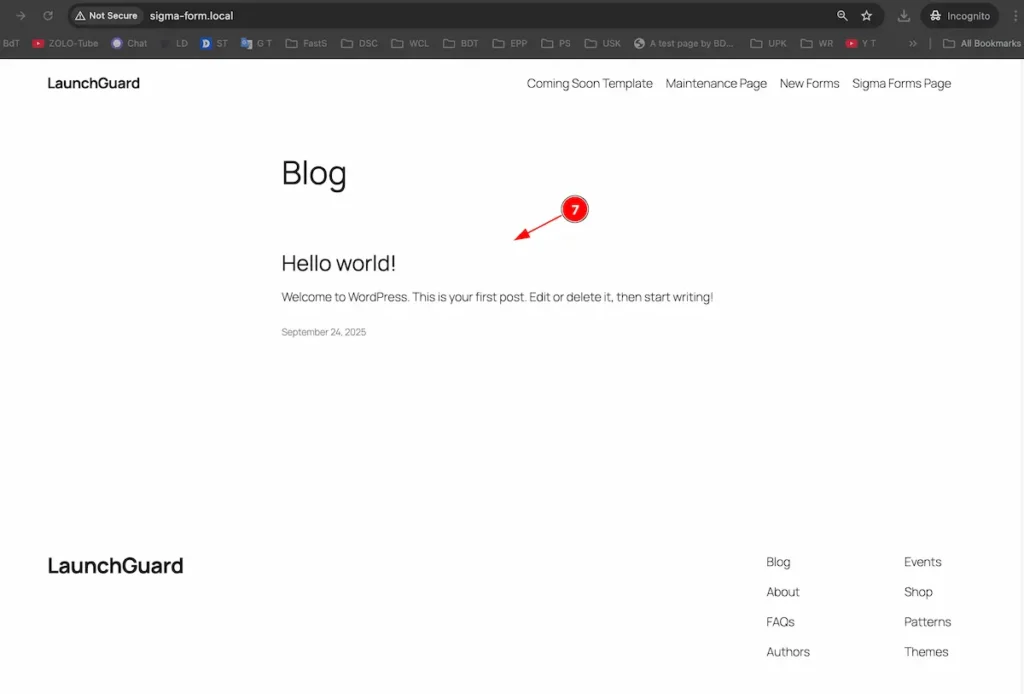
- The View Page appears on the screen.
Analytics
Navigate to LaunchGuard > Analytics
Track visitors, conversions, and performance metrics for your coming soon pages.
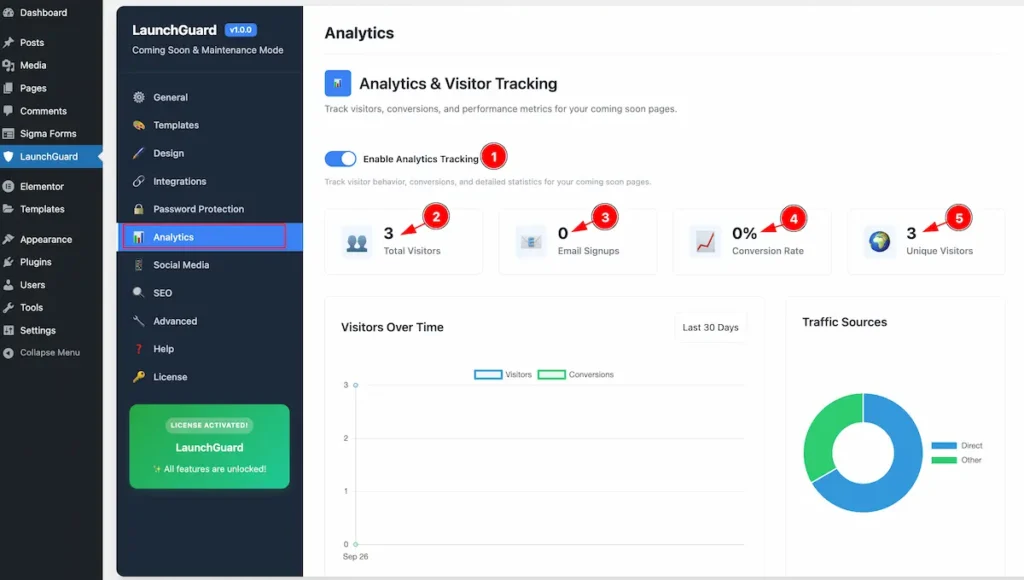
- Enable Analytics Tracking: Enable the toggle switcher to Track visitor behavior, conversions, and detailed statistics for your coming soon pages.
- Total Visitors: Show the Total numbers Visitors visited on the website.
- Email Signups: Demonstrate how many emails are signed up.
- Conversation Rate: The Conversation rate appear on the. Number appear on Percentage.
- Unique Visitors: Show the Unique visitors.It showing the only unique visitor not a single user visited many times.
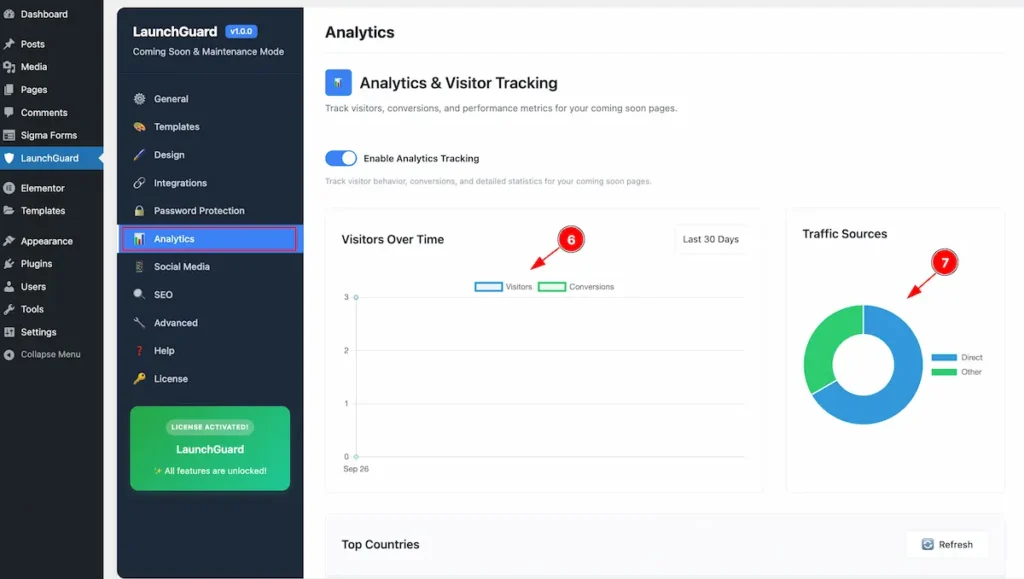
- Visitors Over Time: Demonstrate the visitors over time.
- Traffic Sources: Show the traffic in Pie view. Direct Link or Other source Link.
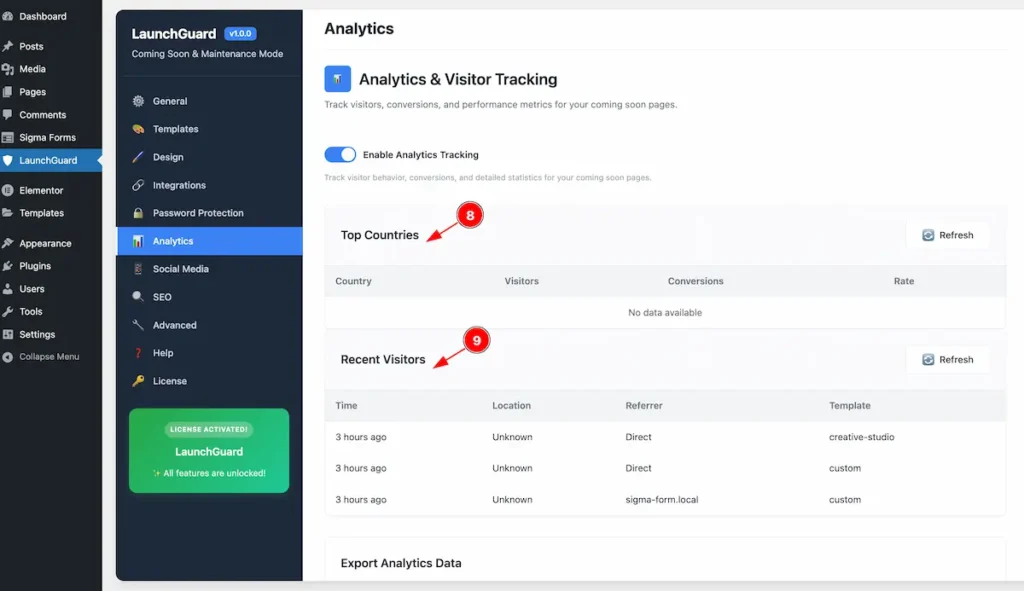
- Top Countries: It will demonstrate the visitor info from Top Countries.
- Recent Visitors: Demonstrate the recent visitors info.
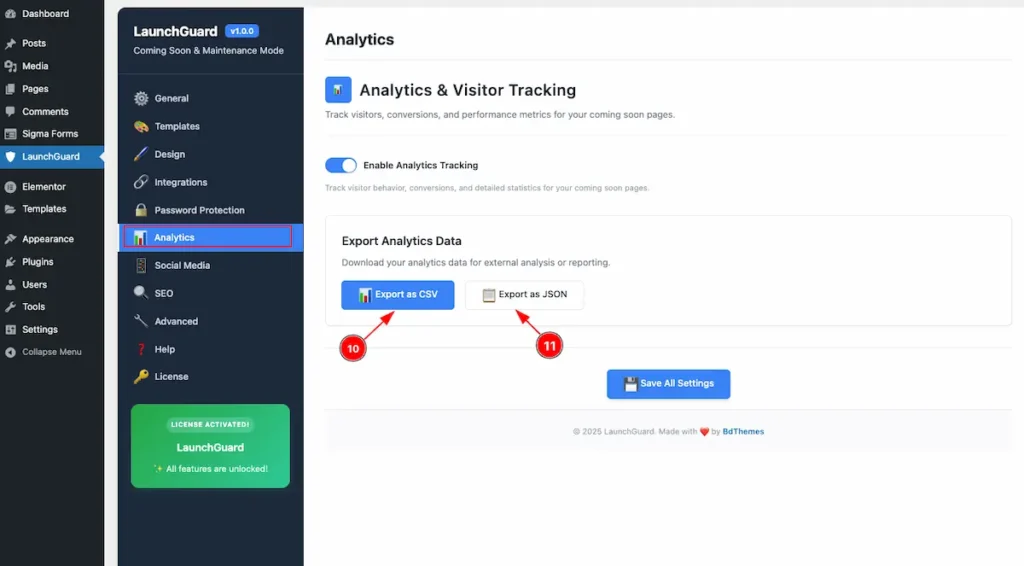
- Export as CSV: Click on the Export button to export the file as CSV Format.
- Export as JSON: Click on the Export button to export the file as JSON Format.
Social Media
Navigate to LaunchGuard > Social Media
Add social media links to your coming soon page. Links will only display if social media is enabled and at least one URL is provided.
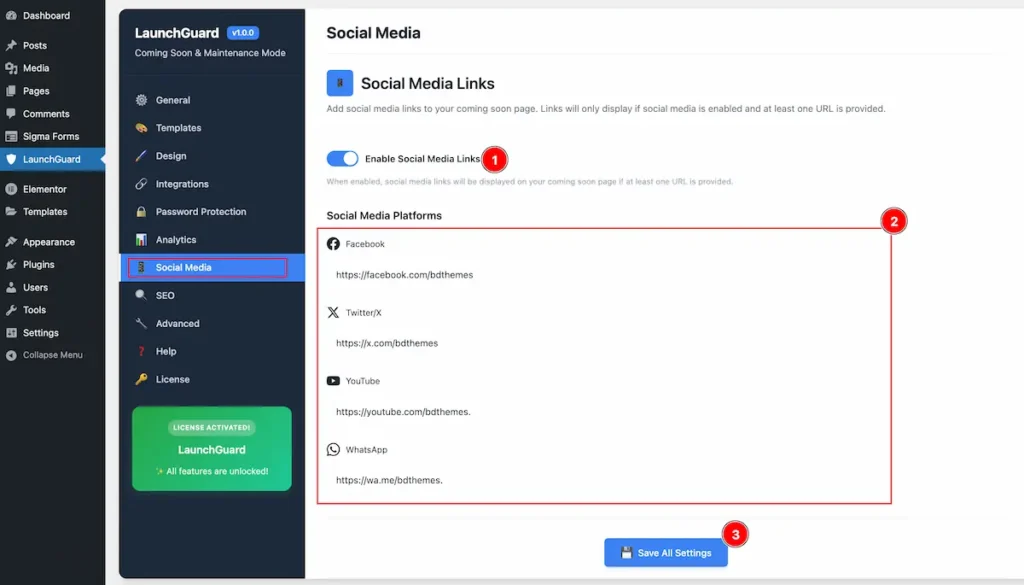
- Enable Social Media Links: Enable the switcher to demonstrate the social media links. When enabled, social media links will be displayed on your coming soon page if at least one URL is provided.
- Social Media Platforms: Demonstrate the social media platforms. Facebook, Twitter/X, YouTube, WhatsApp, Linkedin, Tiktok, Pinterest, Snapshot, Discord.
- Click on the ” Save All Settings ” button to make it changes.
Preview the Social Media
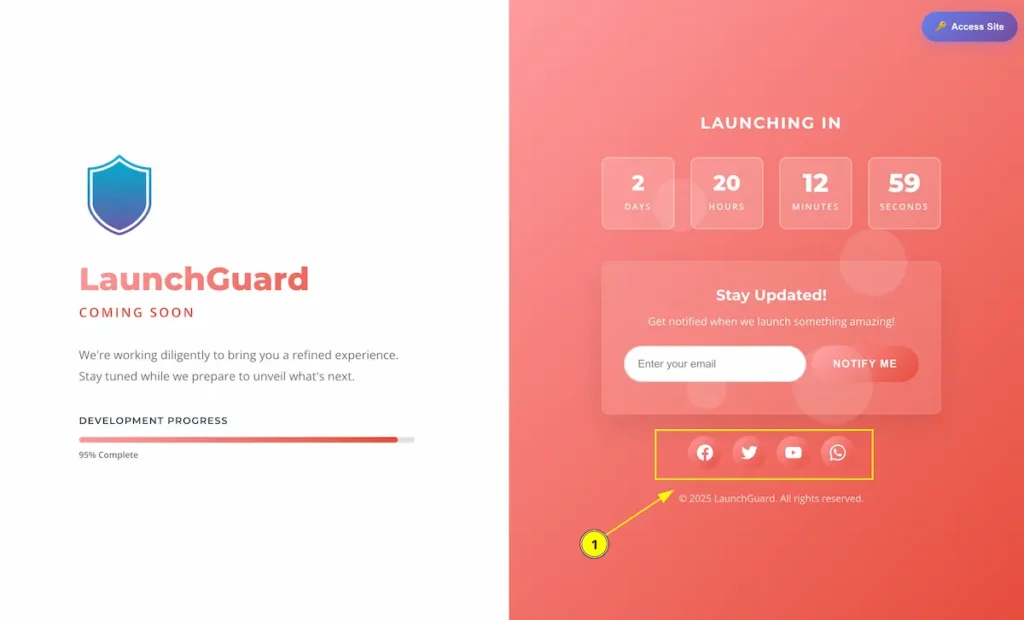
- The Social Media appear on the Coming soon page. Click on the social media icon to view page.
SEO
Navigate LaunchGurad > SEO
Configure SEO meta tags and Google Analytics for your coming soon page.
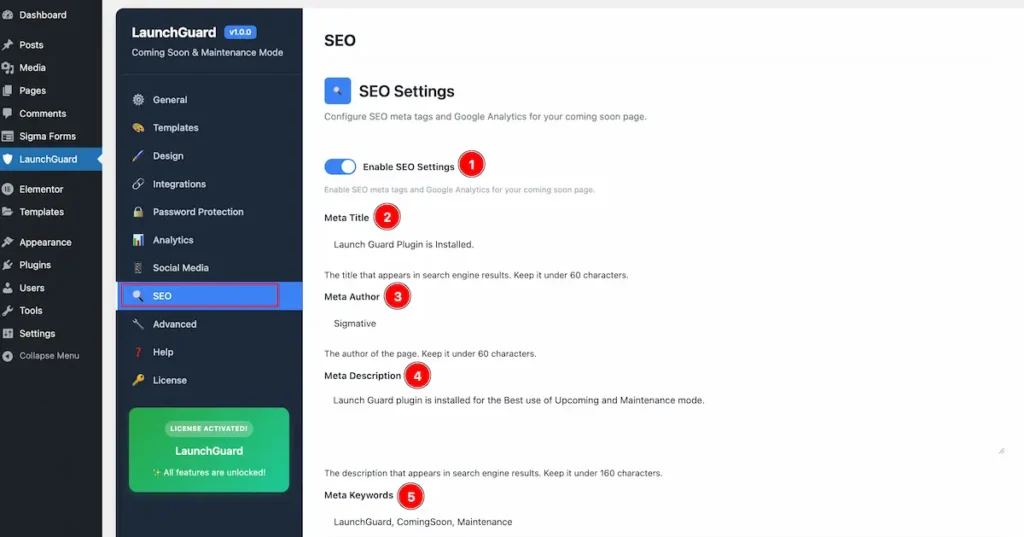
- Enable SEO Settings: Enable SEO meta tags and Google Analytics for your coming soon page.
- Meta Title: Set the title that appears in search engine results. Keep it under 60 characters.
- Meta Author: Set the author of the page. Keep it under 60 characters.
- Meta Description: Set the description that appears in search engine results. Keep it under 160 characters.
- Meta Keywords: Set the Keywords for search engine. Comma-separated keywords relevant to your page content.
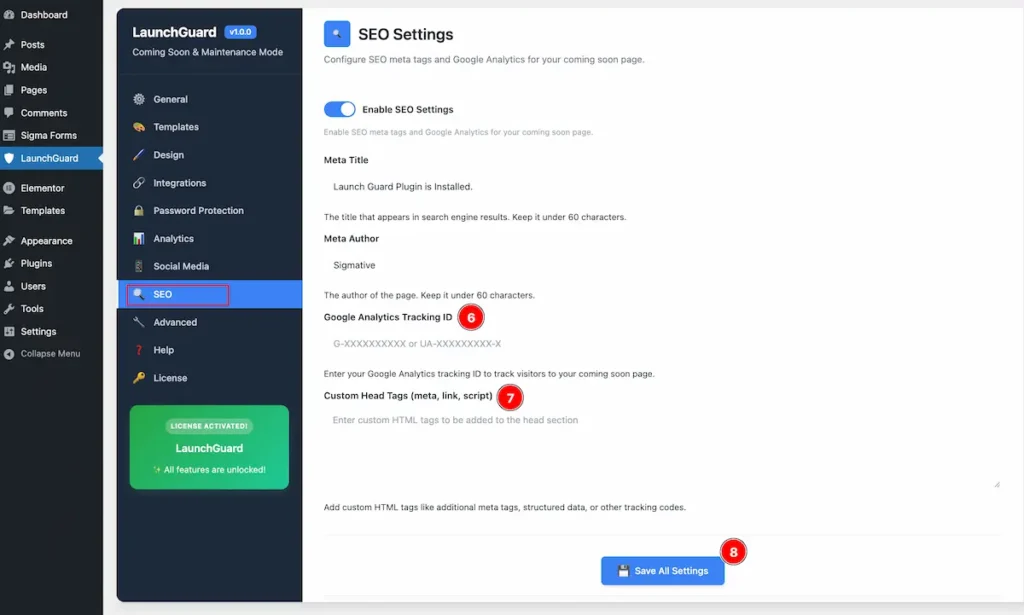
- Google Analytics Tracking ID: Enter your Google Analytics tracking ID to track visitors to your coming soon page.
- Custom Head Tags ( meta, link, script): Add custom HTML tags like additional meta tags, structured data, or other tracking codes.
- Click on the “Save All Setting” button to save it.
Advanced
Navigate to LaunchGuard > Advanced
Control which user roles can bypass the coming soon or maintenance page.
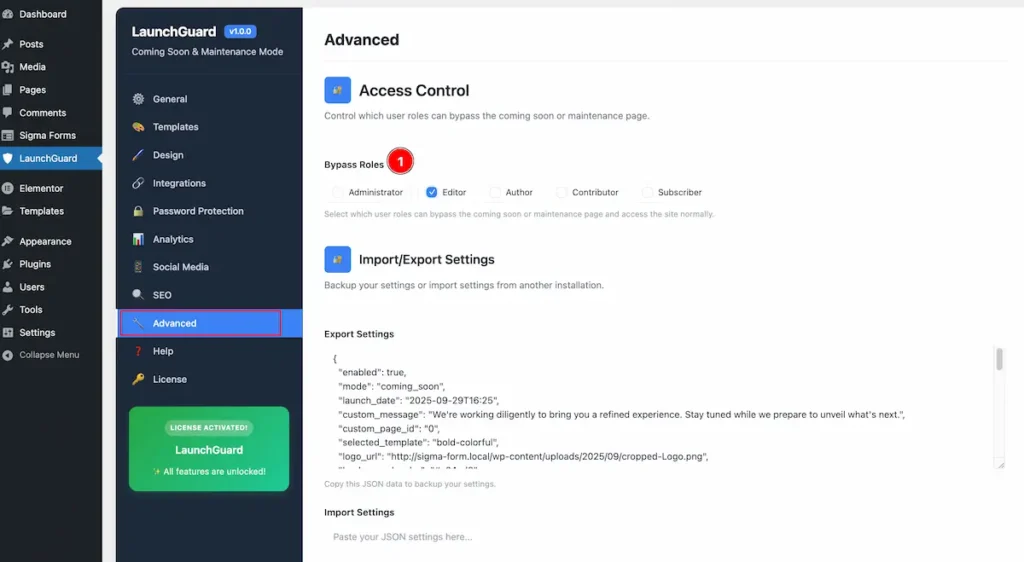
- Bypass Roles: Select which user roles can bypass the coming soon or maintenance page and access the site normally. Available Roles are Administrator, Editor, Author, Contributor, Subscriber.
Preview the Bypass Roles
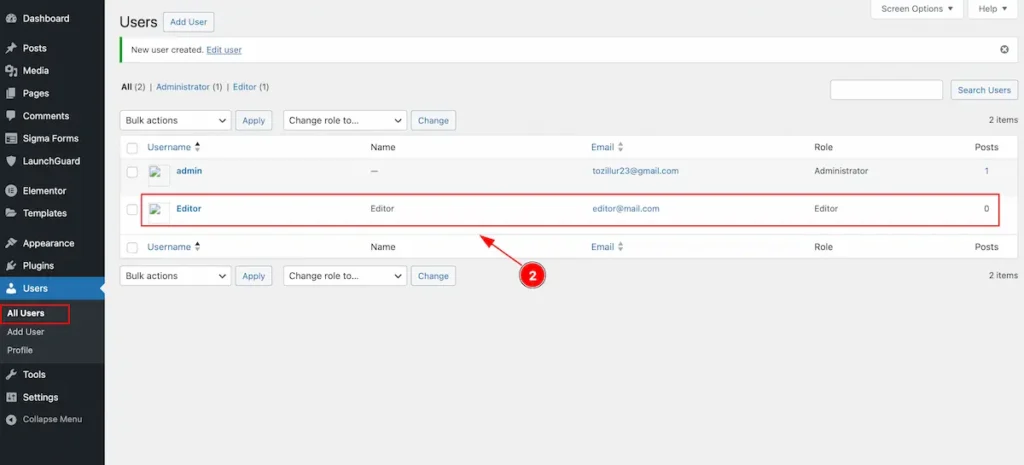
- Create a Editor role. As we selected the Editor role for bypass.
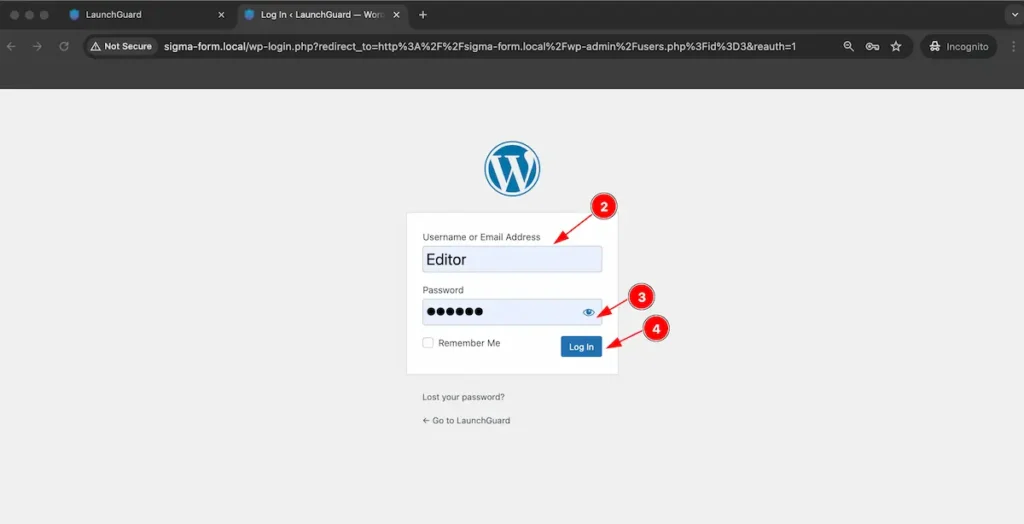
- Username or Email Address: Input the username or email address for login.
- Password: Input the password.
- Log In: Click on the button to login to access to the website.
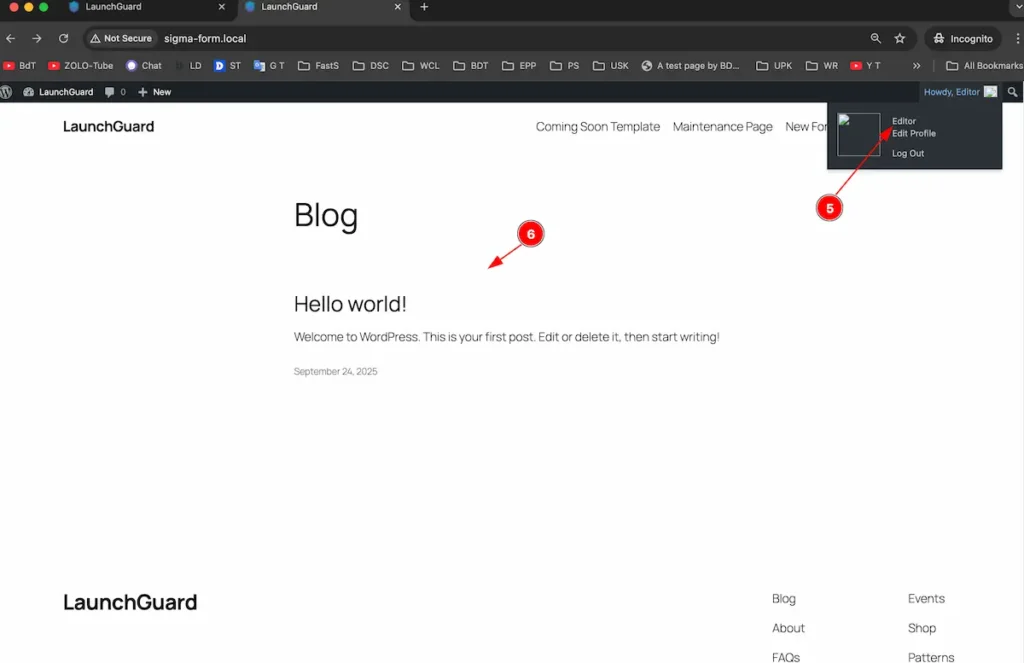
- After login it will not appear the Coming soon. Check the “Editor” role.
- The page appear correctly. It’s bypassing for this Role.
Video Tutorial
Please check the video tutorial to learn more about it. Here is the demo page link of the Launch Guard plugin.
Thanks for staying with us.