The Changelog widget from Element Pack Pro lets you display version history, updates, fixes, and improvements in a clean, organized layout. It helps visitors stay informed about development progress with flexible styling and layout options. This documentation explains how to use and customize the Changelog widget in Elementor.
Enable The Changelog Widget
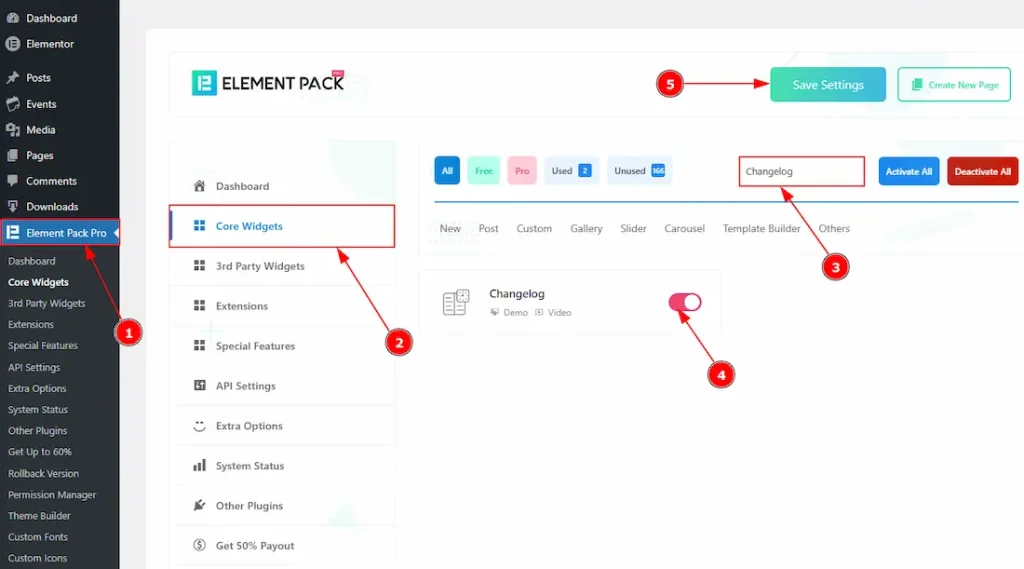
To use the Changelog widget from Element Pack Pro, first, you have to enable the widget.
- Go to WordPress dashboard → Element Pack Pro Plugin dashboard.
- Then, Click the Core Widgets Tab.
- Search the Changelog Widget Name.
- Enable the Changelog Widget.
- Hit the Save Settings Button.
Inserting The Changelog Widget
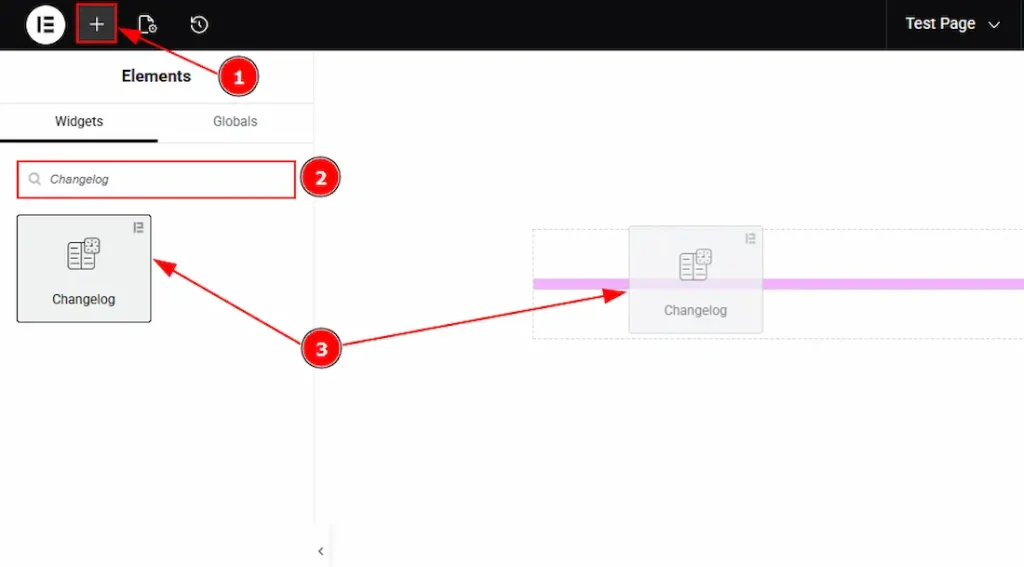
1. Go to the Elementor Editor Page and hit the “+” icon Button.
2. Search the Changelog name.
3. Drag the widget and drop it on the editor page.
How to Create and Get the Changelog File Link
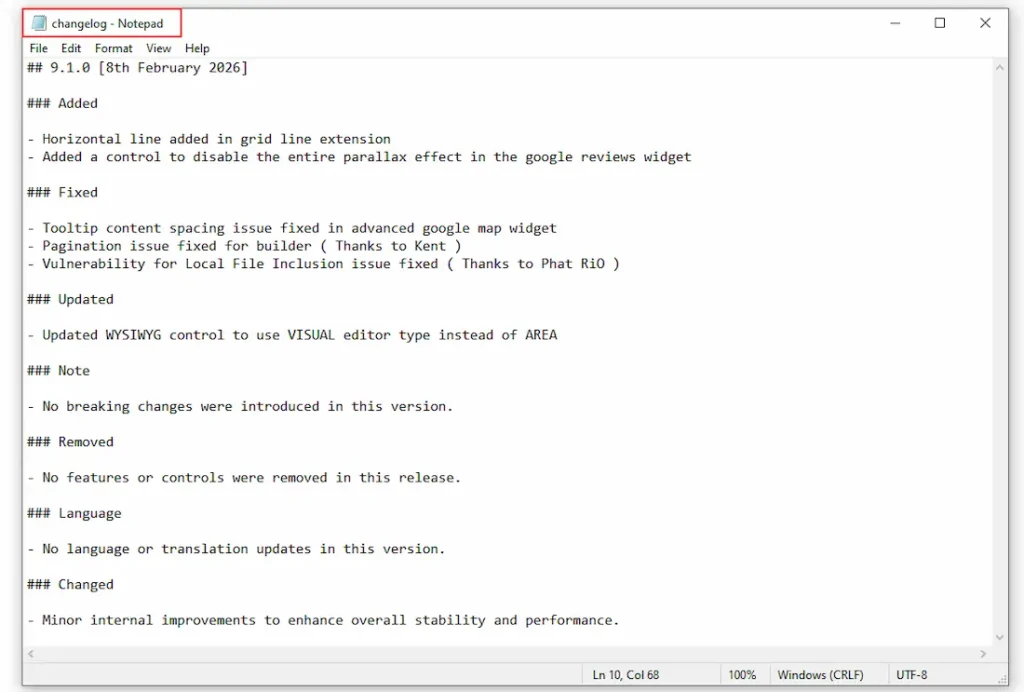
First, create a changelog file containing the information you want to display to your audience. In this example, Notepad is used to add the changelog content, but you may use any text editor of your choice. Ensure the file is saved with a .txt extension.
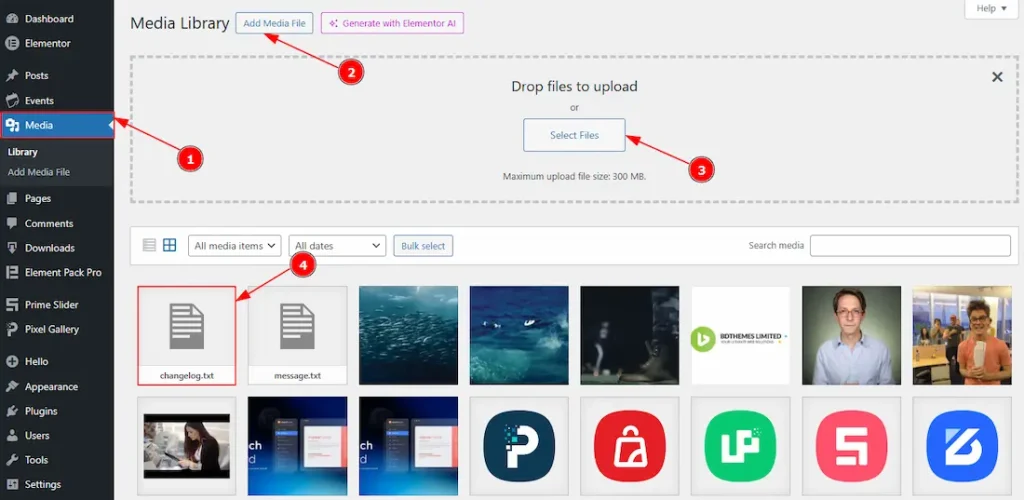
1. Go to WordPress dashboard → Media dashboard.
2. Then, click the Add Media File option.
3. Select files that you have already created or drag and drop the file here.
4. After the upload is completed successfully, you will see the file here. Now click on the file to open it.
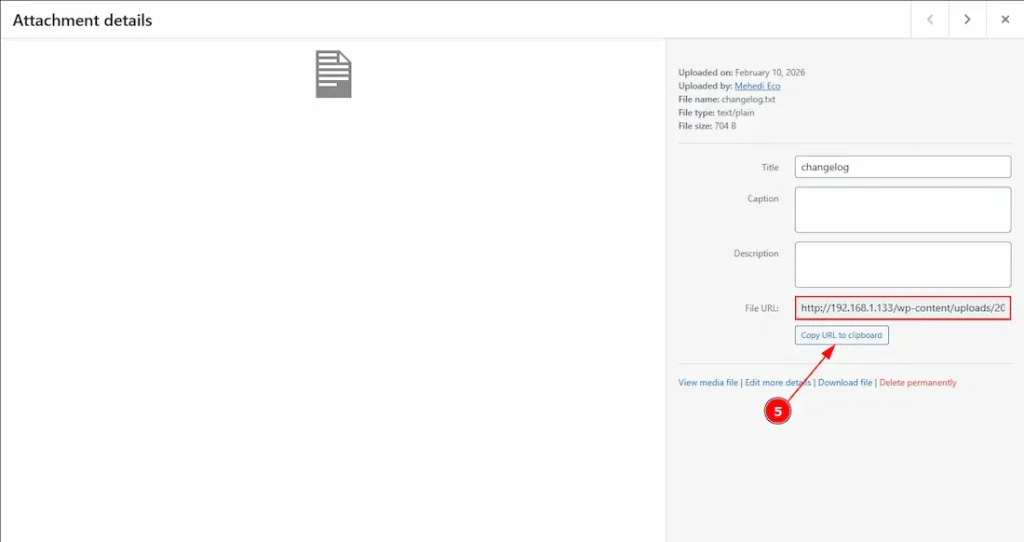
5. After clicking on the file, a pop-up will appear, then click on the Copy URL to clipboard button to copy the file URL to use it on the widget.
Work With The Content Tab
Content Section
Go to Content → Changelog
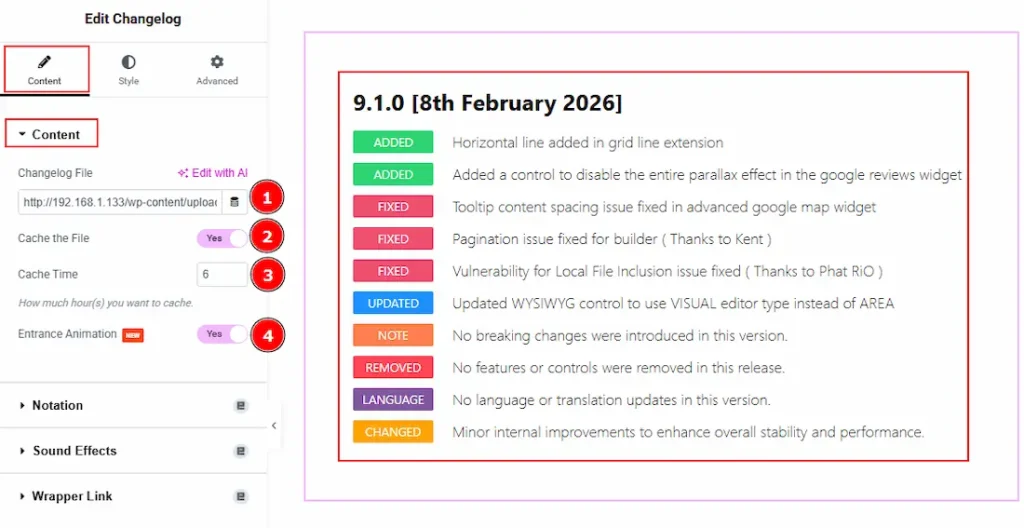
1. Changelog File: This option allows you to add the URL of the changelog file. Please paste the link here that you have already copied from the media files.
2. Cache the File: Enable the switcher to cache the changelog file to improve loading performance by reducing repeated file requests.
3. Cache Time: This option defines how long (in hours) the changelog file will be stored in cache before it refreshes and loads updated content.
4. Entrance Animation: Enable the switcher to add an animation effect when the changelog content appears on the page
Work with The Style Tab
Changelog Section
Go to Style → Changelog
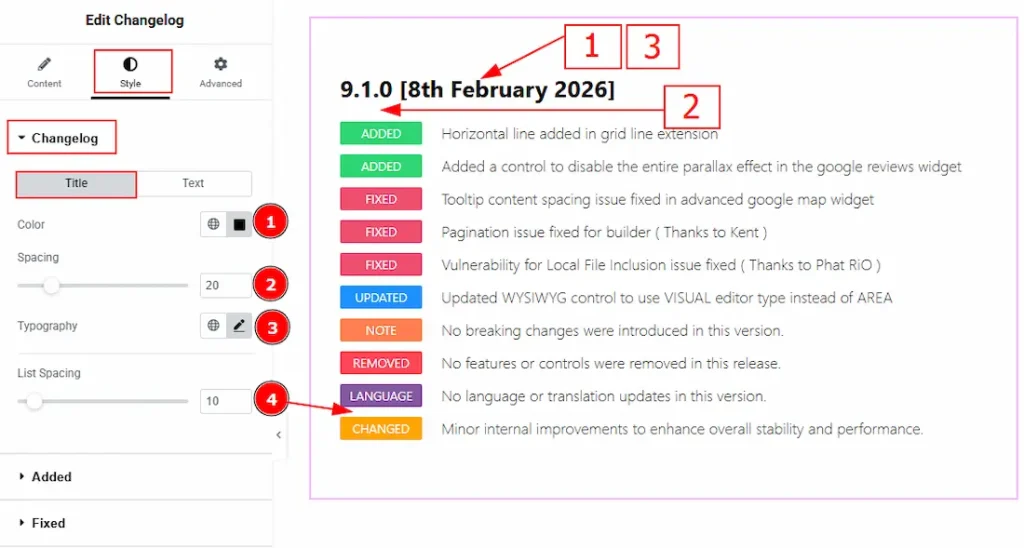
In this section, we have two more tabs. These are Title and Text. Let’s start with the Title tab first –
1. Color: You can change the title text color with this option.
2. Spacing: You can adjust the space between the title and the list with this option.
3. Typography: Change the font family, size, weight, transform, style, decoration, line height, letter spacing, and word spacing from here.
4. List Spacing: You can adjust the space between the list items with this option.
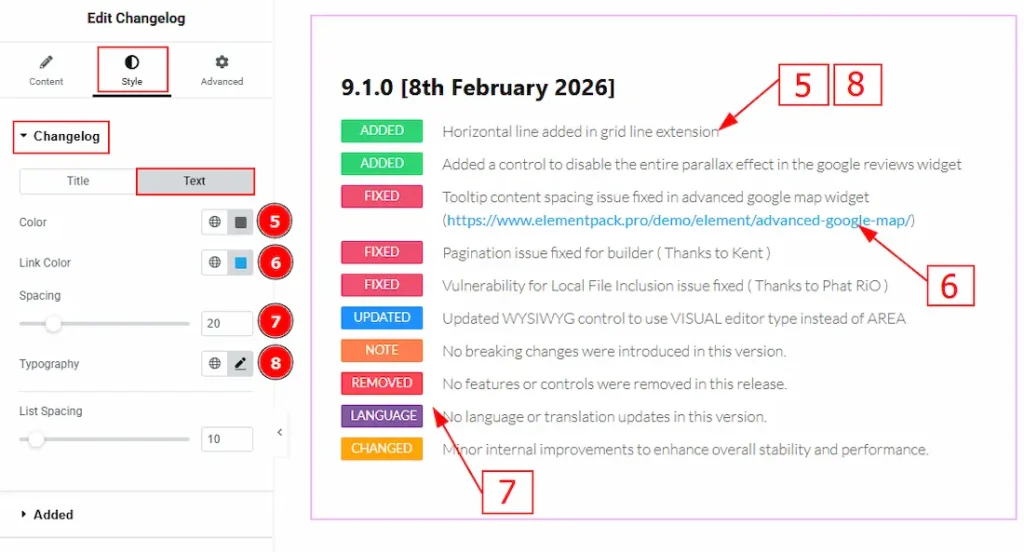
Now, let’s proceed to the Text Tab –
5. Color: You can make changes to the list text color with this option.
6. Link Color: You can make changes to the link text color with this option.
7. Spacing: You can adjust the space between the badges and the text with this option.
8. Typography: Change the font family, size, weight, transform, style, decoration, line height, letter spacing, and word spacing from here.
Added Section
Go to Style → Added
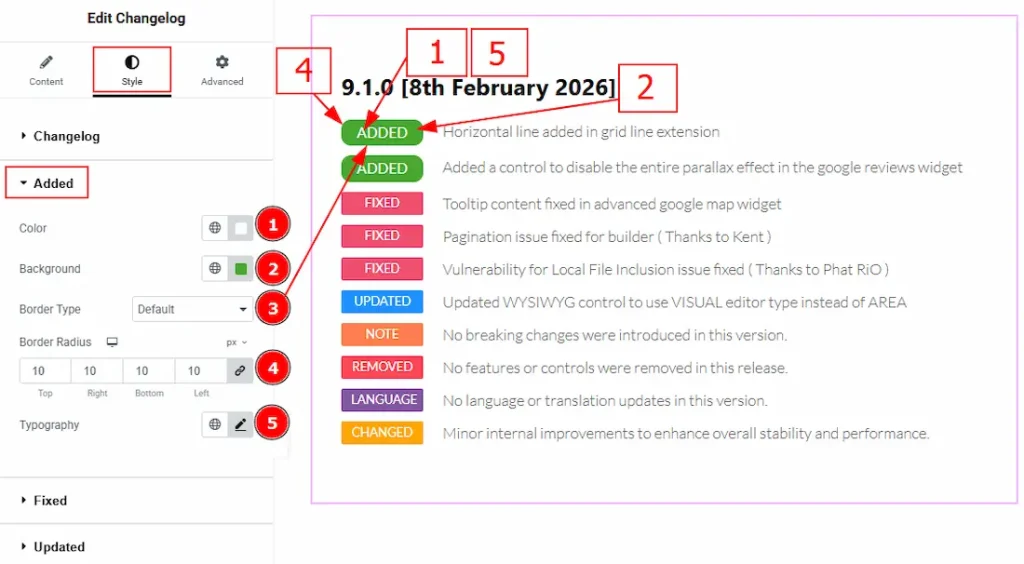
1. Color: You can make changes to the added badge text color with this option.
2. Background: You can make changes to the badge background color with this option.
3. Border Type: You can add or change the border type with this option.
4. Border Radius: You can control the roundness of the border with this option.
5. Typography: Change the font family, size, weight, transform, style, decoration, line height, letter spacing, and word spacing from here.
Fixed Section
Go to Style → Fixed
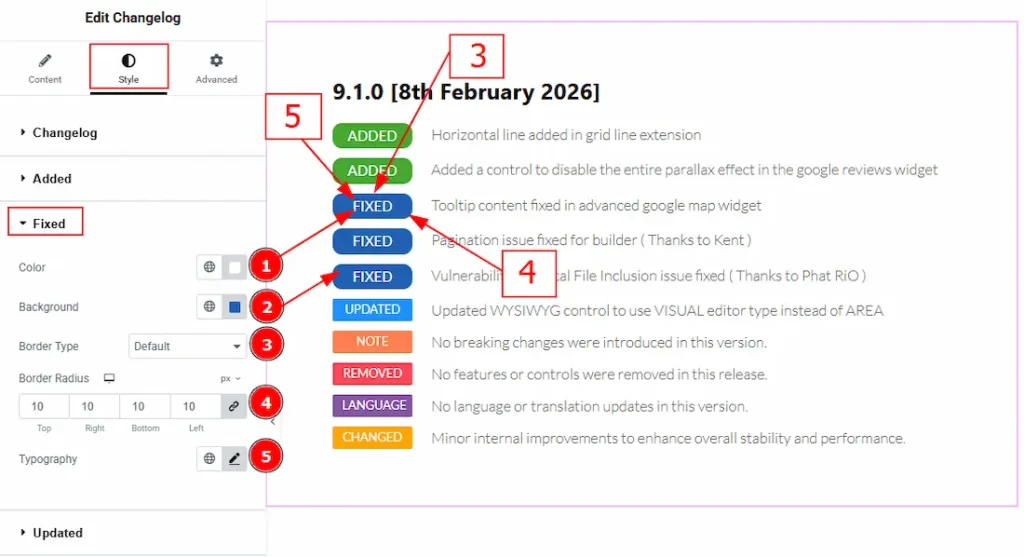
1. Color: You can make changes to the fixed badge text color with this option.
2. Background: You can make changes to the badge background color with this option.
3. Border Type: You can add or change the border type with this option.
4. Border Radius: You can control the roundness of the border with this option.
5. Typography: Change the font family, size, weight, transform, style, decoration, line height, letter spacing, and word spacing from here.
Updated Section
Go to Style → Updated
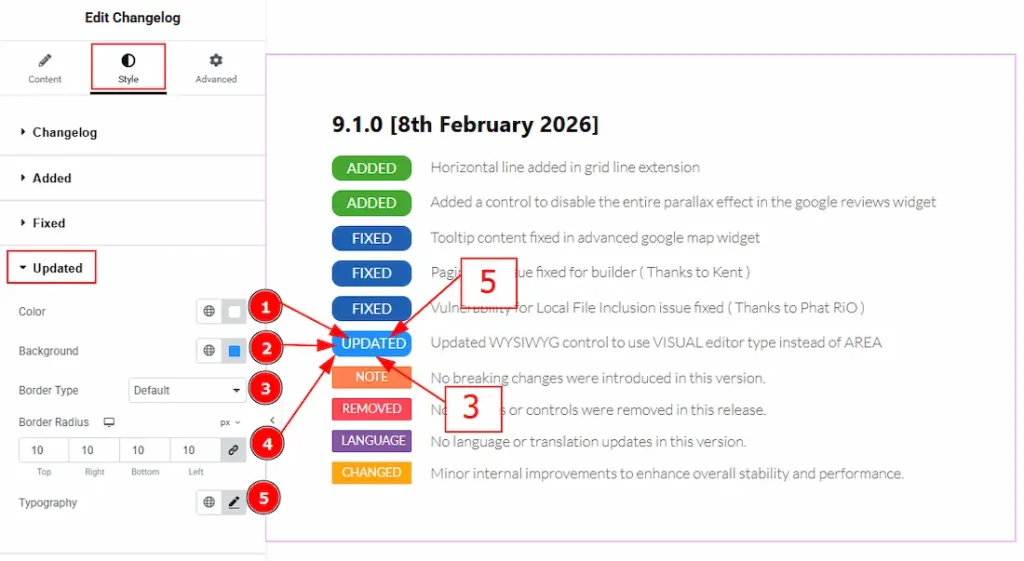
1. Color: You can make changes to the updated badge text color with this option.
2. Background: You can make changes to the badge background color with this option.
3. Border Type: You can add or change the border type with this option.
4. Border Radius: You can control the roundness of the border with this option.
5. Typography: Change the font family, size, weight, transform, style, decoration, line height, letter spacing, and word spacing from here.
Note Section
Go to Style → Note
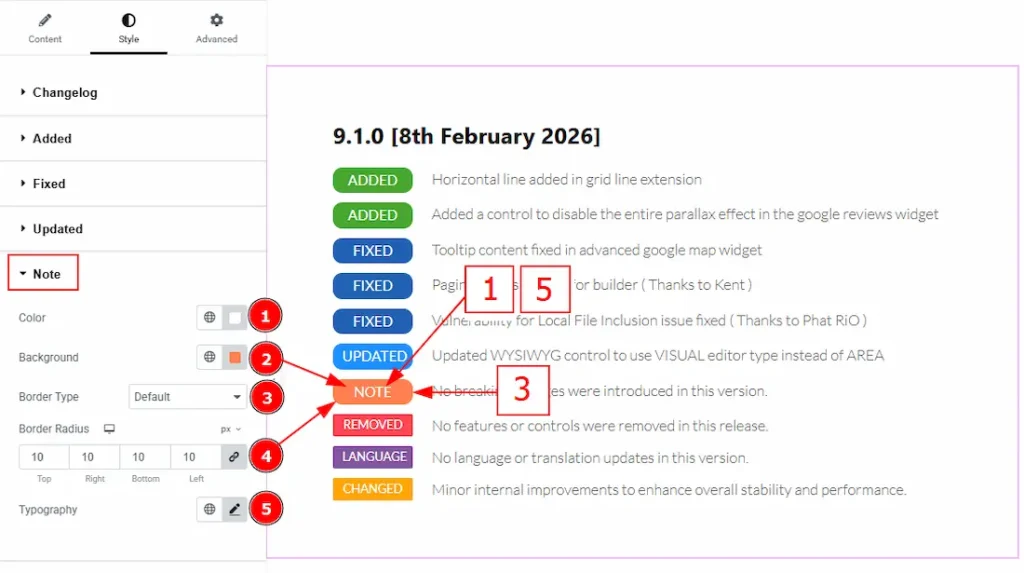
1. Color: You can make changes to the note badge text color with this option.
2. Background: You can make changes to the badge background color with this option.
3. Border Type: You can add or change the border type with this option.
4. Border Radius: You can control the roundness of the border with this option.
5. Typography: Change the font family, size, weight, transform, style, decoration, line height, letter spacing, and word spacing from here.
Removed Section
Go to Style → Removed
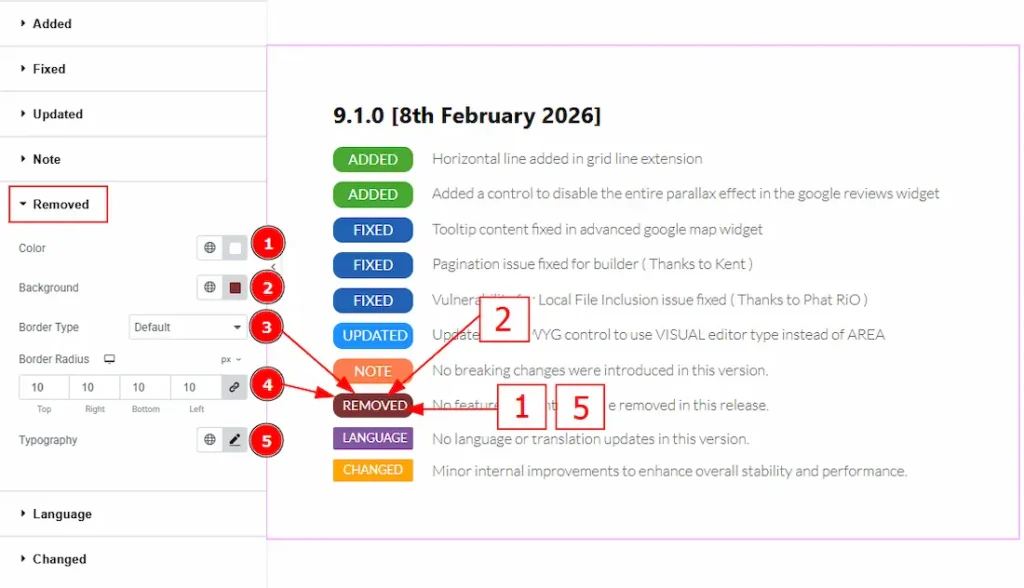
1. Color: You can make changes to the removed badge text color with this option.
2. Background: You can make changes to the badge background color with this option.
3. Border Type: You can add or change the border type with this option.
4. Border Radius: You can control the roundness of the border with this option.
5. Typography: Change the font family, size, weight, transform, style, decoration, line height, letter spacing, and word spacing from here.
Language Section
Go to Style → Language
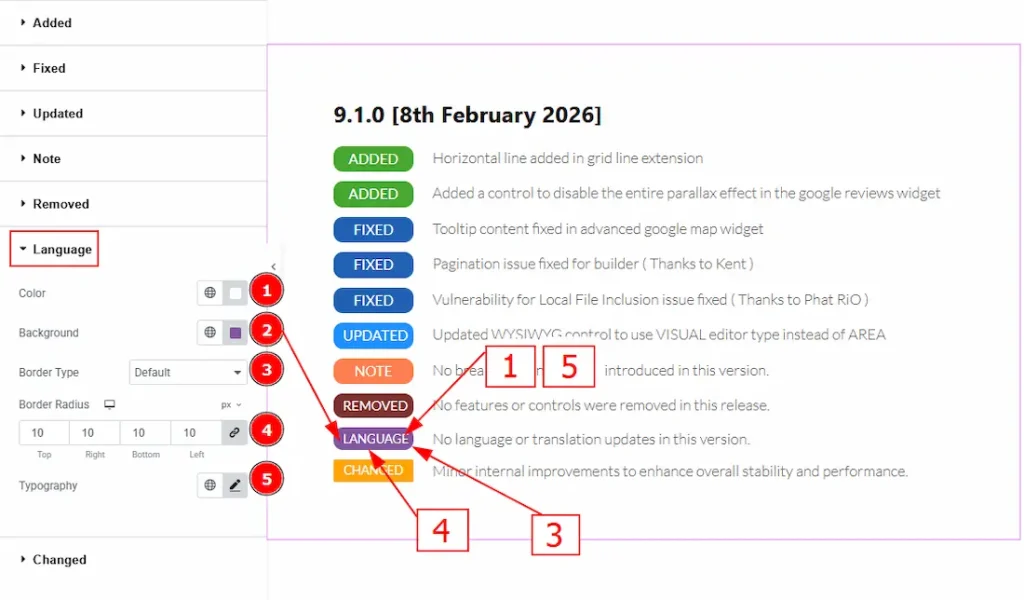
1. Color: You can make changes to the language badge text color with this option.
2. Background: You can make changes to the badge background color with this option.
3. Border Type: You can add or change the border type with this option.
4. Border Radius: You can control the roundness of the border with this option.
5. Typography: Change the font family, size, weight, transform, style, decoration, line height, letter spacing, and word spacing from here.
Changed Section
Go to Style → Changed
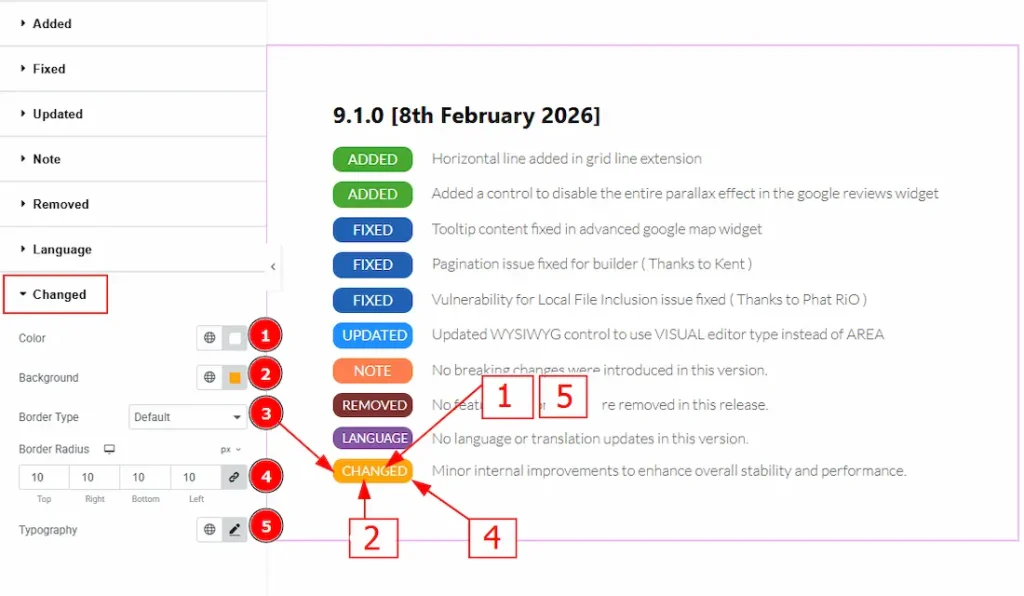
1. Color: You can make changes to the changed badge text color with this option.
2. Background: You can make changes to the badge background color with this option.
3. Border Type: You can add or change the border type with this option.
4. Border Radius: You can control the roundness of the border with this option.
5. Typography: Change the font family, size, weight, transform, style, decoration, line height, letter spacing, and word spacing from here.
All done! You have successfully customized the Changelog widget on your website.
Video Assist
You can also watch the video tutorial to learn more about the Changelog widget. Please visit the demo page for examples.
Thanks for being with us.