
The Barcode widget is a modern solution for product branding and identification, fully integrated into Element Pack. It allows you to generate and display multiple barcode types using a single widget, making barcode management simple and efficient on your website. In this documentation, we will discuss the customization of the Barcode widget, brought to you by the Element Pack Pro for Elementor.
Enable The Barcode Widget
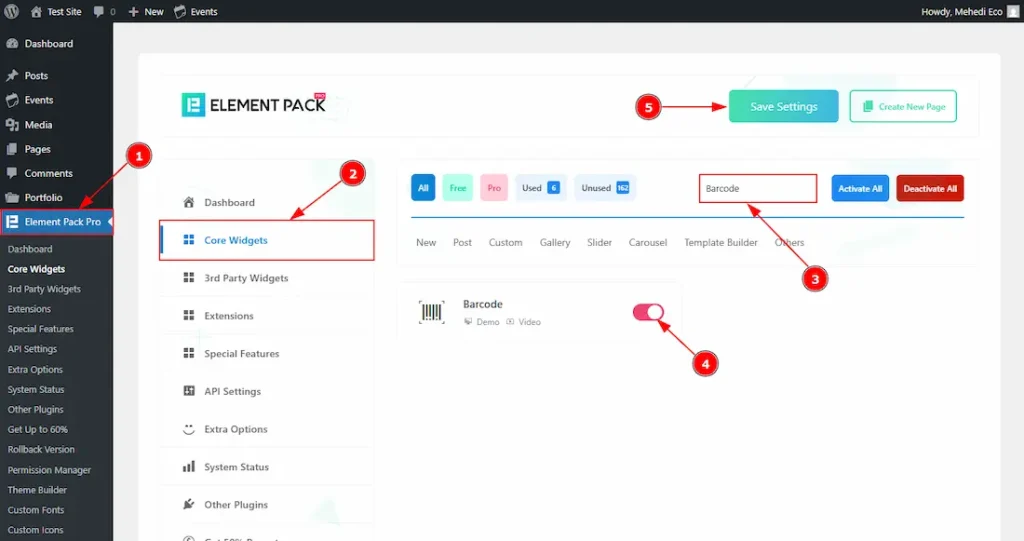
To use the Barcode widget from Element Pack Pro, first, you have to enable the widget.
- Go to WordPress dashboard → Element Pack Pro Plugin dashboard.
- Then, Click the Core Widgets Tab.
- Search the Barcode Widget Name.
- Enable the Barcode Widget.
- Hit the Save Settings Button.
Inserting The Barcode Widget
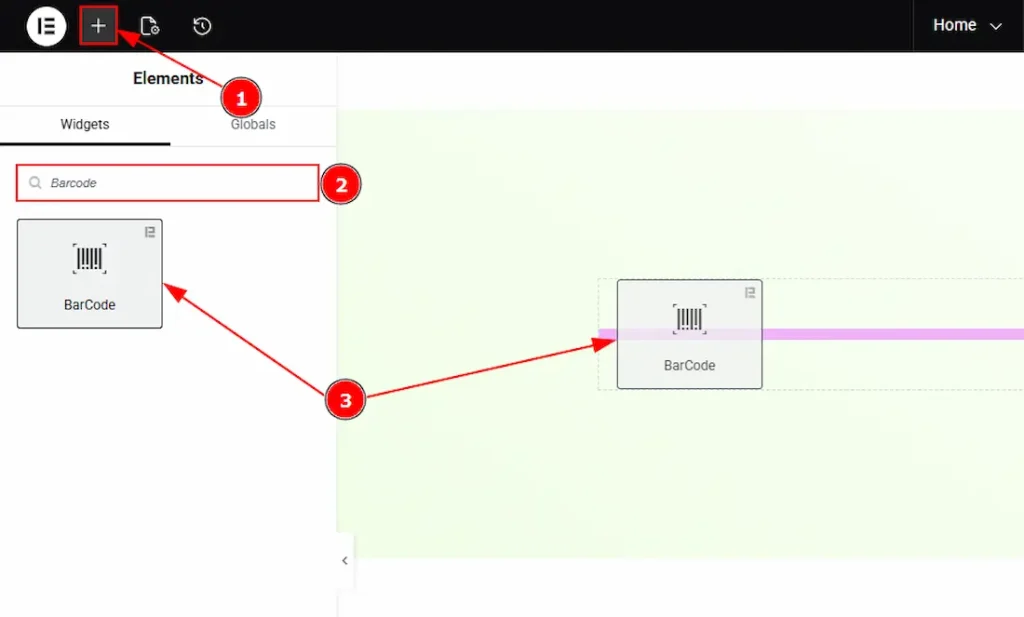
1. Go to the Elementor Editor Page and hit the “+” icon Button.
2. Search the Barcode name.
3. Drag the widget and drop it on the editor page.
Work With The Content Tab
Barcode Section
Go to Content → Barcode

1. Alignment: You can set the position of the barcode to left, center, or right with this option.
2. Format: This option specifies the barcode standard used for generation. Each format supports specific input rules, and selecting the correct format ensures proper validation. If the content does not match the selected format, the barcode may not generate correctly. You can select the format according to your preference with this option. The provided formats are –
- Auto: Automatically detects and applies a suitable barcode format based on the entered content. This option is recommended when a specific barcode standard is not required.
- EAN-13: Encodes a 13-digit numeric value and is commonly used for product identification in retail systems. The final digit is a check digit used for validation. If the check digit is not included, it is calculated automatically. Example: 5901234123457
- EAN-8: Encodes an 8-digit numeric value and is typically used for small product packaging. Includes a mandatory check digit. Example: 12345678
- EAN-5: A supplementary barcode format used with EAN-13 or UPC barcodes to represent additional information such as pricing. Example: 12345
- EAN-2: A supplementary barcode format commonly used for magazines and periodicals to indicate issue numbers. Example: 12
- UPC: Encodes a 12-digit numeric value and is widely used in retail systems in the United States and Canada. The final digit is a required check digit used for verification. Example: 123456789999
- PHARMACODE: Encodes a single numeric value and is primarily used in pharmaceutical packaging. Supported values range from 3 to 131070. Example: 12345
- CODABAR: Supports numeric values and specific start and stop characters. Commonly used in libraries, blood banks, and logistics systems. Example: A123456A
- MSI: Encodes numeric values (0–9) and is commonly used for inventory control and warehouse management. Checksum calculation is applied automatically when required. Example: 1234
- ITF14: Encodes a 14-digit numeric value and is used for packaging and shipping units. The final digit is a checksum. If omitted, it is calculated automatically. Example: 12345678901231
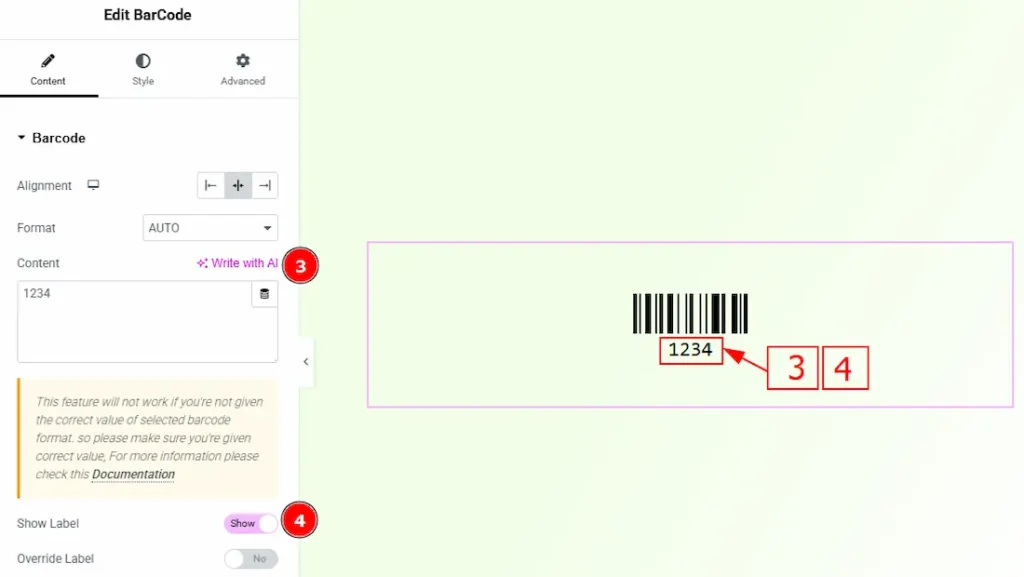
3. Content: The Content field holds the data to encode in the barcode. It must meet the selected Format’s requirements; otherwise, the barcode may not generate correctly.
4. Show Label: Enable the switcher to show the label of the barcode with this option.
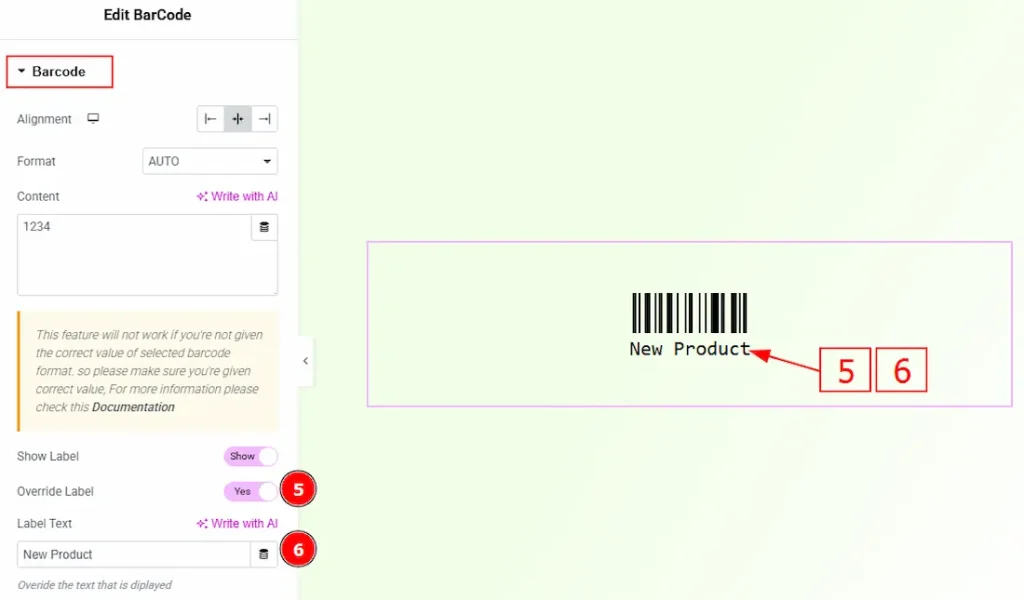
5. Override Label: Enable the switcher to override the label with this option.
6. Label Text: You can input the text that you want to override with the default label in this field.
Work with The Style Tab
Barcode Section
Go to Style → Barcode
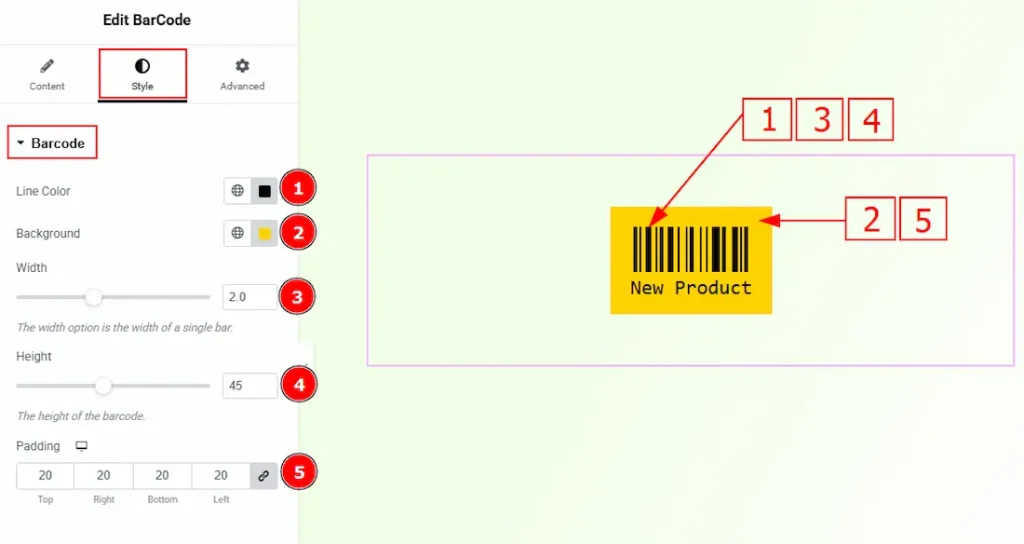
1. Line Color: You can make changes to the barcode line color with this option.
2. Background: You can make changes to the barcode background color with this option.
3. Width: You can adjust the width of the barcode line with this option.
4. Height: You can adjust the height of the barcode line with this option.
5. Padding: You can adjust the inner space of the barcode field with this option.
Label Section
Go to Style → Label
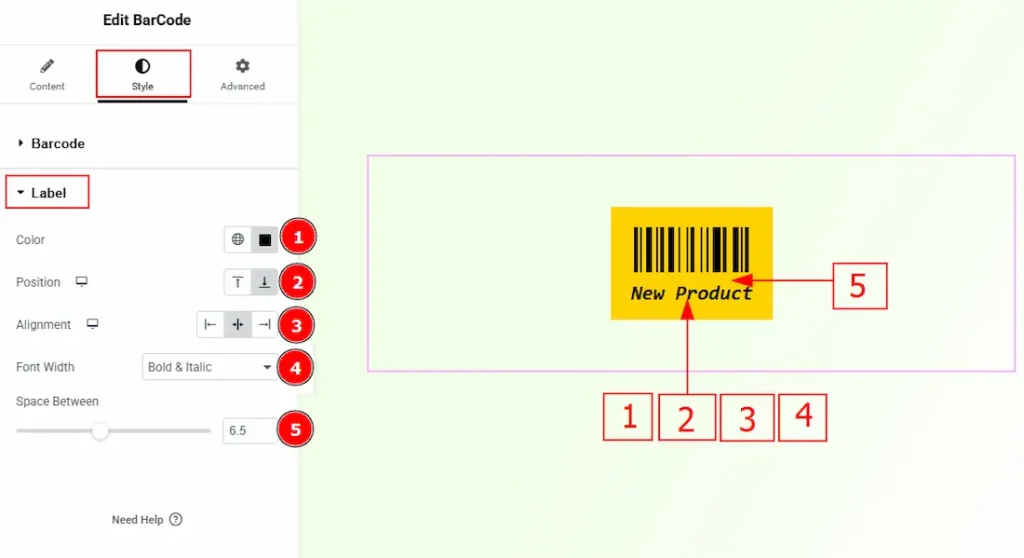
1. Color: You can change the label text color with this option.
2. Position: You can set the position of the label text to top or bottom with this option.
3. Alignment: You can set the position of the label text to left, center or right with this option.
4. Font Width: You can set the font width to Normal, Bold, Italic or Bold & Italic with this option.
5. Space Between: You can adjust the space between the barcode line and the label text with this option.
All done! You have successfully customized the Barcode widget on your website.
Video Assist
You can also watch the video tutorial to learn more about the Barcode widget. Please visit the demo page for examples.
Thanks for being with us.