In this documentation, we will explain how to use and customize the Wrapper Link Extension brought to you by Element Pack Pro.
Enabling The Elementor Wrapper Link Extension
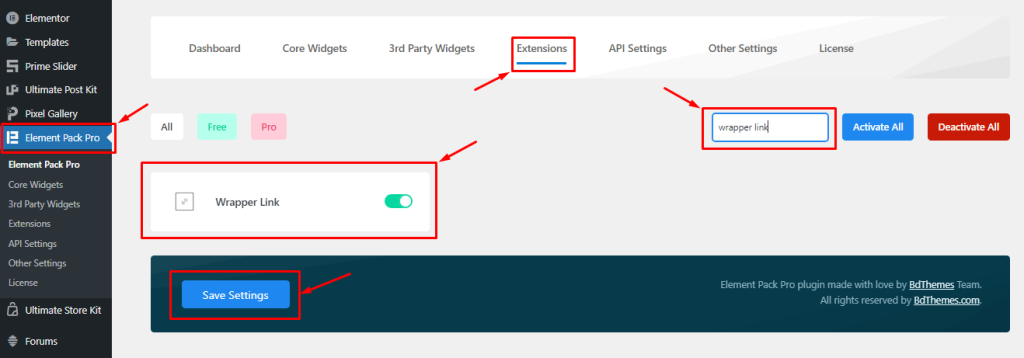
Go to Dashboard > Element Pack Pro > Extensions > and turn on the Wrapper Link switcher and save settings.

Start With Any Widget Or Design
Wrapper Link works with existing content on your page. So, let’s start with random content to demonstrate the feature.
Step 1:- Use with widgets/content
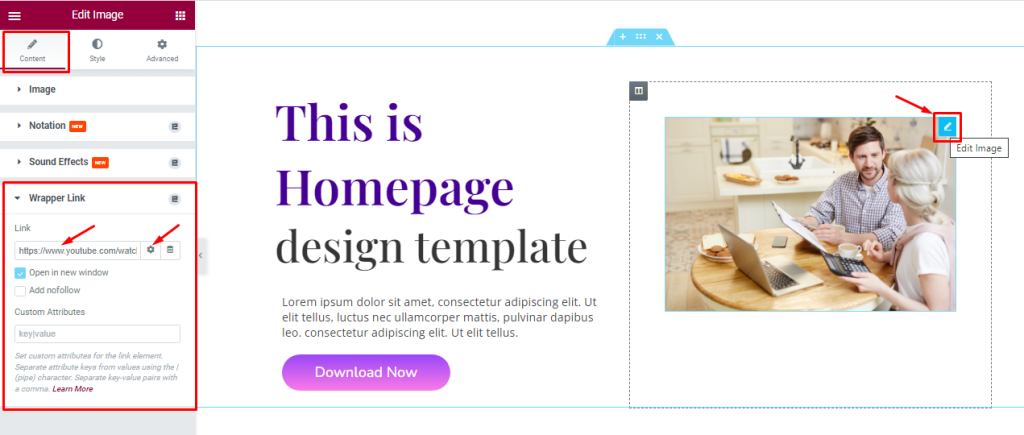
We used the Wrapper Link extension on the image to turn them into clickable objects.

- Click on Edit Image
- Go to Content tab > Wrapper Link
- Paste your link and save settings
Now, the image becomes a clickable object that will redirect to the target URL when clicked on.
Step-2
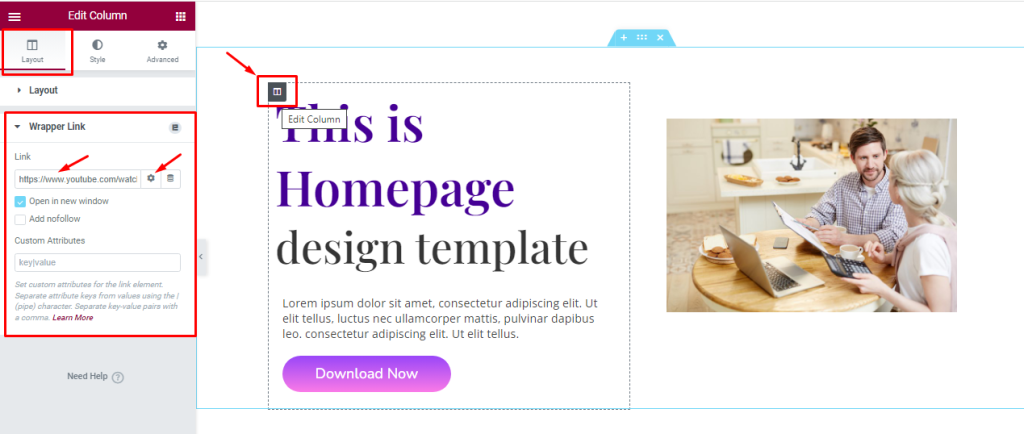
We inserted the Wrapper Link Extension into a column.

You can make your whole column into a clickable area by using a wrapper link inside it.
- Click on Edit Column Section
- Go to Layout Tab > Wrapper Link
- Paste your link and save settings
Step-3
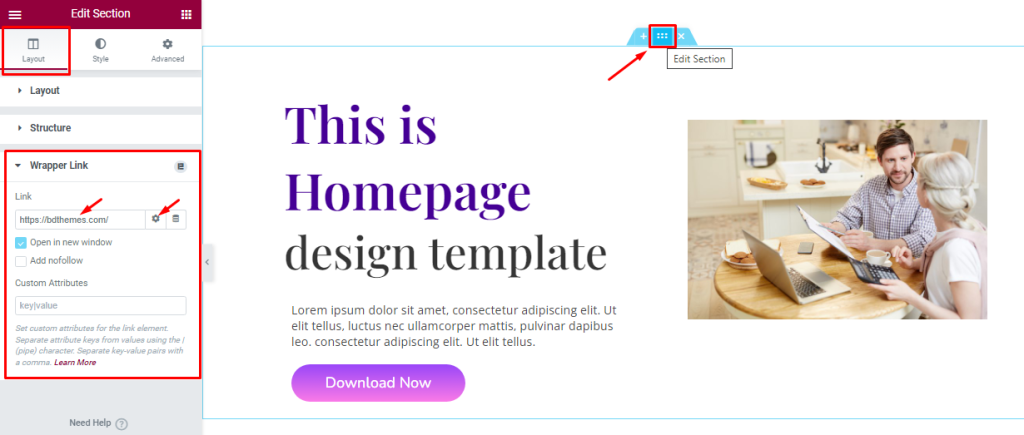
We inserted the Wrapper Link Extension into a Section.

With this, the whole section or container would show as a clickable object and will redirect anyone who clicks anywhere within the section.
- Click on Edit Section
- Go to Layout Tab > Wrapper Link
- Paste your link and save settings
Additionally, you can select the Open in new window option, the Add nofollow option, or use the Custom Attribute field.
Video Assist
You can watch this video featuring the usage of the Elementor Wrapper Link Extension. Don’t forget to visit the demo page for more examples.
Thanks for staying with us.
