In this documentation, we will show you how to customize the Product Meta Widget by Ultimate Store Kit.
Enable the Product Meta Widget
To use the Short Description widget by Ultimate Store Kit, first, you have to enable the widget.
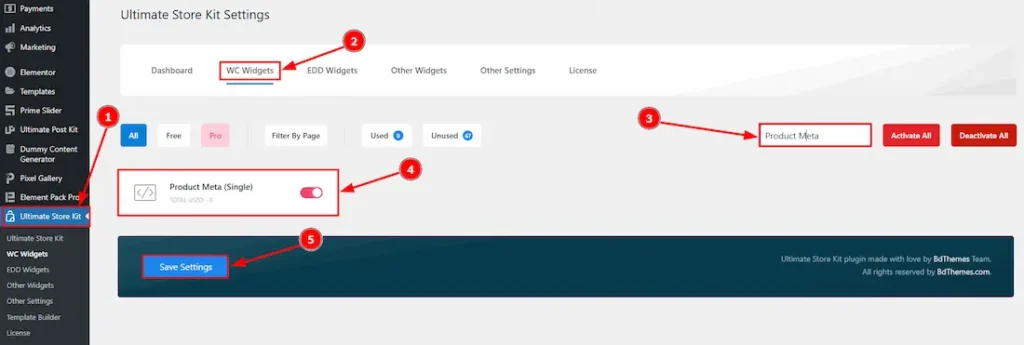
- Go to WordPress > Ultimate Store Kit Plugin dashboard.
- Then Click the WC Widgets Tab.
- Search the Product Meta Widget Name.
- Enable the Product Meta Widget.
- Hit the Save Settings Button.
Inserting The Product Meta widget
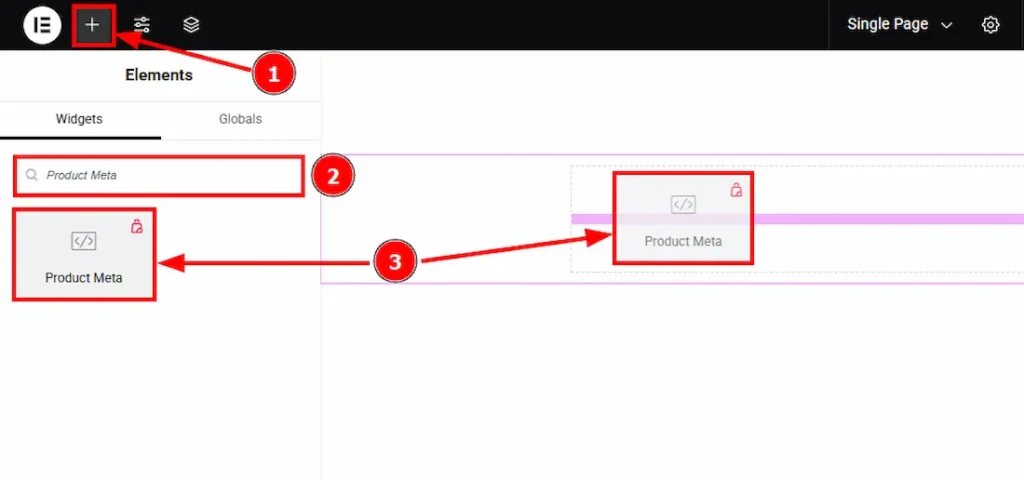
- Go to the Elementor Editor Page and Hit the “+” (Add Element) icon button.
- Search the Product Meta widget.
- Drag the widget and drop it on the editor page
Work with the Style Tab of Product Meta
Product Meta Section
Go to Style > Product Meta
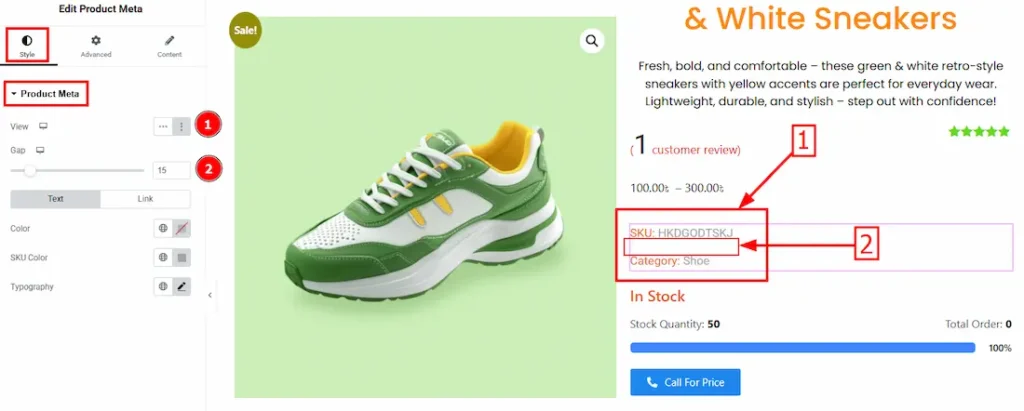
Come to the Product Meta section, you will get two subsections; Text and Link.
1. View: You can select the view option here. There are two options – Inline & List. Here we select the list option.
2. Gap: You can adjust the space by using this option.
Text Sub – Section
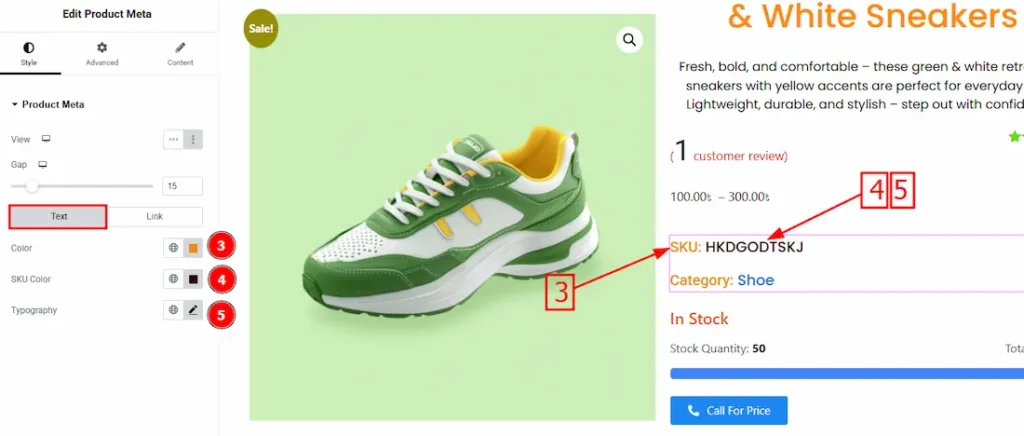
3. Color: You can set the text color here by using this option.
4. SKU Color: You can set the SKU text color here by using this option.
5. Typography: Change the SKU text’s font family, size, weight, transform, style, decoration, line height, letter spacing, and word spacing from here.
Link Sub-Section
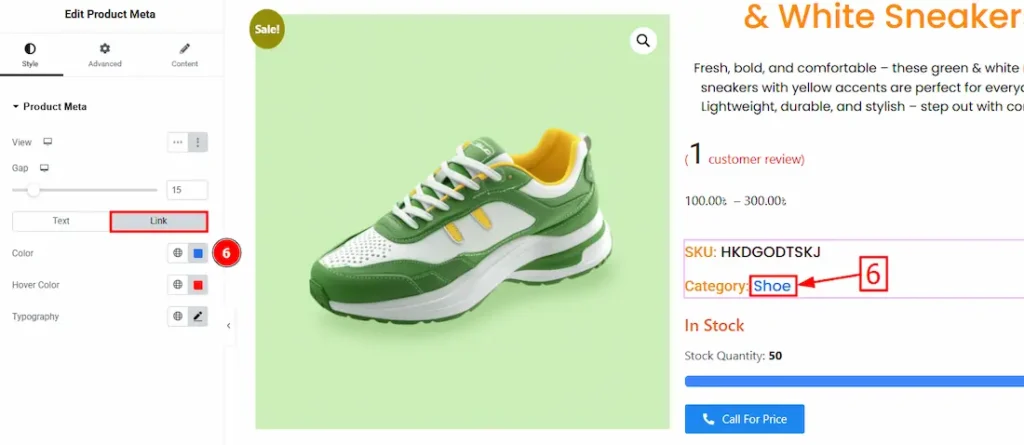
6. Color: You can set the category text link color here by using this option.

7. Hover Color: You can set the category text link hover color here by using this option.
8. Typography: Change the category text’s font family, size, weight, transform, style, decoration, line height, letter spacing, and word spacing from here.
All done! You have successfully customized the Product Meta widget on your website.
Video Assist
The video will come soon. Please visit the demo page for examples.
Thanks for being with us.