In this guide, we will show you how to customize the Swift Checkout plugin to create a seamless, lightning-fast checkout experience that delights customers and supports your business goals.
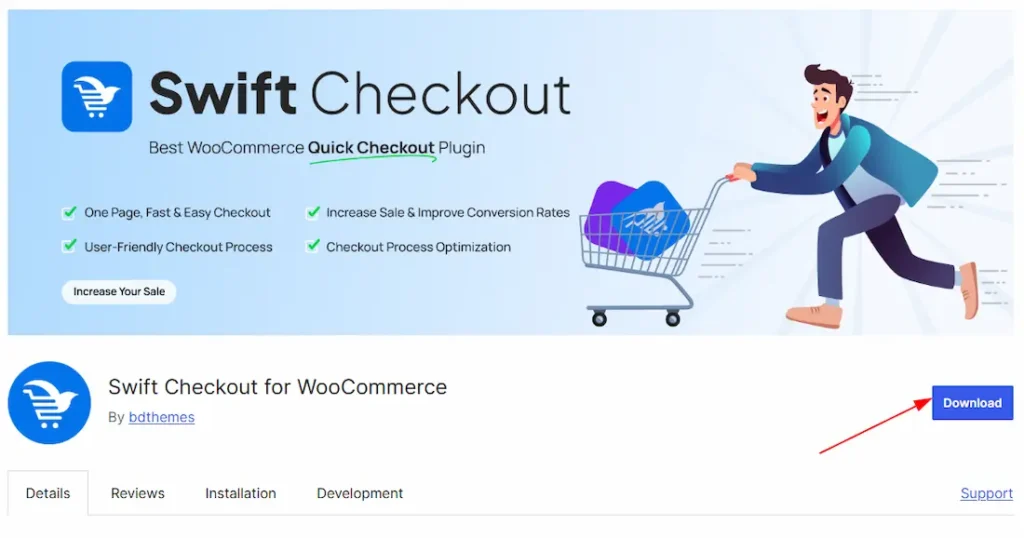
What is The Swift Checkout Plugin?
Swift Checkout is a powerful WooCommerce optimization plugin designed to turn your checkout process into a seamless, high-converting experience. It eliminates long, complicated forms and replaces them with a sleek, lightning-fast interface that keeps customers engaged and encourages more completed purchases.
Built using the latest web technologies and UX best practices, Swift Checkout helps reduce cart abandonment, boost customer satisfaction, and significantly increase conversion rates. Whether you run a small online store or a large eCommerce site, this plugin ensures your checkout is smooth, efficient, and optimized for success.
Why Choose The Swift Checkout Plugin?
We hope everyone likes the Swift Checkout plugin for the following features-
- One-page checkout solution- your cart and checkout are completed on one page.
- Dual Page Builder Support – Works with both Elementor and Gutenberg.
- Shortcode Support – Use anywhere with simple shortcodes.
- Template Override – Full control over checkout appearance.
- Smart Field Control: Easily manage required and optional fields with drag-and-drop.
- Seamless Integration: Fully compatible with WooCommerce, payment gateways, and shipping methods.
- Developer-Friendly: Clean code with hooks and filters for easy customization.
- Performance Optimized: Lightweight, fast, and built to handle high traffic smoothly.
- Lightning-Fast AJAX Processing – No page reloads, instant updates
- Mobile-First Responsive Design – Perfect on all devices
- Customizable Checkout Fields – Tailor forms to your business needs
- Smart Auto Add-to-Cart – Streamline product selection
- Universal Payment Gateway Support – Compatible with all WooCommerce payment methods
- Variable Product Support – Handle complex product variations effortlessly
- Real-Time Cart Updates – Dynamic quantity changes and price calculations
- Translation Ready – Fully internationalized for global stores
- Performance Optimized – Minimal impact on site speed
How to Set Up and Download the Swift Checkout Plugin
To get started with the Swift Checkout plugin, first download it from the official WordPress.org repository. For your convenience, we’ve included the download link below. Simply click the link and download the plugin. Here is the download link. Here is the download link.
Let’s Start to Customize the Plugin
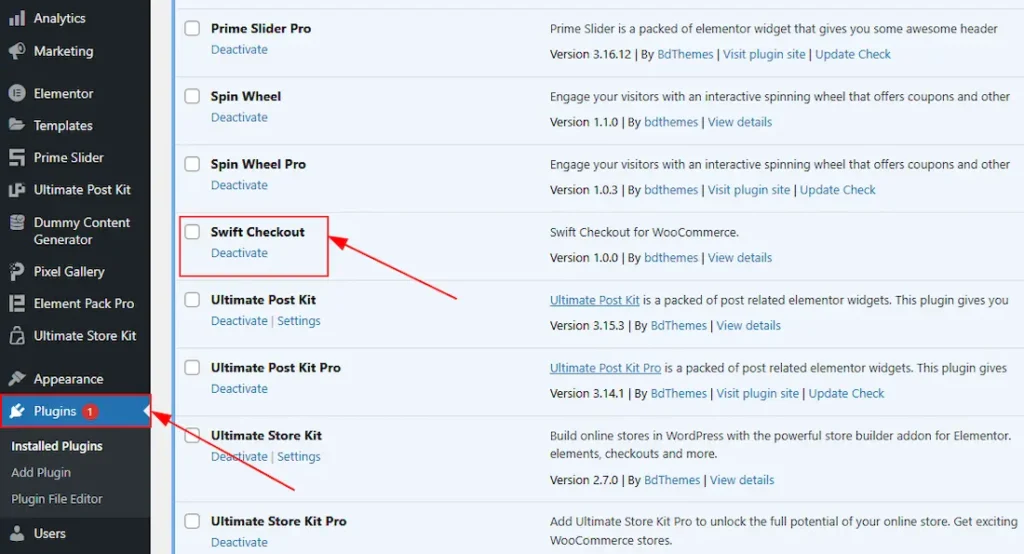
After downloading the plugin, make sure it’s successfully activated. To verify this, go to your WordPress Dashboard → Plugins, and check if Swift Checkout is listed as Active.
Once activated, you’ll find the plugin available within the editor page for use.
Inserting The Swift Checkout Widget
To demonstrate the Swift Checkout feature, we’ve used a pre-designed layout, as shown in the screenshot below. However, you’re free to create and use your own custom design to implement this feature as per your needs.
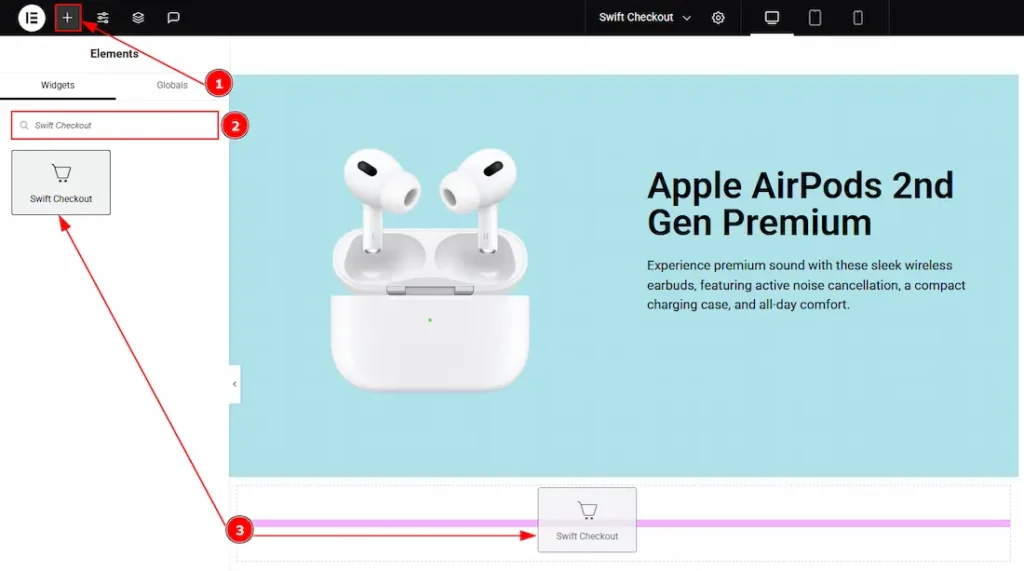
1. Go to the Elementor Editor Page and click the “+” icon Button.
2. Search the Swift Checkout widget.
3. Drag the widget and drop it on the editor page.
Note: You can use the Swift Checkout widget on both the Elementor page builder and Gutenberg block editor.
Here we are using it on Elementor editor. In the same way, you can also use the Swift Checkout block in the Gutenberg block editor.
Work With The Content Tab
Content Section
Go to Content > Content
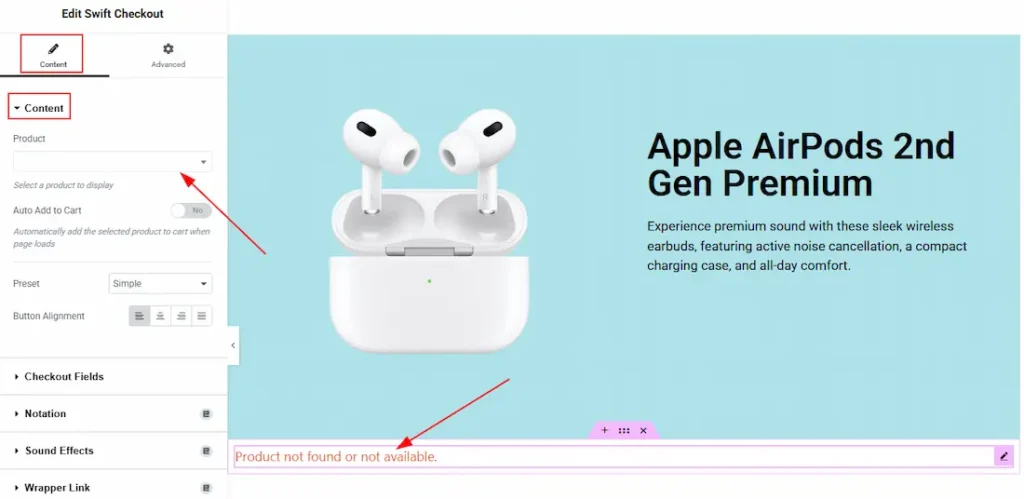
Before using the Swift Checkout feature, make sure you have added some WooCommerce products to your site. Then, select the specific product you want to link with the Swift Checkout widget. If no product is linked or available, the widget will display the message: “Product not found or not available.”
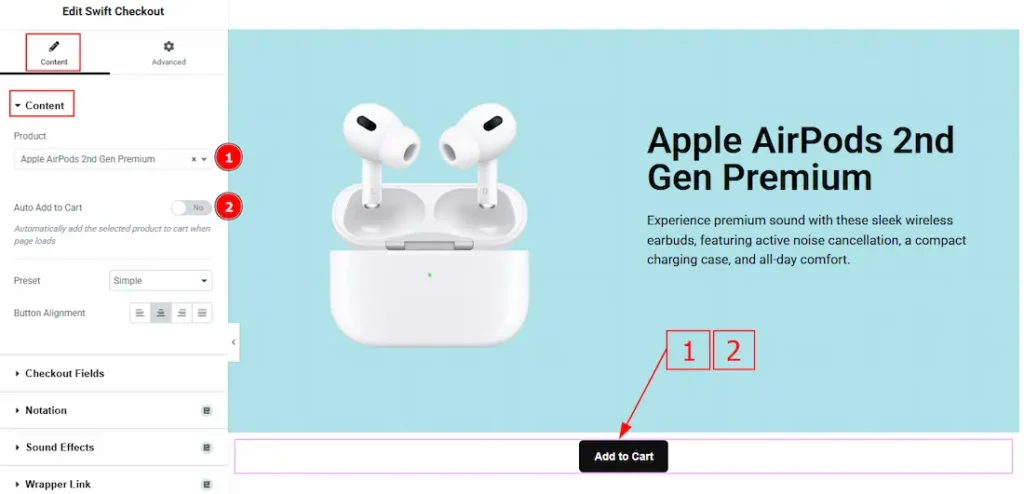
1. Product: You can select the product that you want to link to the swift checkout button with this option.
2. Auto Add to Cart: Automatically adds the selected product to the cart when the page loads. Enable this option to streamline the checkout process.
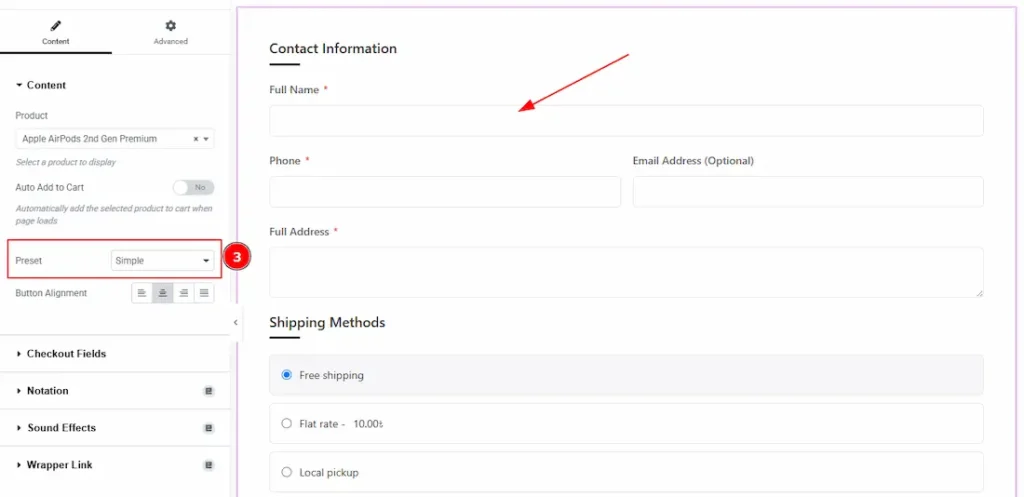
3. Preset: This option lets you select a ready-made form layout style. Right now, we have added two presets. These are simple and Modern. Here we choose the simple style. You can choose one of them.
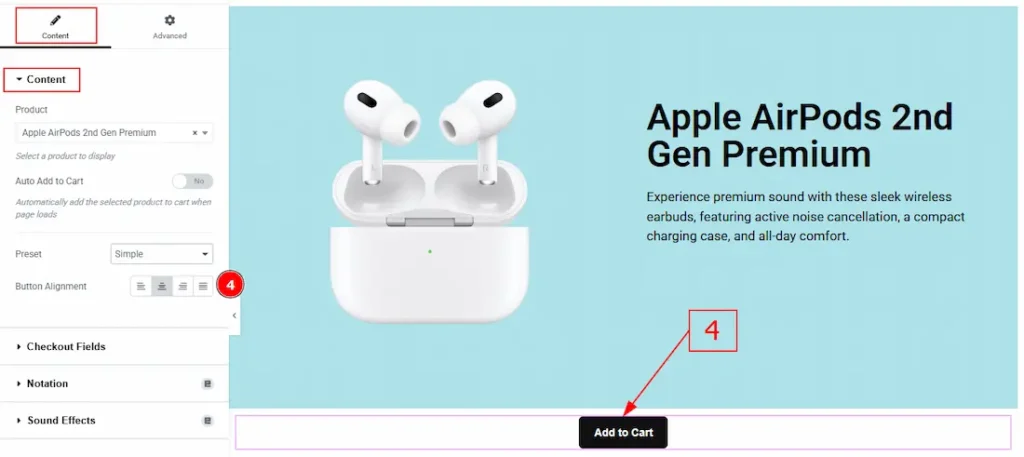
4. Button Alignment: You can adjust the button position to left, center, right, or justified with this option.
Checkout Fields Section
Go to Content > Checkout Fields
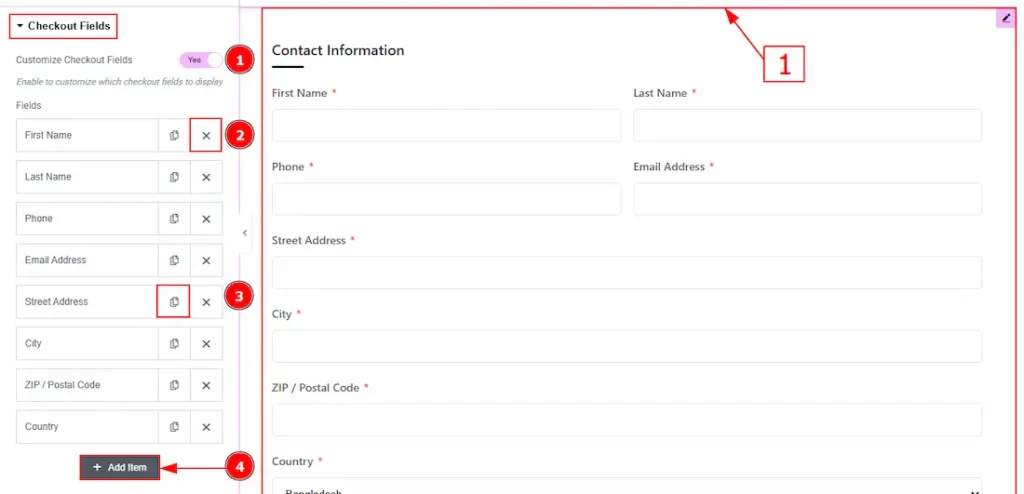
1. Customize Checkout Fields: After enabling the Customize Checkout Fields switcher button, you will get a bounce of form field customization options like the attached screenshot.
2. Close Item: You can delete the form item by clicking the Close icon button.
3. Copy Item: This option lets you copy the same item.
4. Add Item: You can add a new item by clicking the “+” Add Item button.
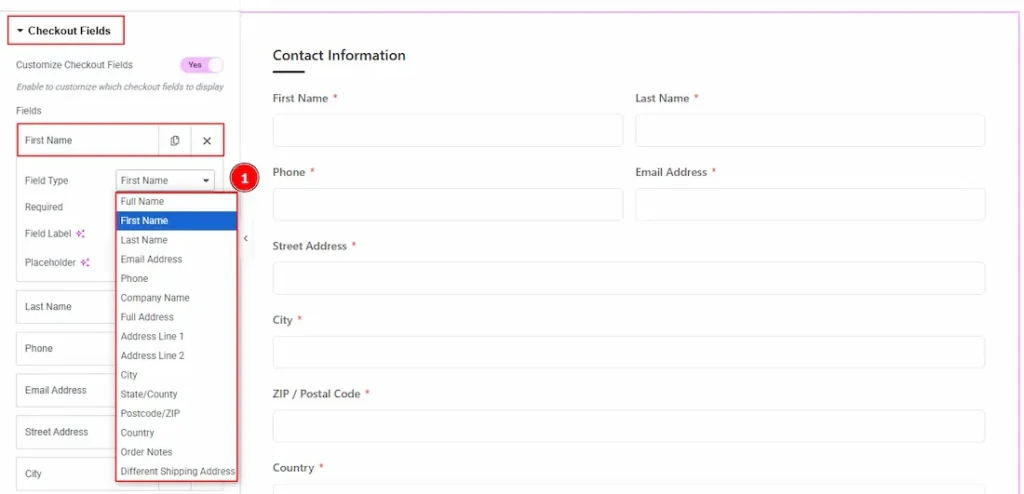
In the Form Items, each item comes with several customizable options. Let’s explore them:
1. Field Type: This lets you choose the type of input field you want to display in your form, such as Full Name, First Name, Last Name, Email Address, Phone Number, Company Name, Full Address, and more.
You can add fields one by one to create a complete and structured form layout tailored to your needs.

2. Required: This option makes the selected form field required. If you enable the required switcher button, then the purchaser must fill in the field; otherwise, the checkout process will not be completed.
3. Field Label: You can change the field label text with this option.
4. Placeholder: You can change the placeholder text with this option.
(Note: In the same way, you can make changes to all remaining items.)
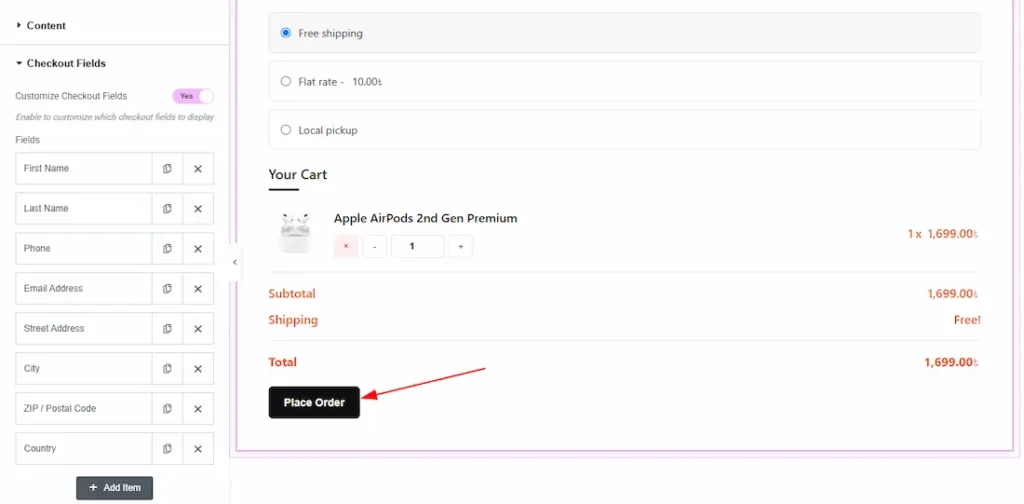
After filling up all the fields of the form, you can click on the place order button to complete your purchase, and then the following screen will be shown to the audience, and the order will be completed.
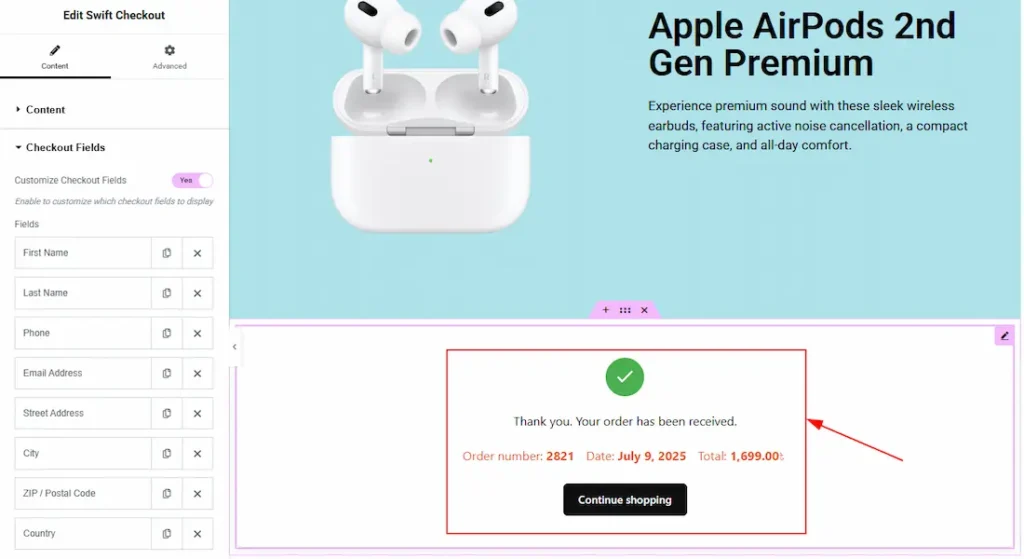
All done! You have successfully customize the Swift Checkout plugin on your website.
Video Assist
The video will help you to learn more about it. Thanks for staying with us.