In this documentation, we will show you how to customize the Post Info widget presented by Ultimate Post Kit Pro.
Inserting The Post Info Widget
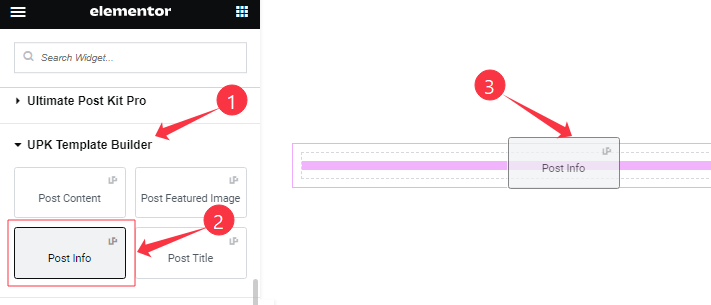
Open your (Single Post or Archive Post) page in the Elementor editor, then Go to UPK Template Builder > Post Info, and then drag and drop it on the page.
Content Tab Customizations
Meta Data Section
Go to Content > Meta Data
Step-1
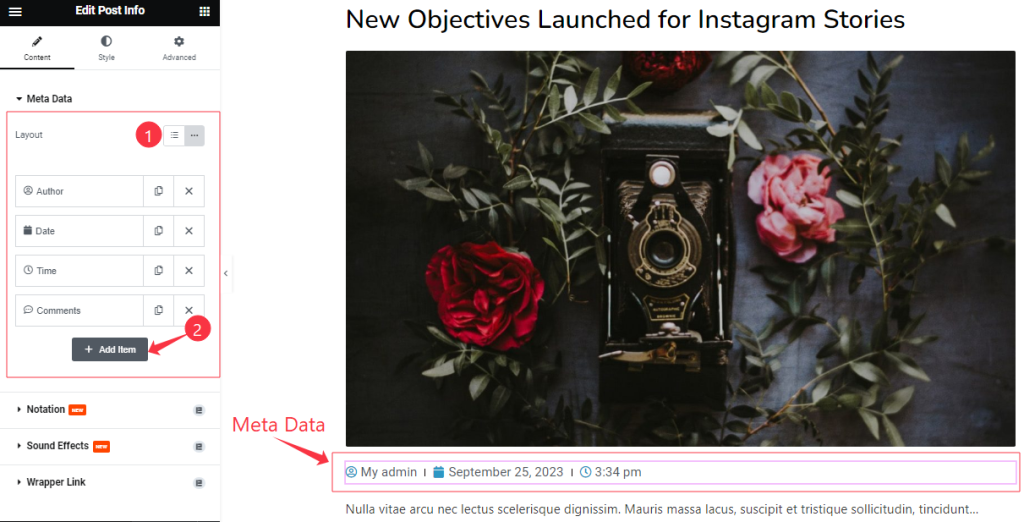
Come to the Meta Data section, find the Layout (Default, and Inline) option, and can add Post Info widget items (with the Add Item button).
Step-2
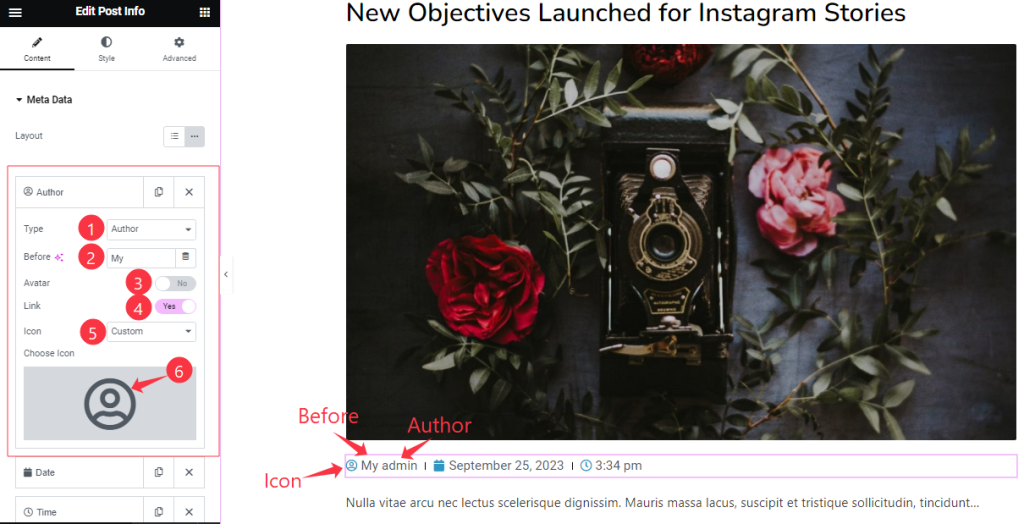
Click on Each widget item, and find the Type (Author, Date, Time, Comments, Terms, and Custom) options.
When you select the Type Author then find the Before, Avatar, Link, and Icon options.
Step-3
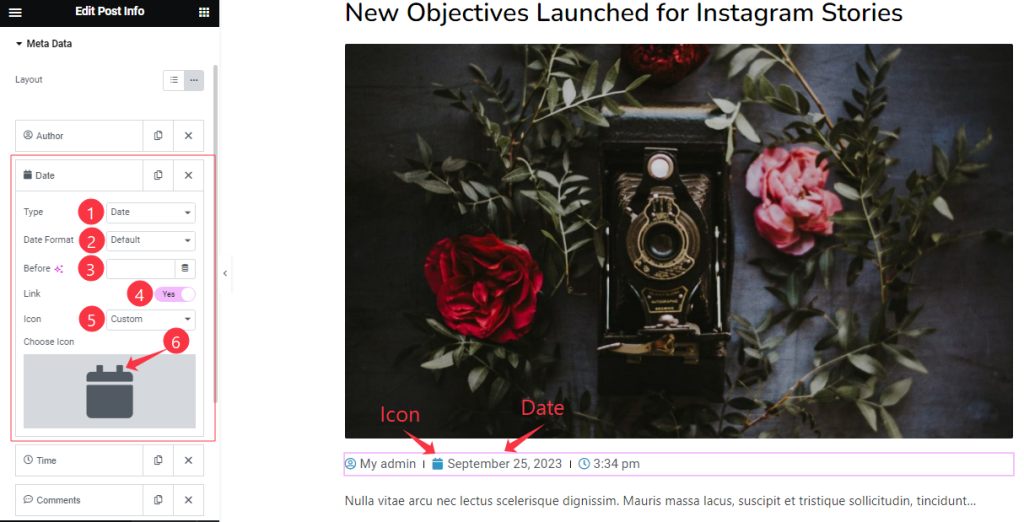
After selecting the Type Date find the Date Format, Before, Link, and Icon options.
Step-4
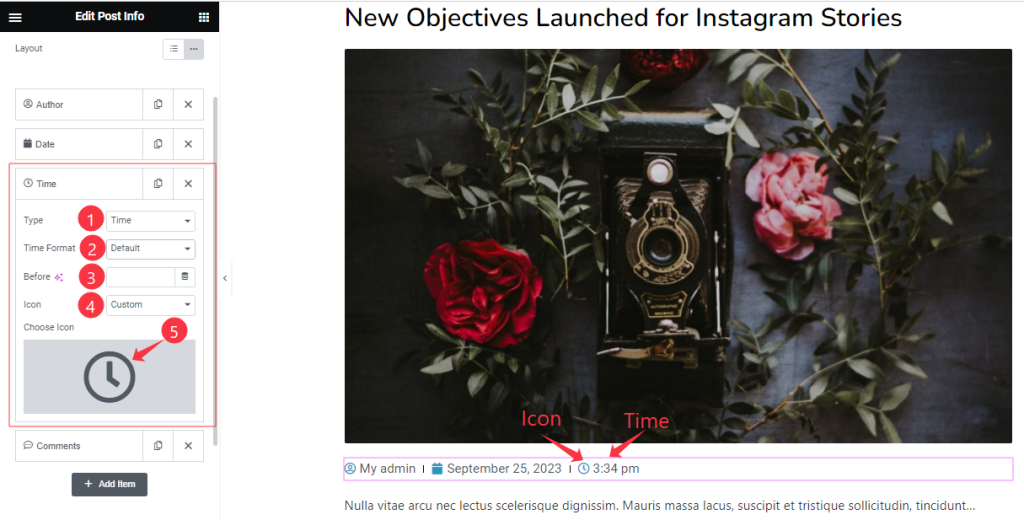
After selecting the Type Time find the Time Format, Before, and Icon options.
In the same process, you can add other items.
Work with The Style Tab
List Section
Go to Style > List
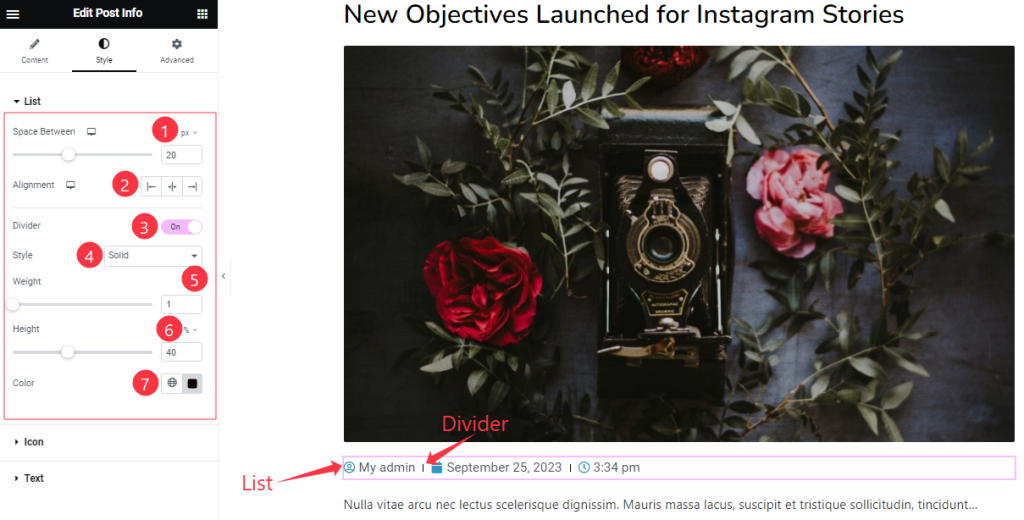
Here find the Space Between, Alignment, Divider, Style, Weight, Height, and Color options.
Style The Icon Section
Go to Style > Icon
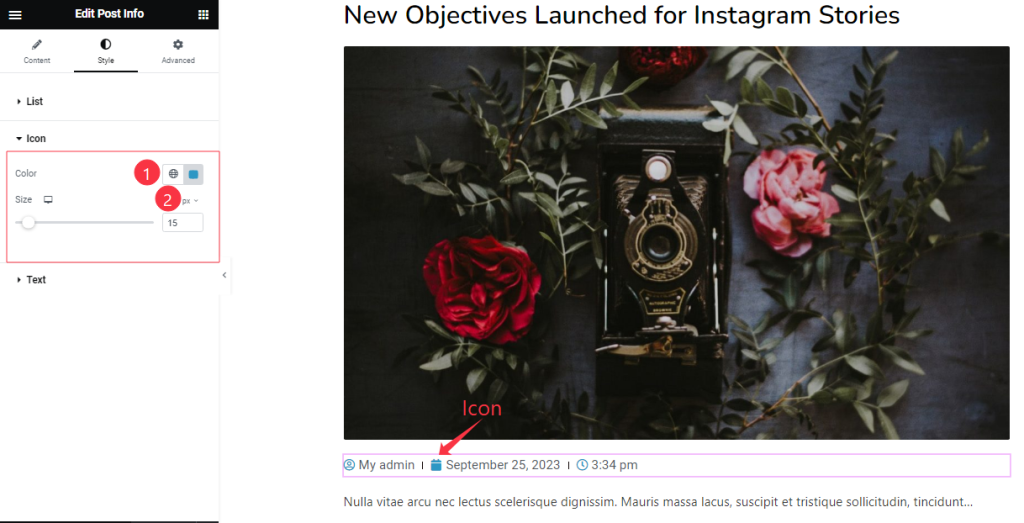
Come to the Icon section, Find the Icon Color, and Size options.
Text Section Customization
Go to Style > Text
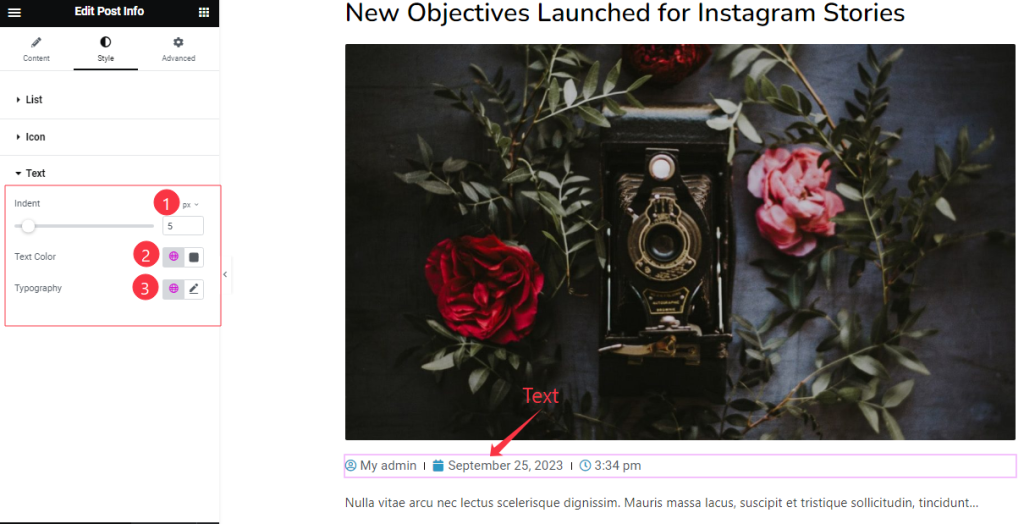
Here find the Text Indent, Text Color, and Typography options.
All done! You have successfully customized the Post Info widget on your website.
The Video and Dome will be coming soon.
