Instant Image Generator is an all-in-one WordPress plugin that lets you search, preview, and import millions of free images directly into your Media Library without leaving your dashboard. Access sources like Pixabay, Pexels, Unsplash, Openverse, and Giphy, or generate AI images using OpenAI DALL·E and Google Gemini Images from text prompts. This documentation offers a complete overview of the Instant Image Generator Plugin.
Why use the Instant Image Generator Plugin?
The Instant Image Generator plugin lets you quickly search, generate, and upload high-quality images from Gemini, Dall-E, and One Click Image from Unsplash, Openverse, Pixabay, Pexels, and Giphy, saving time and enhancing your website design with just one click.
Install and Activate Instant Image Generator Plugin

To use the Instant Image Generator plugin, you need to download the plugin first. You can easily find the plugin on the WordPress.org site. Don’t worry about it. We have attached a download link here. Just visit the link and download the plugin. Here is the download link. After downloading the plugin, just follow the steps below.
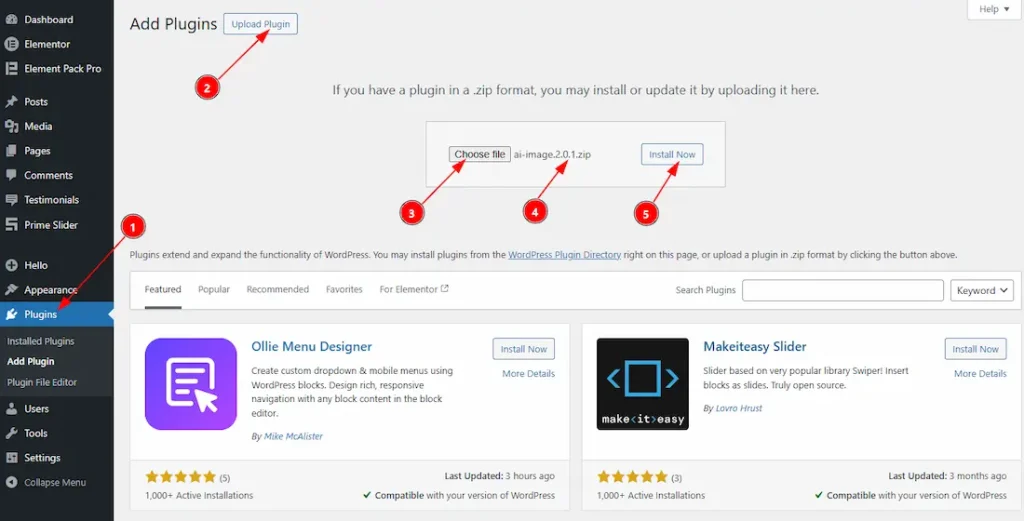
1. Navigate to the Plugin Dashboard and click on the ” Add Plugin ” section.
2. Then, click on the Upload Plugin button.
3. Click on the Choose file, choose the Download file, and Select It.
4. The selected file will appear with the name, e.g., ai-image.2.0.1.zip
5. Click on the Install Now Button to install the Plugin.
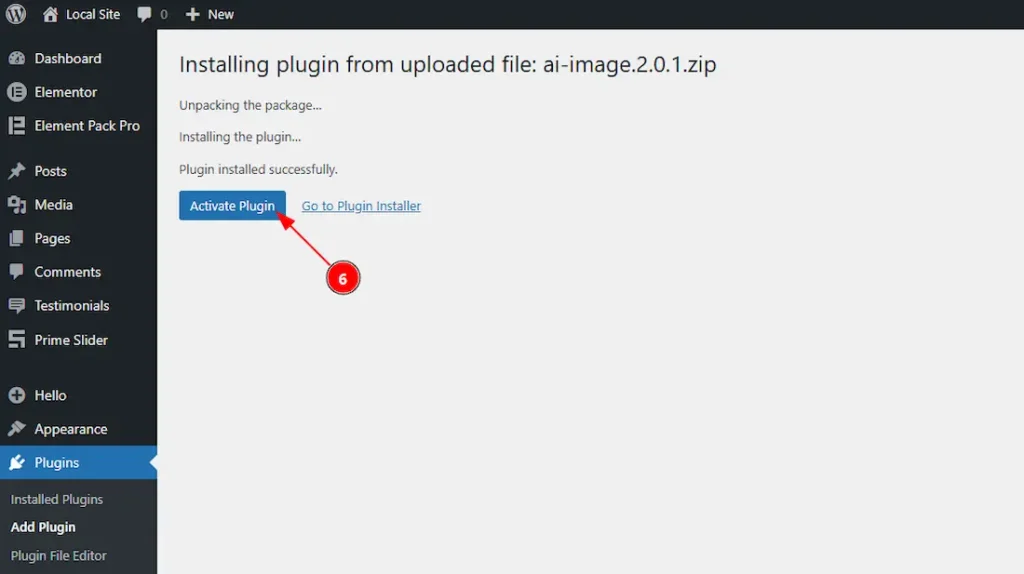
6. After installing the plugin, the “Activate Plugin” button will appear. Now, click on it to activate.

7. After clicking on the Activate Plugin button, it will activate the plugin and redirect you to the plugin dashboard. Here you can re-check again if the plugin is activated or not.
Customizing the Instant Image Generator Plugin
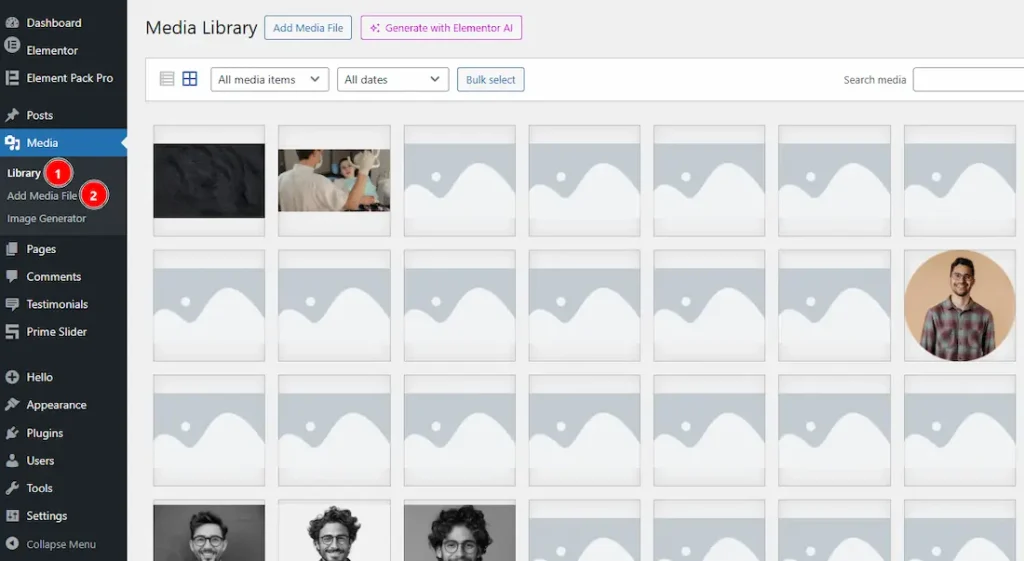
Unlike some plugins that create their own dashboard, Instant Image Generator integrates directly into the default WordPress Media section & the Settings section. This allows you to manage your media without navigating away from the familiar interface. The first two options are standard WordPress functionality: they let you upload and view files, but no option to generate image in the same dashboard.
1. Library: This is the default WordPress media library where you can view all uploaded files.
2. Add Media File: The default WordPress option to upload new media.
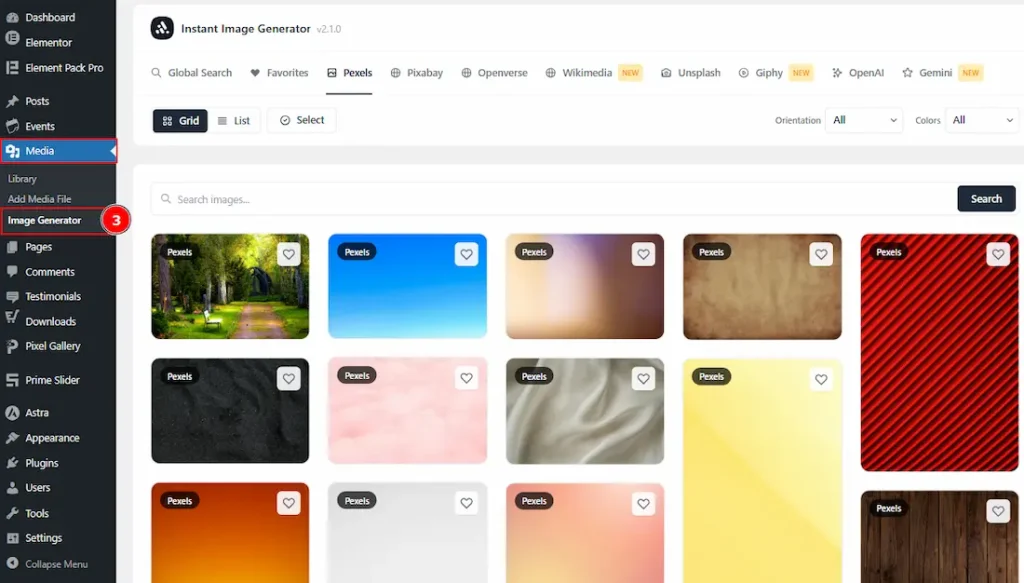
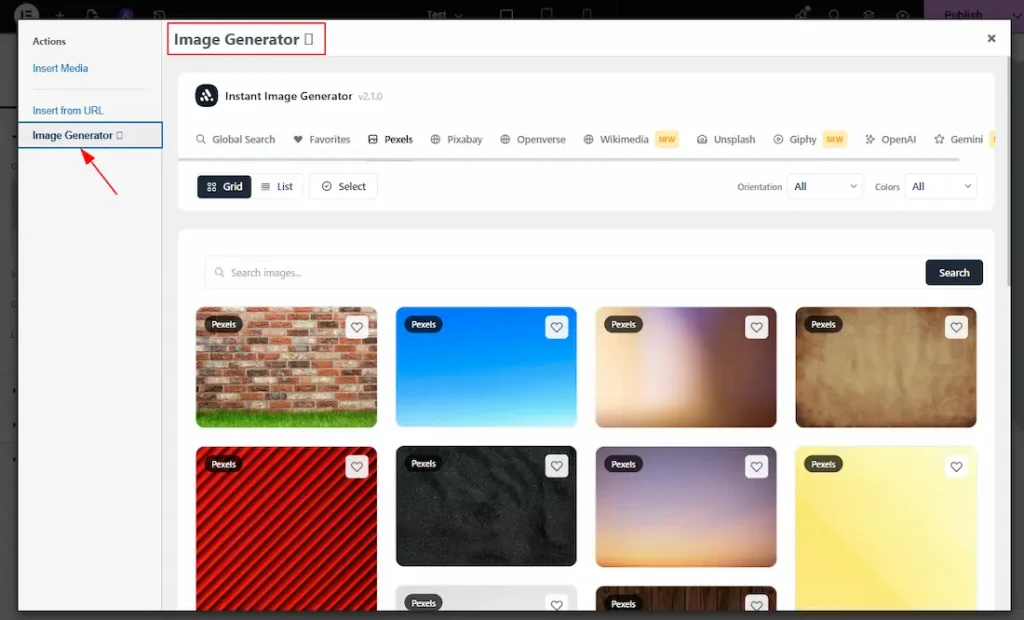
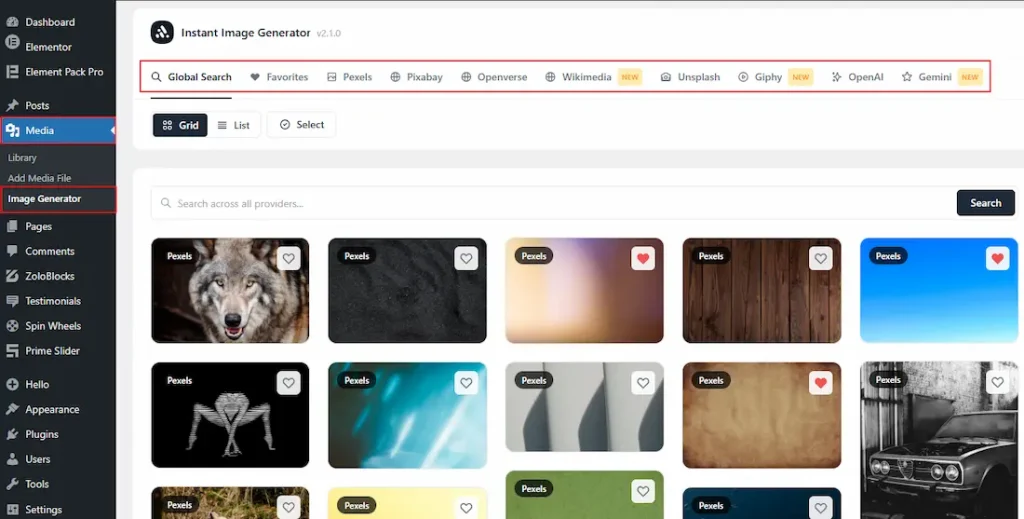
3. Image Generator: Here is where the magic of Instant Image Generator plugin’s come, you can search for any type of image you need in different platforms like Pexels, Pixabay, Openverse, unplash, giphy & wikimedia and import the image directly to your WP media.
Now, let’s explore what you can do with the Instant Image Generator.
Image Generator (Settings)
Go to WP Dashboard → Settings → Image Generator
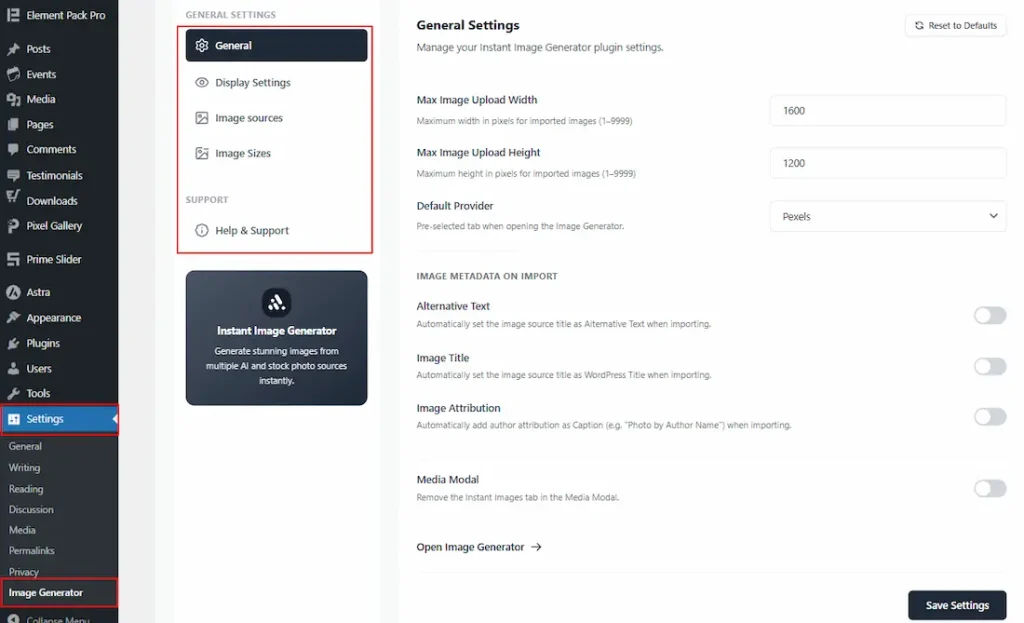
To use the Instant Image Generator plugin, you must first configure the plugin settings. The settings panel consists of five (5) tabs that control different aspects of the plugin: General, Display Settings, Image Source, Image Size, and Help & Support. In the following sections, we will go through each tab individually and explain its available options and configurations.
General Tab
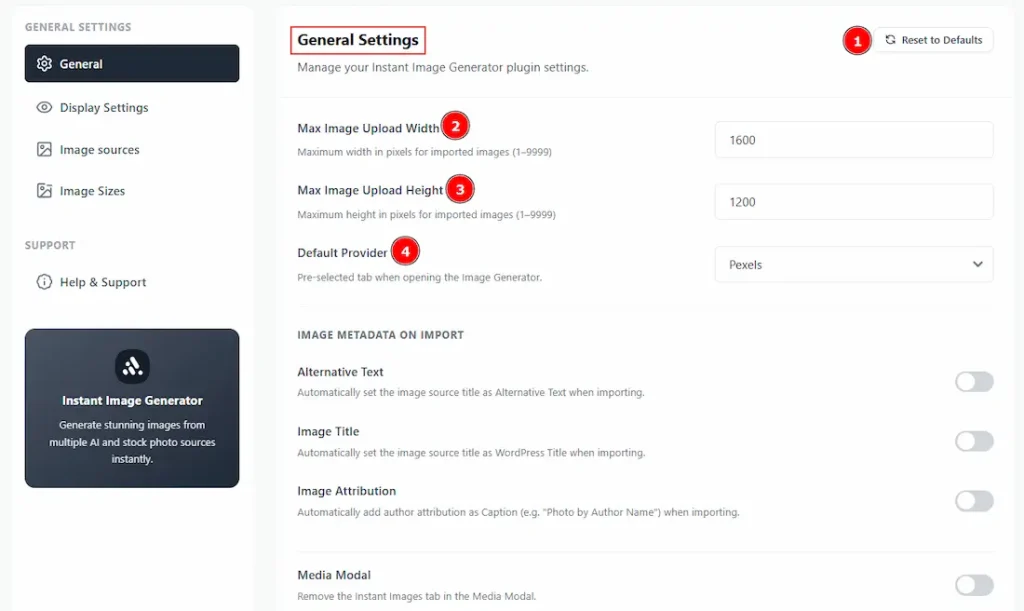
1. Reset to Defaults: You can reset the settings that you have applied to change with this option.
2. Image Upload Width: You can set a maximum width in pixels for imported images with this option. You can choose between 1 to 9999.
3. Max Image Upload Height: You can set the maximum height in pixels for imported images with this option. You can choose between 1 to 9999.
4. Default Provider: This option allows you to select a default provider that will automatically be active whenever you open the Image Generator from the Media section.
Preview 01

After making changes to the default tab, moved to WP Dashboard → Media → Image Generator, and here the Pexels tab was active as per the settings we have changed and applied.

5. Alternative Text: Enable the switcher to automatically set the image source title as Alternative text when importing with this option.
6. Image Title: Enable the switcher to automatically set the image source title as WordPress Title when importing with this option.
7. Image Attribution: Enable the switcher to automatically add author attribution as Caption (e.g “Photo by Author Name) when importing with this option. Please note that in the place of the author’s name, you will find the name of the image generator platform.
Preview 02
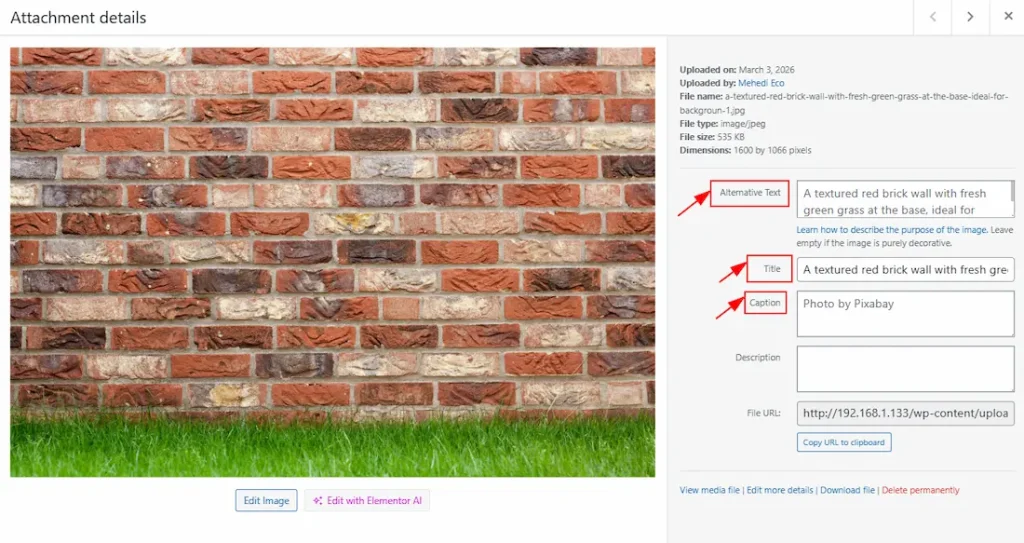
To view the changes, first import an image from the Image Generator dashboard. Then navigate to the Media Library and click on the imported image. In the pop-up modal, you will see that the Alternative Text, Title, and Caption have been generated automatically.
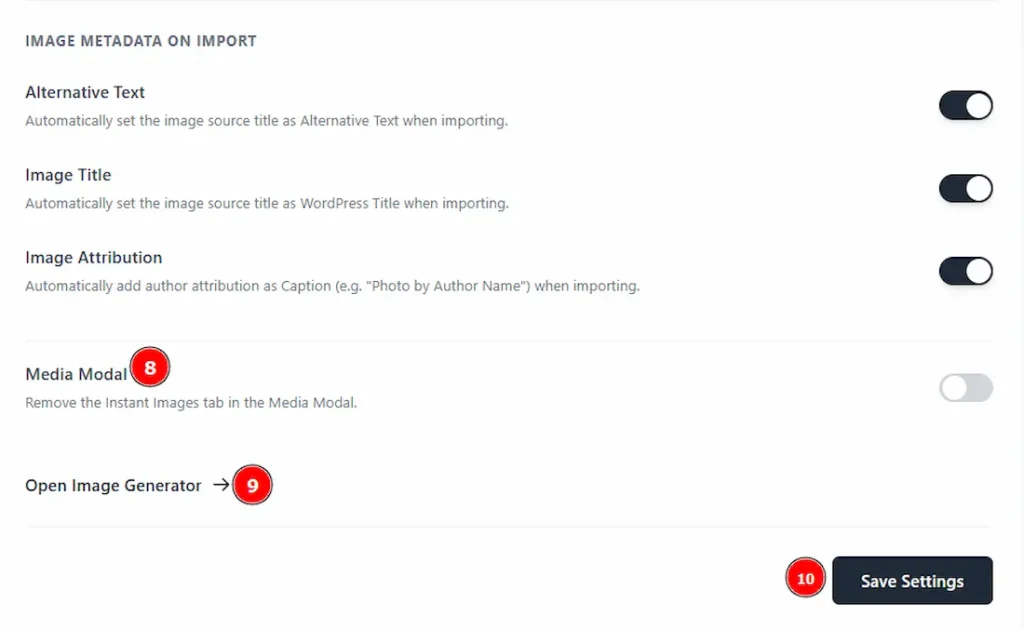
8. Media Modal: Enable the switcher to remove the instant images tab in the media modal with this option.
9. Open Image Generator: Click on this text to automatically redirect to the Image Generator Dashboard of the Media section.
10. Save Settings: You have to click on this button to apply the changes that you have made.
Preview 03
The media modal option allows you to directly access the image generator dashboard on the editor page and import images as you want.
Display Settings Tab

1. Default View Mode: Here, you can choose the default view mode for the Image Generator dashboard. Two options are available: Grid and List. Select your preferred layout to determine how images will be displayed when the dashboard is opened.
2. Items Per Page: You can select the number of images to show per page with this option. The lowest number is 20 & the highest is 100.
3. Thumbnail Size (Grid View): You can select the size of the thumbnail in grid view with this option. The available options are small (200px), medium (300px) & large (400px). Please note that this option will work only with the grid view layout.
4. Load More Mode: You can choose how the additional images are loaded when scrolling. You can choose between Manual Load (Load More Button) & Auto Load (Infinite Scroll).
- Manual Load: You will get to see a button, and by clicking that button, more images will load.
- Auto Load: Images will load automatically when scrolling below for selecting this option.
5. Save Settings: You have to click on this button to apply the changes that you have made.
6. Reset to Default: By clicking on this button, you can reset all the changes to the default.
Preview:
Here, you can see the preview of the changes of the number of 1,2,3 described above in the Display Settings Tab.

See the preview of the number 4 here.
Image Source Tab
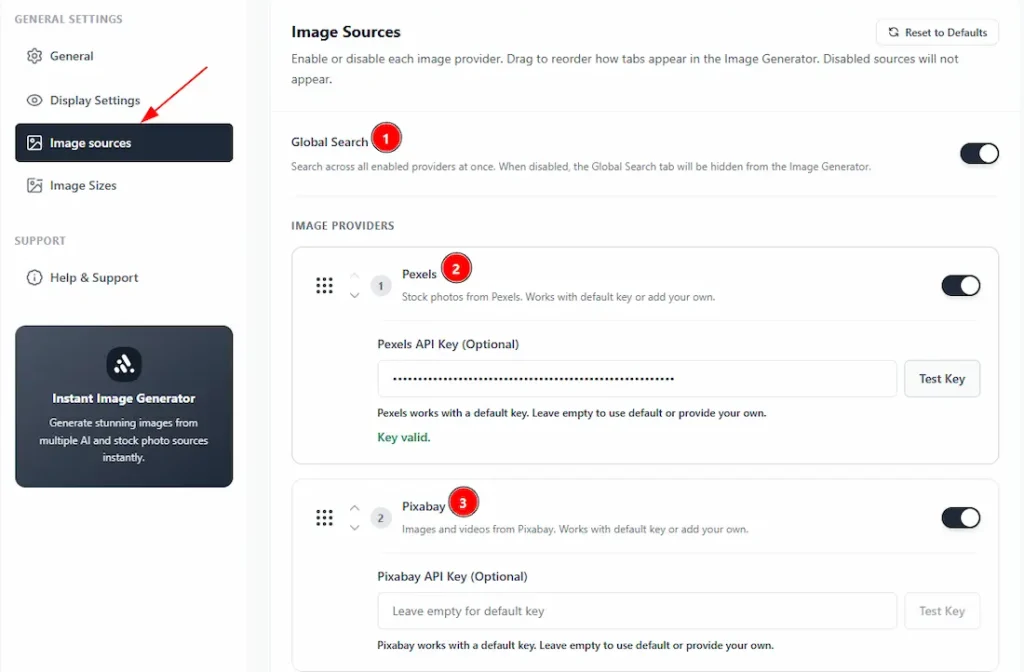
1. Global Search: Enable the switcher to search across all enabled providers at once. By disabling the switcher, the global search tab will be hidden from the Image Generator Dashboard.
2. Pexels: Enable this option to show the Pexels tab on the Image Generator dashboard. You can use the default API key or enter your own. After entering your key, click the Test Key button to verify whether it is valid or not. To get the Pexels API key, please visit here.
3. Pixaby: Enable this option to show the Pixaby tab on the Image Generator dashboard. You can use the default API key or enter your own. After entering your key, click the Test Key button to verify whether it is valid or not. To get the Pexels API key, please visit here.
Preview 01:
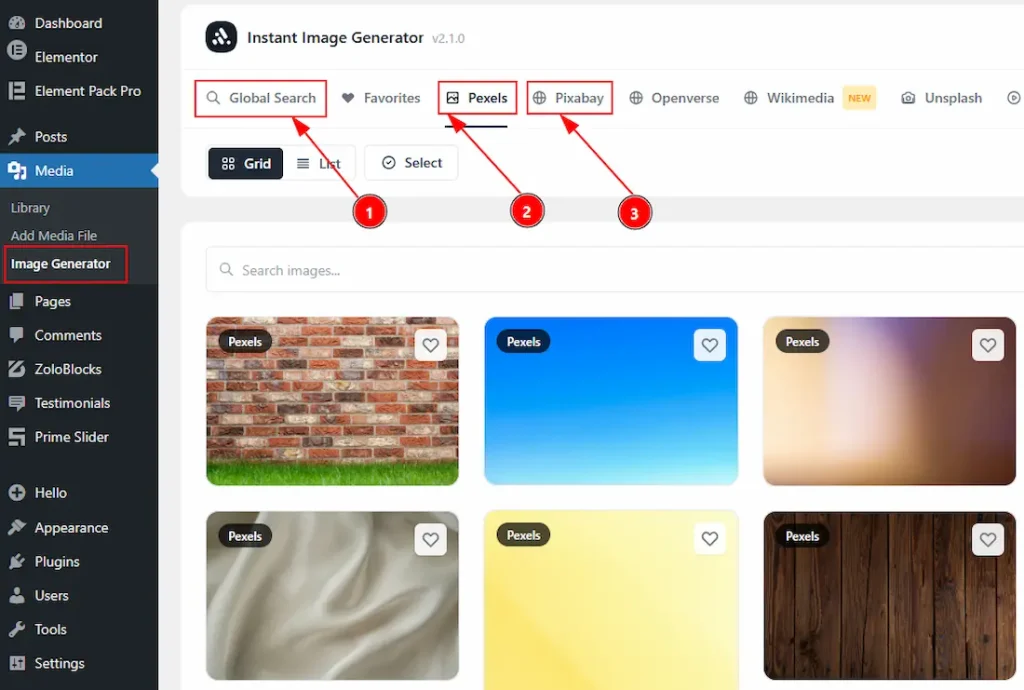
Here, you can view the Instant Image Generator dashboard, which includes the (1)Global Search, (2)Pexels, and (3)Pixabay image provider tabs.
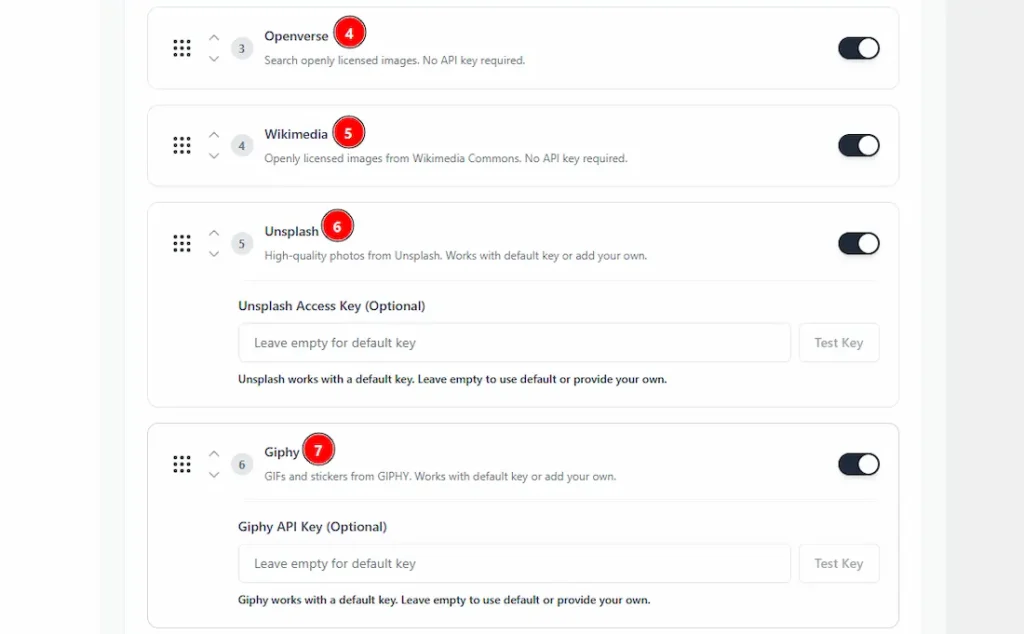
4. Openverse: Enable the switcher to add the Openverse tab on the Image Generator Tab. It’s free to use, and no API is needed for this image provider.
5. Wikimedia: Enable the switcher to add the Wikimedia tab on the Image Generator Tab. It’s free to use, and no API is needed for this image provider.
6. Unplash: Enable this option to show the Unplash tab on the Image Generator dashboard. You can use the default API key or enter your own. After entering your key, click the Test Key button to verify whether it is valid or not. To get the Pexels API key, please visit here.
8. Giphy: Enable this option to show the Giphy tab on the Image Generator dashboard. You can use the default API key or enter your own. After entering your key, click the Test Key button to verify whether it is valid or not. To get the Pexels API key, please visit here.
Preview 02:
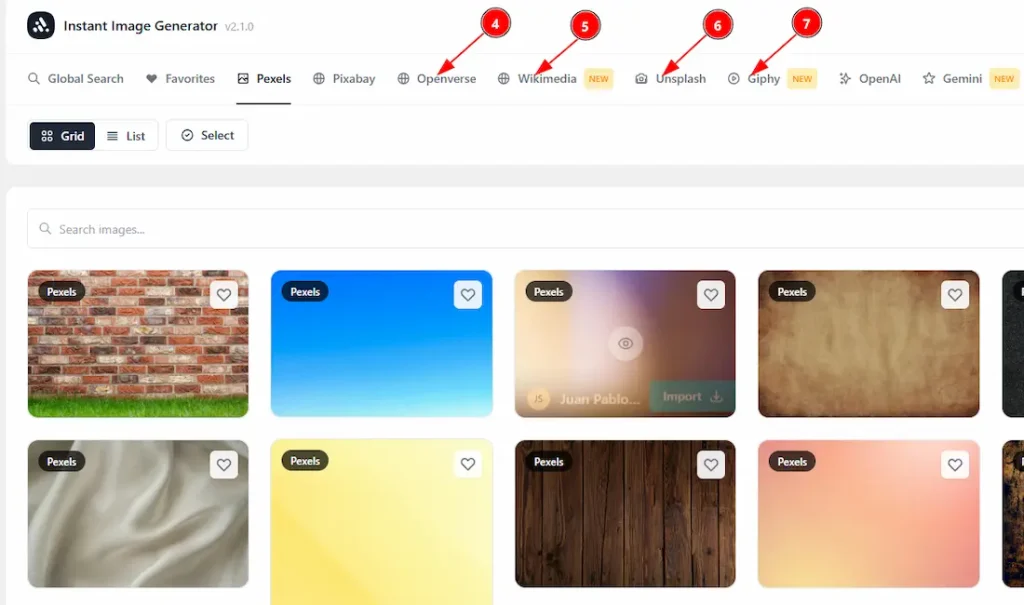
Here, you can view the Instant Image Generator dashboard, which includes the (4)Openverse, (5)Wikimedia, (6)Unsplash, and (7)Giphy image provider tabs.
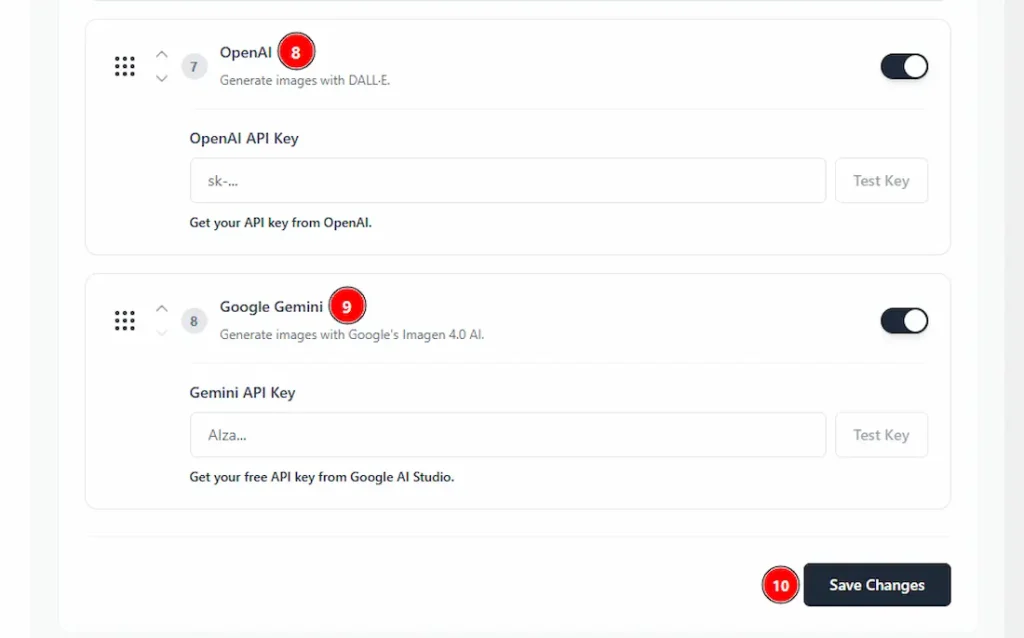
8. OpenAI: Enable this option to show the OpenAI tab on the Image Generator dashboard. You can use the default API key or enter your own. After entering your key, click the Test Key button to verify whether it is valid or not. To get the Pexels API key, please visit here.
9. Google Gemini: Enable this option to show the Google Gemini tab on the Image Generator dashboard. You can use the default API key or enter your own. After entering your key, click the Test Key button to verify whether it is valid or not. To get the Pexels API key, please visit here.
10. Save Settings: Click on the save settings button to apply the changes that you have made.
Preview 03:
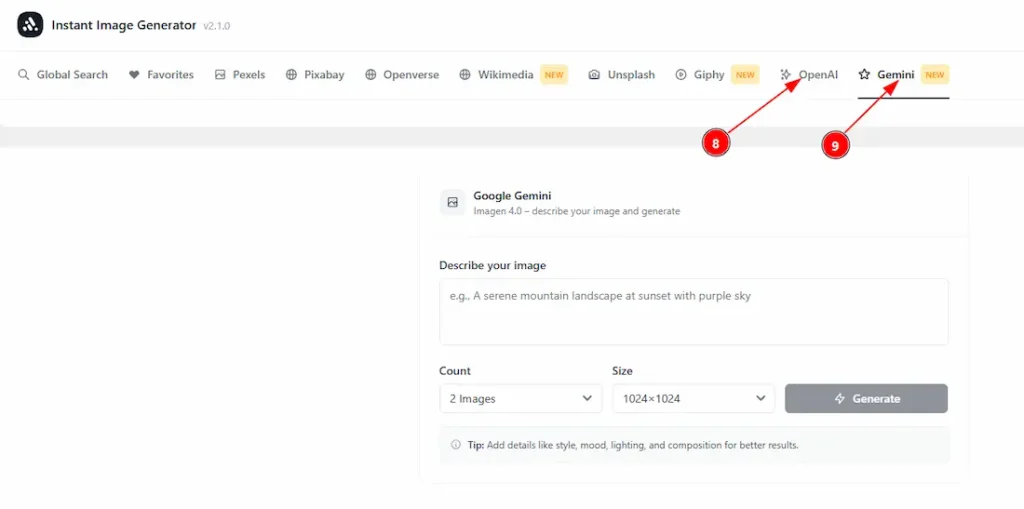
Here, you can view the Instant Image Generator dashboard, which includes the (8)OpenAI and (9)Gemini image provider tabs.
Image Sizes Tab
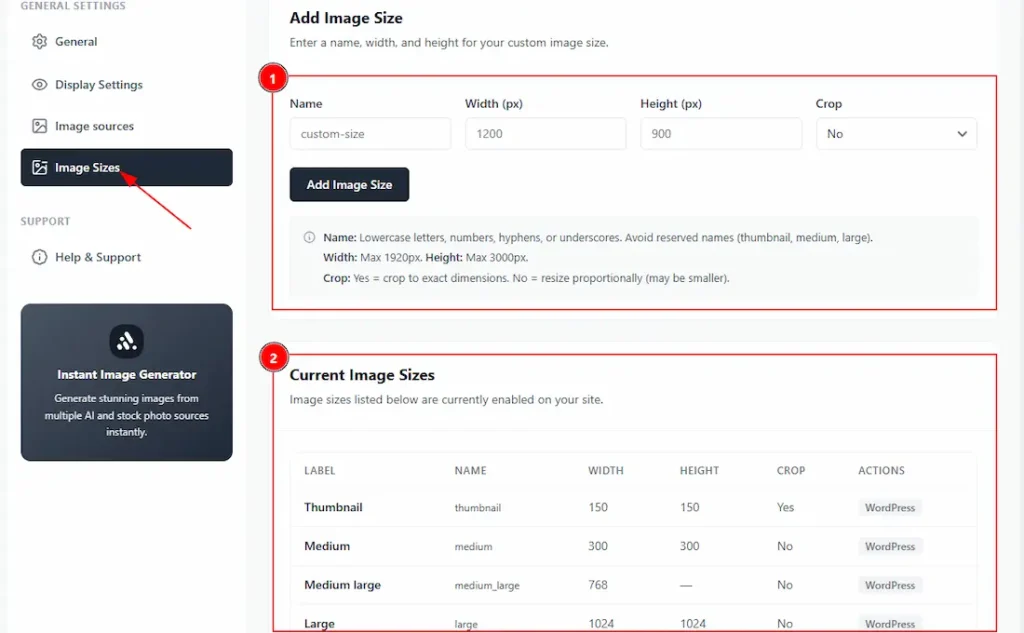
1. Add Image Size: With this option, you can define a custom image import size based on your requirements. Enter a name using lowercase letters, set the width (maximum 1920px) and height (maximum 3000px), and choose whether to crop the image. Select Yes to crop to exact dimensions, or No to resize proportionally.
2. Current Image Sizes: You can see the image size listed in this option. The added image size will be added below.
Help & Support Tab
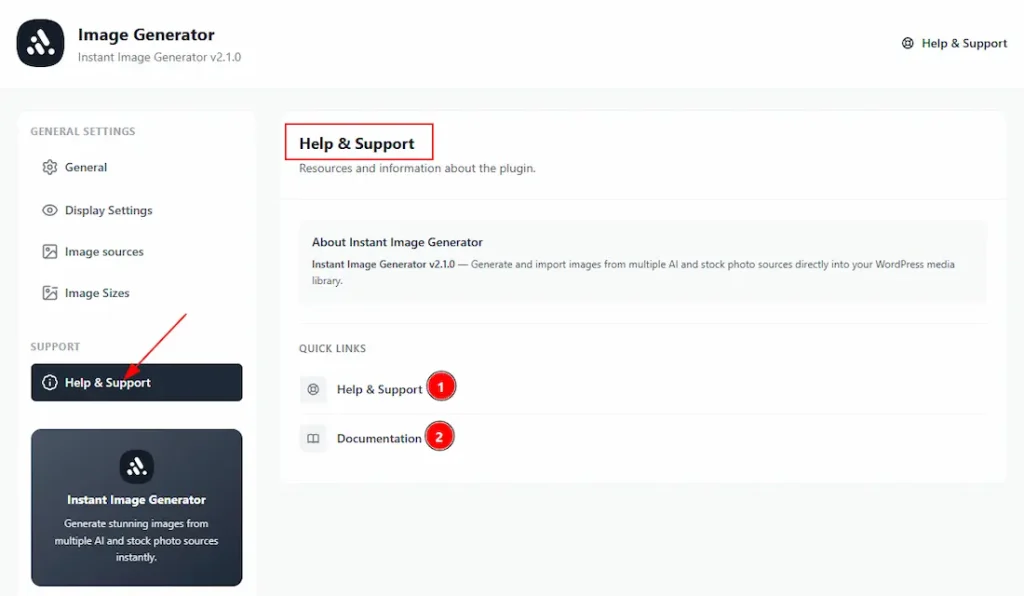
1. Help & Support: By clicking on this link, you will be taken to https://bdthemes.com/support/ to contact our support team.
2. Documentation: By clicking on this link, you will be taken to the document that has a complete guideline for using the Instant Image generator plugin.
As the setup part is complete now, let’s proceed to the Dashboard of Instant Image Generator and explore what’s in it.
Image Generator (Media)
Go to WP Dashboard → Media → Image Generator
After completing the plugin settings configuration, you can proceed to customize the Image Generator Dashboard. The tabs displayed on the dashboard are based on the providers you enabled in the Image Source tab within the settings. In this section, we will explore each of these tabs individually and explain their available features and options.
Global Search Tab

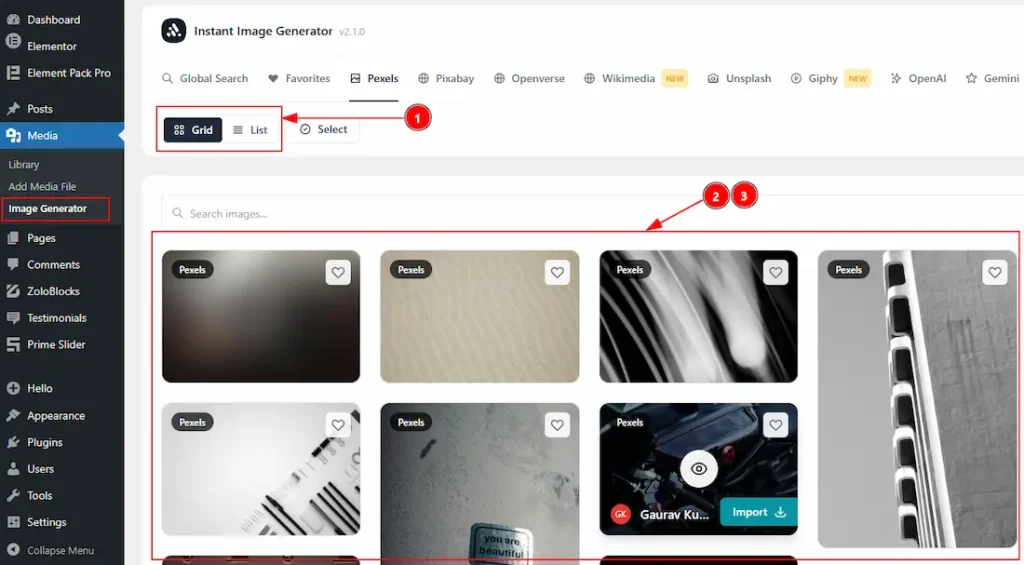
1. Grid/List: You can select the layout of the images between the grid and list style with this option.
2. Select: You can click on the select button to get this option. Here you can select all the images on this page or cancel the selection.
3. You can see the number of the selected image in this field.
4. Import All: You can import all the images at once by clicking on this button.
5. Favourite All: You can make all the image as your favourite at once by clicking on this button.
6. Clear: You can clear the selection by clicking on this clear button.
7. Search: You can search for the images as per your need in this field.
Favourite Tab
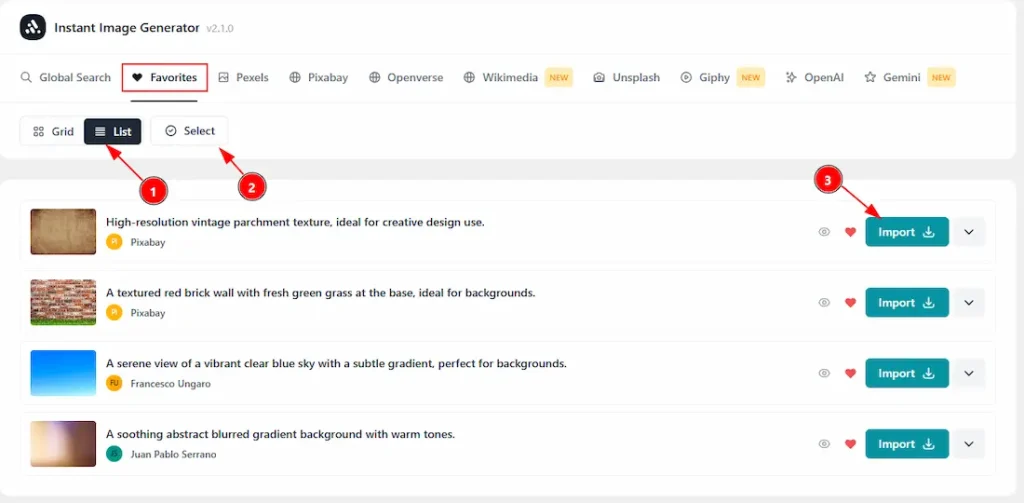
1. Grid/List: You can select the layout of the images between the grid and list with this option.
2. Select: You can select the images by clicking on this button.
3. Import: You can import an image to the media files by clicking on this button.
Pexels Tab
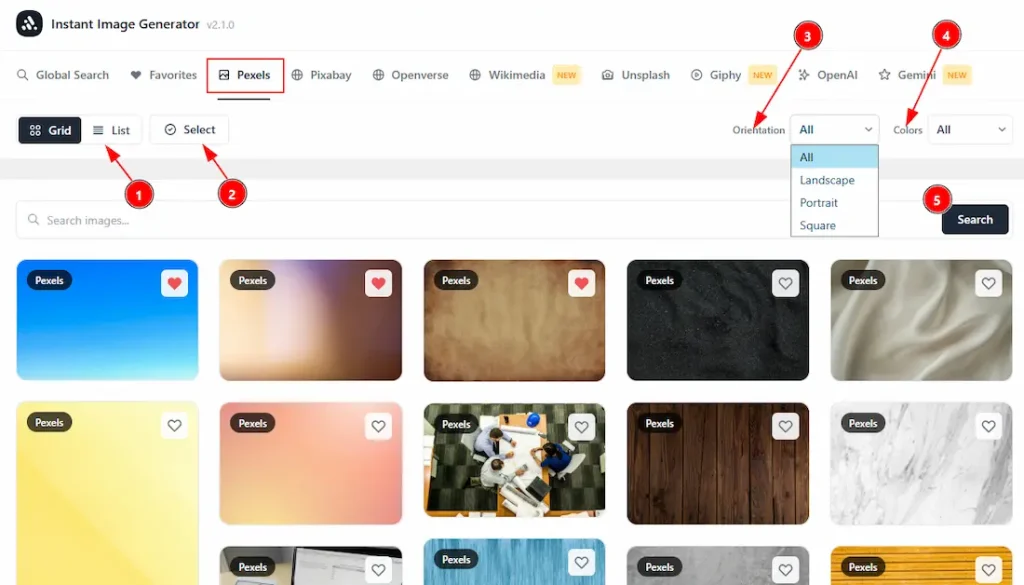
1. Grid/List: You can select the layout of the images between the grid and list style with this option.
2. Select: You can select the images by clicking on this button.
3. Orientation: The Orientation field allows you to filter images based on their layout (aspect ratio) before displaying the search results. The available options to select are –
- All: Displays images of all orientations.
- Landscape: Shows horizontally aligned images (width greater than height).
- Portrait: Displays vertically aligned images (height greater than width).
- Square: Shows images with equal width and height.
4. Color: The color option used to filter images based on their dominant color.
5. Search: You can search for the image as you prefer with this option.
Pixabay Tab

1. Grid/List: You can select the layout of the images between the grid and list with this option.
2. Select: You can select the images by clicking on this button.
3. Order: You can filter the image based on the popularity and the latest order with this option.
4. Type: You can select the type of images with this option. You can select between all, photo, illustration & vector.
5. Category: There are various types of categories here. You can select the category based on your needs with this option.
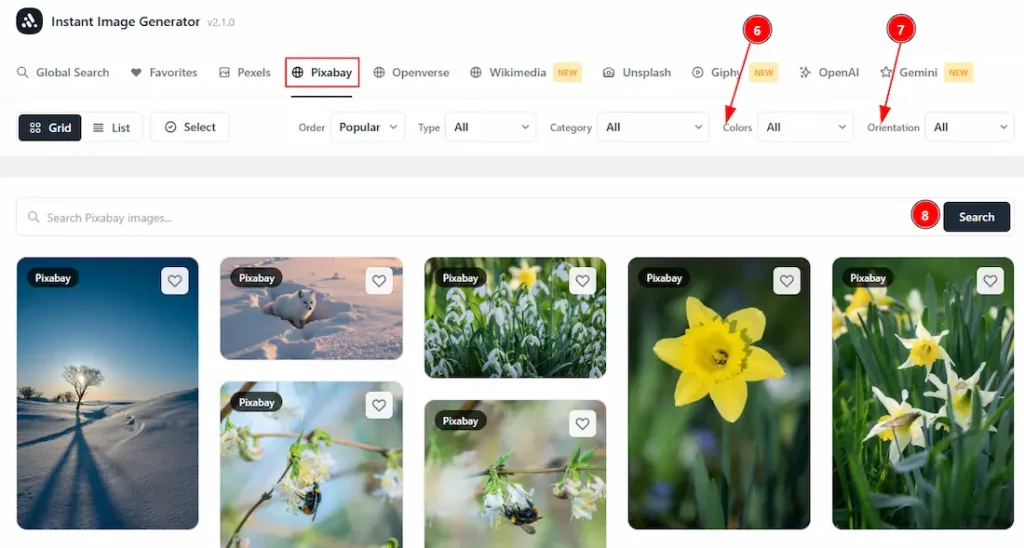
6. Color: The color option used to filter images based on their dominant color.
7. Orientation: The Orientation field allows you to filter images based on their layout (aspect ratio) before displaying the search results. You can choose between all, horizontal & vertical with this option.
8. Search: You can search for the image as you prefer with this option.
Openverse Tab

1. Grid/List: You can select the layout of the images between the grid and list with this option.
2. Select: You can select the images by clicking on this button.
3. Source: You can select the source to import the image on the dashboard with this option. The available sources are – All, WordPress, Nasa, SpaceX, Wikimedia, Museum, Victoria, Met Museum, RawPixel, Europeana, Biodiversity, Heritage, Smithsonian, Cleveland Museum & Brooklyn Museum.
4. Orientation: The Orientation field allows you to filter images based on their layout (aspect ratio) before displaying the search results. You can choose between all, square, tall & wide with this option.
5. Search: You can search for the image as you prefer with this option.
Wikimedia Tab

1. Grid/List: You can select the layout of the images between the grid and list with this option.
2. Select: You can select the images by clicking on this button.
3. Media Type: You can select the media type between all, image or vector with this option.
4. Sort: You can sort by filtering the images appearing by relevance, newest or oldest with this option.
5. Search: You can search for the image as you prefer with this option.
Unsplash Tab
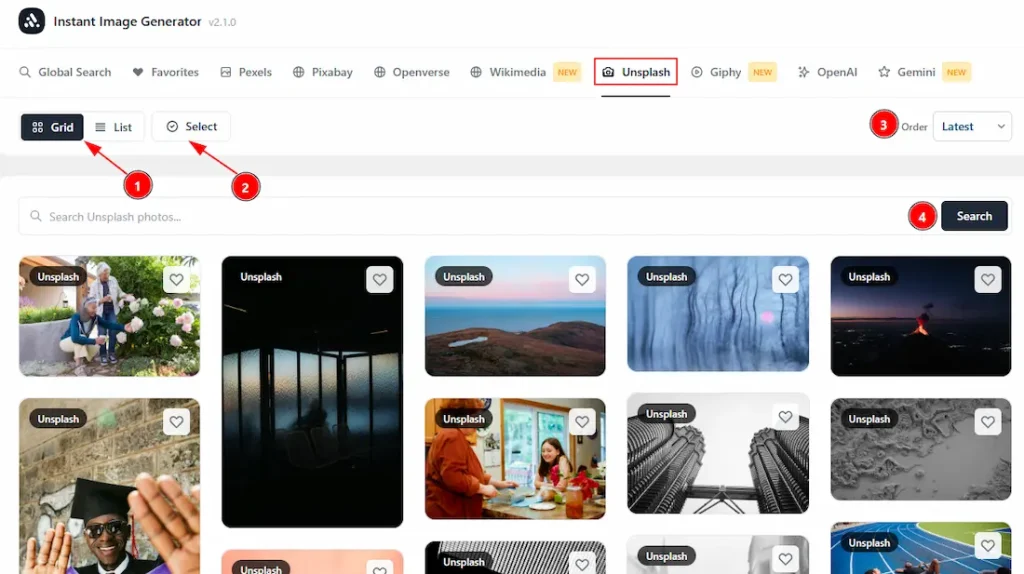
1. Grid/List: You can select the layout of the images between the grid and list with this option.
2. Select: You can select the images by clicking on this button.
3. Order: You can filter the order by the latest or most relevant with this option.
4. Search: You can search for the image as you prefer with this option.
Giphy Tab
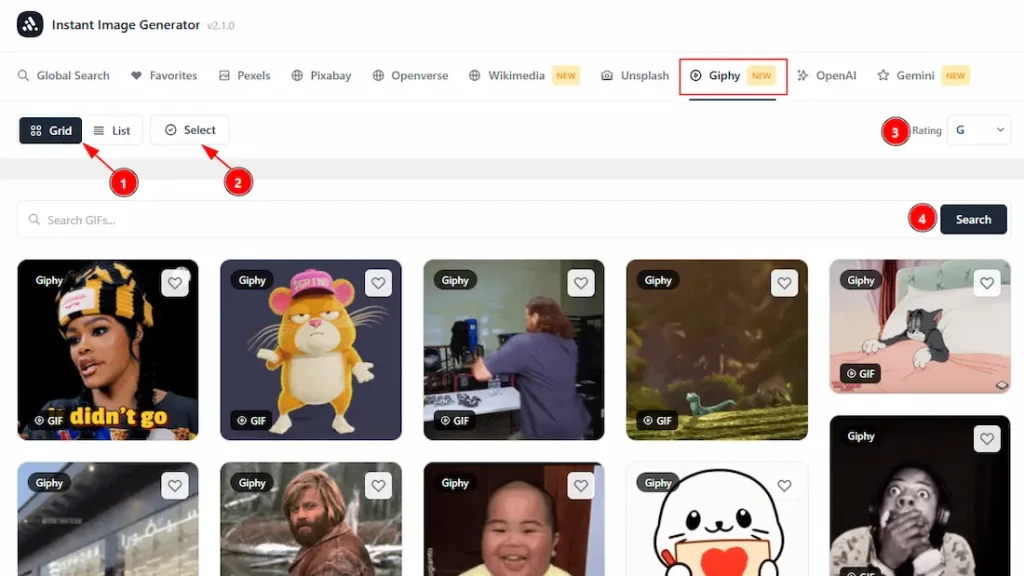
1. Grid/List: You can select the layout of the images between the grid and list with this option.
2. Select: You can select the images by clicking on this button.
3. Rating: You can filter the rating of the GIF by G, PG, PG-13, R with this option.
4. Search: You can search for the image as you prefer with this option.
OpenAI Tab
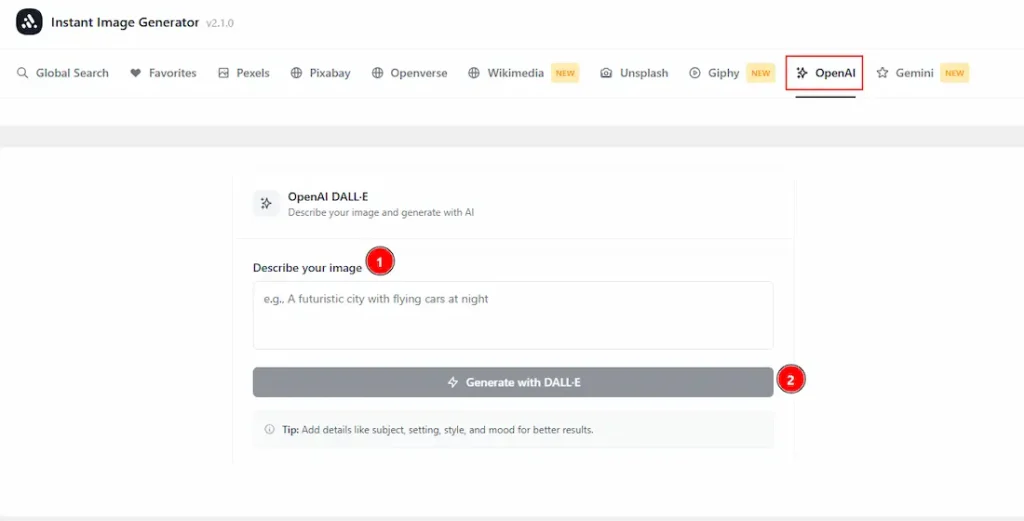
1. Describe Your Image: Here, you can add the prompt by describing your reference of image in this field.
2. Generate: Click on this button to generate the image.
Gemini Tab
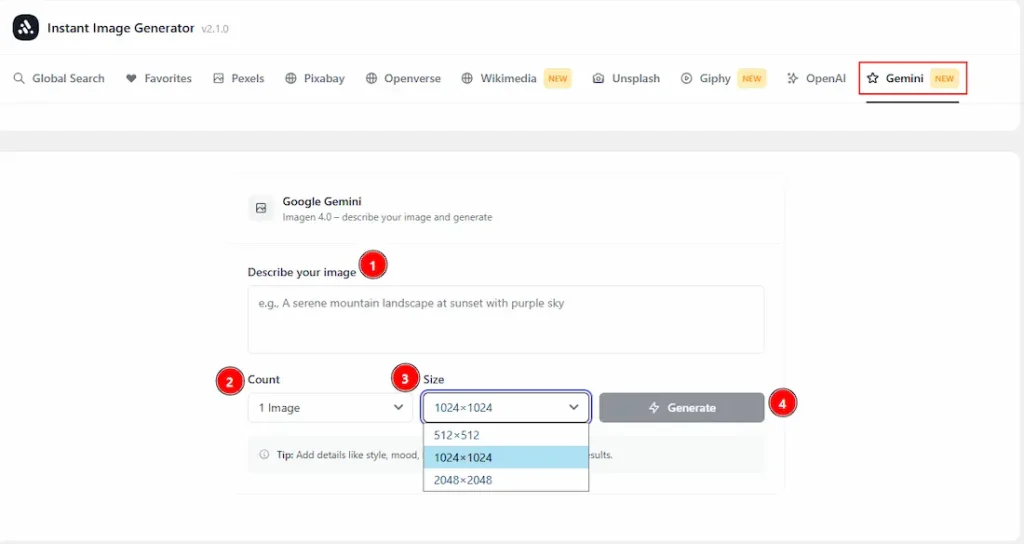
1. Describe Your Image: Here, you can add the prompt by describing your reference image in this field.
2. Count: You can select how many images you want to generate at once with this option.
3. Size: You can select the size of the image that will be generated with this option.
4. Generate: Click on this button to generate the image.
All done, you have successfully customized the Instant Image Generator plugin on your Site.
Video Assist
Please watch the video tutorial to use the Instant Image Generator plugin on your site.
Thanks for staying with us.