Kalon Grid widget adds thumb-size post grids with dynamic tags and a seamless title on the post images. Ultimate Post Kit made it to show the post date & author name below the title of the post images.
Let’s see how it works!
Inserting widget

Find the Kalon Grid widget from the widget menu in the Elementor page editor and drag it inside your webpage.
Content tab
The Content tab holds the base settings for the widget and lays the foundation of the layout of the final content. It’s divided into three parts for the Kalon Grid widget.
Layout
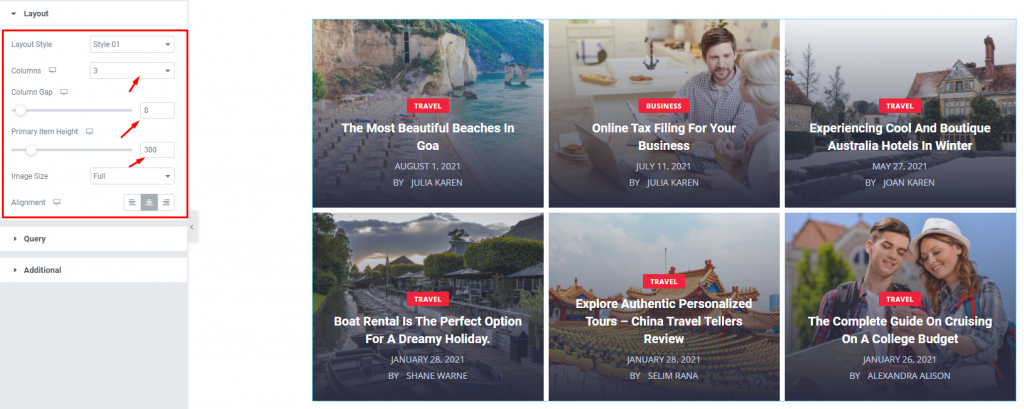
Go to Content> Layout
In this section, you can change the number of columns, adjust column gaps for the posts as well as set the height of the items on the Elementor Post grid.
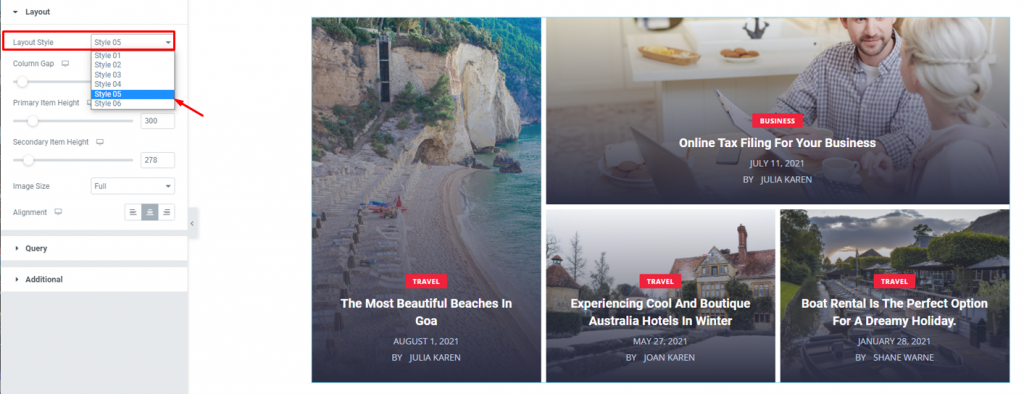
There are 6 amazing layout styles provided for this blogging widget. Each has its own taste and comes with a modern finish.

You can always play with the column number, column gaps, and item height to change the layout according to your will. Your blog will just look fantastic!
Query
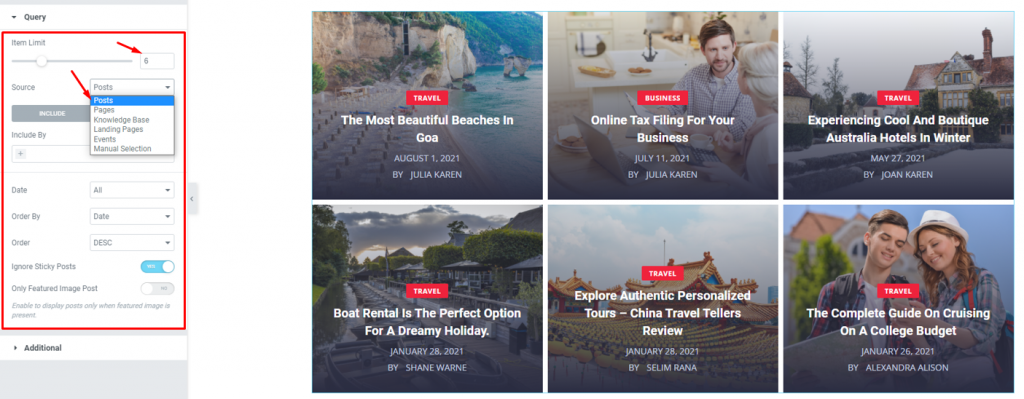
Go to Content> Query
The query lets you limit the number of items on display. For the source, you can select from pages, posts, landing pages, etc as the source of the Kalon Grid widget.
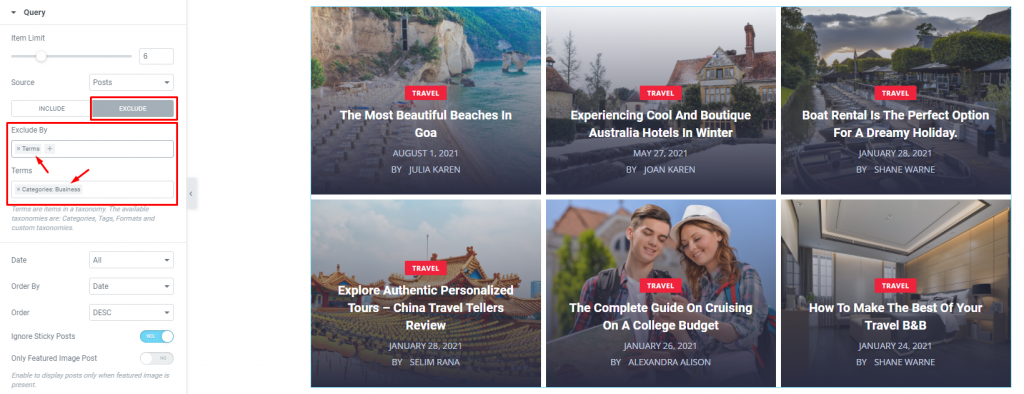
Using the exclude field, you can remove posts from displaying on the blog page of the Kalon grid for Elementor. You can the whole picture in our query tutorial video. Did you notice that we already removed the Business category posts from the display?
Additional
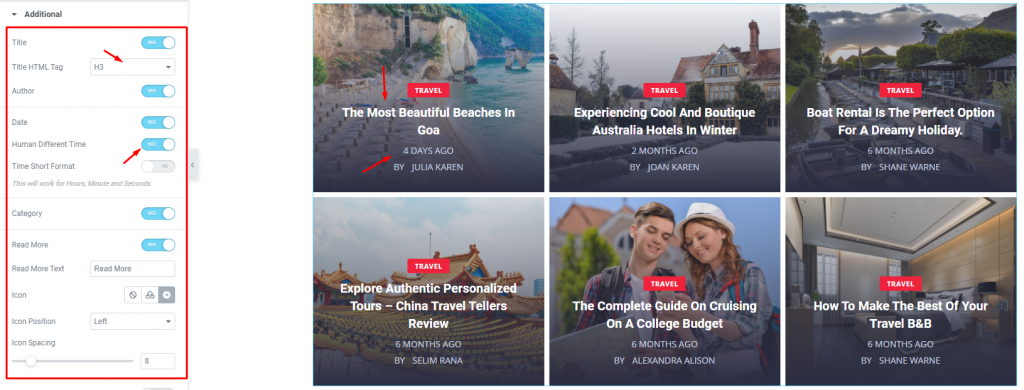
Go to Content> Additional
The addition section has a bunch of switchers. Each one is responsible for a certain item on the display. Clicking them off will hide the titles, authors, dates, categories, etc.
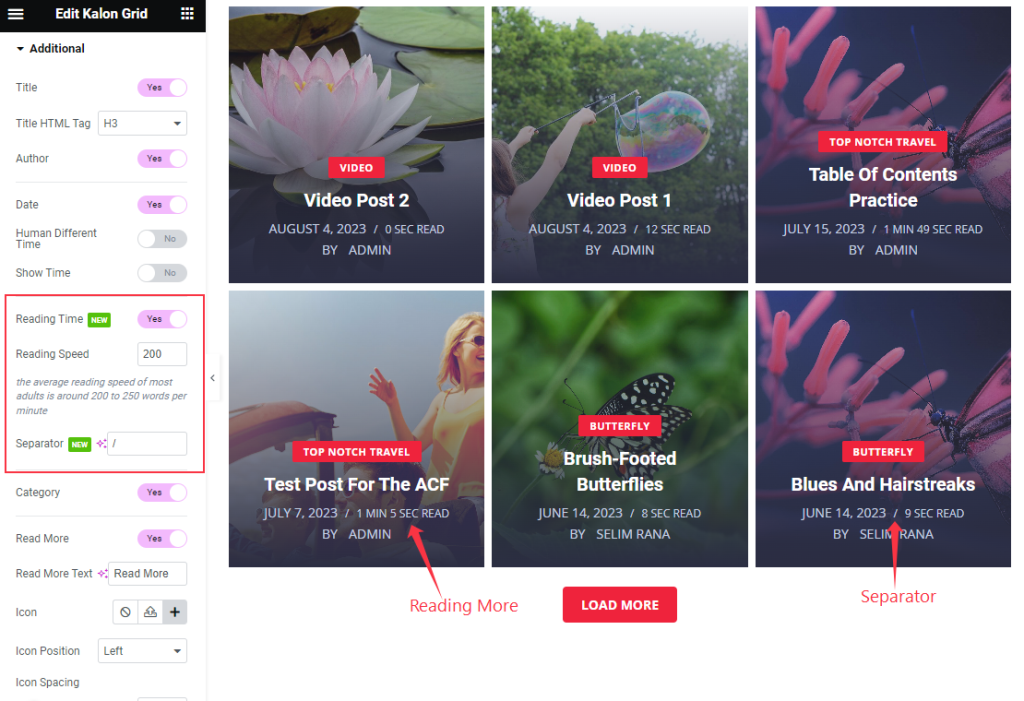
The Reading Timing switcher will show the time of reading the post and the Separator shows between the Meta tag.
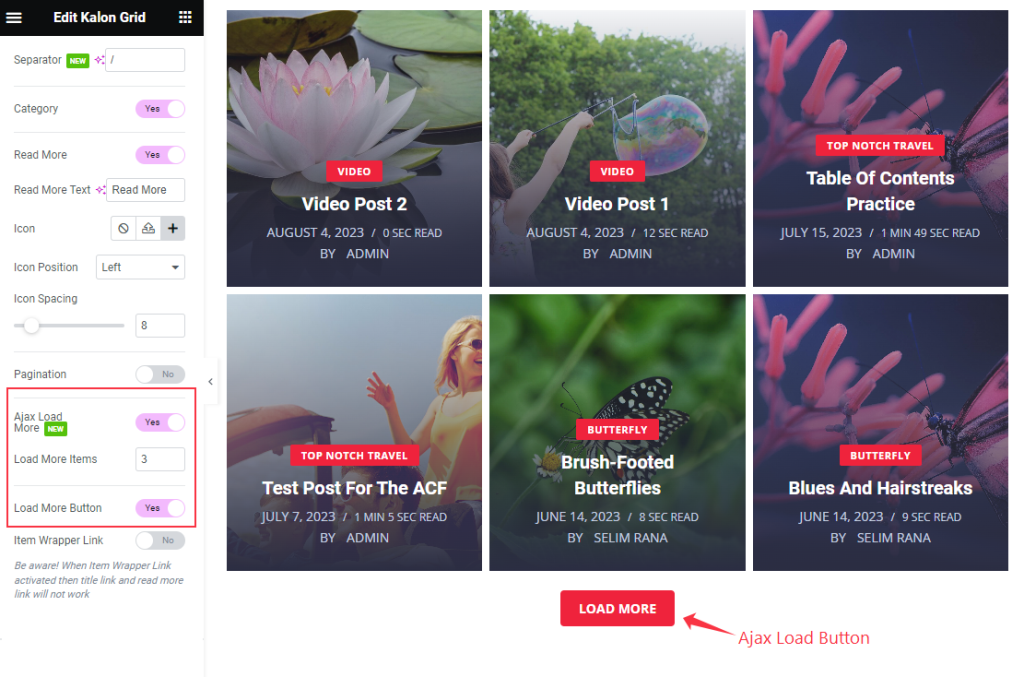
The Ajax Load More Switcher is for showing the Limited items by clicking on the Button and setting the Items that want to load.
Style tab
The style tab allows you to change or customize the appearance of the Kalon Grid widget content layout. The options include color settings, borders, paddings, etc.
There are several sections on this tab.
Items
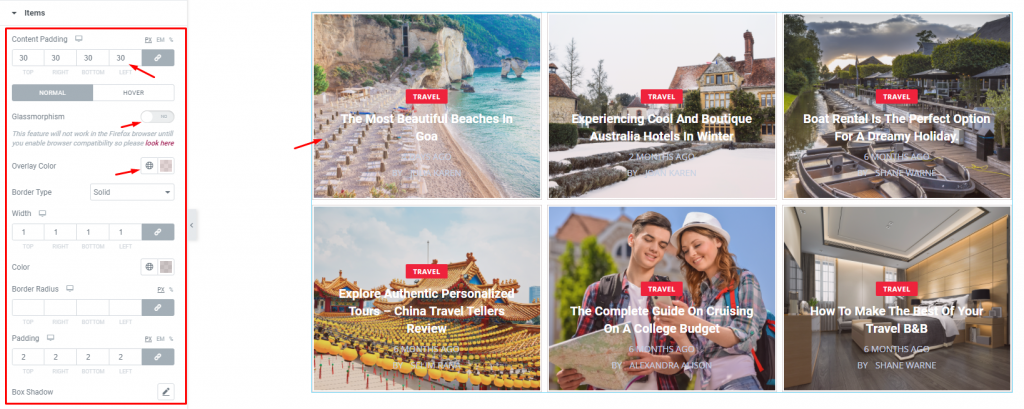
Go to Style> Items
Firstly, you can add content padding for the posts using the options in this section. It has a Glassmorphism switcher to apply a blurred glass effect on the post images. Also, you may use image overlay to drag out the beauty of your blog posts.
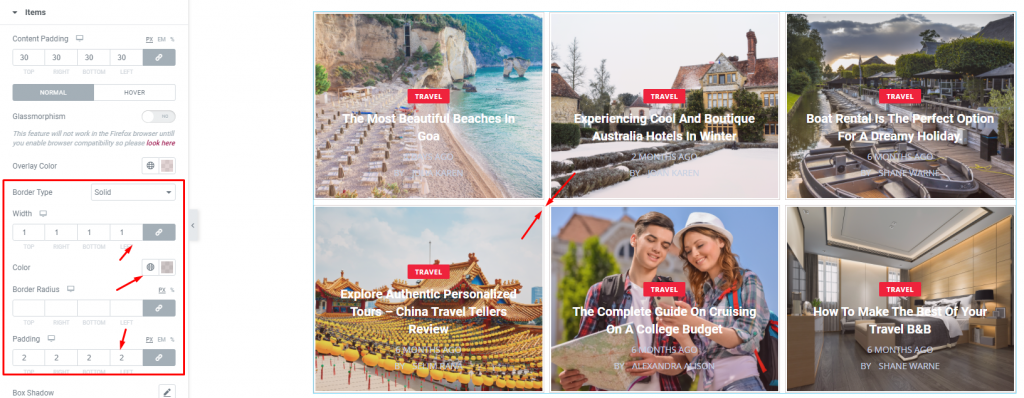
Other than that, there are border options, box-shadow, and item padding available. Use them to make unique attributes to your posts.
Title
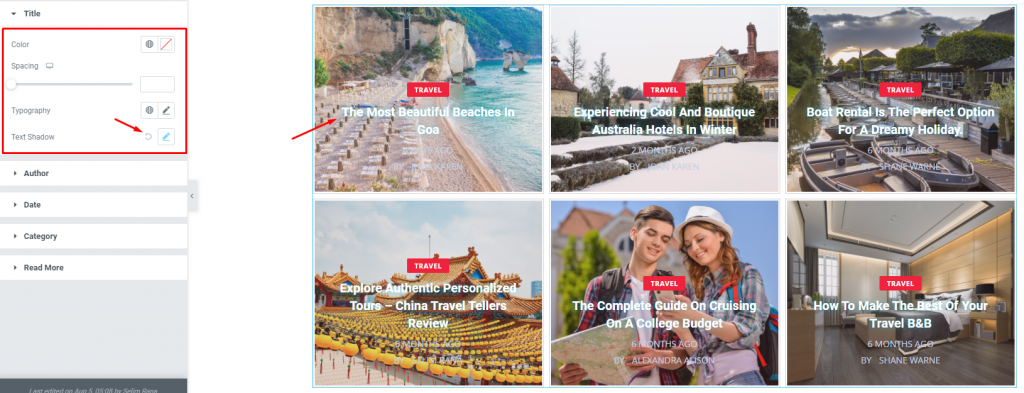
Go to Style> Title
The Title section mainly gives you the option to change the text color, spacing, and typography of the titles. Also, you can apply a text shadow to beautify the post titles on the Kalon Grid widget.
Author
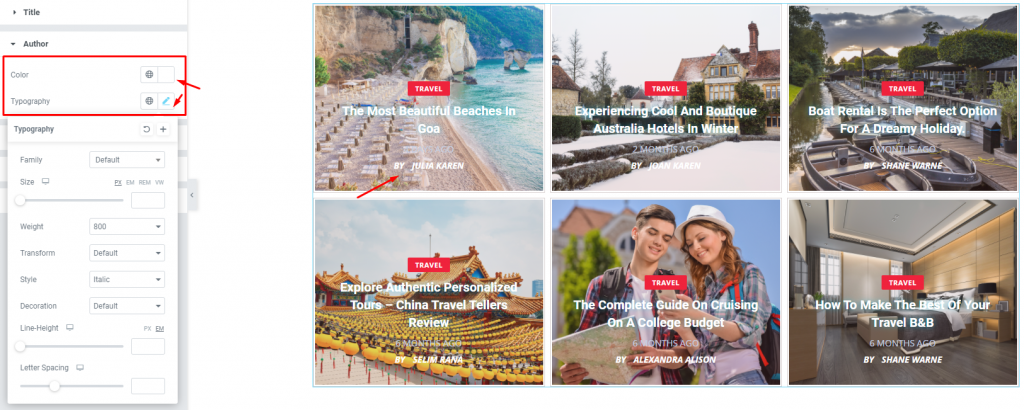
Go to Style> Author
For authors, you can customize the color and typography of the text.
Date
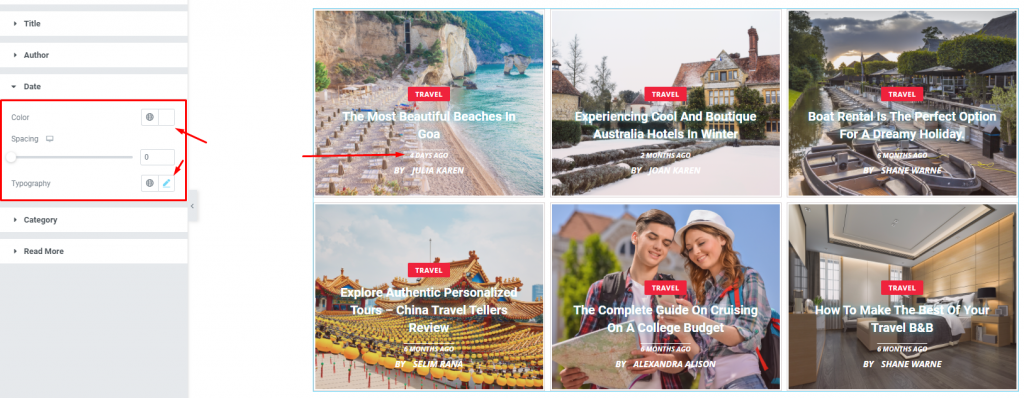
Go to Style> Date
You will find the post dates right below the post titles of the Elementor post grid. Change its color, spacing, or even the typography of the date according to your preferences.
Category
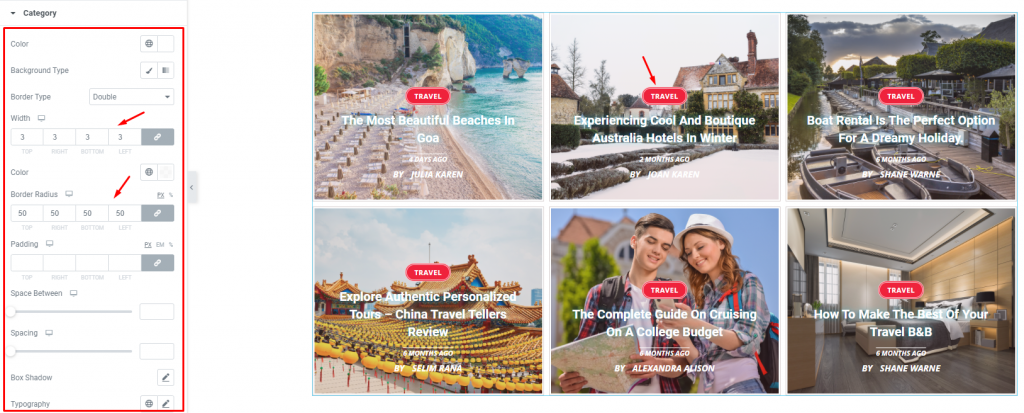
Go to Style> Category
Of course, how could we forget about the categories? The post categories are located at the top of their titles. Just access this section to change the text & background color,
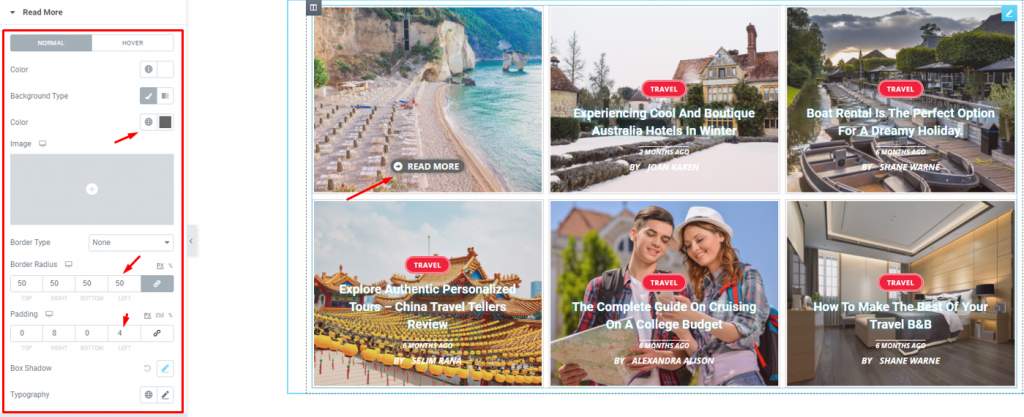
Go to Style> Read More
Lastly, the read more button located at the opposite side of the Kalon Grid widget posts can be customized using the options in this section. You can easily change the button color, add border and border radius, padding, box-shadow, and typography.
Conclusion
Still, stuck?
Watch this quick video on the Kalon grid widget for details. Also, see the demo page for more examples of the widget, provided by Bdthemes.

