The eCommerce Brand Grid Widget is a wonderful tool presented by BDthemes and part of Ultimate Store Kit. It lets you brand your products and your site in grid view to catch visitors’ eyes.
Let’s learn how to use the widget on your site.
Inserting the widget

At first, you have to insert the widget on the page. To do that, go to the widget menu, search Brand Grid, and then drag-drop the widget in the text area on the page.
Content tab customization
Edit the Layout

Now, we are going to customize the Layout section under the Content tab. To do that, go to Content > Layout. Here, set the Columns limit by 4, then set the Column Gap by 20.
Arrange the Brand Items

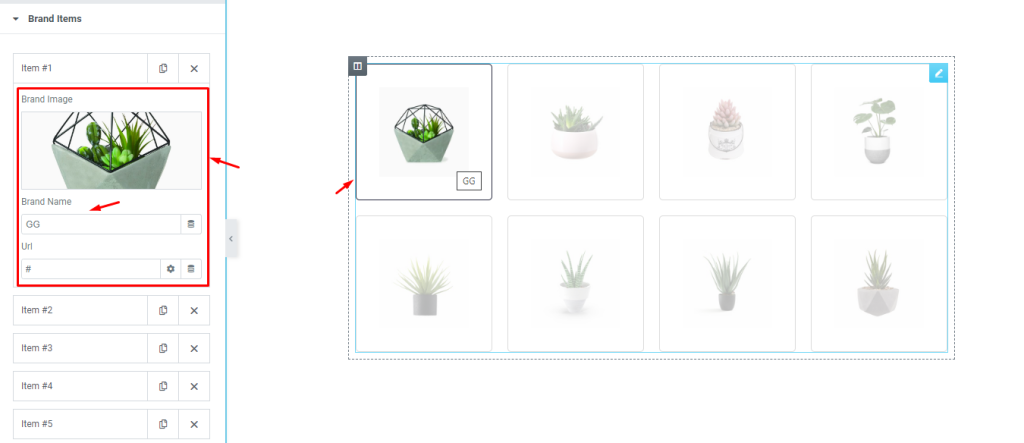
Next, go to Content > Brand Items. Here, you can see a row of items. Just go to the first Item, then change the Brand Image, then change the Brand Name, and see the result on the page. Do the same procedure for the remaining items.
Style tab customization
Format the Items

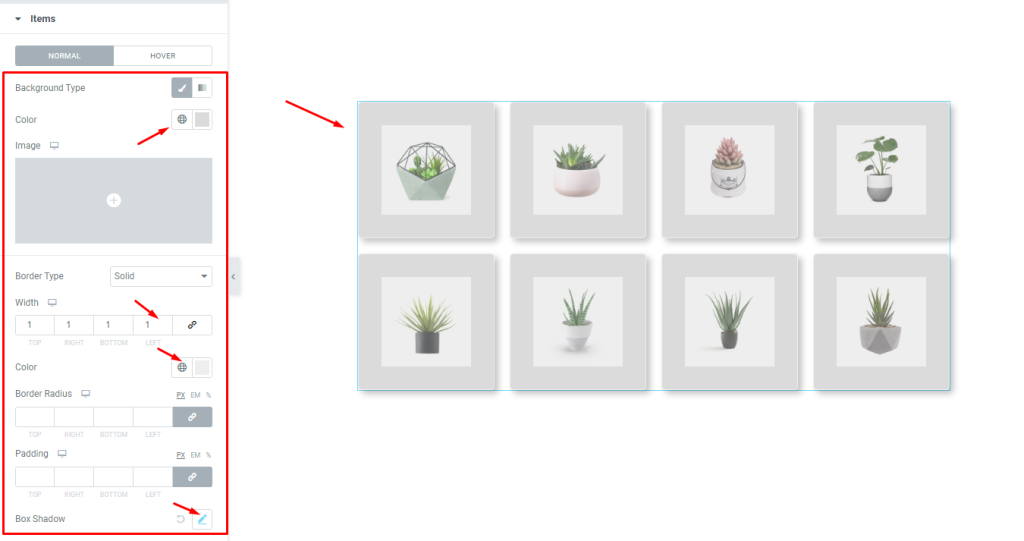
Now, we are going to customize the Items section under the Style tab. To do that, go to Style > Items. Here, you can see two modes i.e.: NORMAL and HOVER. For the NORMAL mode, change the Background Color, then set a thin Border, then change the Border Color, then change the Box Shadow, and see the result on the page.
Edit the Image

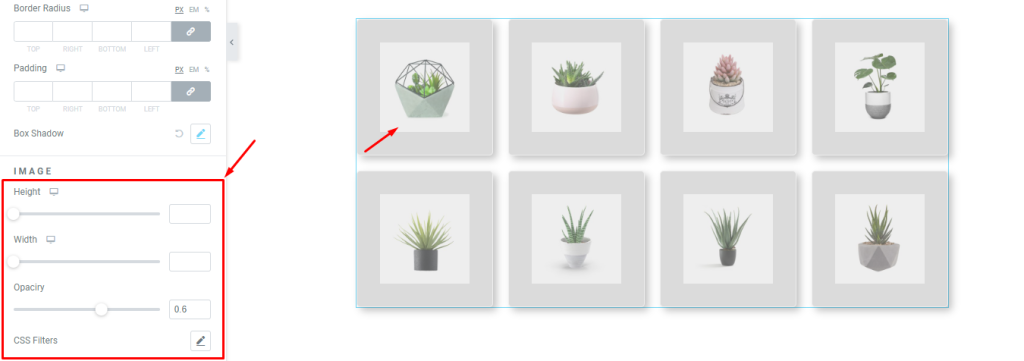
Lastly, go to the IMAGE sub-section. Here, change the image Height, then change the Width, then set Opacity, then change the CSS Filters, and see the result.
Video assist
If you want to know more about this widget, please watch the attached tutorial.
You can also see the demo page to learn more.
Thank you.

