The Give Receipt widget generates a donation receipt for your valuable donors upon entering their valid mail address. This super easy widget won’t take much time configuring and will perform well for a long time.
Let’s see how to operate it in this tutorial.
Inserting widget

Find the Give Receipt widget from the widget menu and drag it inside your page.
Content tab

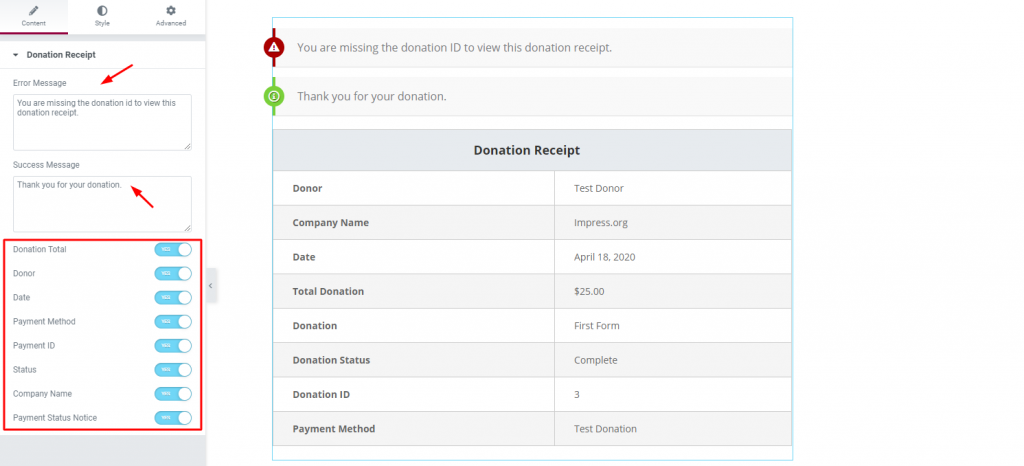
The Content tab houses all the basic settings for the interface of the Give donation widget for Elementor. There are two blank fields above for inserting the error/success messages.
You can see a number of switchers beneath the fields. Those are for turning off/on specific contents of the receipt form. Turning all of them off will eventually result in a blank receipt with no info.
Go ahead and have a look.
But that’s it for the Content tab. Now, moving on to the Style tab.
Style tab
The style tab has two section for the WordPress donation plugin, the Header and the Body.
Header

In the Header section, you have options for changing the color, border, add padding, and typography for the header.
Notice, the two warning lines above the header is not part of the form but a return message.
Body

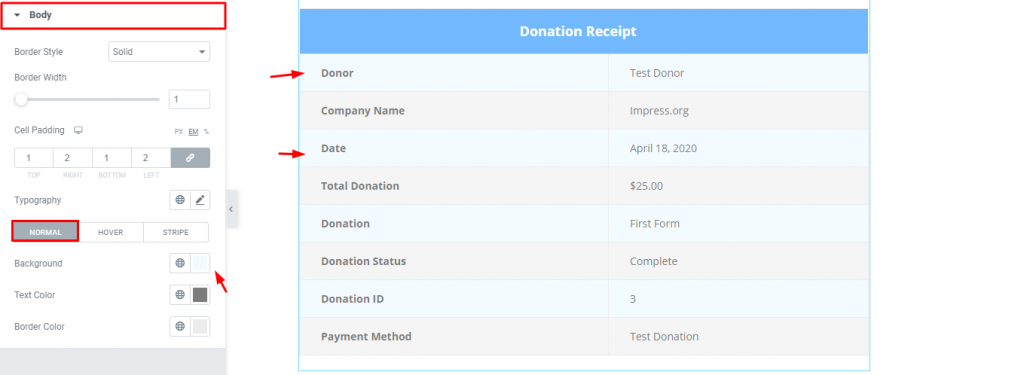
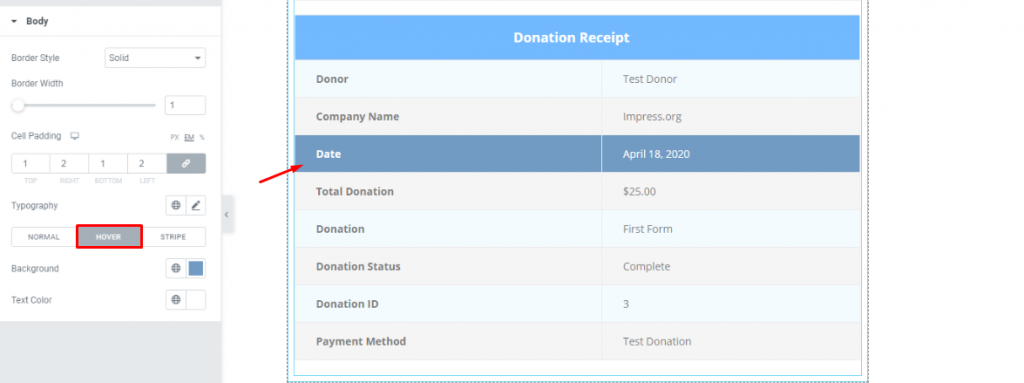
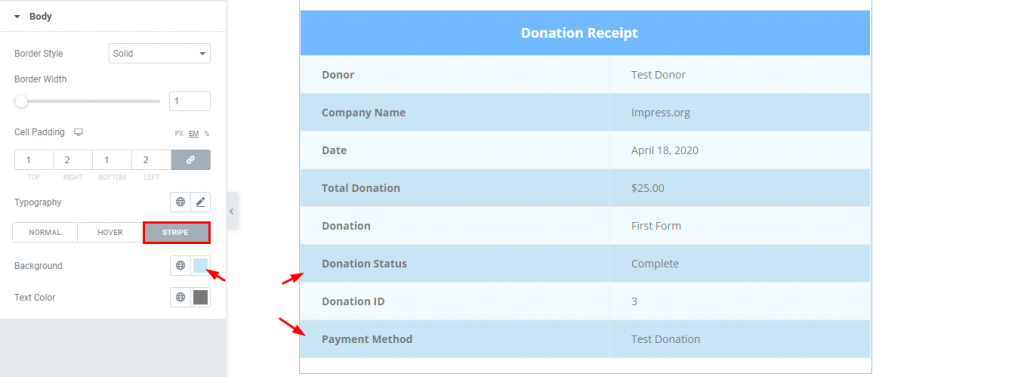
This section has options for border, padding, and typography for the full body of the form and three sub-section for color options.
The first sub-section lets you change the colors of the general fields. Look closely at the image.

The second sub-section holds color options for adding a hover effect.

And the last one is for changing the stripe pattern color.
That’s it.
Conclusion
Watch this video for more visuals on the Give Receipt widget and visit this demo page, by Bdthemes, for more examples.
Thanks for staying up.

