In this documentation, we will show you how to use the Floating Effects extension powered by the Element Pack Pro addon.
Activate the Floating Effects Extension
The floating effects is an extension of Element Pack Pro. You can activate it from the Element pack pro dashboard.
Go to Element Pack Pro > Extension > Floating Effects
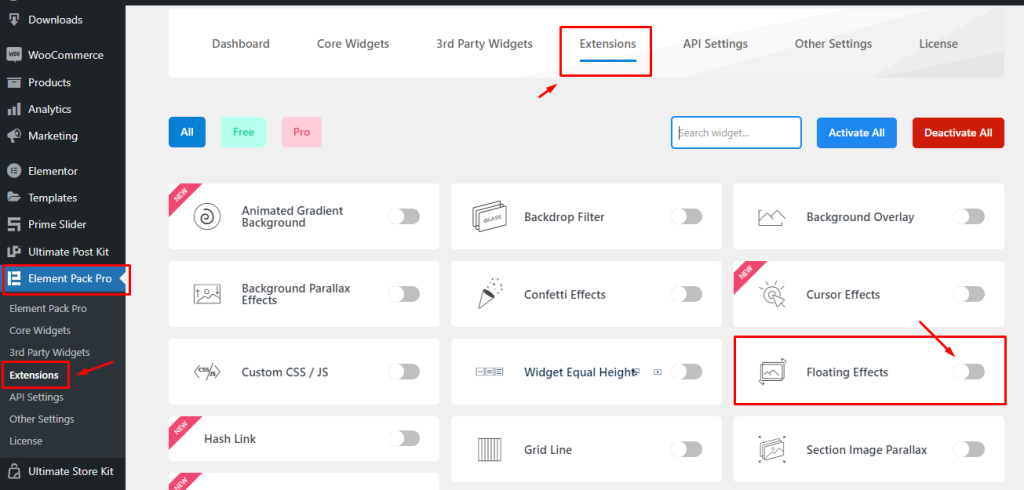
Find the Floating Effects extension and turn it on.
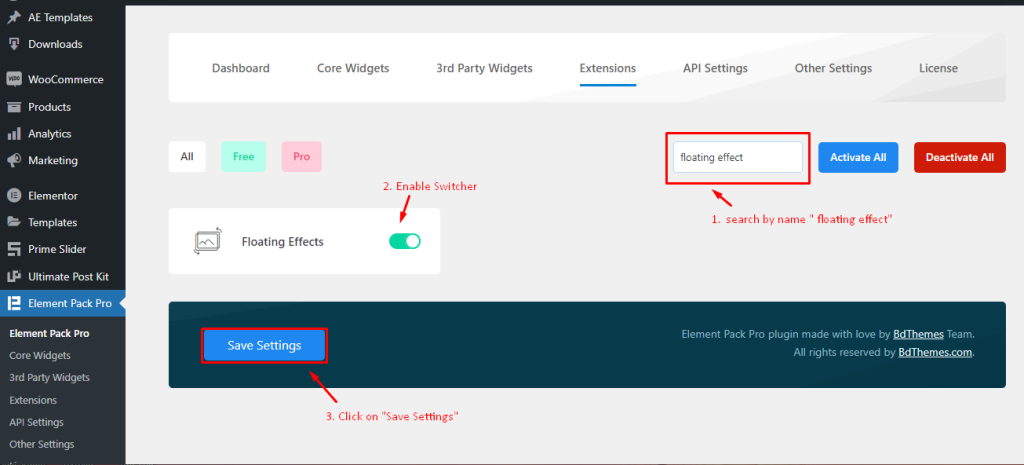
Save Settings to activate the Extension in order to use it.
Where to find the Floating Effects Extension
You will find this extension on every element or widget’s Advanced tab.
Go to Advanced Tab > Motion Effect
In the advanced tab, you will see a section named “ Motion Effect “.
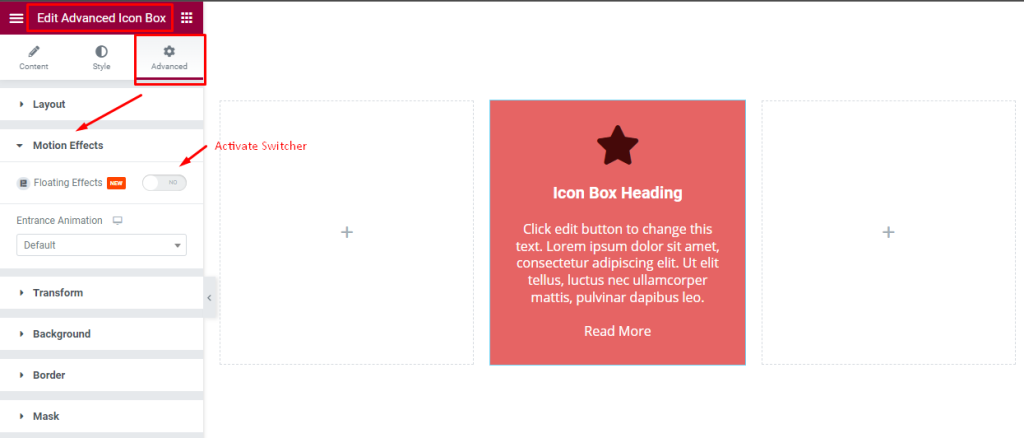
There you can see the Floating Effects Switcher which is disabled by default. Click on the switcher to activate it.
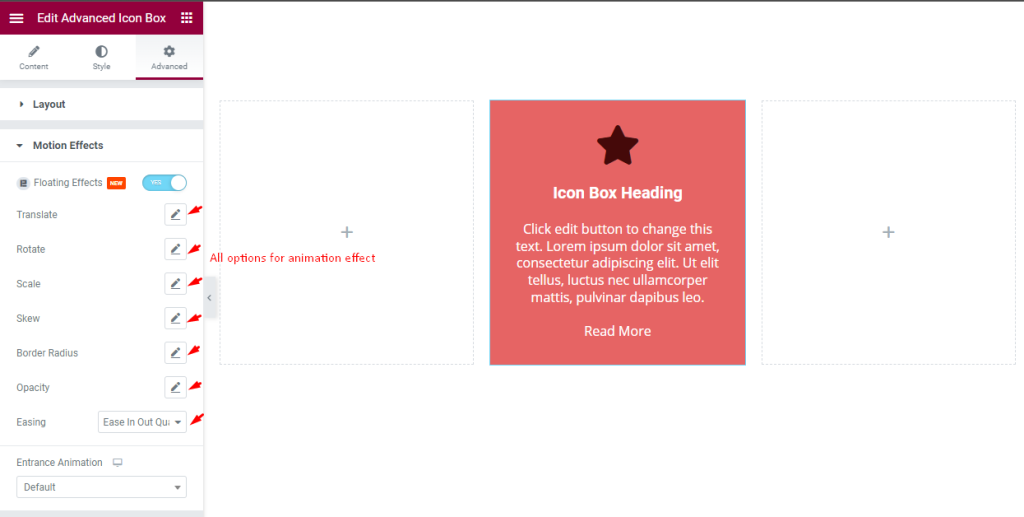
After enabling this, you will see several options here. Let’s explore all the possibilities one by one.
Translate options explore
Translate is used to change the position of any elements in the vertical and horizontal directions. It defines the translated property x- and y-coordinates of an element in 2D.
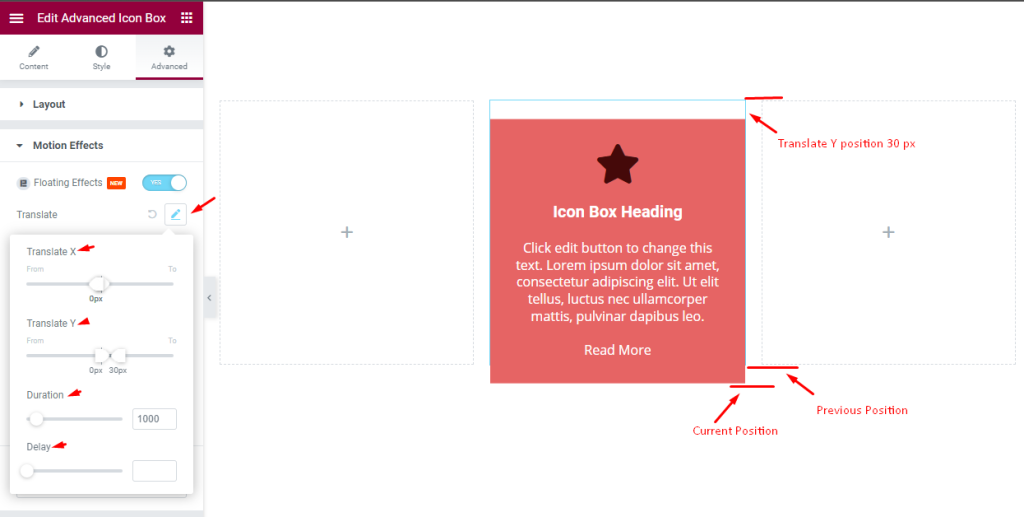
You can see the Translate X which is 0px and Translate Y is 30px. It means that it will change position only in the vertical direction.
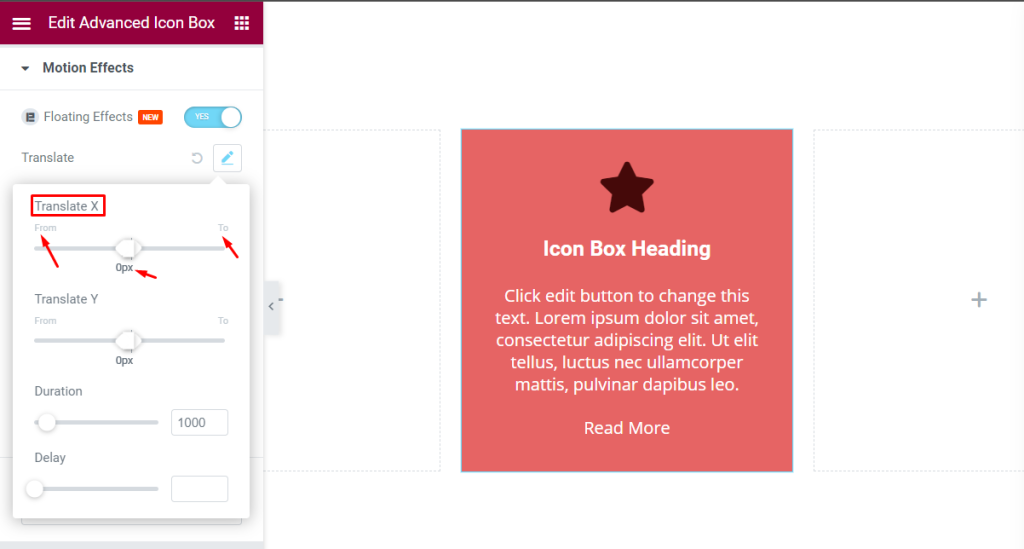
The position controls have a start and end position value.

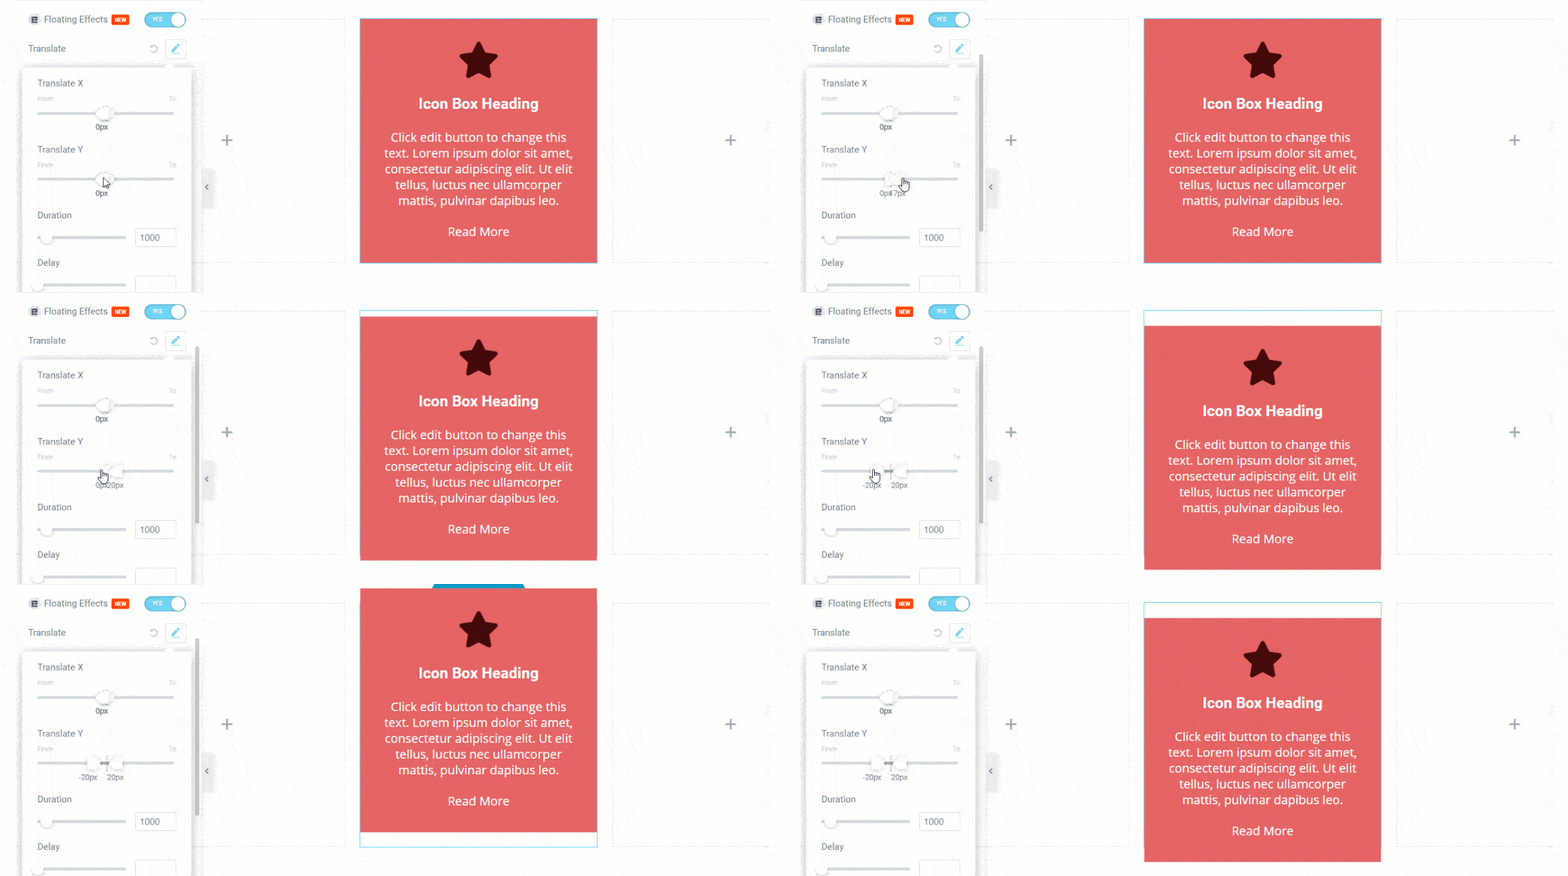
That lets you determine the initial position of the element and the final position of it. The element will move within the position, creating a fluid animation movement.
Duration: Determines the total time for the animation to happen. Less means quicker.
Delay: Time required before the animation loop restarts.
Rotate Position Explore
Rotate is used to rotate an element by a certain degree. Their position can be set X-axis, Y-axis, and Z-axis. It’s like a 3D Rotation.
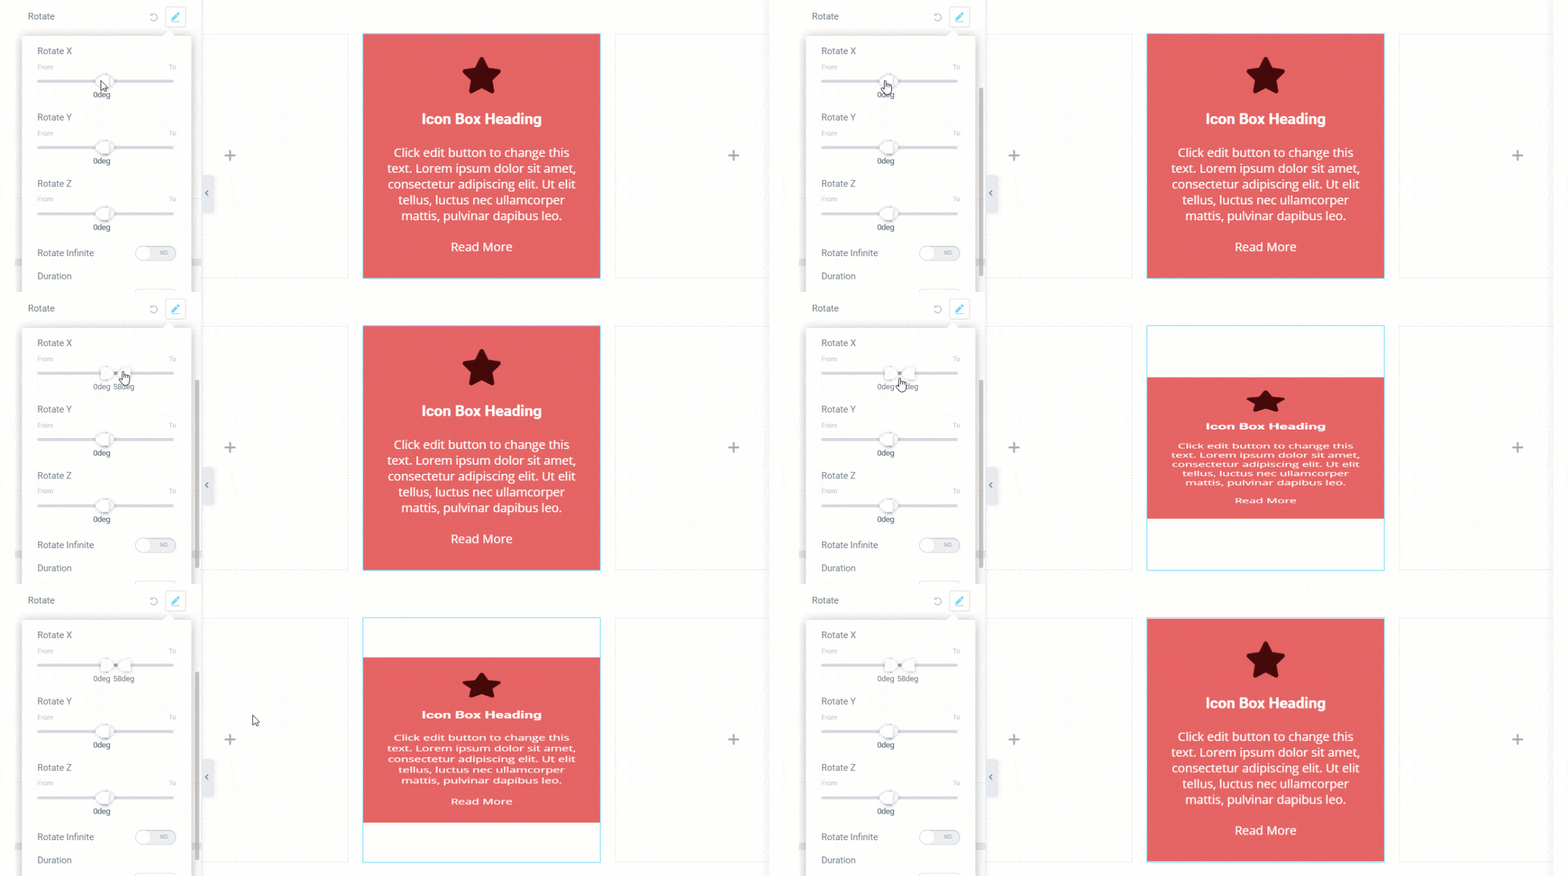
Set degree in Rotate X axis
Set the position for the x-axis. It will compress from the x-axis.
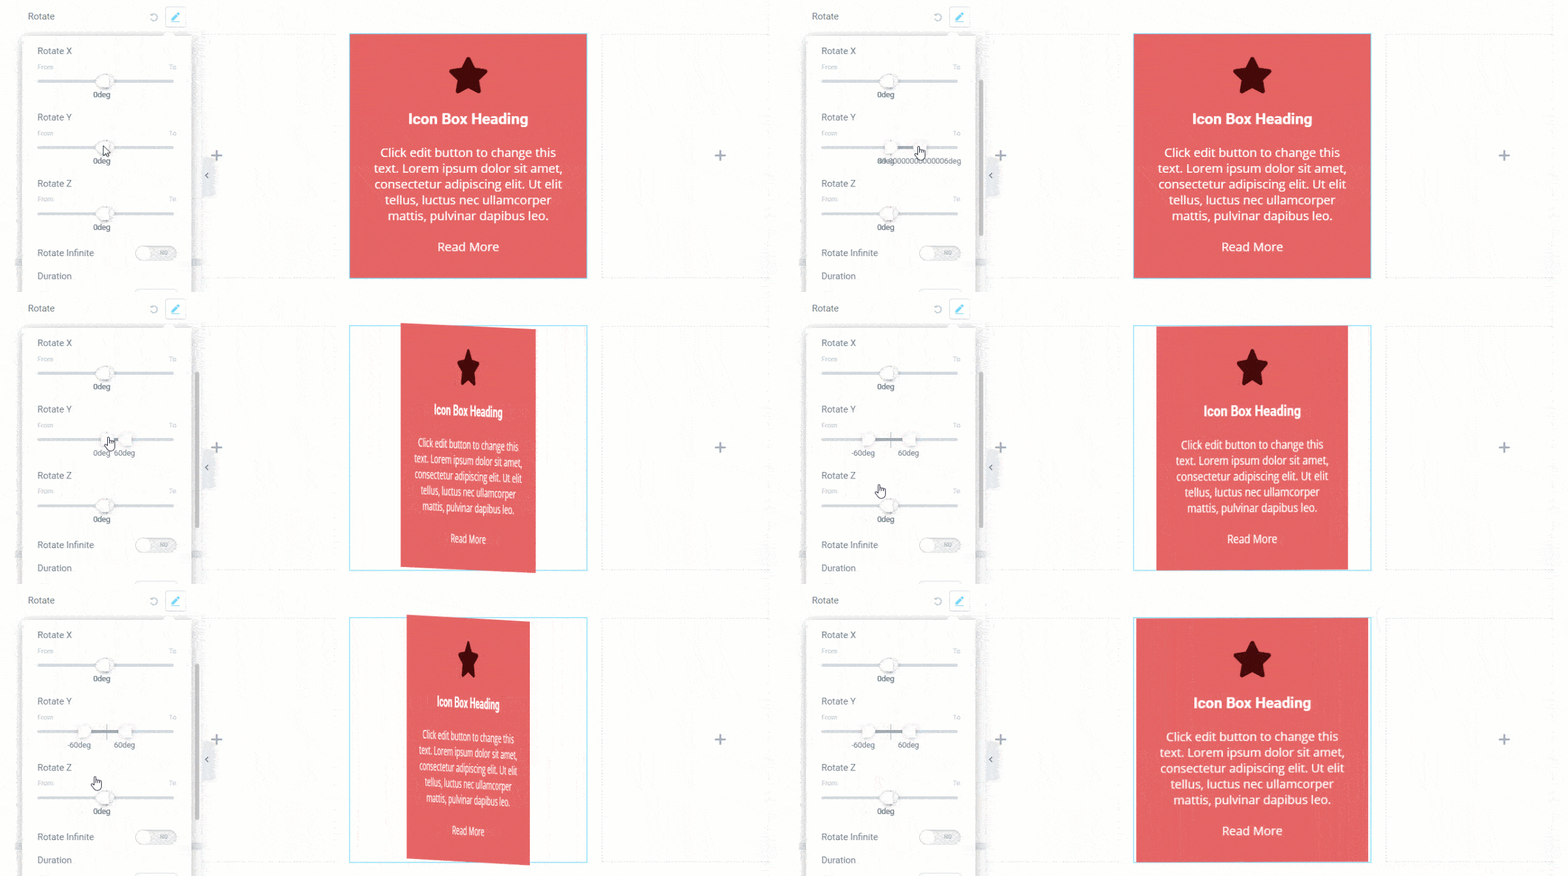
Set degree in Rotate Y axis
In Rotate Y axis you can set degrees. It will change the rotation point in the Horizontal direction.
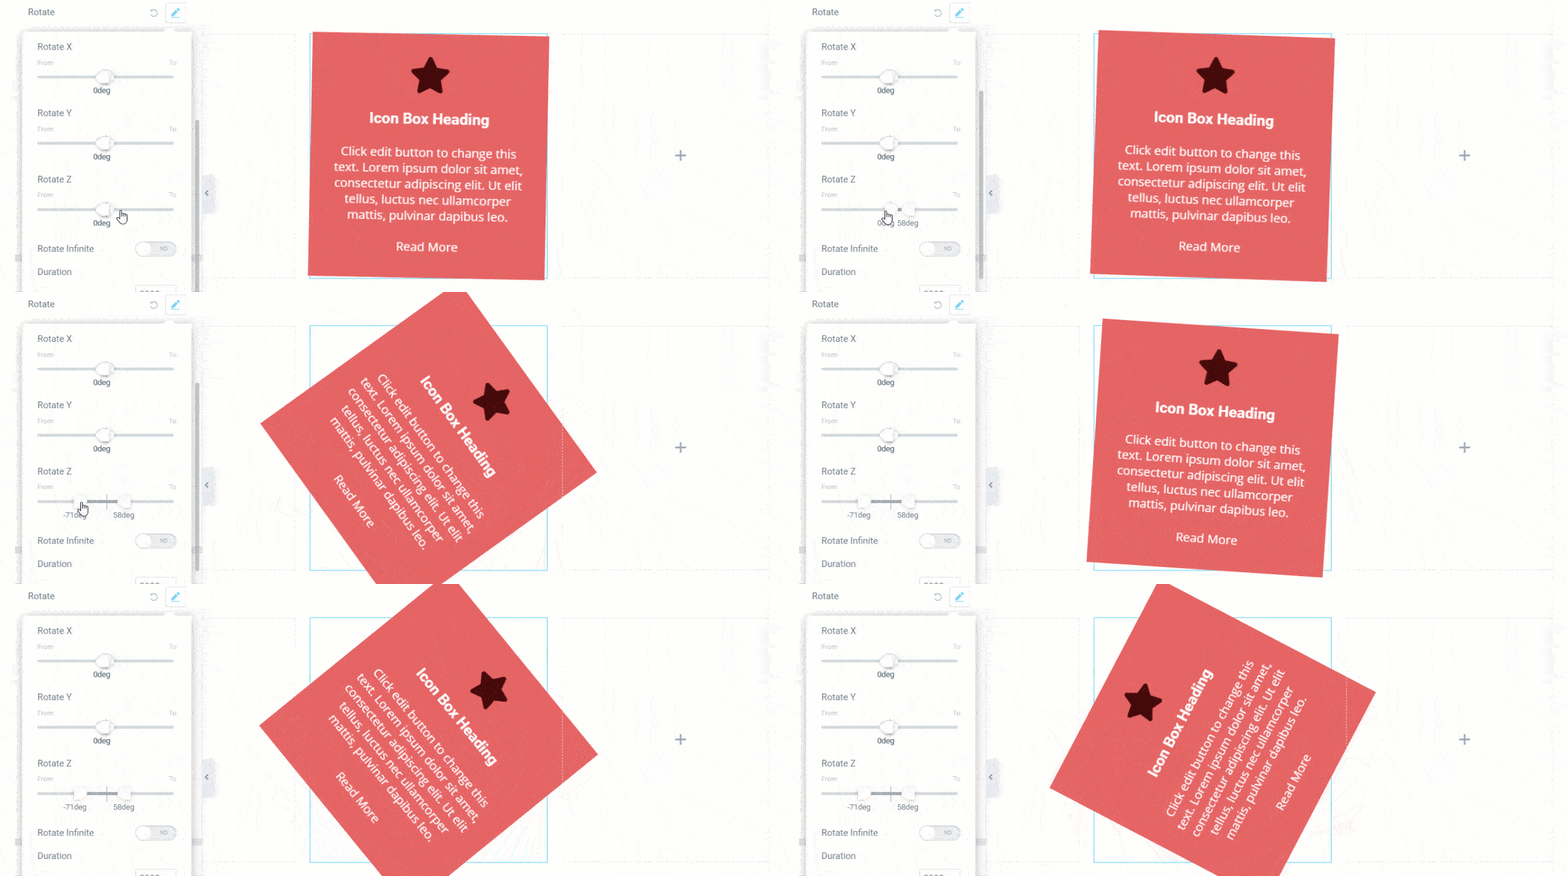
Set degree in Roate Z axis
The z-axis refers to the 3D degree in position.
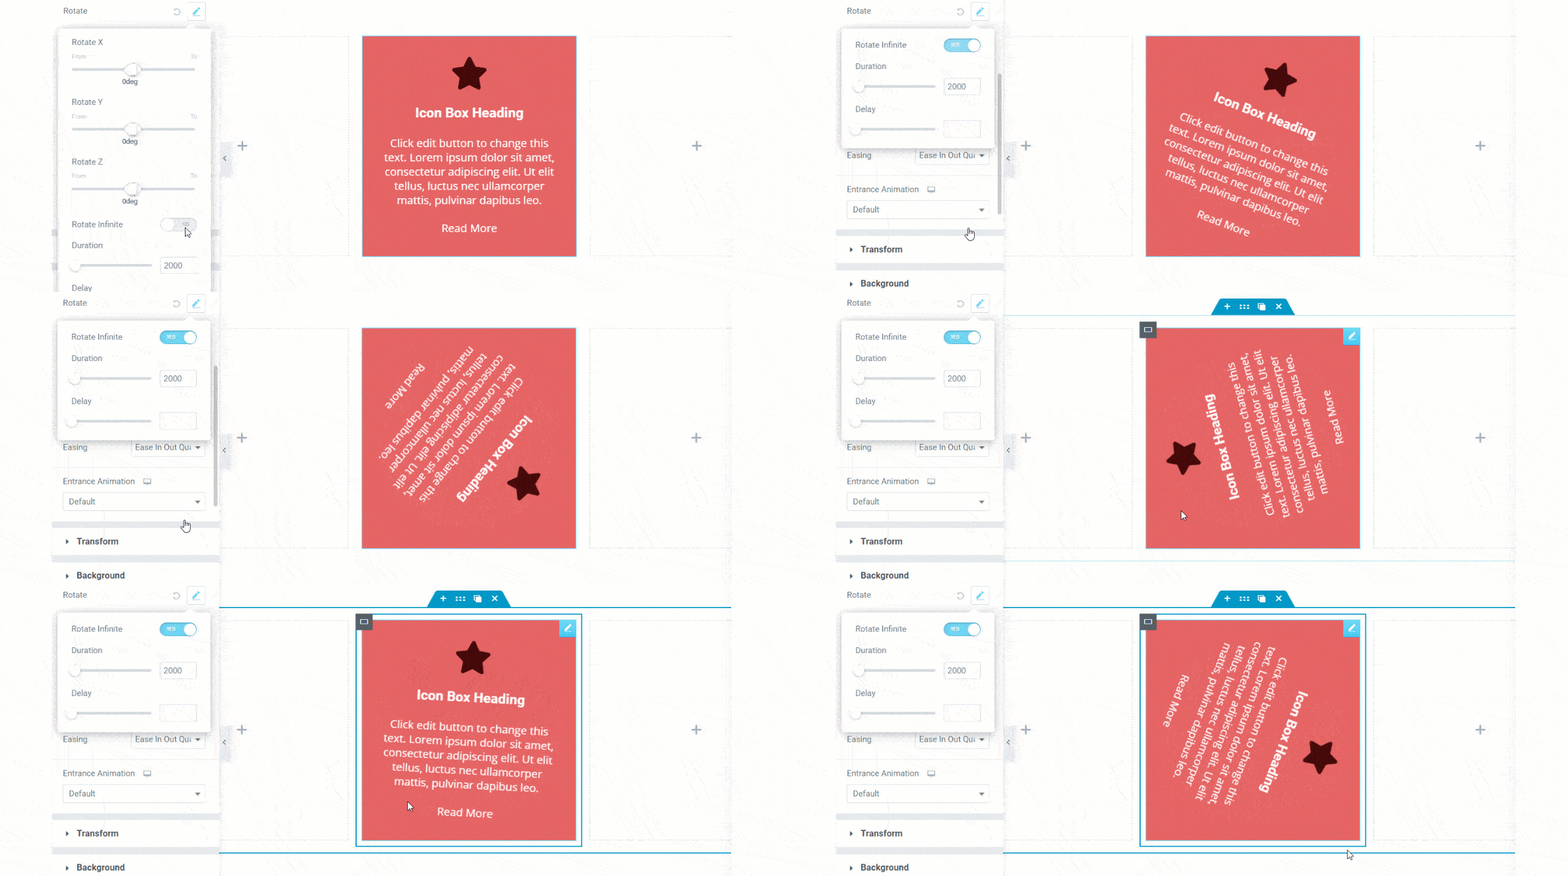
Also, there is a special feature called Rotate Infinite Loop switcher.
Watch this quick video to learn about the Rotate animation effects.
Scale option explore
The Scale method increases or decreases the size of an element. The scale property multiplies values for how much an element is scaled in x- and y-directions.
In the picture below, this div element is two times its original width and three times its original height.
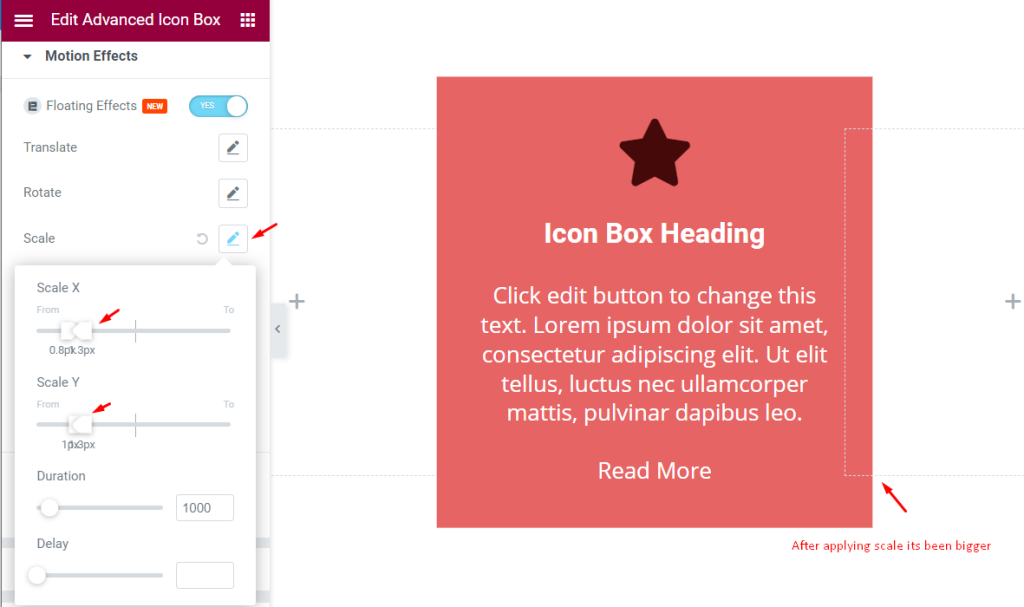
The values are multiplied to scale easily. Also comes with animation Duration and Delay options.
Skew option explore
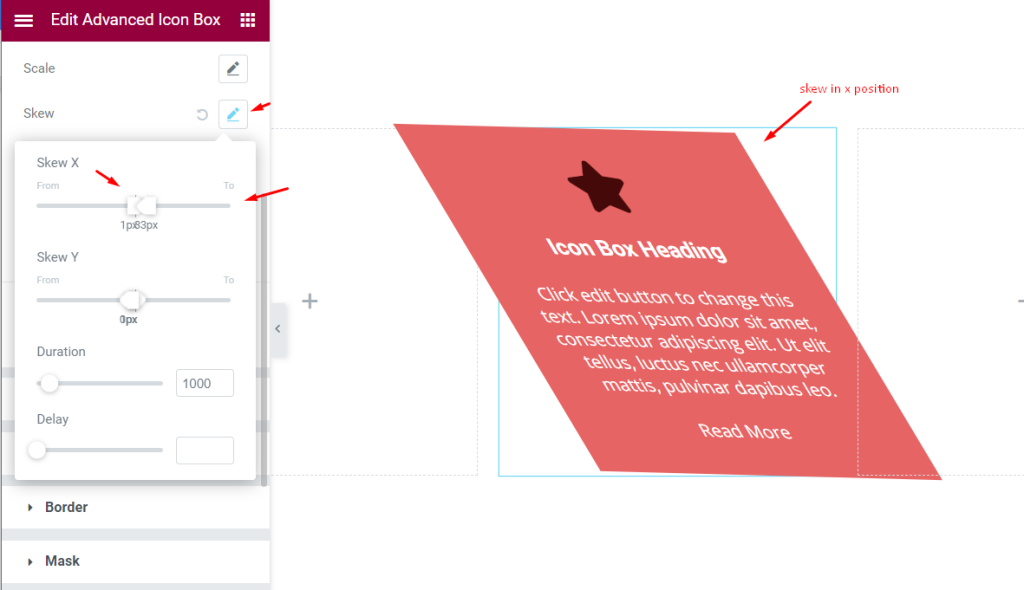
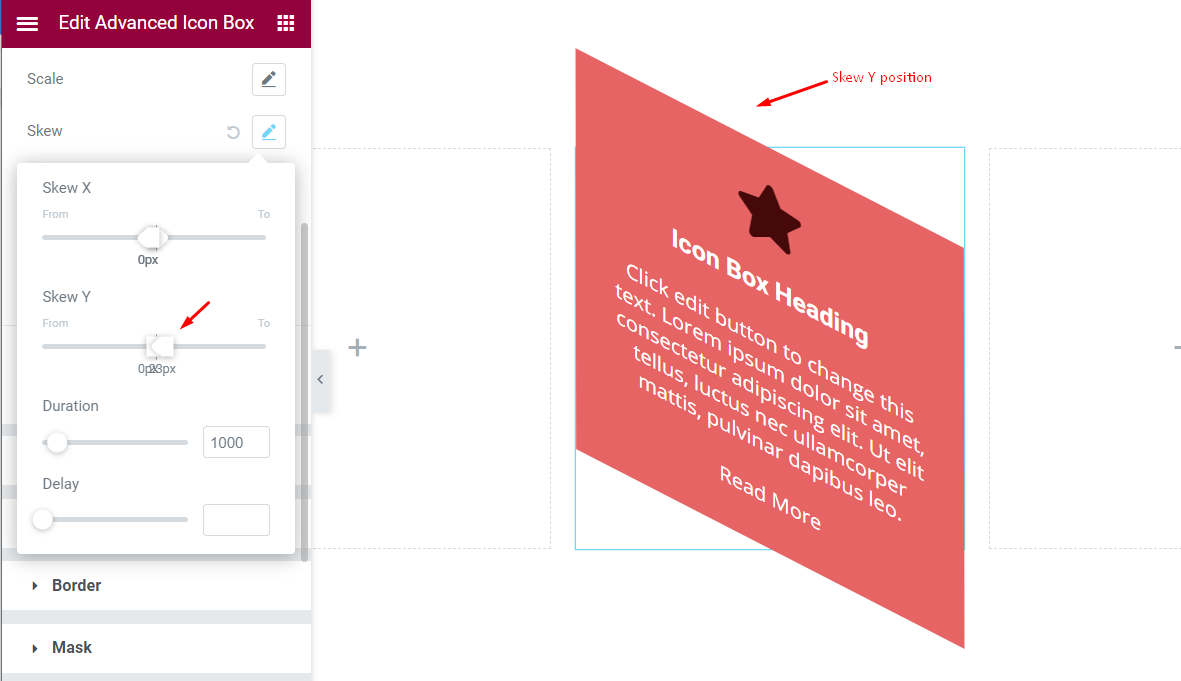
Skew is an inbuilt function that is used to pick a point and push or pull an element in different directions.
Skew X: This parameter holds the angle representing the horizontal axis to distort an element.
Skew Y: This parameter holds the angle representing the vertical axis to distort an element.
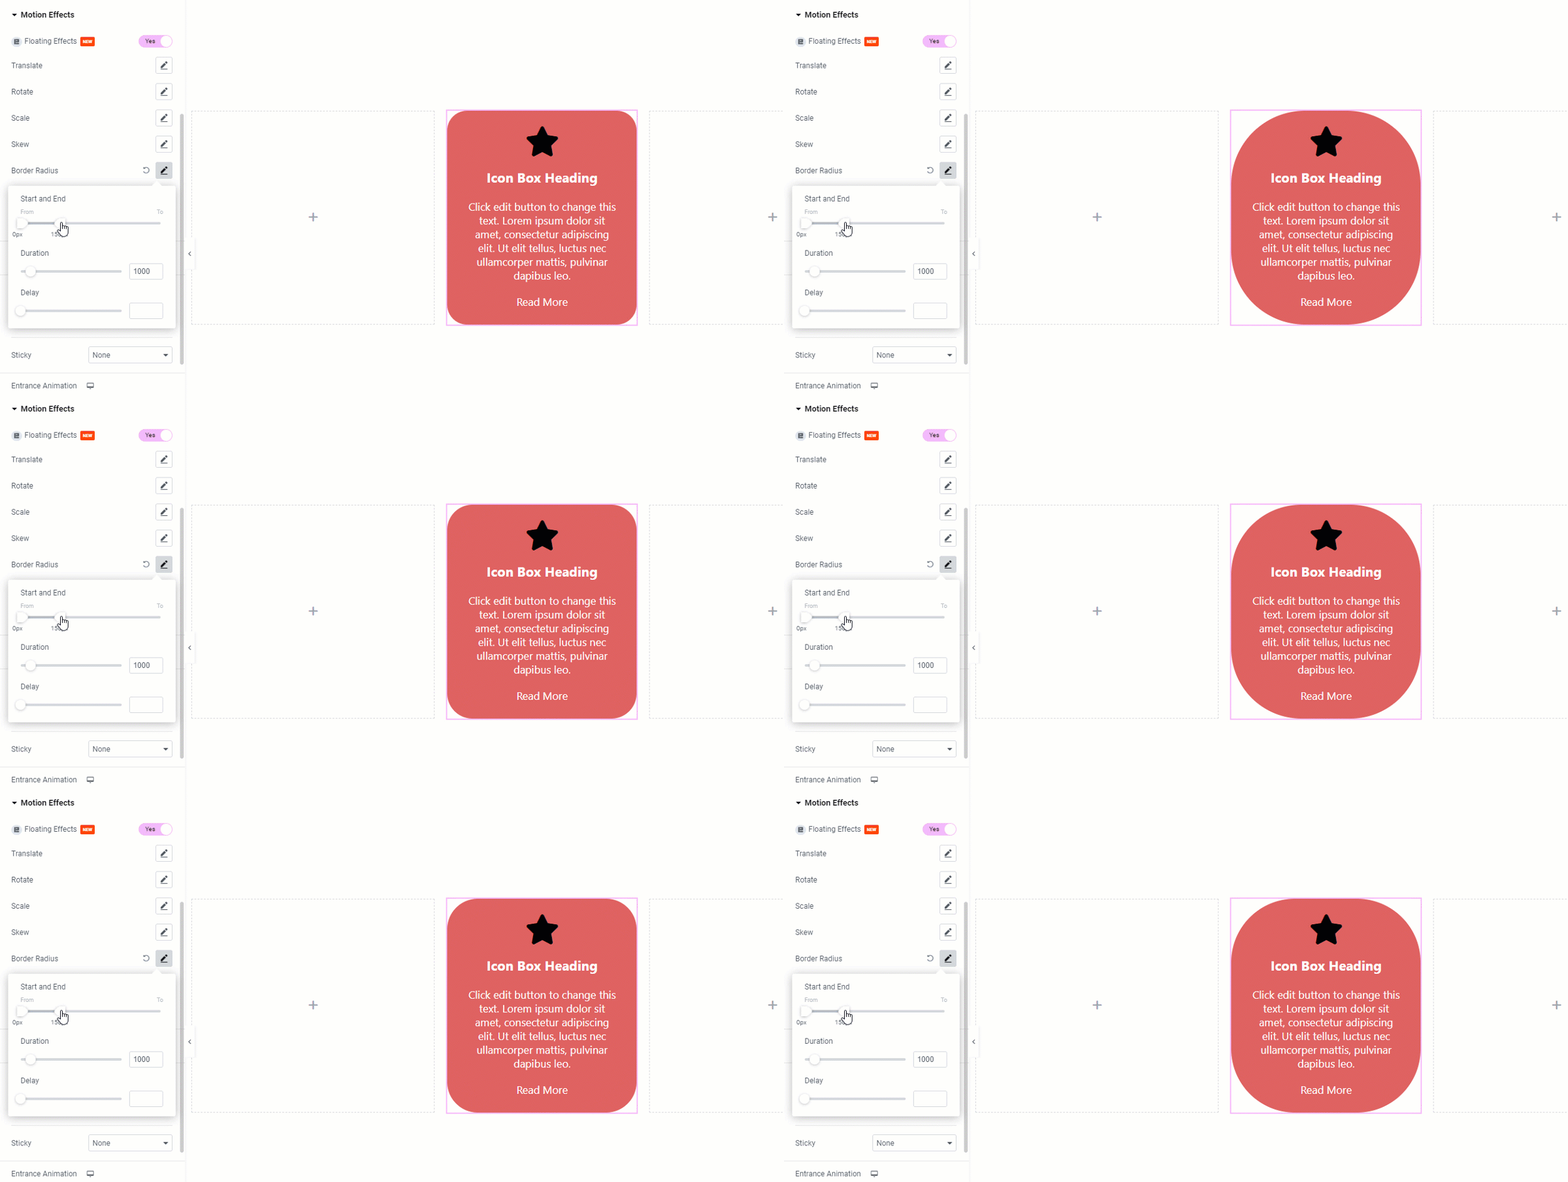
Border Radius effect
The border-radius CSS property rounds the corners of an element’s outer border.
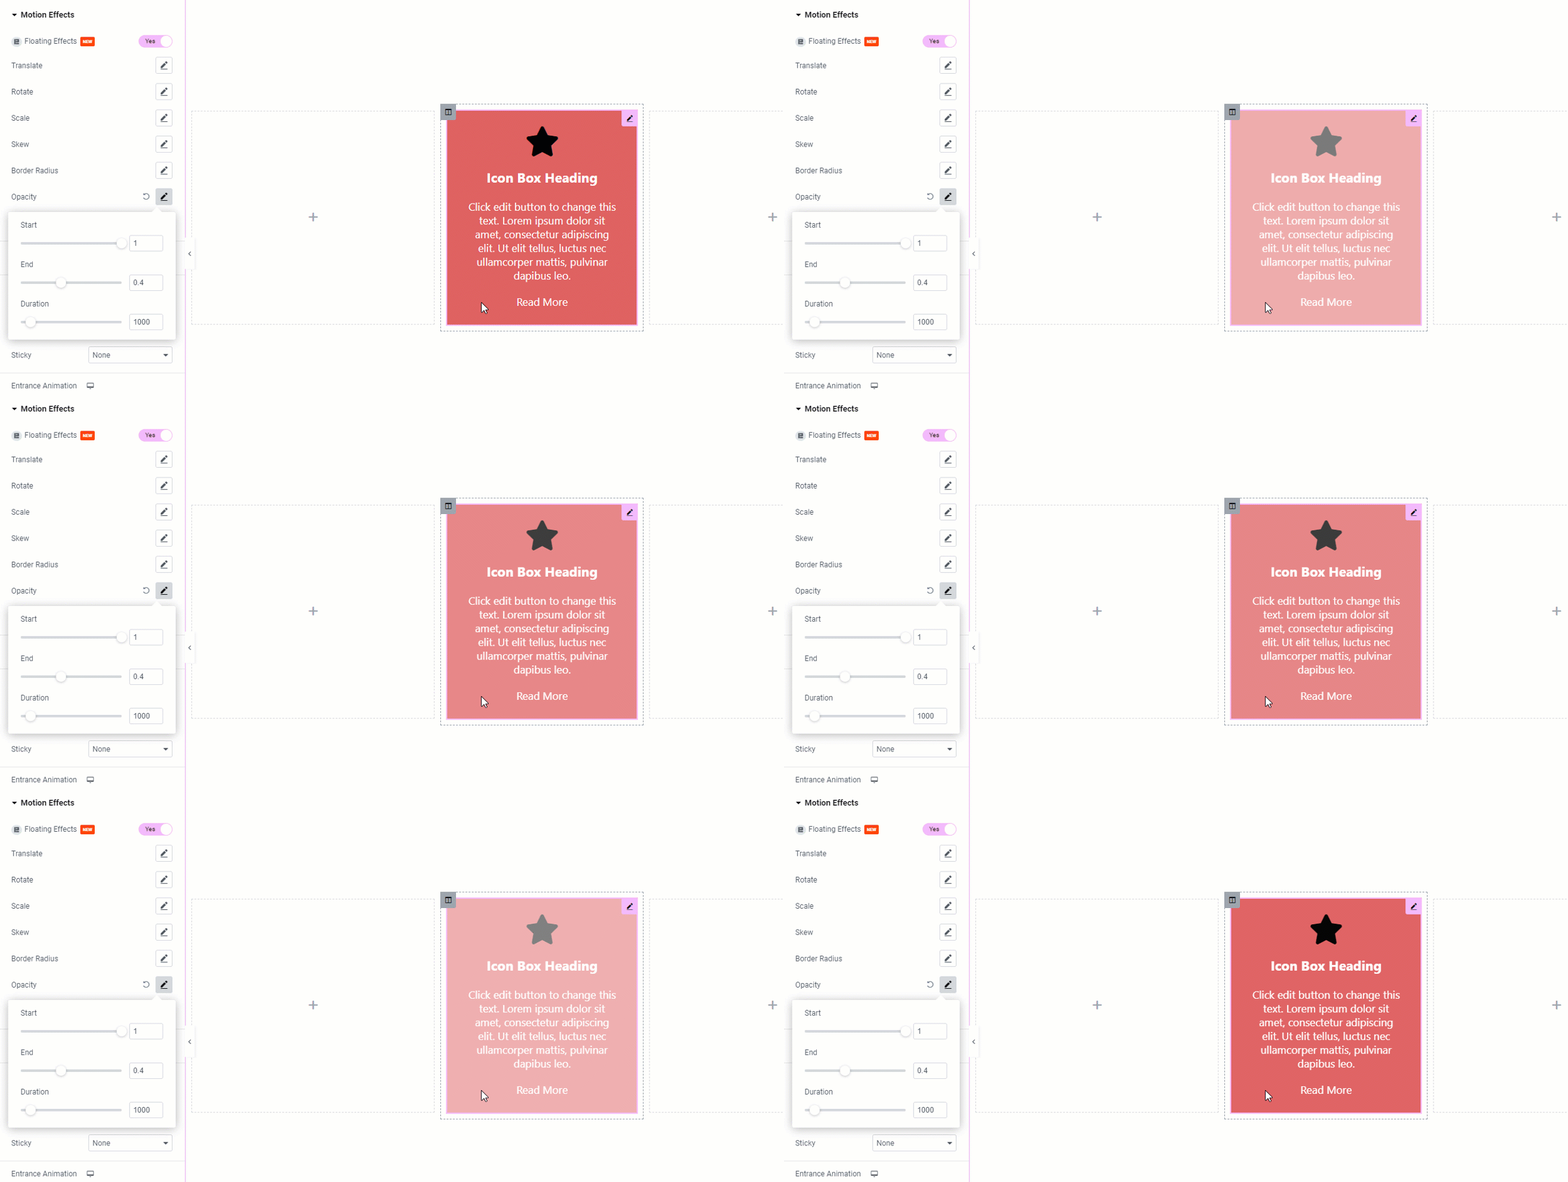
Opacity Control of elements
The Opacity property lets you animate an element by setting up a Start and End opacity value and pulsating between the values as an animation.
Easing Animations
The floating effects can be coupled with an easing animation from the 9 pre-defined animation setups.
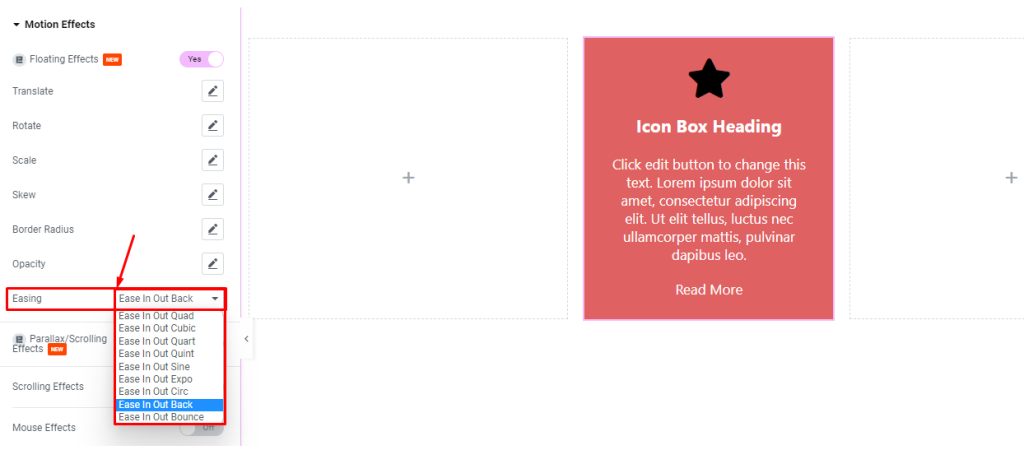
You can choose any from the list to add more motion to your animation.
Video Assist
Watch the video to learn about the Floating Effects feature. Please visit the demo page for examples.
Thanks for being with us.
