In this documentation, we will discuss the customization of the Text Gradient Background Extension, brought to you by the Element Pack Pro.
Why the Text Gradient Background Extension?
Using just a simple CSS class, you can seamlessly add gradient backgrounds to any text element( Like- Heading, Text, etc). This feature enhances your typography with a modern and stylish appearance while ensuring flexibility for customization.
Enabling The Text Gradient Background Extension
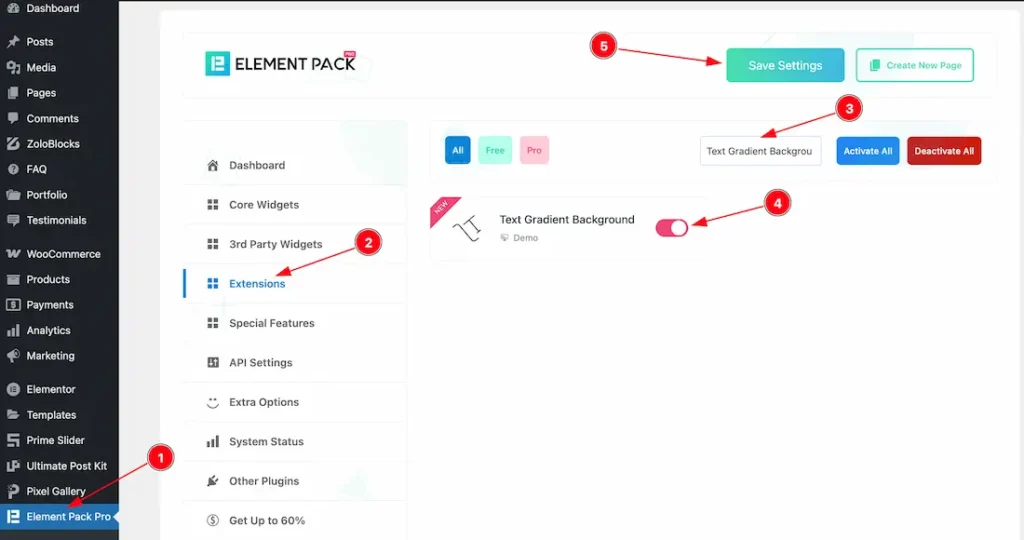
To use the Text Gradient Background Extension from Element Pack, you must first enable the extension.
- Go to WordPress Dashboard > Element Pack Plugin dashboard.
- Then Click the Extension Tab.
- Search the Text Gradient Background Extension Name.
- Enable the Text Gradient Background Extension.
- Hit the Save Settings Button.
Let’s Start to Customize the Extension
To demonstrate the Text Gradient extension feature, you can apply gradient effects to any text, title, or heading widget. Let’s explore them one by one-
Set Gradient Background For Title Or Heading widget
To demonstrate the Text Gradient Background extension feature, we’re using the Elementor Heading widget. You can apply it to any heading widget if you prefer. To do it, just follow the below instructions-
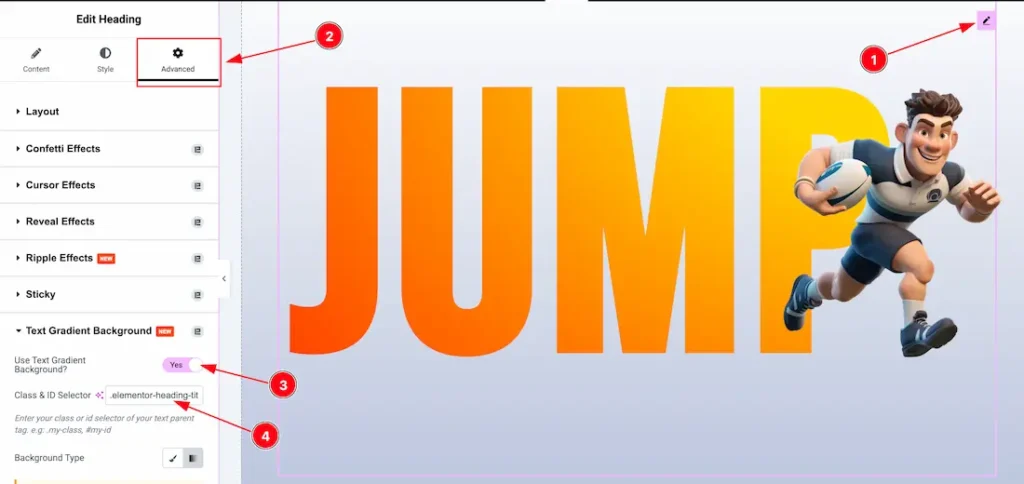
- Select the Heading widget.
- Go to the Advanced tab.
- Open the Text Gradient Background section and enable the Text Gradient Background switch.
- Enter the Parent Class or ID of the heading widget in the Class/ID field.
Lets explore the inner customizations options-
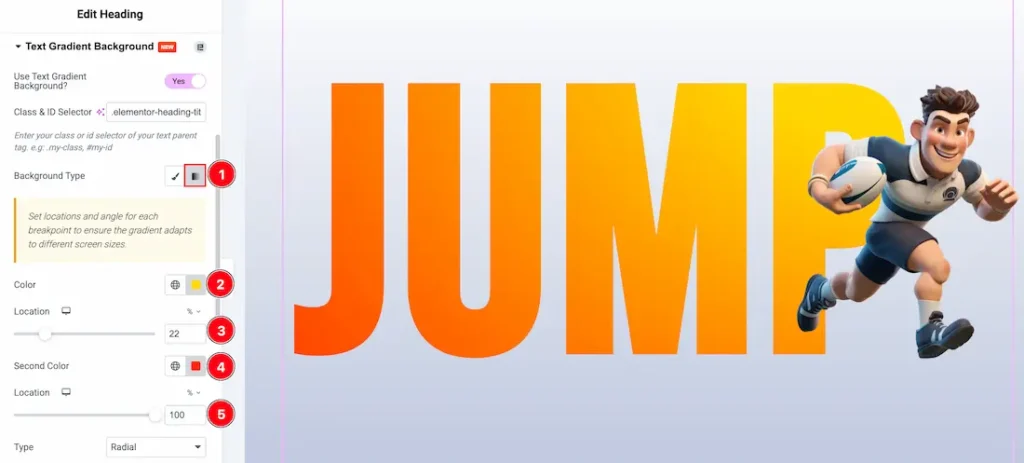
1. Background Type: You can change the color of the title widget background to classic or gradient. Here we choose the Background type Gradient.
2. First Color: This option lets you set the first color of the gradient background.
3. First Color Location: This option lets you set the first color location of the gradient background.
4. Second Color: This option lets you set the second color of the gradient background.
5. Second Color Location: This option lets you set the second color location of the gradient background.
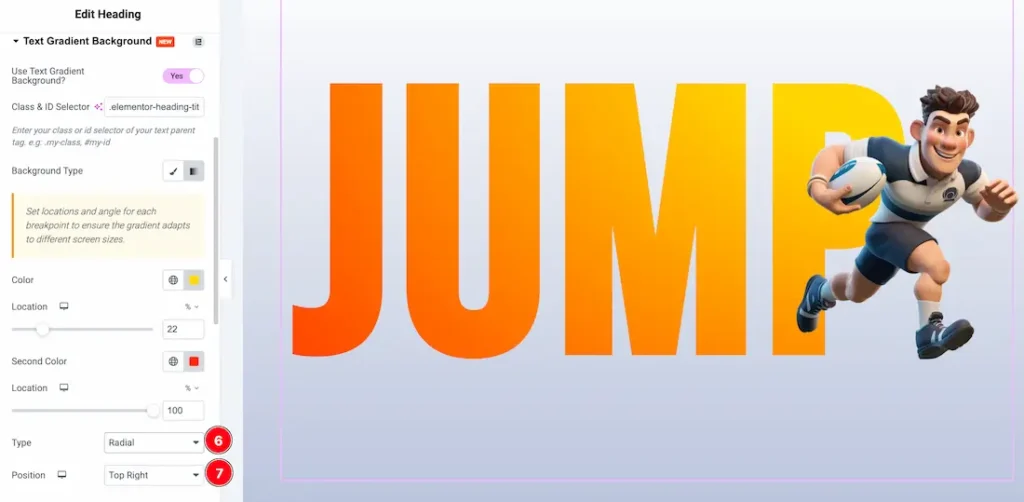
6. Type: You can set the gradient type – Linear, and Redial. You can choose one of them. From here you also can set the color angle from here.
7. Position: You can set the gradient color position as- Center Center, Center Left, Center Right, Top Center, Top Left, Top Right, Bottom Center, Bottom Left, and Bottom Right.
How Get the Widget Parent Class or ID

After adding the widget to your editor page, go to the preview page, inspect the site, and select the parent class or ID of the widget. Then copy the class or ID as shown in the screenshot and paste it inside the text gradient background class/id field.
Set Gradient Background For Specific Title Or Heading Word
You can set the text gradient background for specific title or heading word. To do it, just follow the below instructions-
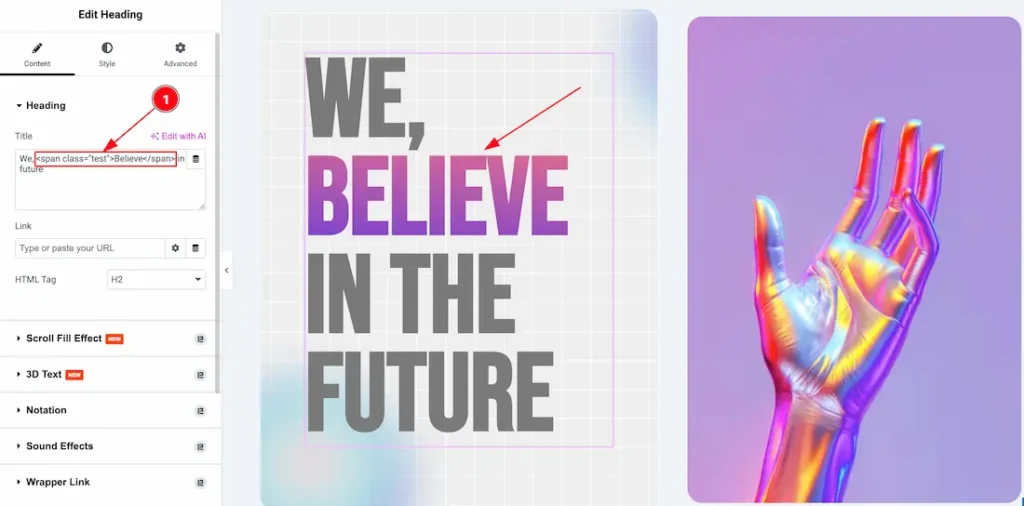
1. First, set the Title parent class or ID for the specific word as shown in the screenshot above. You can choose any HTML tag, such as H1–H6, P, Div, Span, etc.
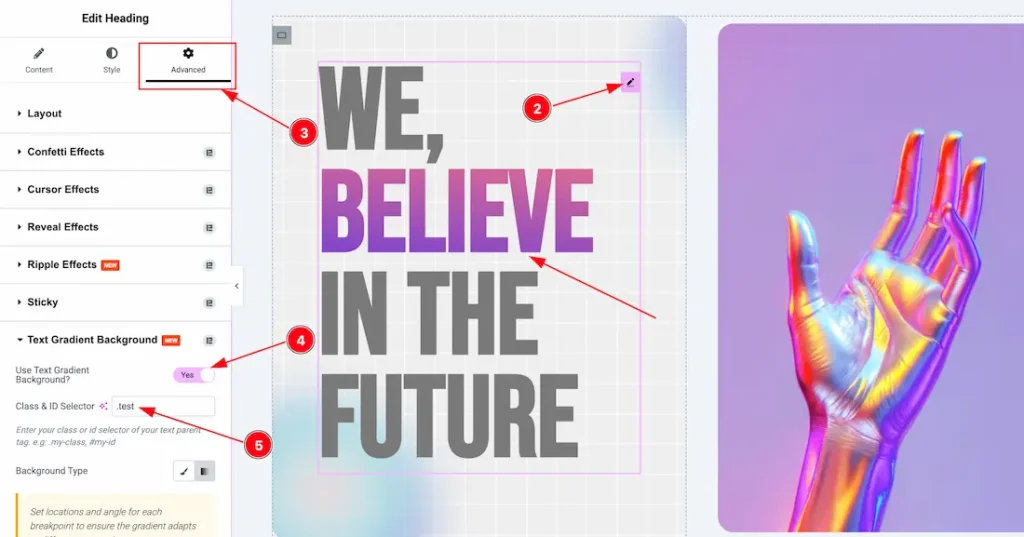
2. Select the Heading widget.
3. Go to the Advanced tab.
4. Open the Text Gradient Background section and enable the Text Gradient Background switch.
5. Enter the Parent Class or ID of the heading widget in the Class/ID field.
After that, the Text Gradient Background works for your selected specific title or heading word.
Set Gradient Background For Any Text or Paragraph Widget
The Text Gradient Background works for any Text or Paragraph widget. To do it, just follow the instructions below-
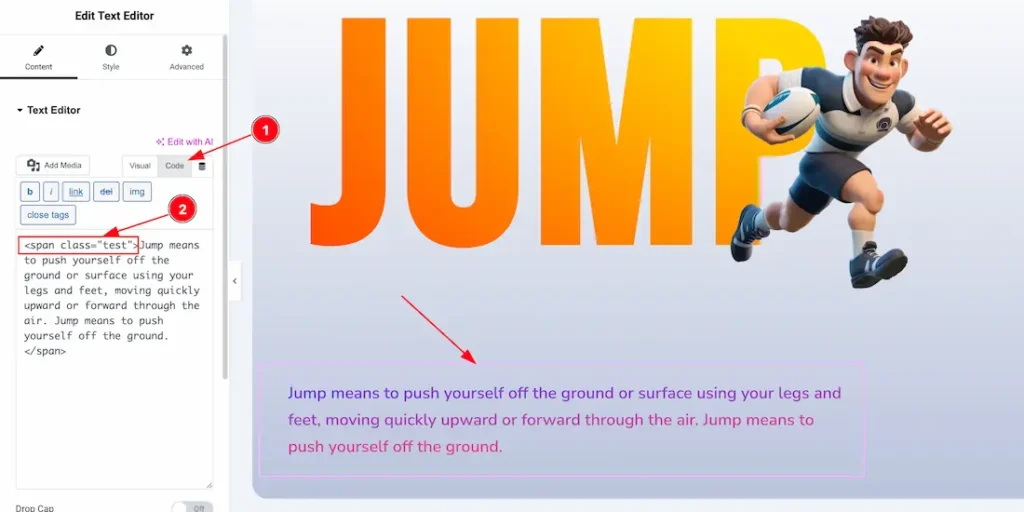
- Insert the Text widget into your page, then go to the Content section and select Code.
- Set the Text parent class or ID as shown in the screenshot above. You can choose any HTML tag, such as P, Div, Span, etc.
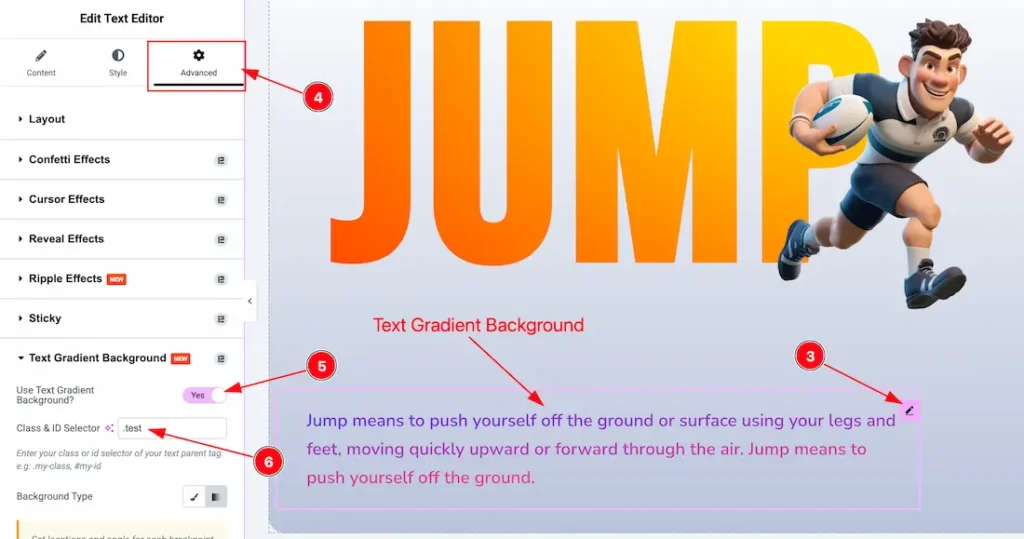
3. Select the Text or Paragraph widget.
4. Go to the Advanced tab.
5. Open the Text Gradient Background section and enable the Text Gradient Background switch.
6. Enter the Parent Class or ID of the Text or Paragraph widget in the Class/ID field.
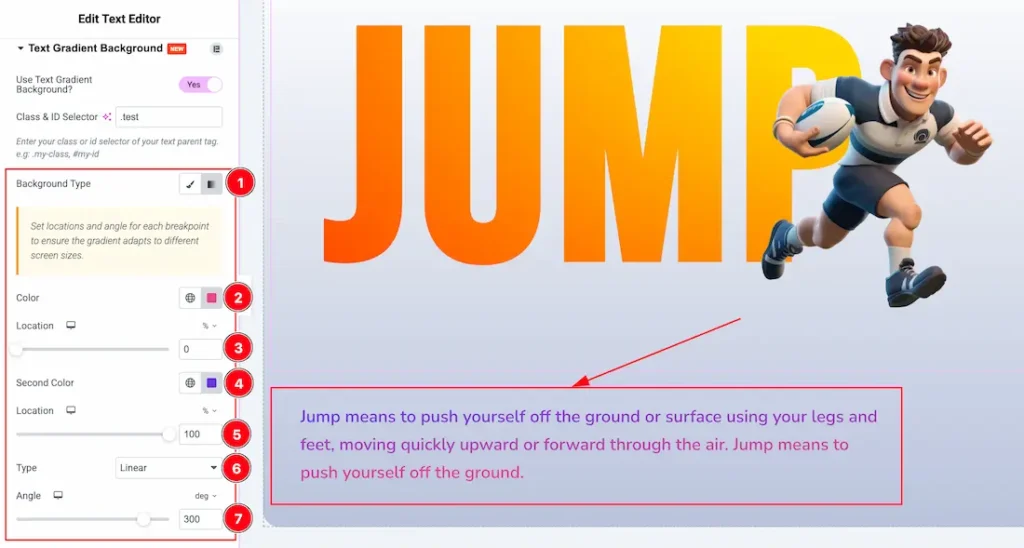
1. Background Type: You can change the color of the Text widget background to classic or gradient. Here we choose the Background type Gradient.
2. First Color: This option lets you set the first color of the gradient background.
3. First Color Location: This option lets you set the first color location of the gradient background.
4. Second Color: This option lets you set the second color of the gradient background.
5. Second Color Location: This option lets you set the second color location of the gradient background.
6. Type: You can set the gradient type – Linear, and Redial. You can choose one of them. From here you also can set the color angle from here.
7. Position: You can set the gradient color position as- Center Center, Center Left, Center Right, Top Center, Top Left, Top Right, Bottom Center, Bottom Left, and Bottom Right.
All done! You have successfully customized the Text Gradient Background Extension on your website.
Video Assist
I hope the video will help you to learn more about the feature. Please check the demo page for more examples.
Thanks for staying with us.