The Horizontal Scroller widget allows you to display content in a smooth horizontal scrolling layout, fully integrated into Element Pack Pro. It enables users to scroll through sections or items horizontally while scrolling vertically, creating a modern and engaging browsing experience. In this documentation, we will explore the customization options of the Horizontal Scroller widget provided by Element Pack Pro for Elementor.
Enable The Horizontal Scroller Widget
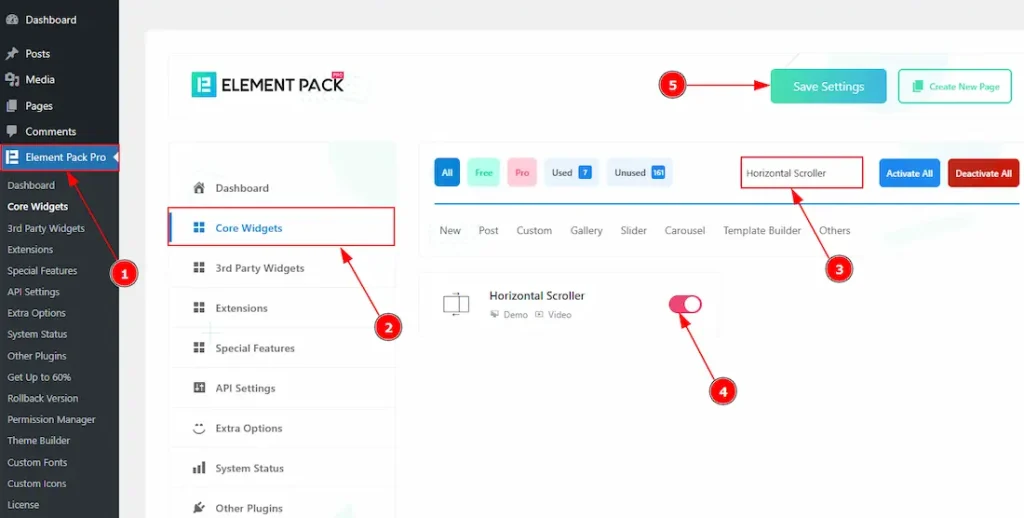
To use the Horizontal Scroller widget from Element Pack Pro, first, you have to enable the widget.
- Go to WordPress dashboard → Element Pack Pro Plugin dashboard.
- Then, Click the Core Widgets Tab.
- Search the Horizontal Scroller Widget Name.
- Enable the Horizontal Scroller Widget.
- Hit the Save Settings Button.
Inserting The Horizontal Scroller Widget
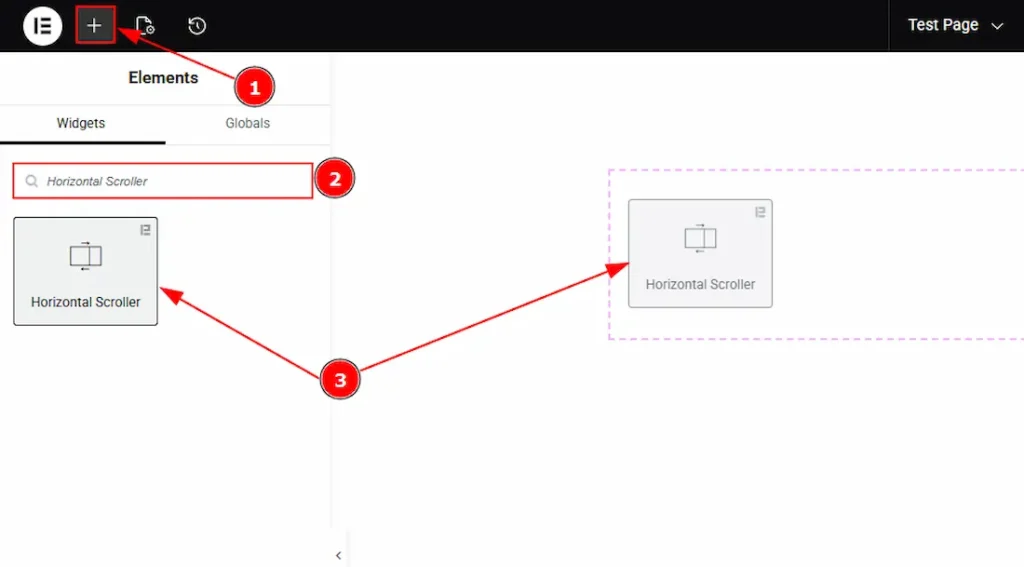
1. Go to the Elementor Editor Page and hit the “+” icon Button.
2. Search the Horizontal Scroller name.
3. Drag the widget and drop it on the editor page.
Configure the Design for Horizontal Scroller Widget Integration
To use the Horizontal Scroller widget, you first need to create a design based on your layout requirements. This design must be built inside a Container.
In the example below, you can see a demo design created inside a container to help you understand how the Horizontal Scroller widget is applied in a real layout.
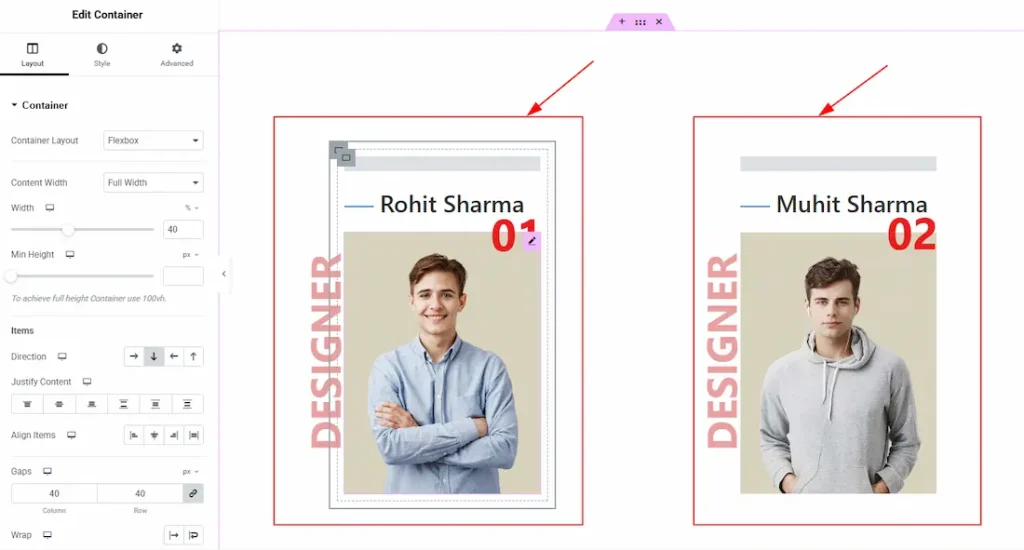
In this example, we used a container with a dual flexbox layout to display content in two sections. Each section contains dual Advanced Headings & Image.
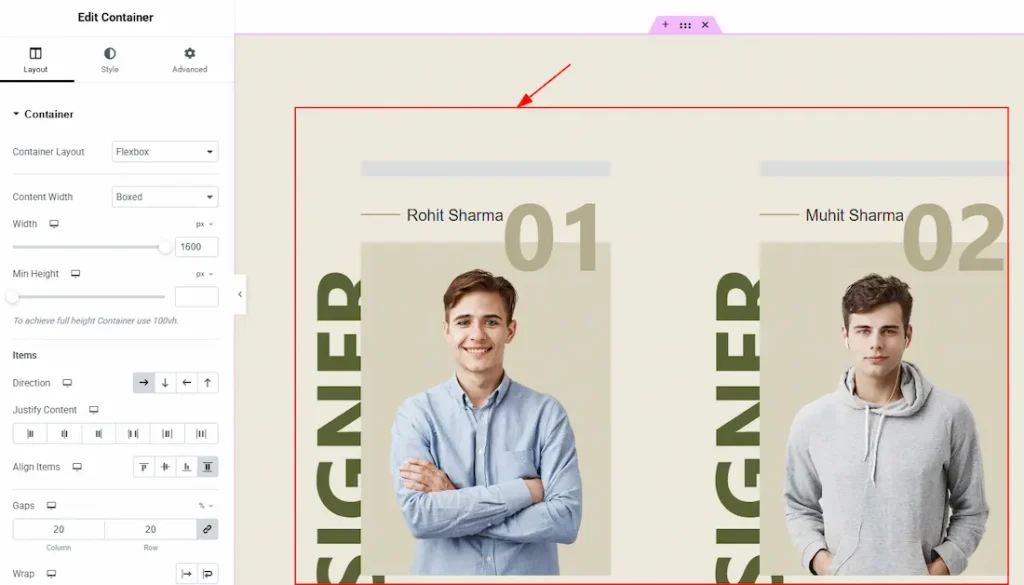
After setting up the layout, we added the required content and customized the design according to our needs. You can create multiple containers in the same way based on your requirements. In this example, we have created three containers and customized each of them accordingly.
Work With The Content Tab
Horizontal Scroller Section
Go to Content → Horizontal Scroller
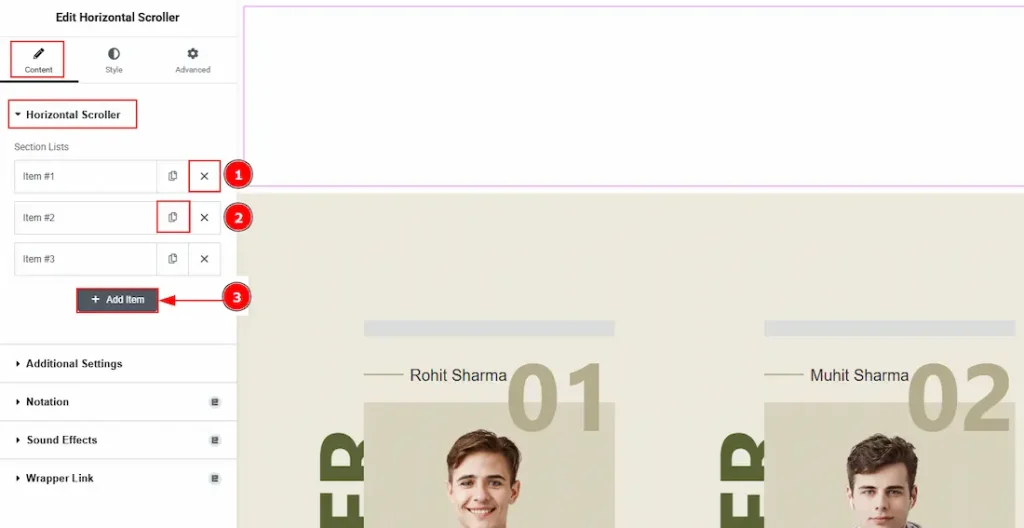
From this panel, you can add, duplicate, or remove Horizontal Scroller items. Create one Horizontal Scroller item for each container or section you want to integrate with the Horizontal Scroller widget. For example, if you have created three containers, you need to add three Horizontal Scroller items to properly link each one with the Horizontal Scroller widget.
1. Close Item: You can delete the Slider item by clicking the Close icon button.
2. Copy Item: This option lets you copy the same item.
3. Add Item: You can add a new item by clicking the “+” Add Item button.
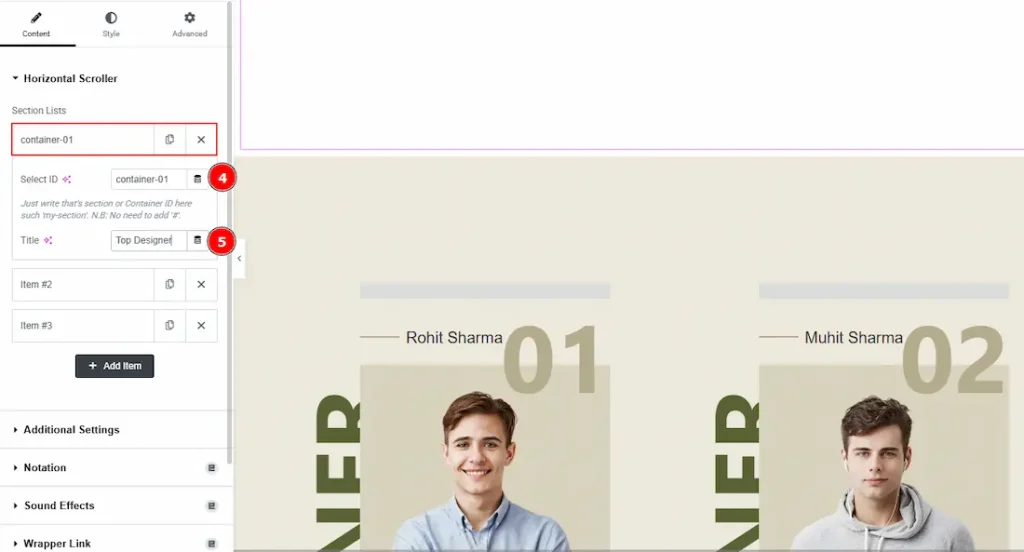
4. Select ID: Select the Horizontal Scroller widget, go to the inner option of the Horizontal Scroller items, and here you have to set the ID to connect with the container. (Please ensure that you use the same ID in both places.)
5. Title: You can make changes to the section list title with this option.
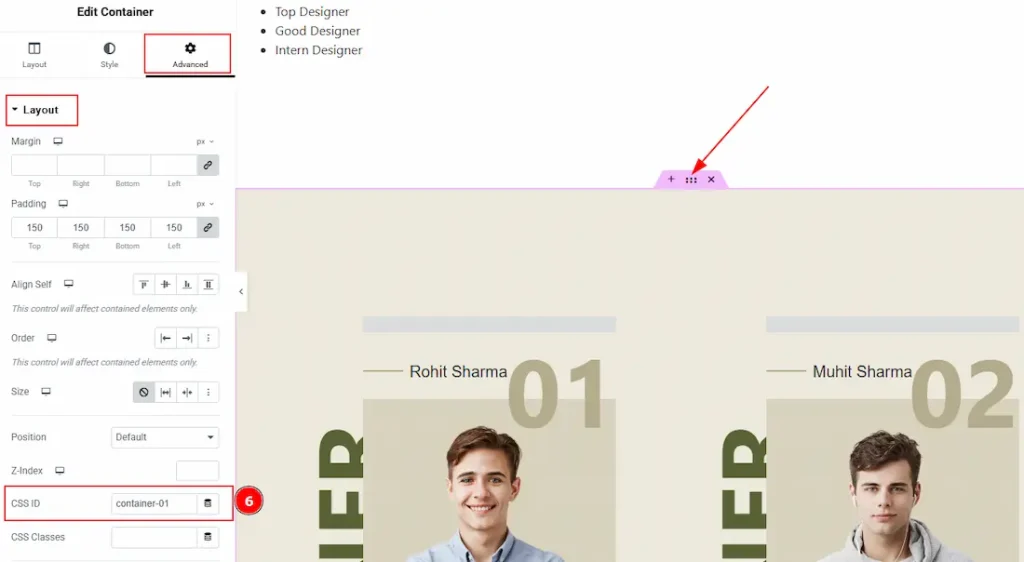
6. Select the container that you want to connect, then go to Advanced and paste the ID in the CSS Id field to complete the connection. (Please ensure that you use the same ID in both places.)
Additional Settings
Go to Content → Additional Settings
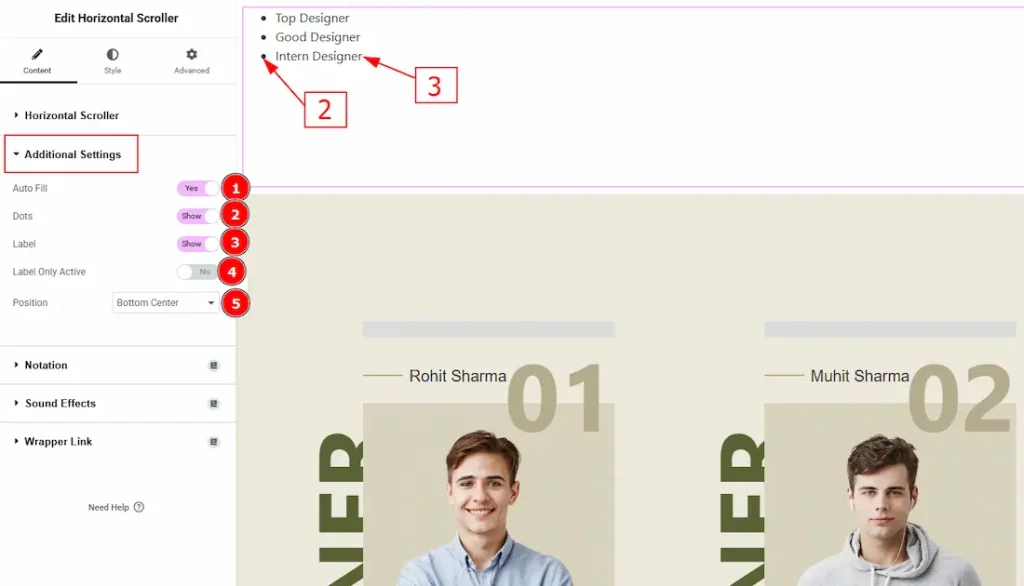
1. Autofill: Enable the switcher to automatically adjust the width of each item to evenly fill the available horizontal space on the mouse wheel, ensuring a balanced and consistent layout across different screen sizes.
2. Dots: Enable the switcher to show the navigation dots to your audience.
3. Label: Enable the switcher to show the label to your audience.
4. Label Only Active: When enabled, only the label of the currently active item is visible, keeping the interface clean while still indicating the active state.
5. Position: You can move the dot and label position to bottom center, bottom left, bottom right, center left & center right with this option.
Style Tab Customization
Dots Section
Go to Style → Dots

In this section, we have two tabs. These are Normal & Hover. Let’s start describing the Normal Tab first –
1. Color: You can make changes to the dots color with this option.
2. Spacing: You can adjust the space of the dots with this option.
3. Width: You can adjust the width of the dots with this option
4. Height: You can adjust the height of the dots with this option.
5. Border Type: You can add or change the border type to the dots with this option.
6. Border Radius: You can control the roundness of the border with this option.
7. Shadow: You can add a shadow effect to the dots with this option.
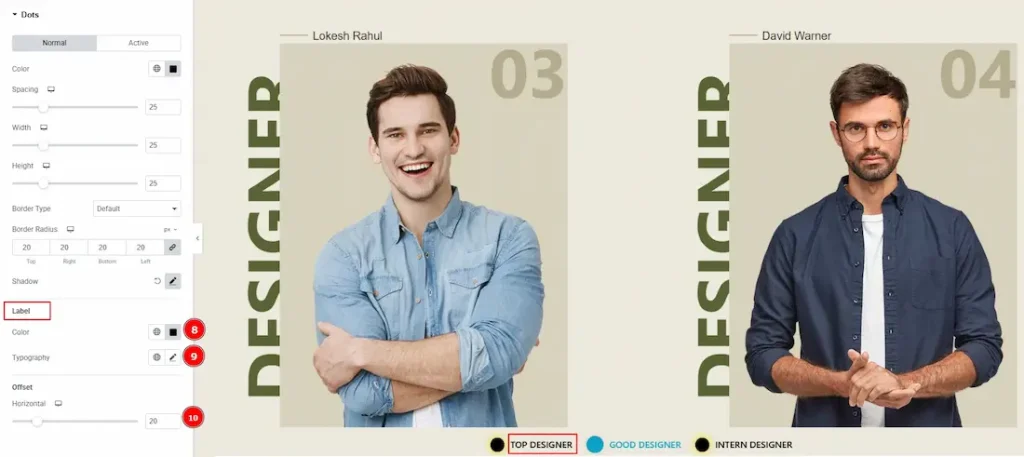
8. Label: You can make changes to the label color with this option.
9. Typography: Change the font family, size, weight, transform, style, decoration, line height, letter spacing, and word spacing from here.
10. Offset: You can move the label horizontally with this option.
(Note: The widget does not function in the editor mode at all. It will work just fine from the frontend perspective. To see the preview of the changes that you have made, please click on the publish button in the top right corner and then preview the changes.)
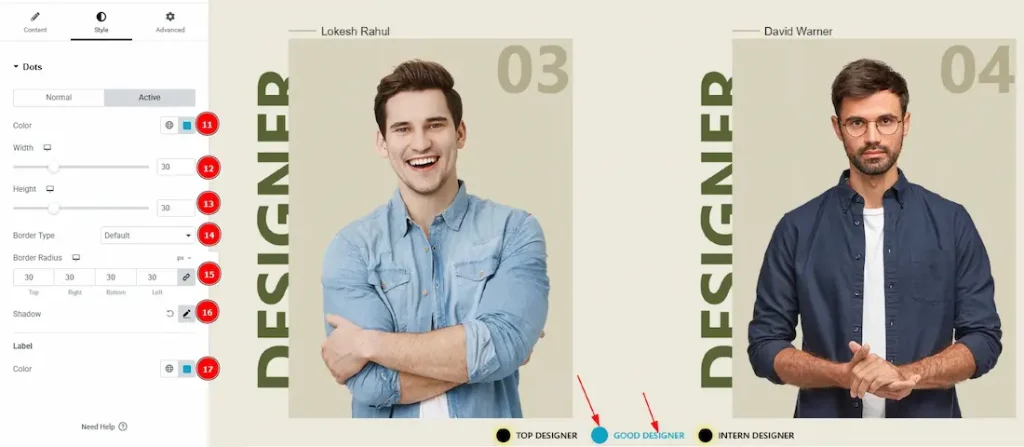
Now let’s start describing the Active Tab –
11. Color: You can make changes to the dots active color with this option.
12. Width: You can adjust the width of the active dot with this option.
13. Height: You can adjust the height of the active dot with this option.
14. Border Type: You can add and change the border type with this option.
15. Border Radius: This option controls the roundness of the border.
16. Shadow: You can add a shadow effect to the active dot with this option.
17. Color (Label): You can make changes to the label’s active color with this option.
All done! You have successfully customized the Horizontal Scroller widget on your website.
Video Assist
You can also watch the video tutorial to learn more about the Horizontal Scroller widget. Please visit the demo page for examples.
Thanks for being with us.