Contact Form 7 widget is a user-friendly plugin, made for your visitors to easily send their inquiry, message, or contact information within minutes. This lightweight widget is not only fast but also simple.
Though it is a 3rd party widget at Element Pack, they made sure that you can customize it. To use this easy-to-use widget effectively, you need to know how it works. Let me give you a complete guide to it!
Installing Contact Form 7 Widget

Go to WordPress Dashboard> Element Pack> 3rd Party Widgets
From there, click on the download button to download and install the widget automatically. When it’s done, you will see a window saying “Activate”. Click on that and you are ready to go.
Contact Form 7

Go to WordPress Dashboard> Contact> Add New
To make the widget work, you have to add contact information fields into it manually. The Contact tab lets you make your contact form using HTML raw code. Once you have added the information in the fields, you are ready to go to the next step.
To Insert Widget

Inserting widget is just a matter of drag and drop. However, click and hold on the widget icon from the menu and drag it to the drop point. Follow the picture above.
Content Tab
Using the Content tab, you can basically make a layout of a particular part of the website.
Layout
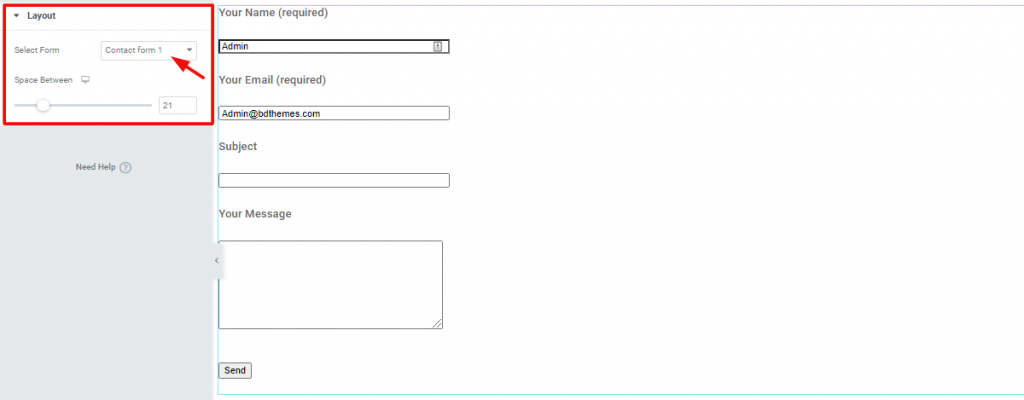
Go to Content Tab> Layout
The Layout section is the only section under Content Tab. Here, you have to choose a form by Select Form drop-down controller. The selection will show the form you have created in the dashboard. You can also increase the space within the contents for the contact 7 form.
Style Tab
Now, time for some Style. In this Style tab, you will have more options to create your unique Contact Form as you like. Let’s have a look.
Label

Go to Style Tab> Label
You can change all the label colors and typography from this section.
Input
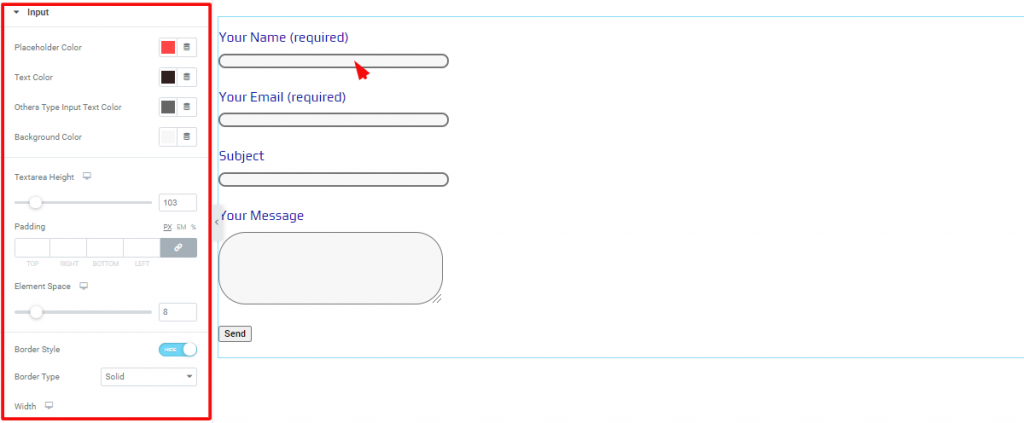
Go to Style Tab> Input
In this section, you can color and shape the input fields for the forms widget for Elementor. You can also increase the height of the message box and choose any border.
Submit Button
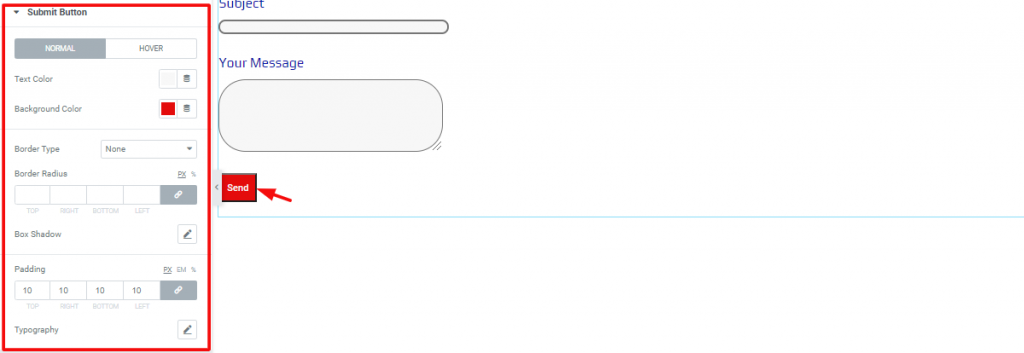
Go to Style Tab> Submit Button
In this section, you can change the appearance of the submit button by editing its color, typography, border, etc.
Additional Option
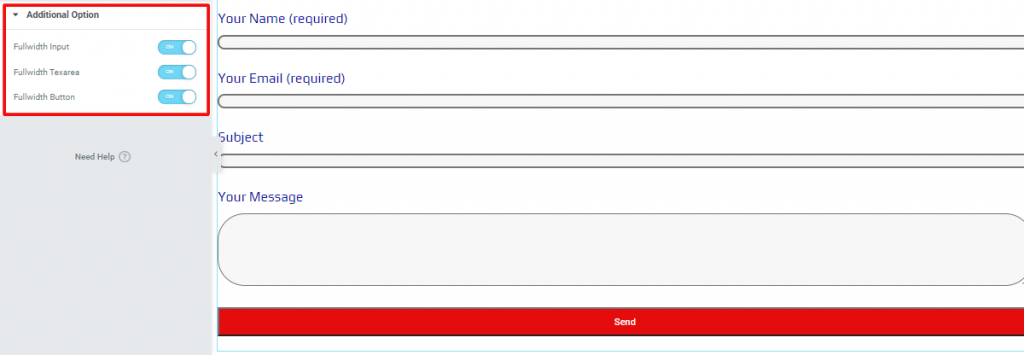
Go to Style Tab> Additional Option
The last section has 3 switchers. By turning them on, you can convert the input fields and button box to full-width.
Video Assist
Well done. Seems you have learned the whole thing and how it works. It is easy and fun. Watch Video Assist and to get more in-depth ideas about the usage of the Contact Form 7 widget, take a tour to the demo page.
[Note: in-page video link]