
The Charitable Donations widget is designed to enlist every donation given to your campaign, in a list. It’s an easy way to keep track of the donations or showcase donation history to the visitors.
This tutorial will introduce you to the customization menu for the Charitable Donations widget. Let’s start!
Inserting Widget
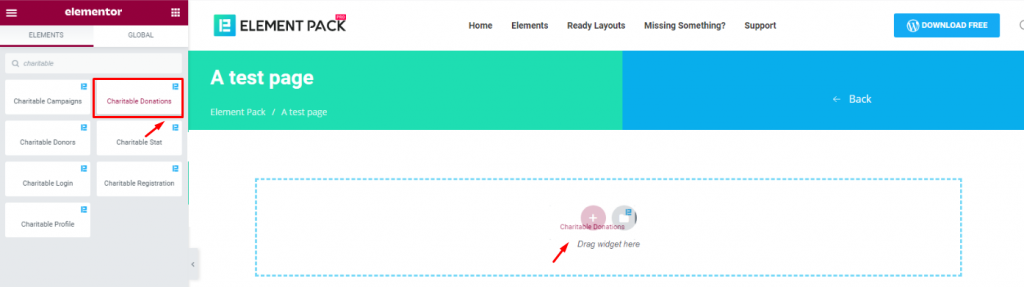
From the widget menu, find the WordPress donation plugin and drag-drop it inside your webpage.
Style tab
The Charitable Donations widget does not have a Content tab as it is dedicated to doing only 1 task entirely. So, let’s see how you can style it up!
The Style tab has two sections; Header & Body. We will start with the Header first.
Header

By default, you will see a list that looks like the image above. This is the donation list that happened in your campaign.
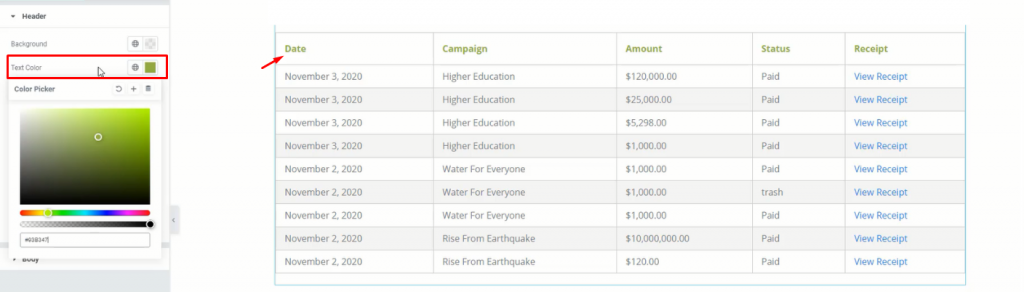
You can change the background color and text color for all of the headings here. See that we removed the background color and put green for the text on the charity donations widget.
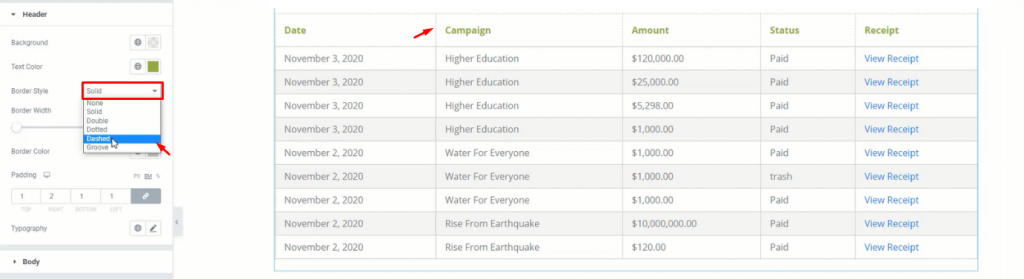
Up to six different border options can be selected from the Border Style menu. Here, we have selected Dashed for our title borders.
You can also change the Border color, add Paddings to the title boxes, and change the Typography. Let’s leave that to your choice.
Body
This section has all the options to customize the body of the content. Your Charitable Donations list needs this part to fully expose all the content to the visitors.
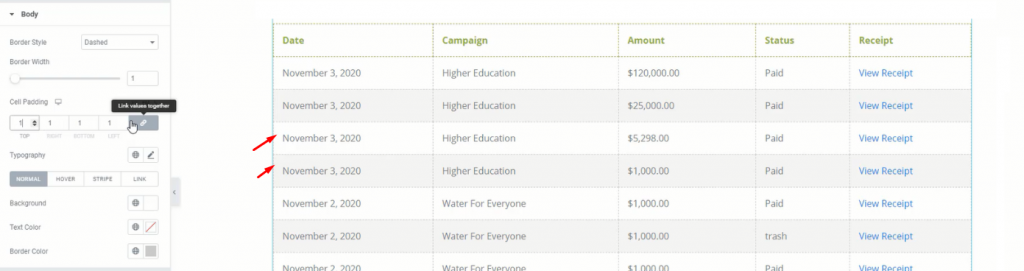
Same as the Header, we choose the Dashed border type for the body too. However, you can change paddings for each one of the cells from the Cell Padding field.
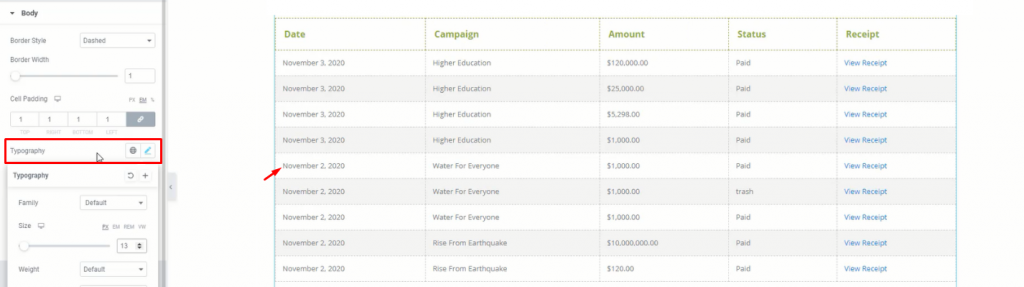
Change the Typography of all the text on the body part to match your choice.

Below the Typography option, you have a field containing 4 segments for customization. The first two represent the state of the content body. While the third one lets you change the stripe visual and the last one is for the link portion.
Now, change the color of the texts from the Normal settings.
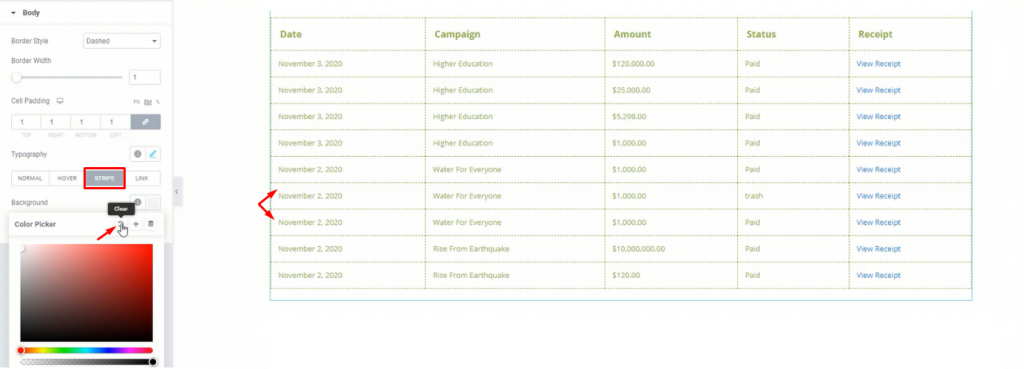
You can choose any color for the Stripe pattern or simply clear the color format to make it blank.
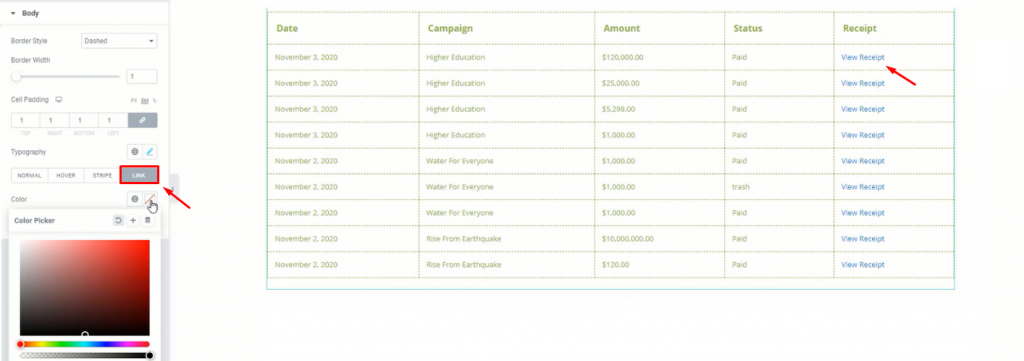
And Lastly, the Link menu lets you change the color combination for the links (View Receipt).
Conclusion
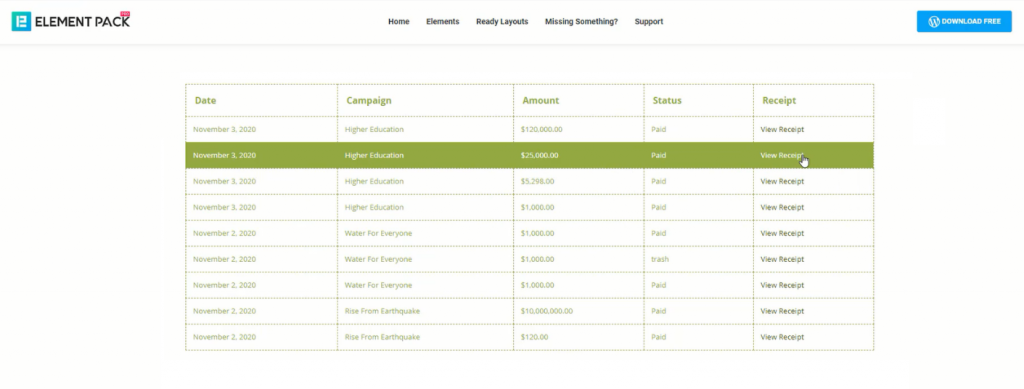
That is all. This is how you can make stunning donation showcases with the Charitable Donations widget by Bdthemes.
Hope you can comprehend what we delivered to your disposal. Check out the demo page here for more info.
Also, check the video tutorial for more insights.
Thank you for staying up.