In this documentation, we will show you how to customize the Document Viewer widget presented by Element Pack Pro.
Enable the Document Viewer Widget

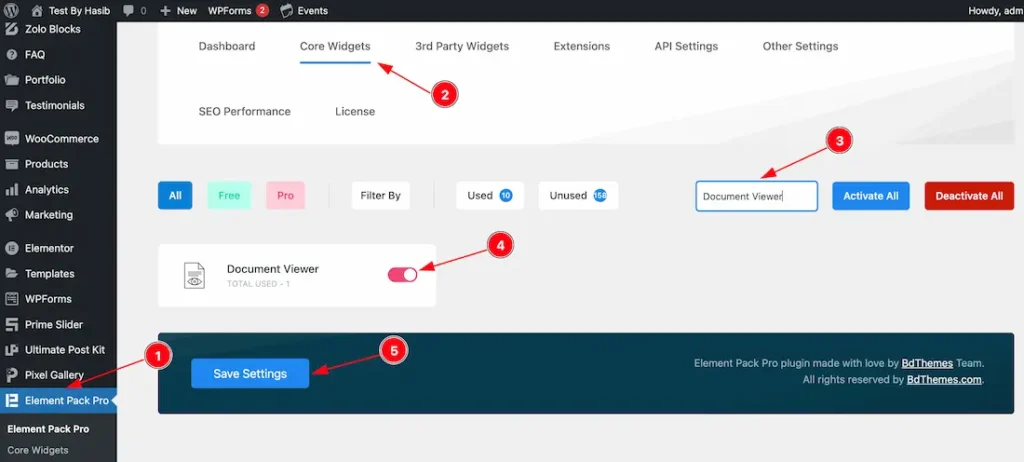
To use the Elementor Document Viewer widget from Element Pack, first, you have to enable the widget.
- Go to WordPress Dashboard > Element Pack Plugin dashboard.
- Then Click the Core Widgets Tab.
- Search the Document Viewer Widget Name.
- Enable the Document Viewer Widget.
- Hit the Save Settings Button.
Inserting The Document Viewer widget

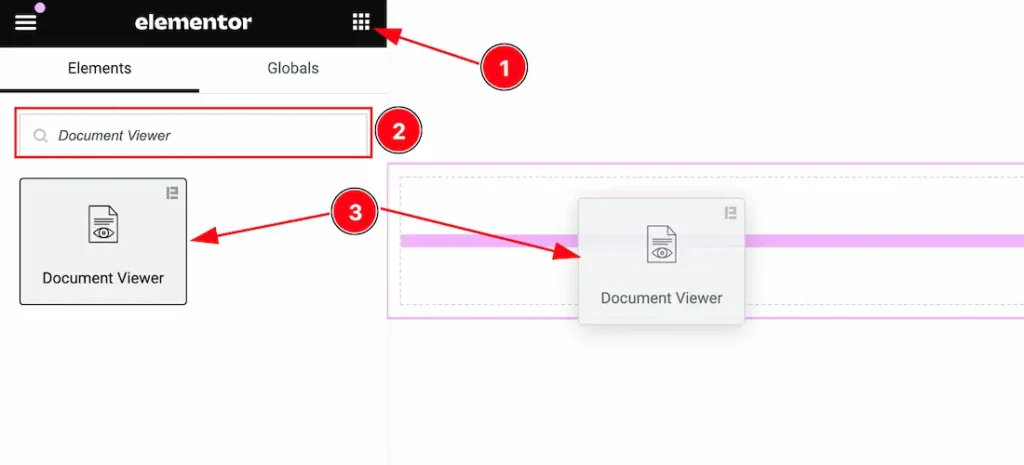
- Go to the Elementor Editor Page and Hit the Get Back To Button.
- Search the Document Viewer widget.
- Drag the widget and Drop it on the editor page.
Note: You need both Elementor and Element Pack installed to use this widget.
Work With The Content Tab
Layout Section
Go to Content > Layout

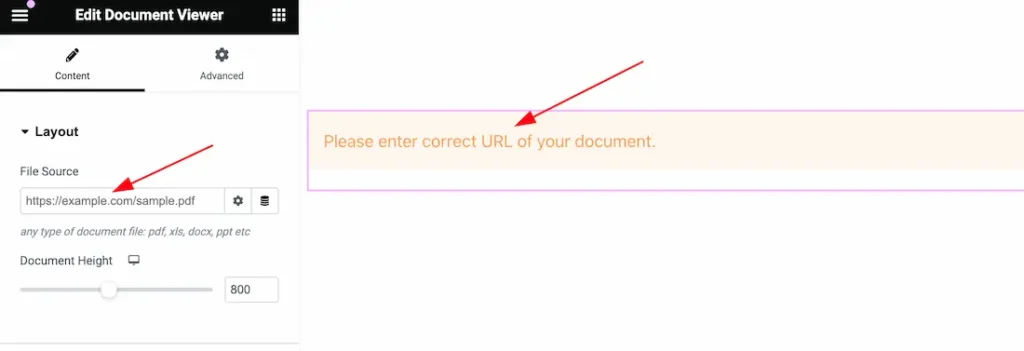
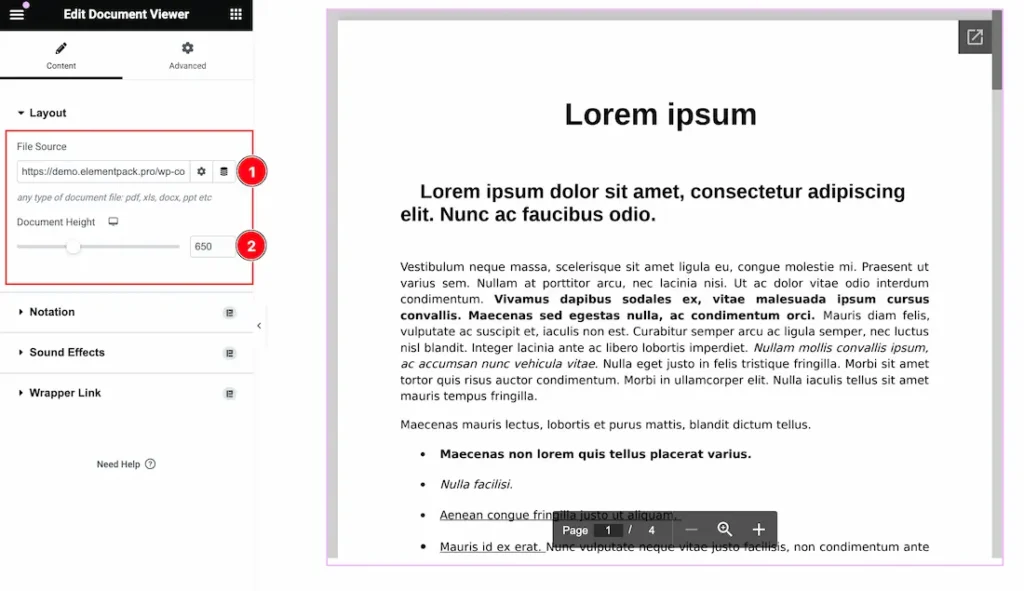
After inserting the Document Viewer widget on your editor page, you will get the File Source and Document Height options. As a file source, you can add any type of document file like as – pdf, xls, docx, ppt, etc.

- File Source: As a file source, you can add any type of document file like as – pdf, xls, docx, ppt, etc. Here we add a pdf type file to demonstrate the option.
- Document Height: This option allows you to set the document height for displaying the document.
Video Assist
You can also watch the video tutorial Learn more about the Document Viewer widget. Please visit the demo page for examples.
Thanks for being with us.
