This documentation provides comprehensive insights into using the Custom Fonts developed by Element Pack Pro.
Custom Fonts Feature
The Custom Fonts feature — a powerful tool that allows you to upload and use your own typography to maintain your brand identity. With this feature, you can apply unique fonts across your Elementor designs, giving your website a professional and personalised look that stands out.
Key Benefits
- Effortless Font Upload – Upload and use your own fonts seamlessly without any coding.
- Brand Consistency – Maintain your unique brand identity with custom typography.
- Multiple Format Support – Compatible with all popular font formats (.woff, .ttf, .otf, .svg, .eot).
- Global Application – Instantly apply custom fonts across any Elementor widget or section.
- Professional Appearance – Enhance your website’s uniqueness and give it a polished, professional look.
Add Custom Font
Go to WP Dashboard > Element Pack Pro
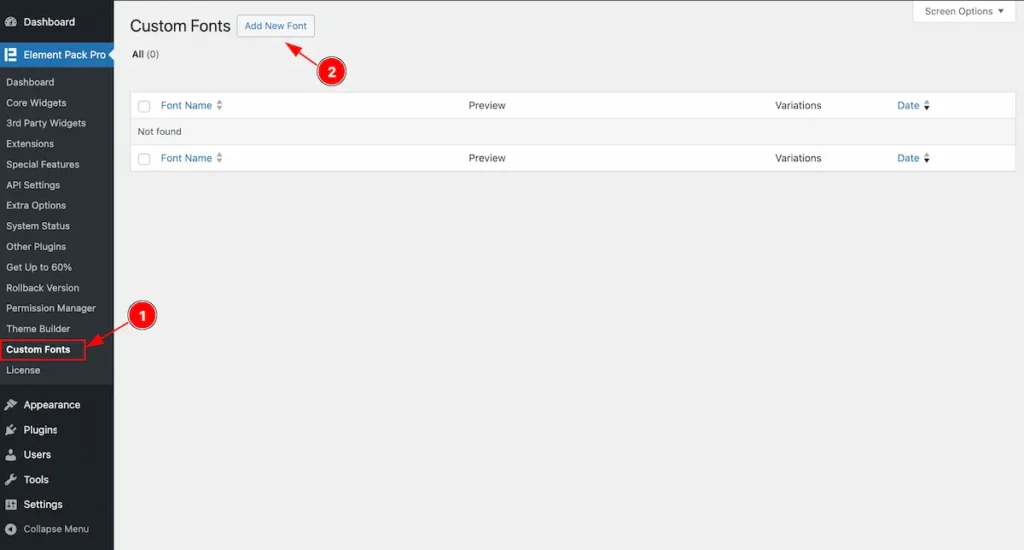
- Now navigate to the ” Custom Fonts ” tab on the Element Pack Pro dashboard tab. It will open the custom fonts page.
- Find the ” Add New Font ” button on the top Left corner and click on the button.
Set Font Name & Upload
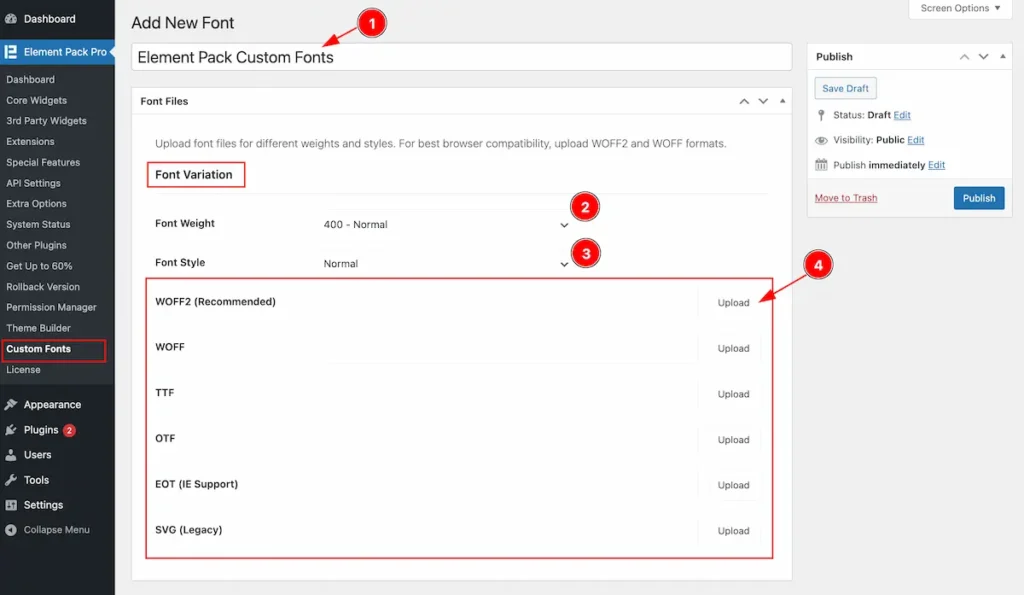
- Set a name for your custom font. Example: Element Pack Pro Custom Fonts
- Font Weight: Set the weight of the font. Example: 400 – Normal
- Font Style: Choose the style for the font. Example: Normal
- Upload Fonts Support.
- WOFF2 ( Recommended ): Best format for modern browsers with superior compression.
- WOFF: Widely supported format ensuring compatibility across most browsers.
- TTF: Standard TrueType font format for desktop and web usage.
- OTF: OpenType font format offering advanced typography features.
- EOT ( IE Support): Embedded OpenType format, primarily for older versions of Internet Explorer.
- SVG ( Legacy ): Legacy format for older iOS devices and browsers.
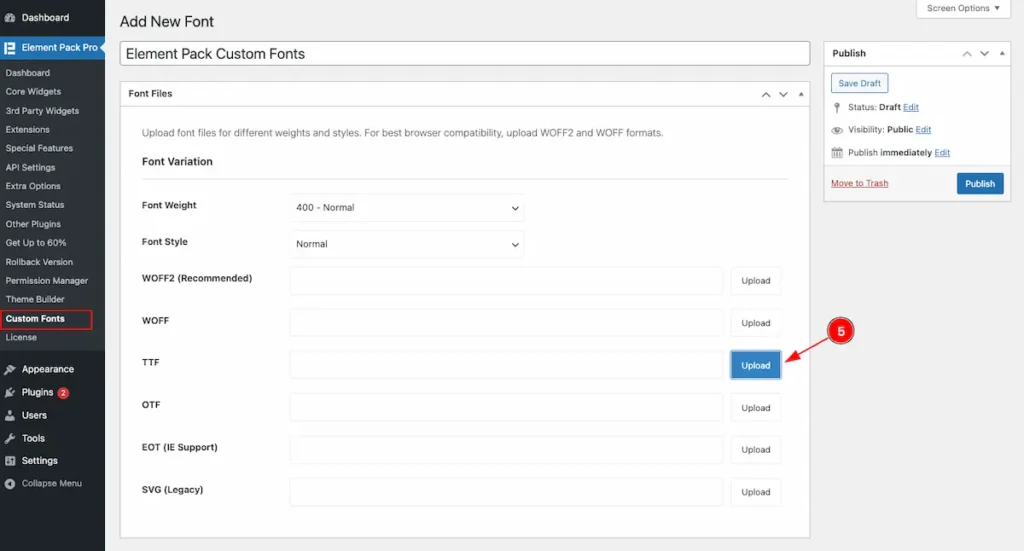
- Upload: Click the Upload button to open the WordPress Media Library and select your desired font file.
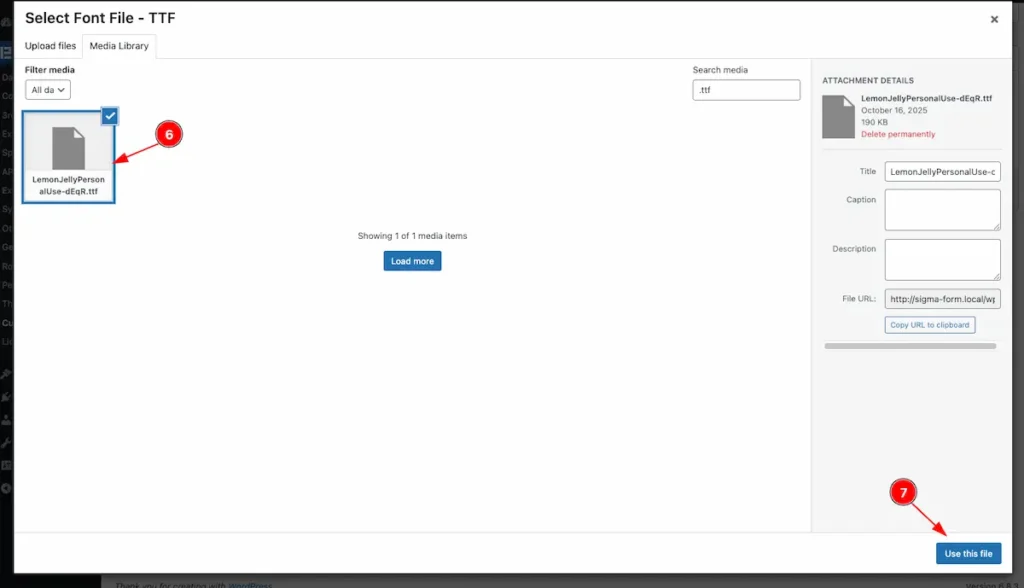
- Choose the desired font you want to work with from the uploaded list to apply it across your Elementor widgets or sections.
- Click on the “Use This File” button to confirm your selection and assign the chosen font file for use on your website.
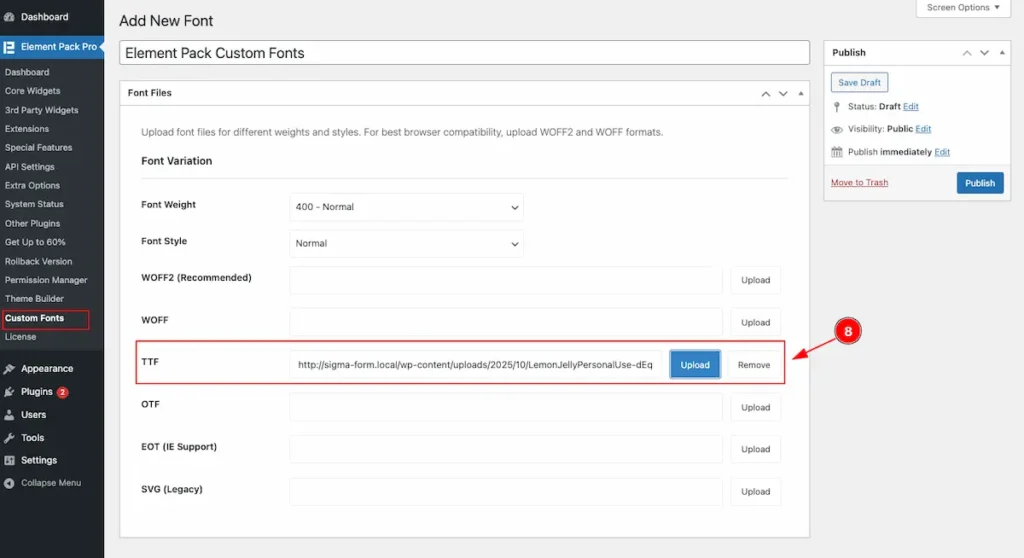
- Once the font file is selected, it will appear in the list. A “Remove” button will also appear next to it — click this button if you wish to delete or replace the uploaded font file.
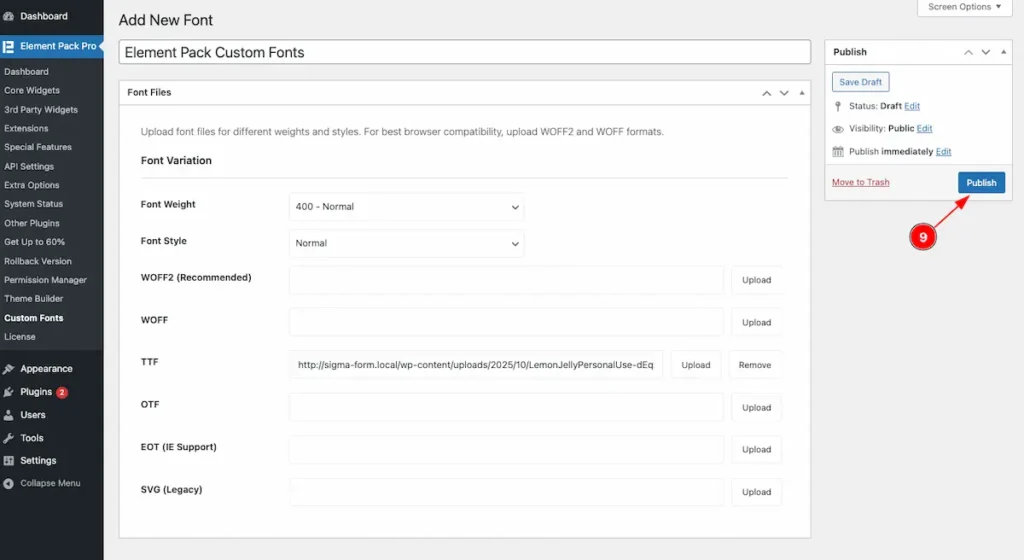
- After uploading the font, click the “Publish” button to save and apply the custom font to your website.
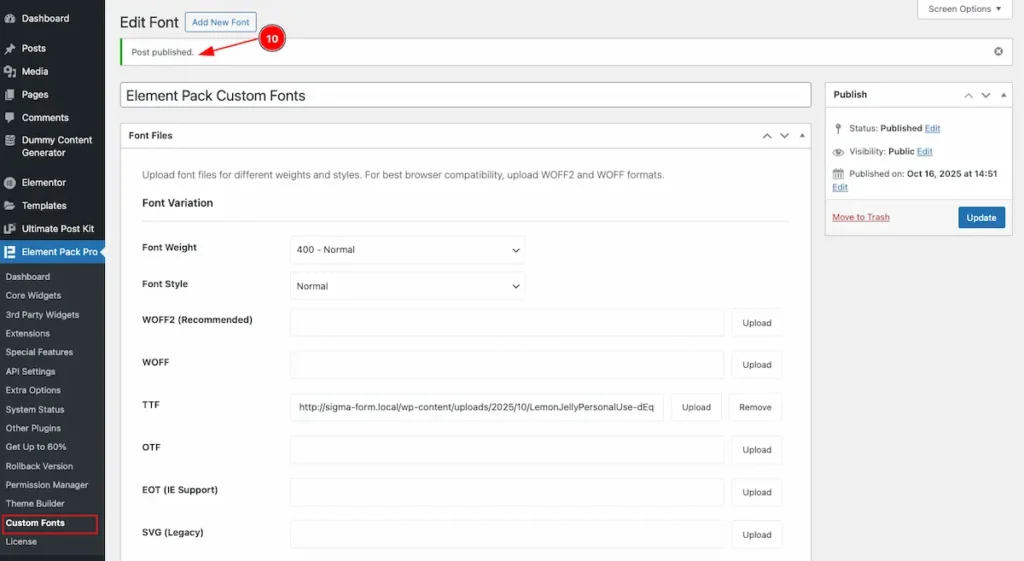
- Once the font is successfully published, a success message will appear confirming that your custom font has been uploaded and saved.
Check uploaded Fonts
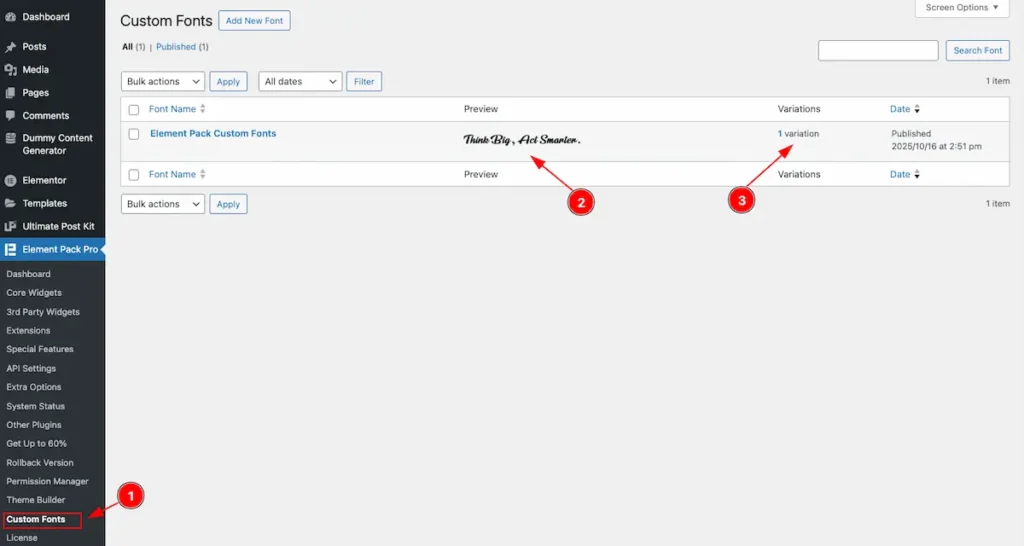
- Click on the “Custom Fonts” tab to open the Custom Fonts section. All uploaded fonts will be displayed in a table format.
- Preview: View a live preview of the font.
- Variation: Shows how many variations are available for the font.
Where to find the Fonts
Add any Text Widget ( Advanced Heading Widget )
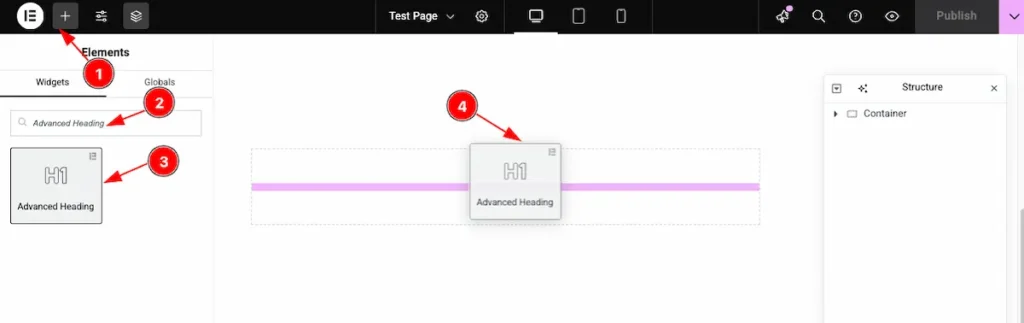
- Click on the “+” icon to open the widget panel.
- Search for the widget named “Advanced Heading”, and it will appear in the results.
- Select the widget, then drag.
- Drop it onto the editor page.
Choose the Typography
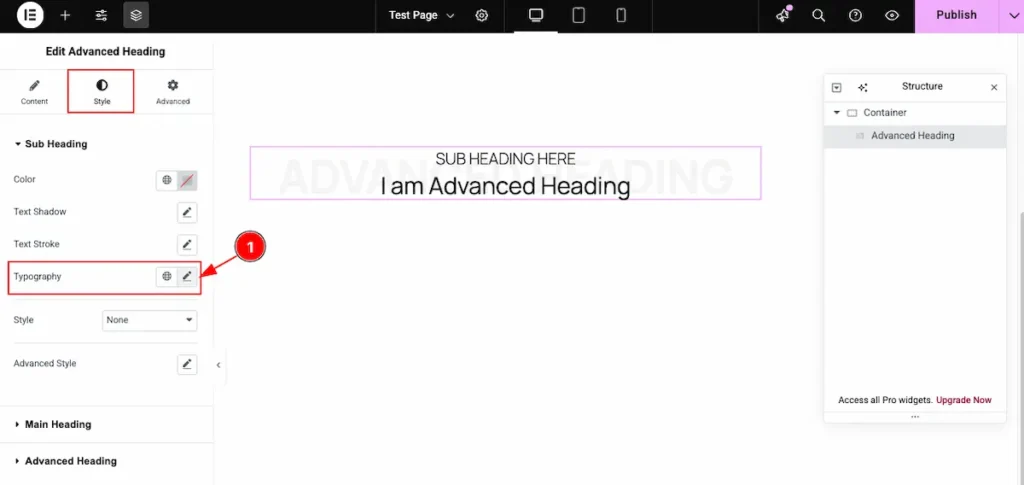
- Navigate to the Style section and locate Typography. Click on it to open the typography settings for editing.

- On the font list, the custom fonts appear under the “Element Pack Font” headline.
- The uploaded fonts are displayed in the right section, showing their name as well, e.g., Element Pack Custom Fonts.
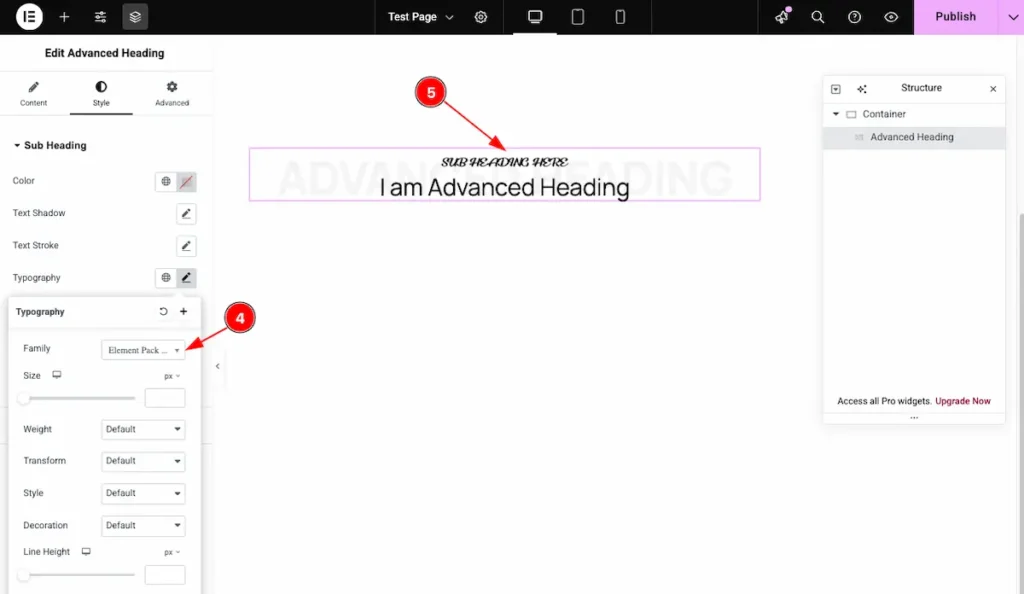
- After selecting the custom font, it will appear under the Font Family option
- The selected font will be applied and displayed on the title.
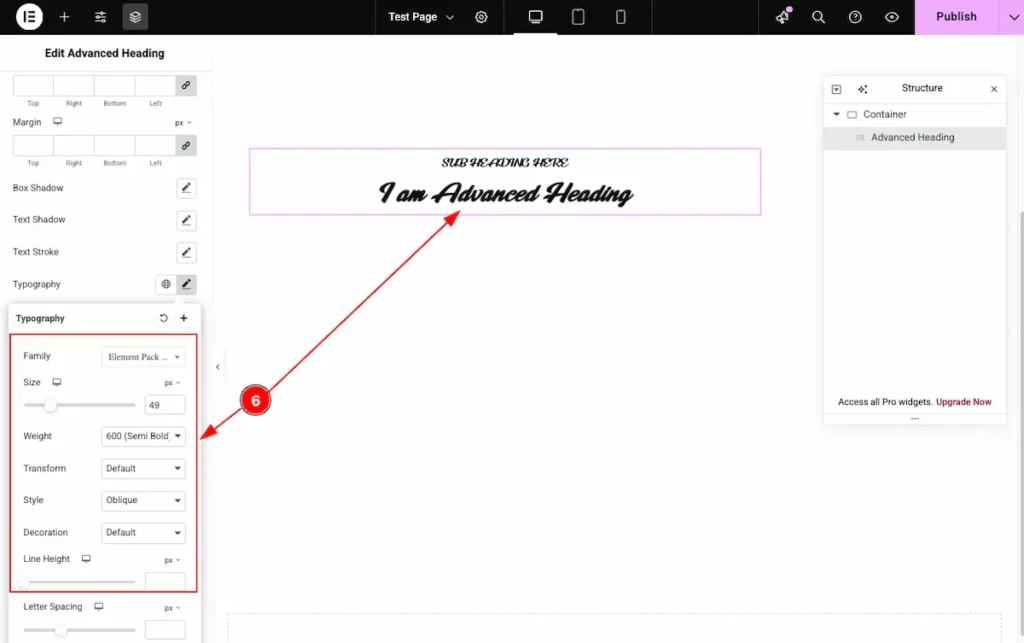
- Select the desired font variation and configure the following settings:
- Size: Set the font size.
- Weight: Choose the font weight (e.g., 400 – Normal, 700 – Bold).
- Transform: Apply text transformations (e.g., Uppercase, Lowercase, Capitalize).
- Style: Set the font style (e.g., Normal, Italic, Oblique).
- Decoration: Apply text decoration (e.g., None, Underline, Overline, Line-through).
Video Assistant
The video will help you to use the Custom Fonts Feature of Element Pack Pro. Please check the demo page to learn more about the feature.
Thanks for staying with us.