The Right Click Context Menu is an amazing feature that will bring the next level web surfing experience for WordPress users. Just by right-clicking your cursor, you can access a hidden menubar within your website.
Let’s see how it works.
Let’s set up Right Click Context Menu
Step-1
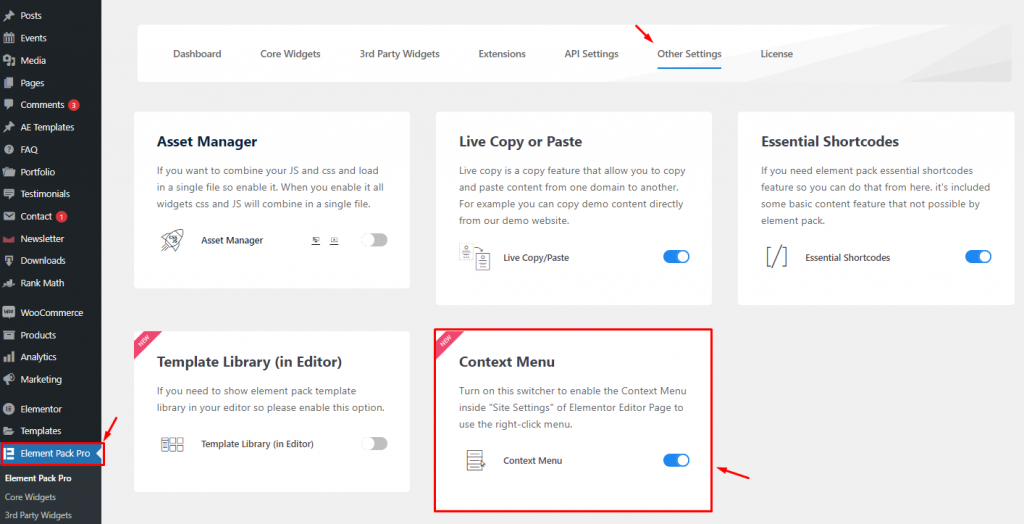
First of all, go to the Element Pack Pro menu from your WordPress dashboard and click on the Other Settings tab. Find the Context Menu there and turn on the switcher.
Step-2
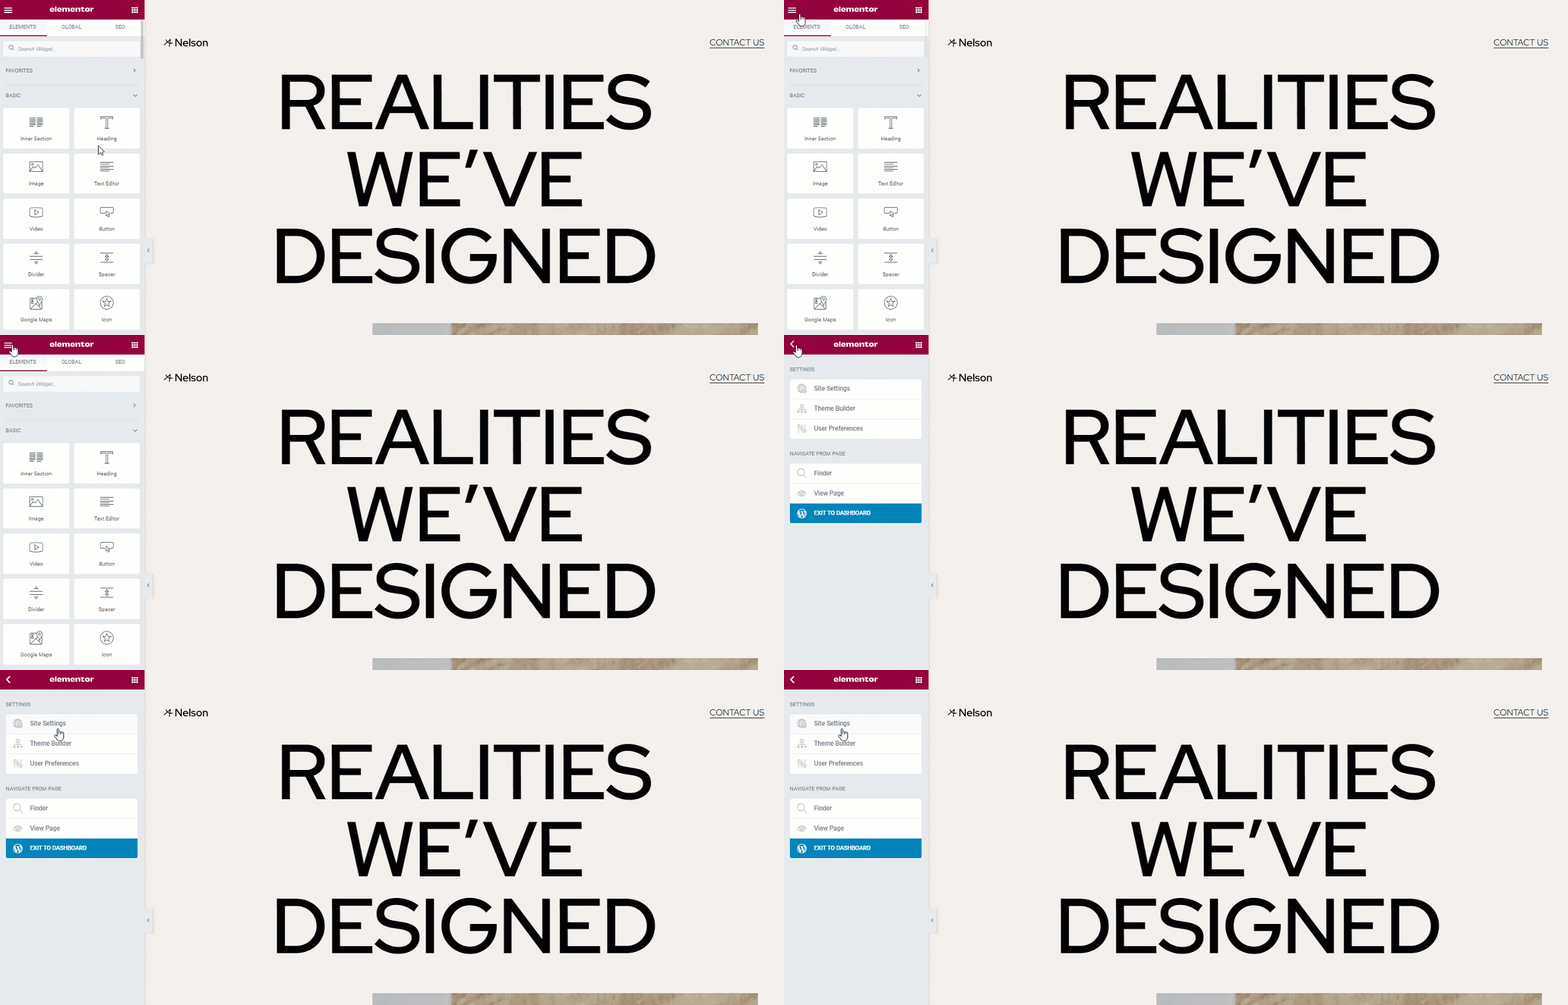
Then go to the Site Settings by clicking the three bars on the top left corner of your display.
Step-3
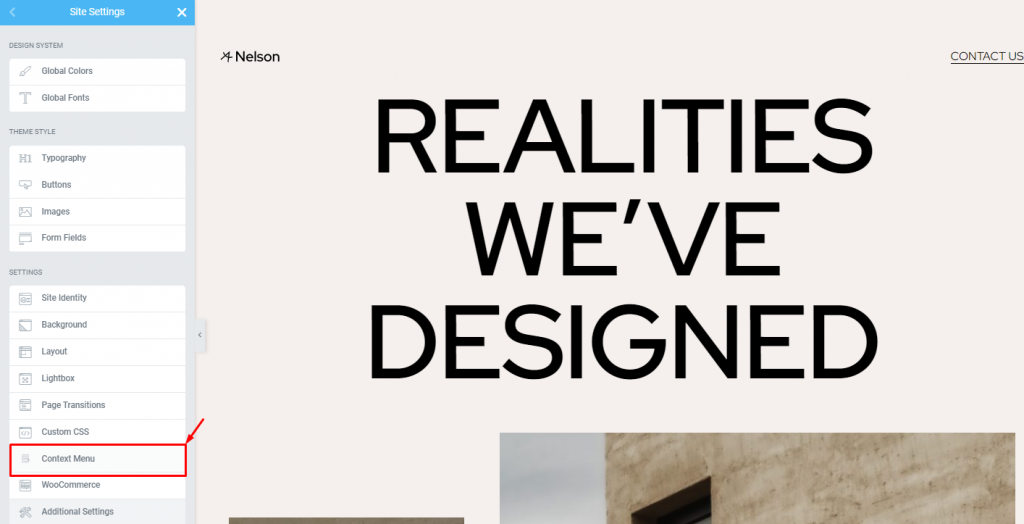
Here, you will find the Context Menu option close to the bottom. Click on the option now.
Step-4
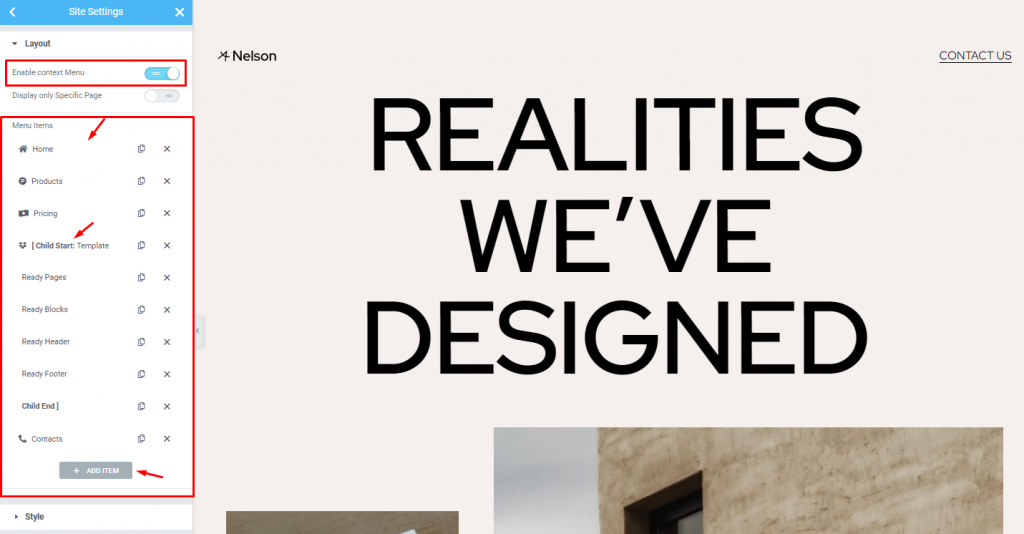
Once you turn on the menu switcher, you will see a custom menu just below. As the context menu is a fully customizable menu, you must customize it yourself as you prefer.
Note that the menu will be activated on your whole website.
Step-5
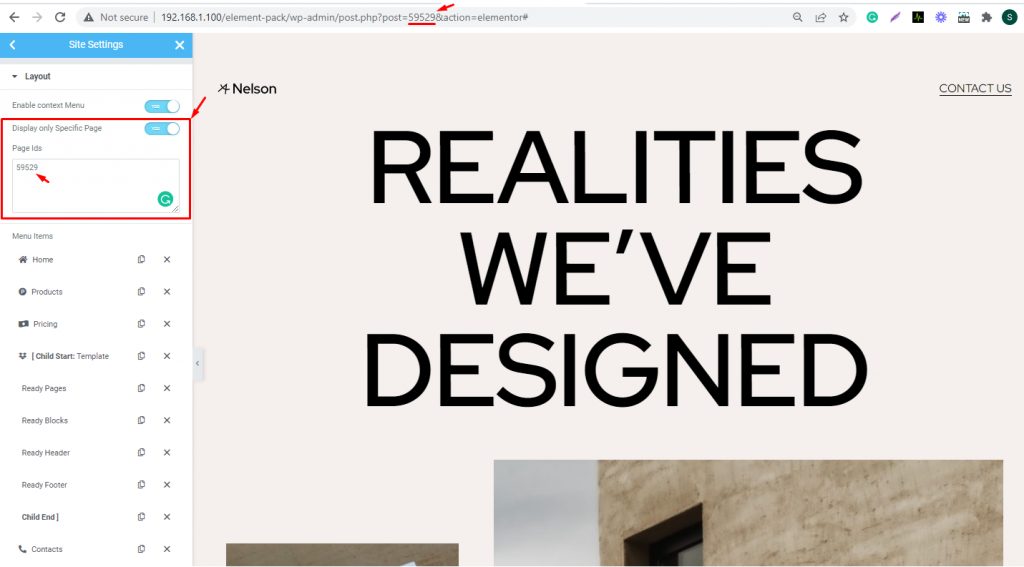
In case you want to show the context menu to specific pages, turn on the Display Only Specific Page switcher and copy-paste the page/post ID inside the Page IDs field.
Step-6
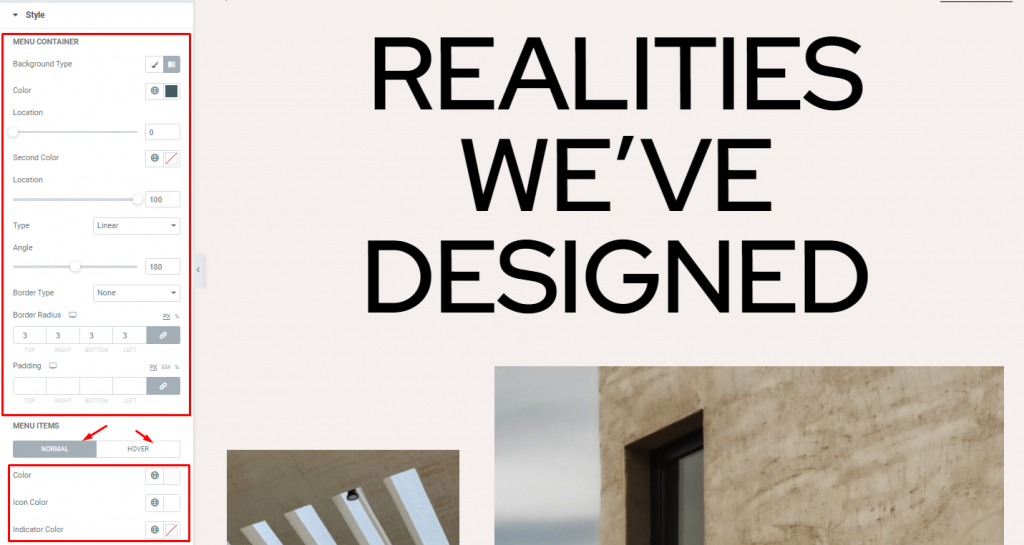
Then in the next section, you can customize the menu container appearance by changing the color of the background with gradient color, adding the border, border-radius, and padding. You can also customize the menu items by color.
Once done, Let’s check it out
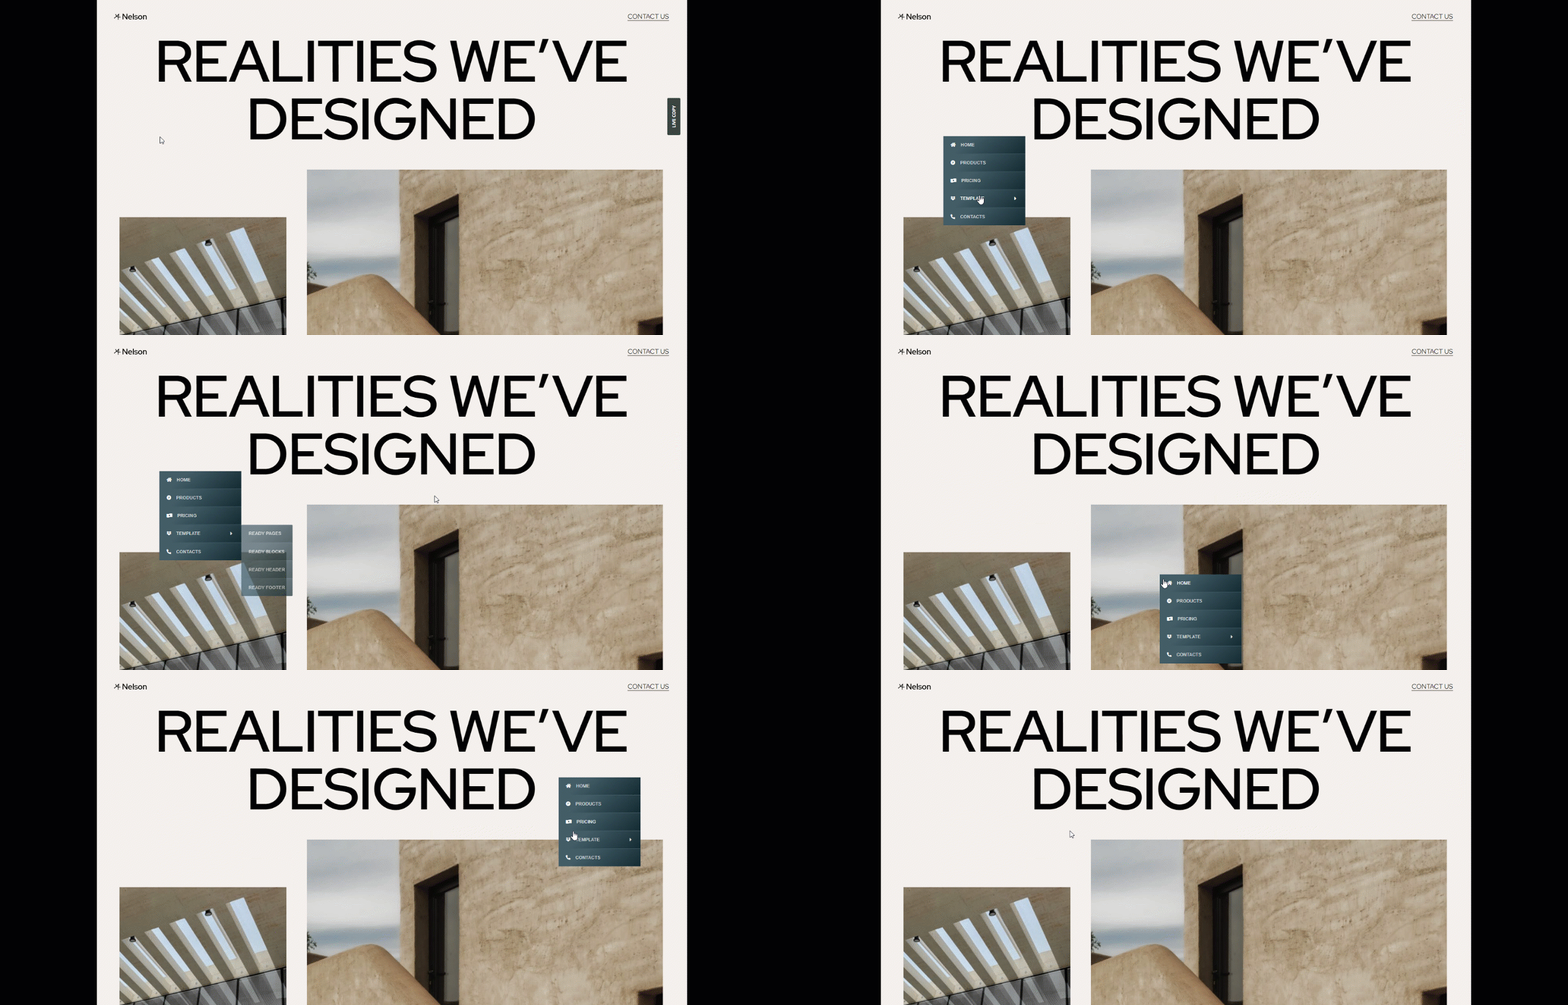
Just like that, you can create an amazing context menu easily that will pop up anywhere on your webpage upon right cursor click.
Video Assist
Watch this video to learn more about the Right Click Context Menu by Element Pack Pro and see the demo page for examples.
This tutorial is powered by BdThemes.

