In this documentation, we will discuss the customization of the Content Protector Extension, brought to you by the Element Pack Pro addon for Elementor.
Enabling The Content Protector Extension

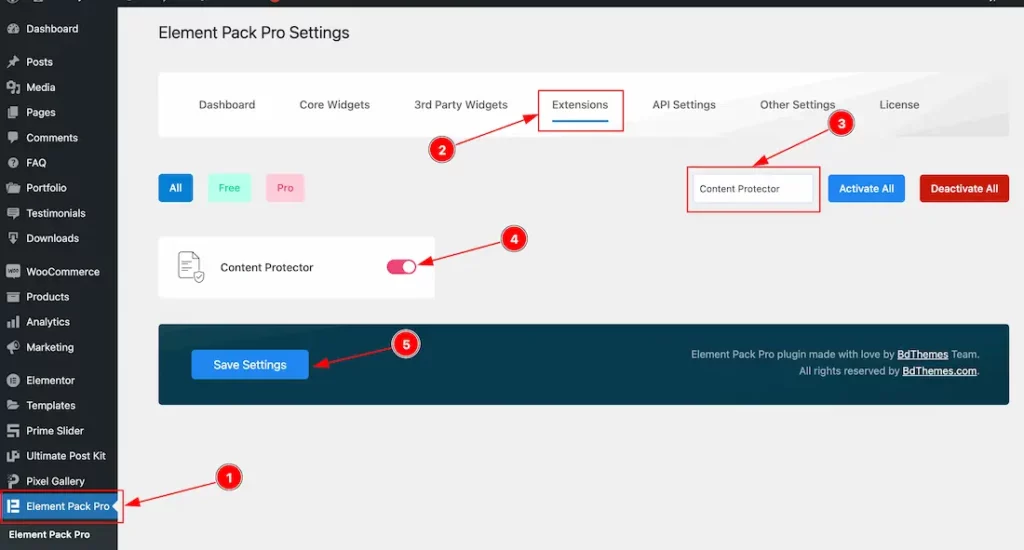
As the Content Protector is an extension of Element Pack Pro, you will find it inside the Extensions tab inside Element Pack Pro under your WordPress dashboard. Here, you also can search for the Content Protector Extension using the search box.
Then enable the extension switcher and hit the Save Changes button. Now, you can access the feature from the Elementor editor page.
Start With Any Widget Or Design
To start with the feature, let’s first take an existing design or widget inside the page. This is for a better understanding of the functions of this feature. Here we have a designed section with some Headings and Text to show you the Content Protector feature. One more thing, This feature will not work on Editor Mode. Please check the Extension on the Preview Page.
Step-1

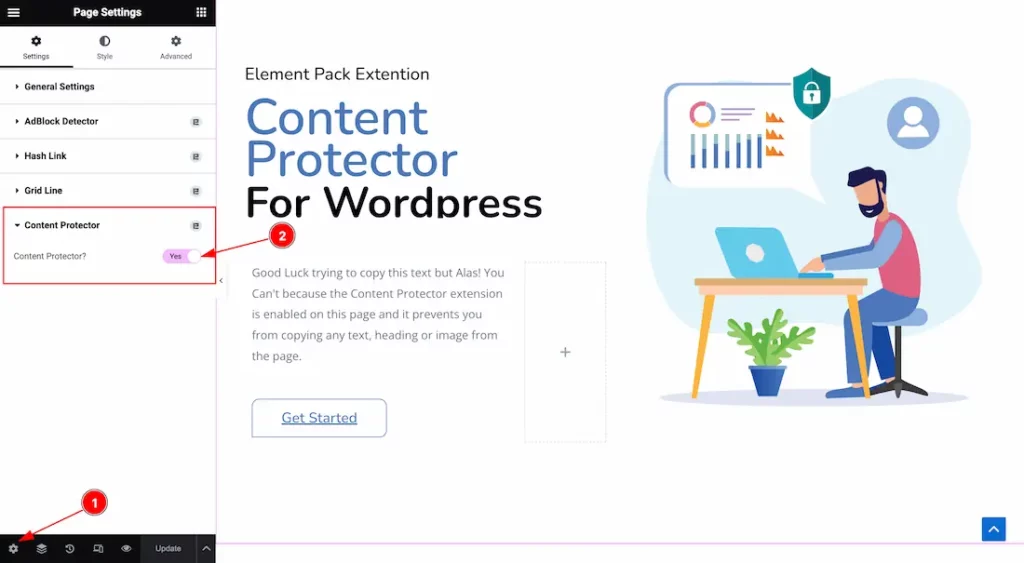
First, go to the Page Settings by clicking the Gear icon at the bottom-left of the page. You will find the Content Protector section under Page Settings. Open the section turn on the switcher, and update the settings.
After that, Go to the preview page to see the output.
All done! You have successfully customized The Content Protector Extension on your website.
Video Assist
You can also watch the tutorial video about the Content Protector Extension. Please visit the demo page for examples.
Thanks for staying with us.
