The BuddyPress Member widget helps you display active members associated with your BuddyPress forum. Let’s see how to use this tool.
Inserting Widget

Find the BuddyPress Member widget from the widget menu and drag it inside the page editor.
Content tab
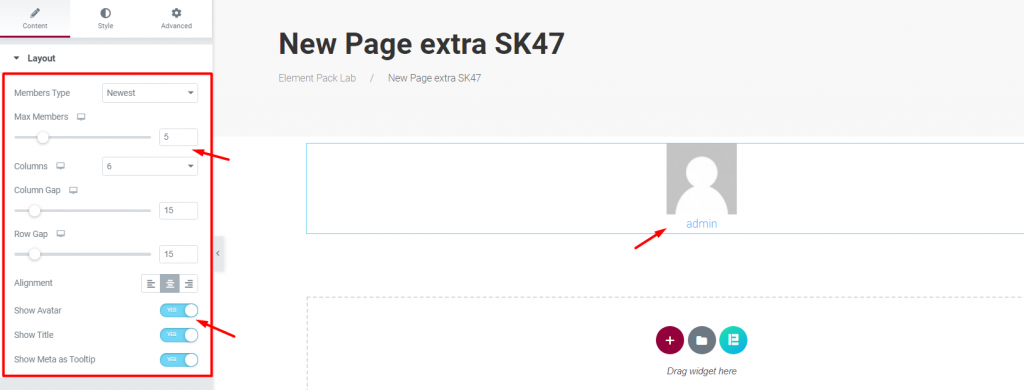
The content tab holds the base settings of the widget. Here, you can control the layout of the final WordPress forum.

There is only one section on the content tab. It has a bunch of options including member type, max number, column & column gap, alignment, and some switchers.
You can switch off Avatar, Title, and tooltip using the three switchers at the bottom of the forum widget.
Style tab
Using the style tab, you can change the appearance of the content on the display by colors, borders, etc.
Avatar

Go to Style> Avatar
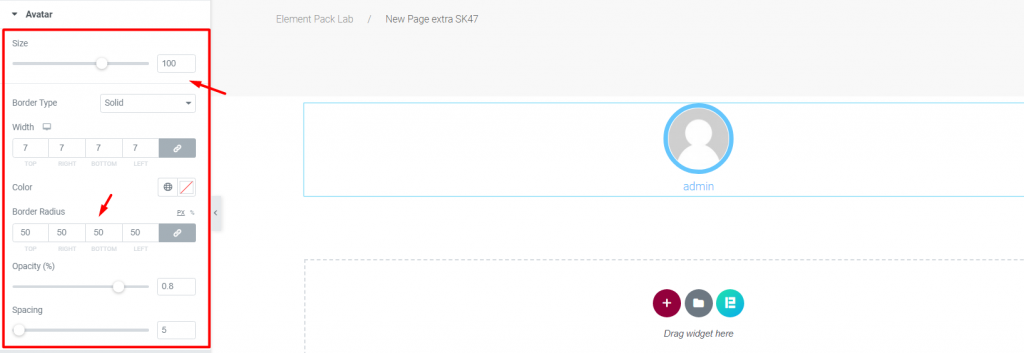
Each member of your BuddyPress community has avatars and a username attached to their account. Using this section, you can change the avatar size, attach a border, color, as well as shape it using the border-radius option.
There are additional options like opacity and spacing as well.
Title

Go to Style> Title
In this section, you can change the color and typography of the title.
Conclusion

Still stuck? Watch this quick video or visit the demo page of the BuddyPress Member widget, by Bdthemes.

