
To build quality mega menus for your online store, forum, or website, the sub menu customizations are very important. Not only it helps you create your mega menu but also it enables you to further enhance the user experience by providing a better navigation system.
This documentation contains the usages and customization procedures of the sub menu widget by Element Pack Pro for designing mega menus in WordPress.
Turn on the Sub Menu widget
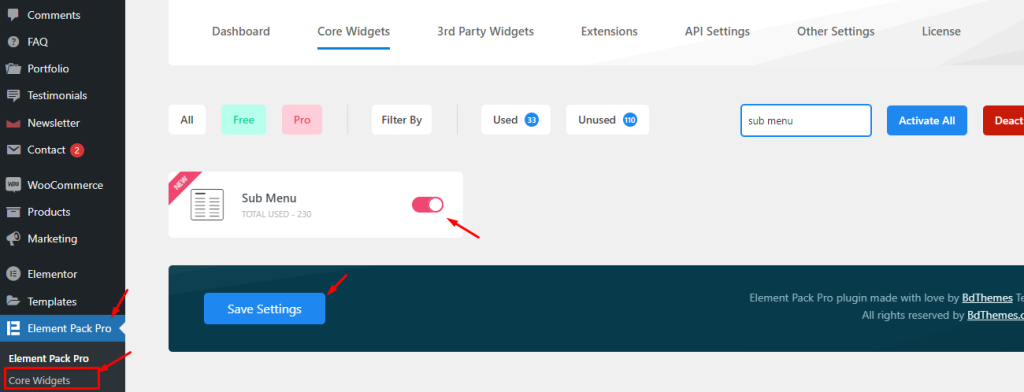
First of all, go to your WordPress dashboard and click on the Core Widgets tab under the Element Pack Pro menu. There, you can use the search field to find the Sub Menu widget easily. Then turn on the switcher and save settings.
Inserting the Sub Menu widget inside Mega Menu from Dashboard
Basically, the sub menu widget is designed to work inside a mega menu. So, we have to prepare a mega menu configuration first, then use the sub menu widget to design the content inside the mega menu.
To do that, please follow the below steps.
Step 1 – Edit the base menu from the Menu dashboard
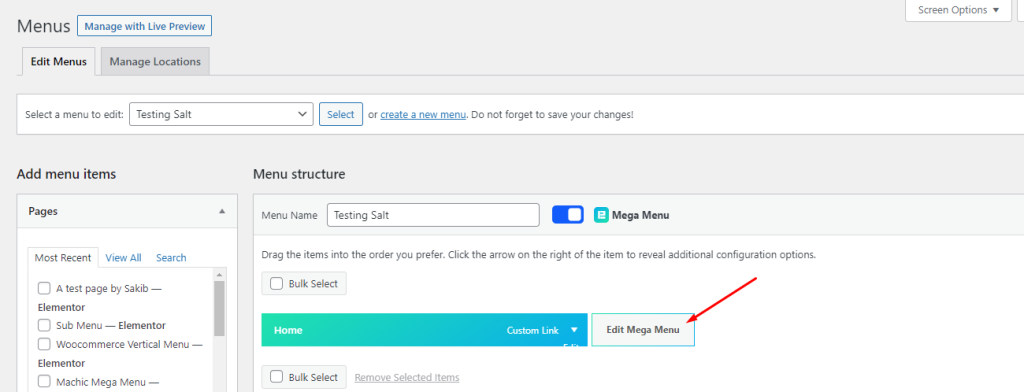
Go to Appearance> Menu and create a menu with Mega Menu settings. See this doc to learn about the process.
Then click on the Edit Mega Menu button on the target base menu item.
Step 2 – Go inside the Mega Menu content window
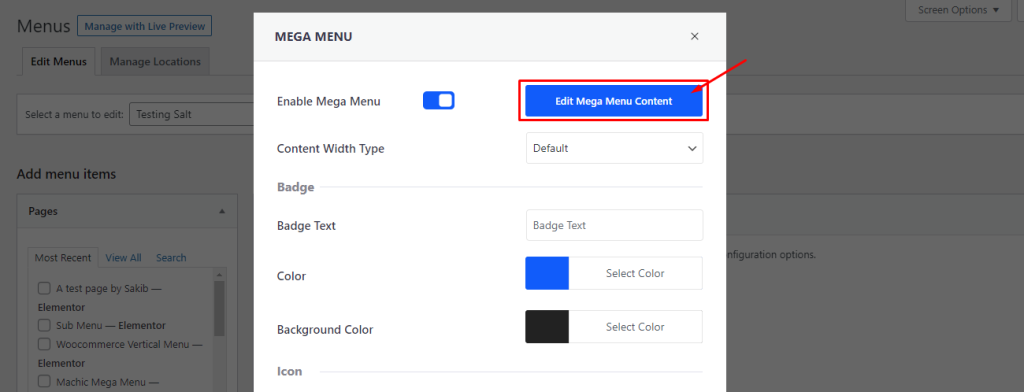
On the new popup window, you will see a button on the top that reads as ‘Edit Mega Menu Content.’ You will need to click on it to get inside the Elementor editor window for customizing the mega menu content.
Step 3 – Insert the sub menu from the widget panel
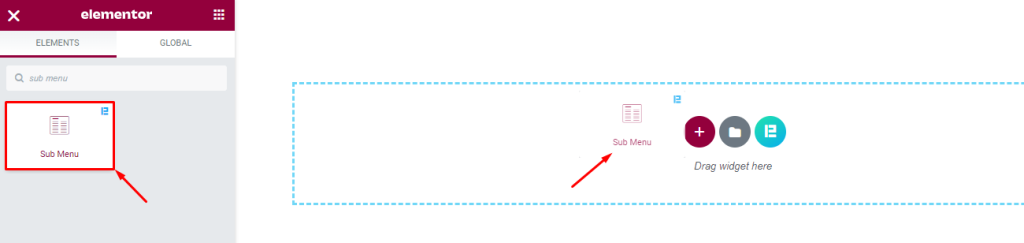
In a new window, you will see the Elementor editor panel that will show you the regular controls except there is no page settings hamburger menu in the top-left corner instead, it’s a close button for closing the page. Now, from the widget menu, drag and drop the sub menu widget inside your webpage to start customizing it.
Note: Before proceeding, make sure you have Elementor installed, otherwise the widget can’t be used. Both free and premium Elementor plugin supports all widgets from Element Pack.
Layout customizations for the Sub Menu addon
The Sub Menu provided by Element Pack Pro has a workable widget control area to customize a number of its functions and create the best possible layout to suit your website Mega menu. The Content tab holds the fundamental settings for the widget such as layout, menu items, and additional options.
Let’s find them out.
First Appearance of the widget
Inserting the sub menu widget gives you a default interface containing 5 pairs of menu items listed on the display. There is an active hover effect that displays an arrow while changing the text color upon hover.
The default setup has no apparent style that you can be proud of. So, let’s see how to customize the widget to make a unique layout of your liking.
Layout customizations from the first section
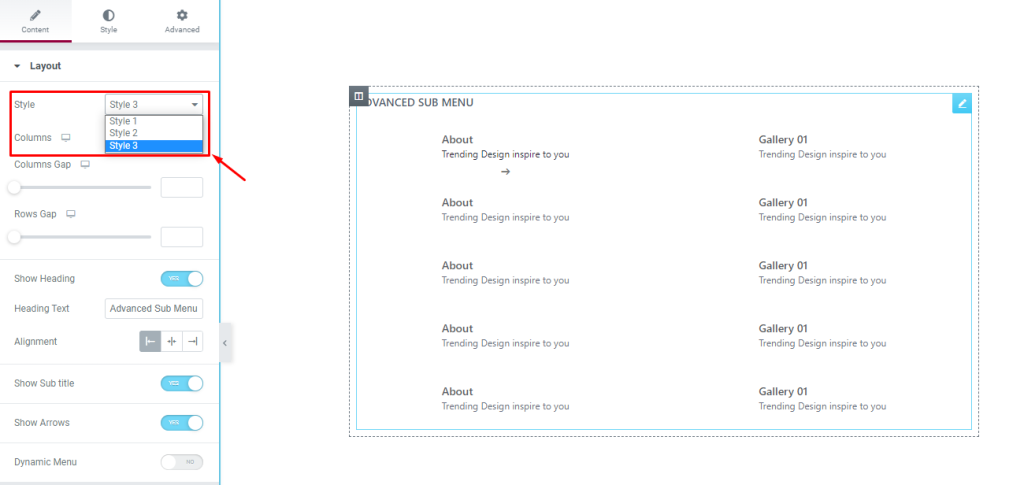
Go to Content> Layout
There are 3 pre-made styles for the sub menu. Each style shows a different arrangement for the menu items.

After selecting a layout style, you can choose the number of columns to divide the menu into proportions. The columns gap and rows gap scrollbars will help further stretch the menu items over the layout.
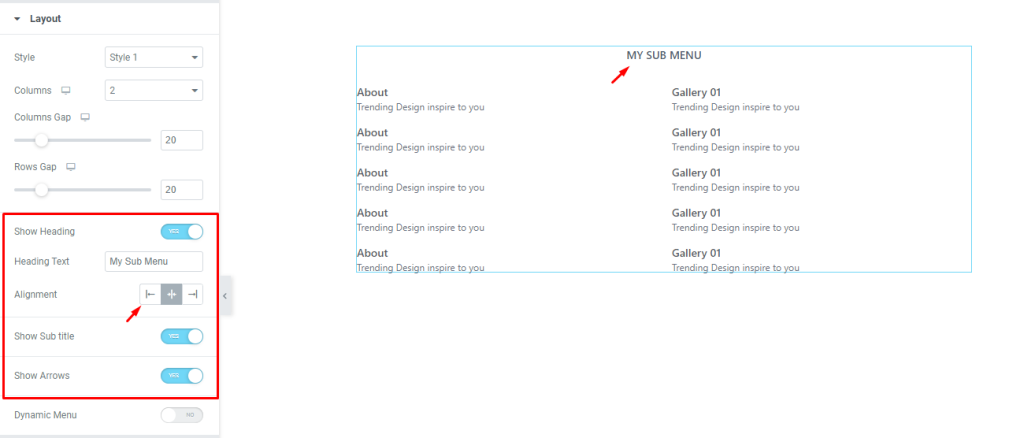
The three switchers below control the visibility of the menu heading, sub title, and arrows. For the heading of the sub menu widget, you can edit the text and place anything you like. Also, the alignment of the title can be changed.
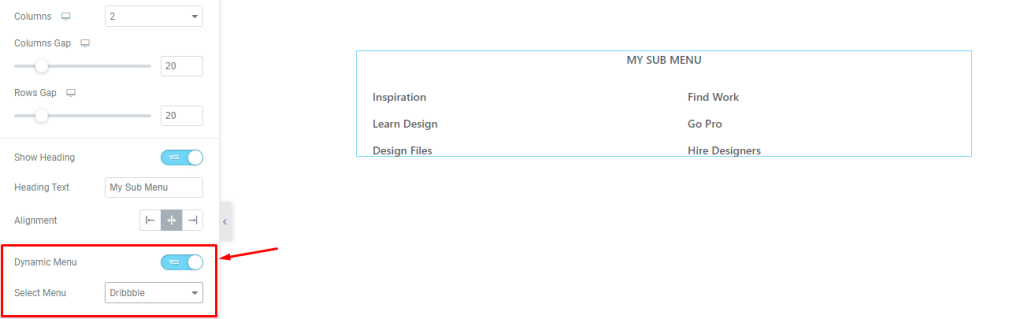
Basically, the sub menu widget has a static menu build up from the start. If you turn on the dynamic menu switcher, you can select any existing menu inside your system and turn it into a sub menu. The optimum integration with WordPress core lets the widget take advantage of the menu system of WordPress to give you better control over the dynamic menus.
Easier to customize and easier to use.
Static Menu customization controls
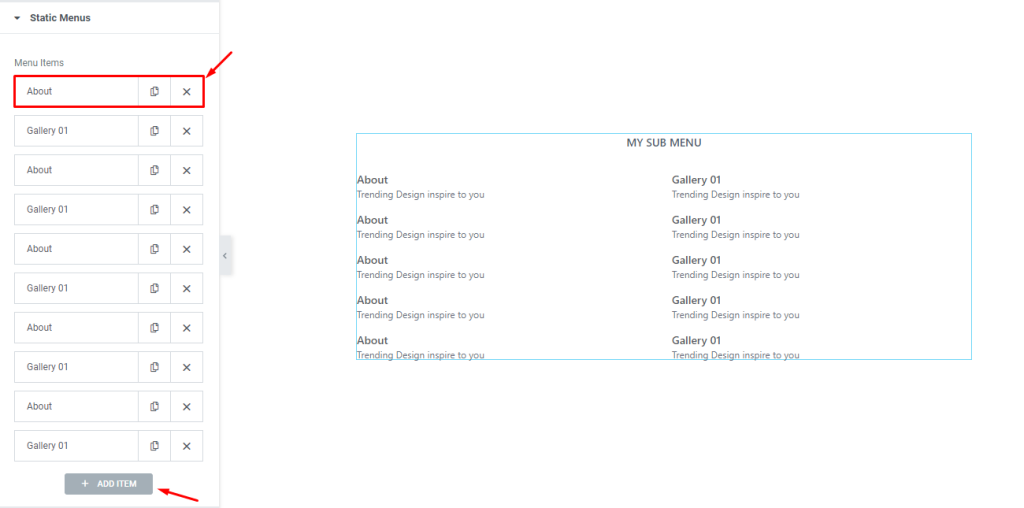
Go to Content> Static Menu
In this section, you will be able to see the menu items listed down. You can close any listed item or add more by clicking the Add Item button below.
Take note that the static menu items will only appear when the dynamic menu switcher is off.
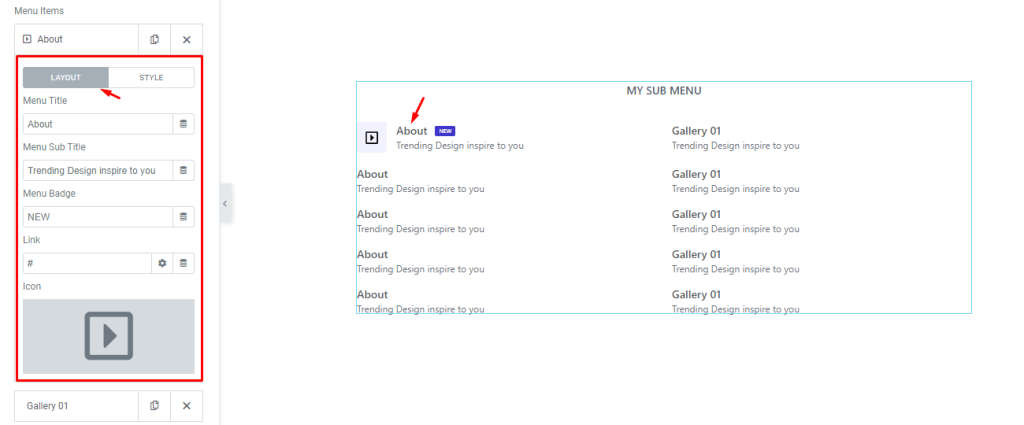
Clicking on an item box will give you Layout and Style controls for the individual item. From the Layout, you can change the title, sub title, menu badge, link, and icon of the sub menu widget item.
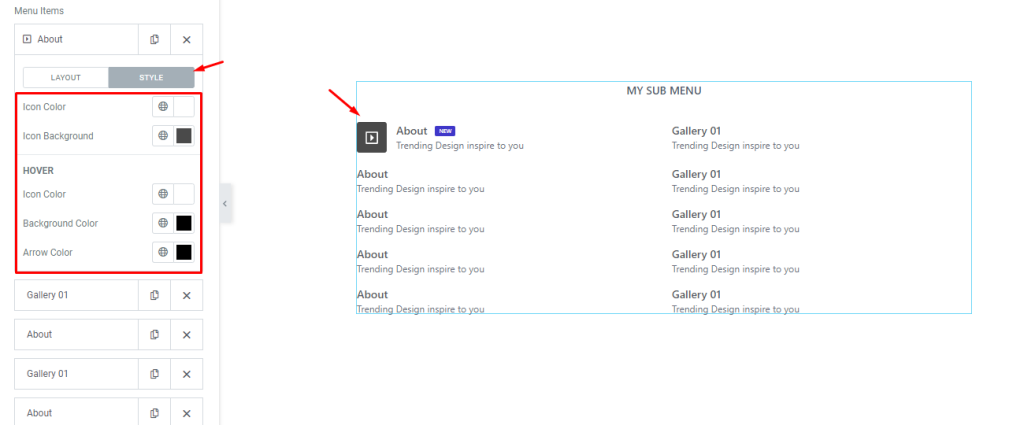
Then from the Style subsection, you can change the color of the icon and icon background for normal and hover modes. Also, you can customize the arrow color from here.
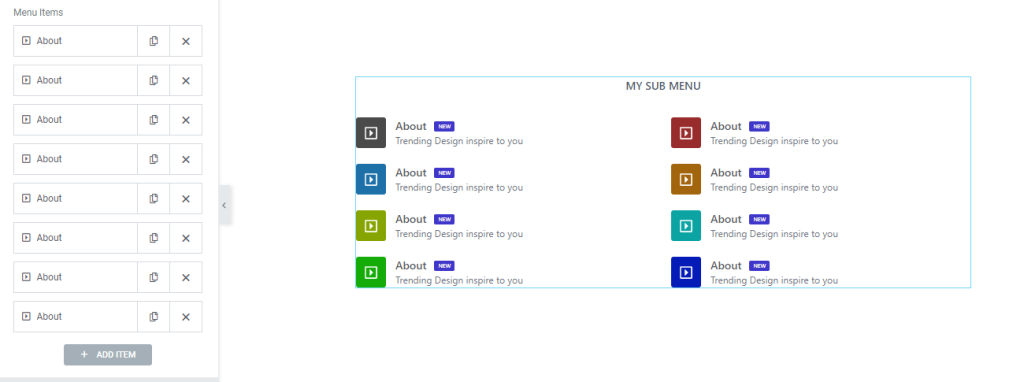
Once you are finished, you will have a complete layout looking like the displayed picture.
Additional Options for better responsiveness
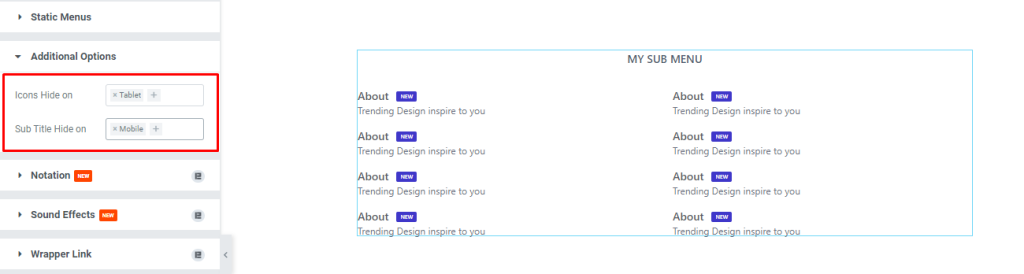
Go to Content> Additional Options
In this section, you can customize the visibility of the menu icons and sub titles in selected devices for better responsive results.
Use Style tab customizations
The Style tab of the Sub Menu widget contains all the necessary options to customize the appearance of the completed layout using color, padding, border, etc. For Element Pack Pro, the customizations are even more user-friendly and selective so you can take maximum advantage of the system to design unique mega menus yourself easily.
Let’s explore the options.
Change the heading color for the Sub Menu widget
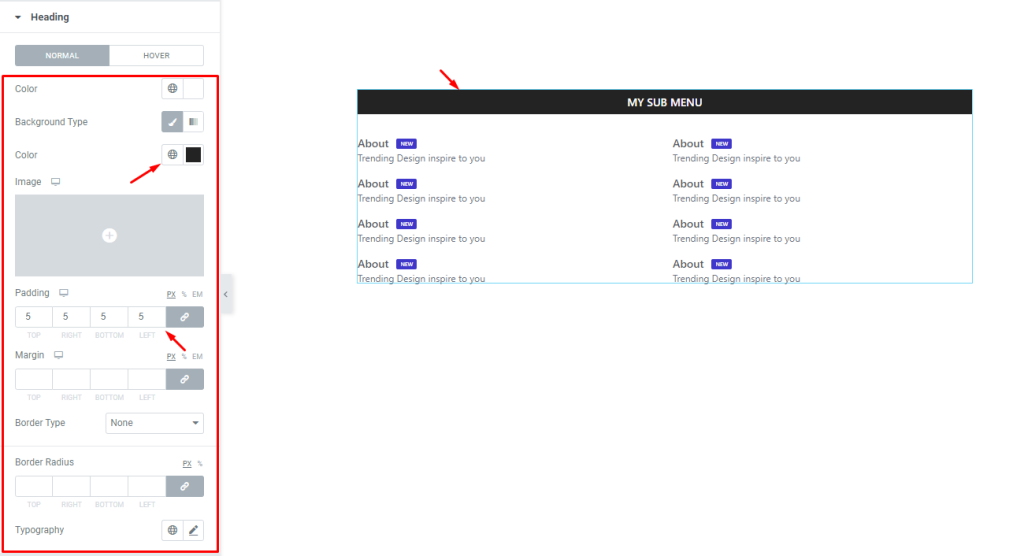
Go to Style> Heading
Let’s change the heading text color to white, the heading background color to black, and add some padding value to buff the heading area. There are more options like margin, border, typography, and box shadow.
Items section customizations
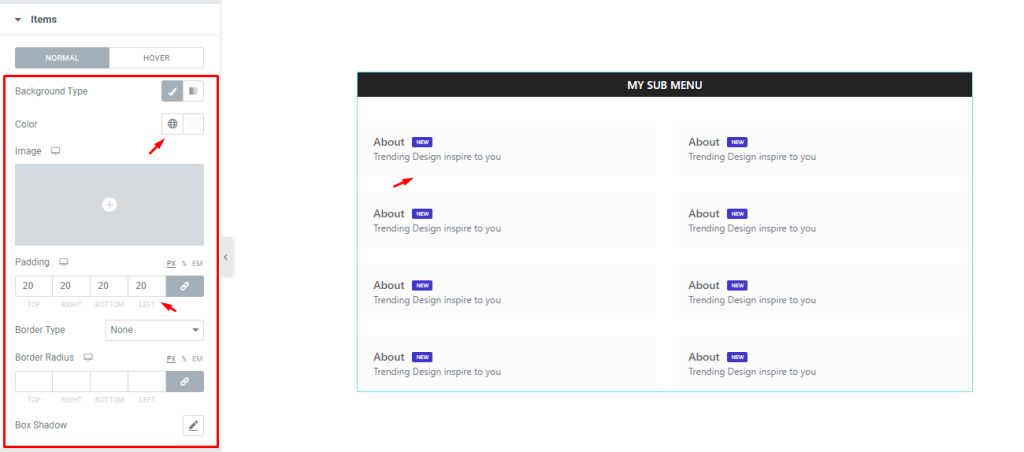
Go to Style> Items
In this section, you will find the color, padding, and border options to customize the looks of all the menu items at once. For instance, we used background color and padding to make a nice rectangular shape for them.
Also, you can use the box shadow option to add 3D like shadows to the items as well.
Title text customizations
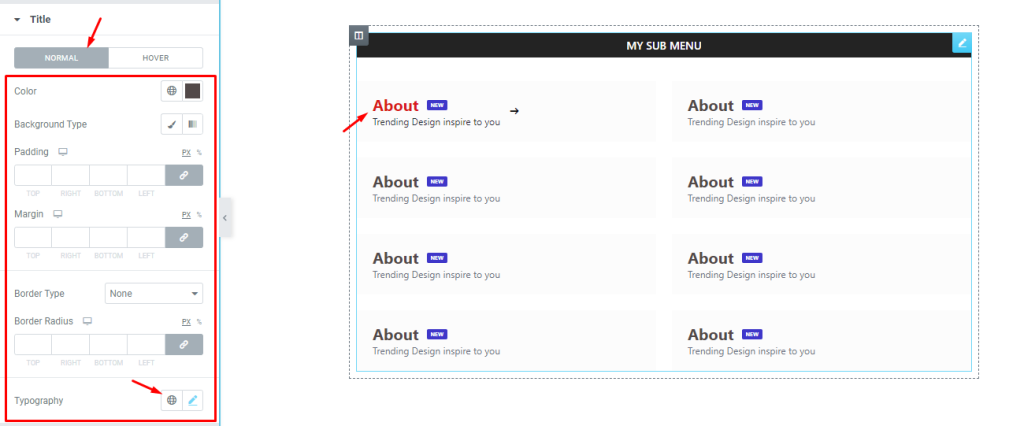
Go to Style> Title
For the title text, you can get a number of options to customize its text color, add a separate background color, or padding, then edit the margin value or border. From the typography option, you can easily customize the font of the title.
Sub Title customizations
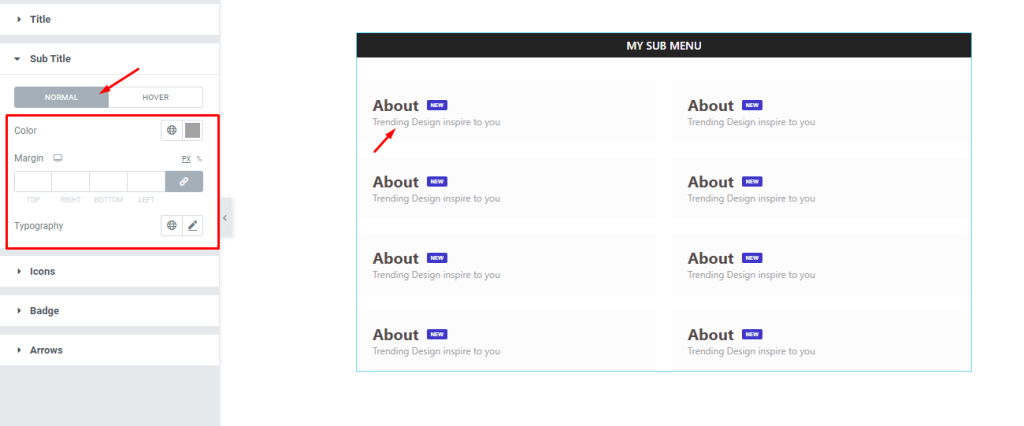
Go to Style> Sub Title
For the sub title of the sub menu widget, the options are limited to text color, margin, and typography.
Sub Menu icons
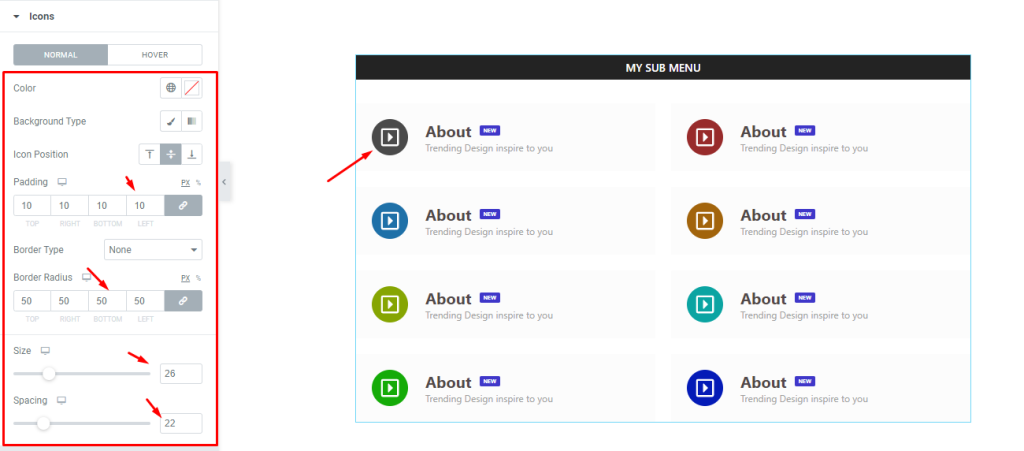
Go to Style> Icons
Once you set icons for the menus, you can customize them from this section. You can change the icon position, then add padding around it. Also, increase the border radius value to make it into a circle. Make sure to adjust the size and spacing of the icon.
Sub Menu widget badge customizations
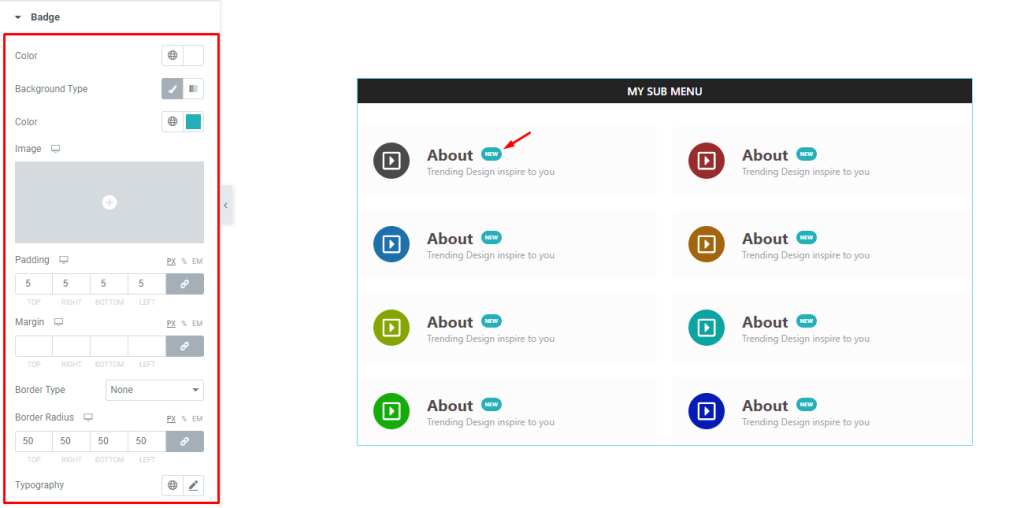
Go to Style> Badge
We already set the menu badges earlier. Now, you can customize the badge text color, background color, padding, and the border radius.
Arrows customization
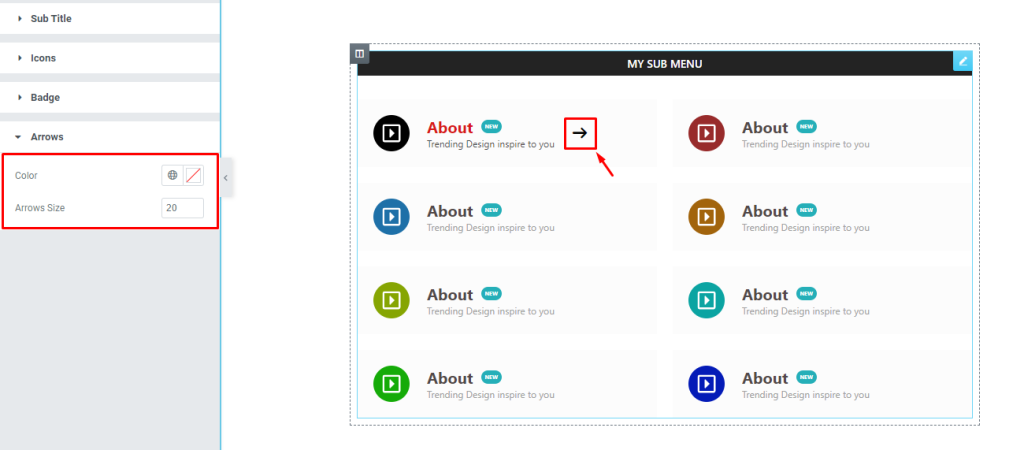
Go to Style> Arrows
Lastly, you can change the arrow color and arrow size from the section here.
Now, have a look at the complete sub menu by inserting it through a mega menu widget.
Video Assist
Watch this video to learn about the sub menu from a user’s perspective as well as visit the demo page for examples.
Brought to you by BdThemes.