
The Hash Link extension lets you transform headings into CSS classes with a clickable link which adds a direct link to the selected content area. Each time a visitor clicks on the clickable link, he/she will land directly on the selected content part of the page, instead of the hero section.
Let’s learn about the extension.
Enabling The Elementor Hash Link Extension
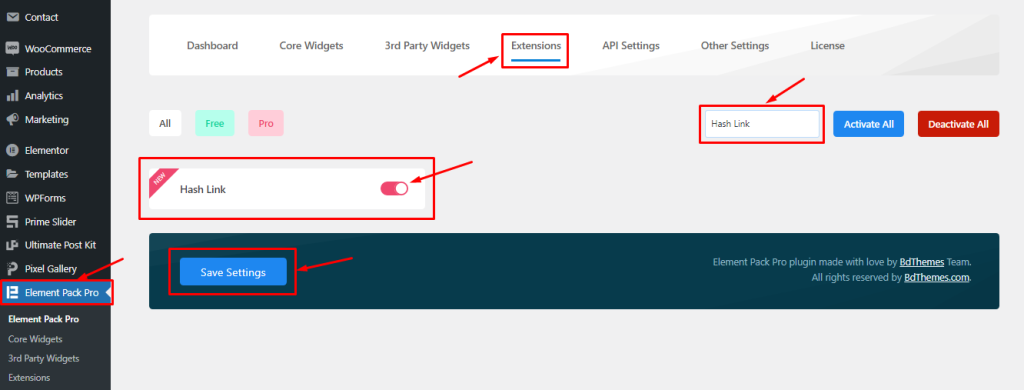
As Hash Link is an Extension of Element Pack Pro, you will find it inside the Extensions tab inside Element Pack Pro under your WordPress dashboard. Here you also can search for the Hash Link Extension on the search box as marked in the screenshot.
Just click on the tiny button beside the extension name and hit the Save Changes button. Now, you will be able to access the feature from the Elementor editor page.
Start With Any Widget Or Design
To start with the feature, let’s first take an existing design or widget inside the page. This is for a better understanding of the functions of this feature. Here we have a designed section with some Headings to show you the Hash Link feature. One more thing, This feature will not work on Editor Mode. Please check the Extension on the Preview Page.
Step-1
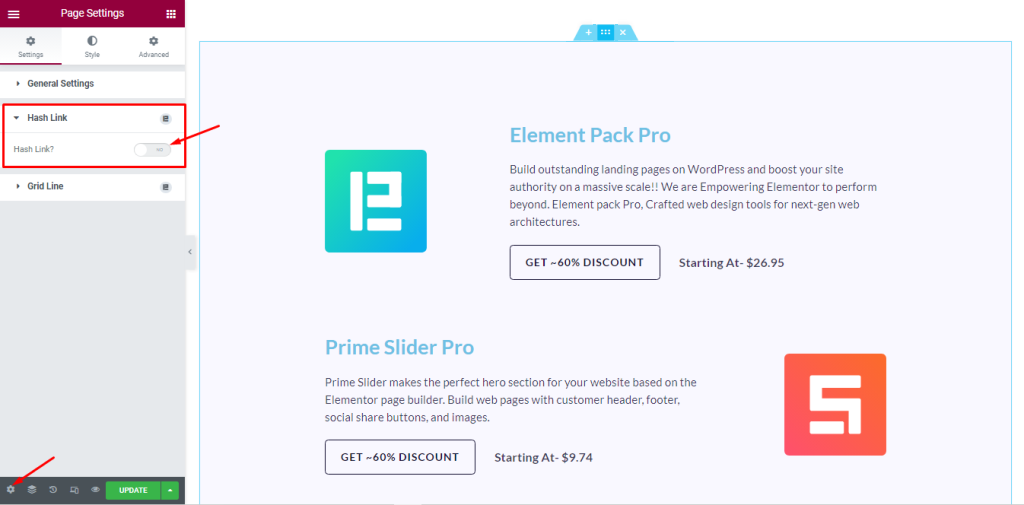
First, go to the Page Settings by clicking the Gear icon at the bottom-left of the page. You will find the Hash Link section under General settings. Open the section and turn on the switcher and update the settings.
Step-2
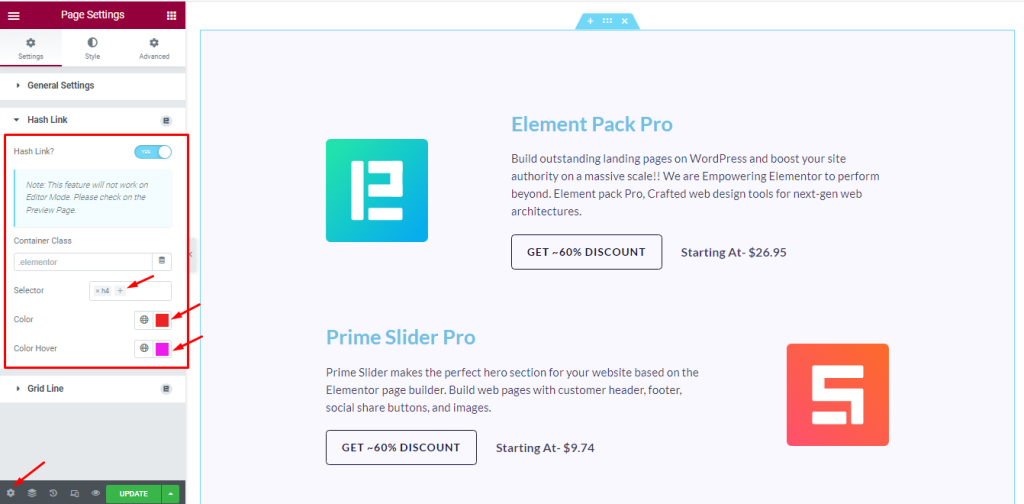
After Enabling the Hash Link switcher button, you can select HTML Tags from the Selector Field section to highlight the linked Heading that you want to see on your page. Here, I have two headings on the page. One is Element Pack Pro and here I select the HTML Tag h4. And Another one is Prime Slider Pro and there I select the HTML Tag h3. Now, we selected h4 from the Selector field.
Then, you can set the Hash Link heading’s Color and Hover Color from the settings.
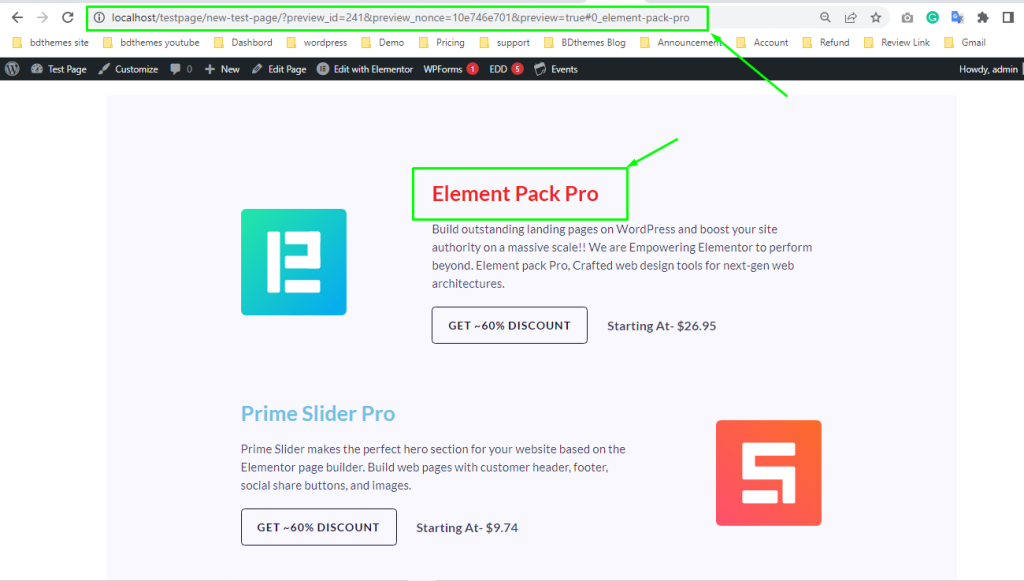
Now update the settings again and go to the preview page to see the output.
You can see the Hash Link Extension worked on the heading with the h4 tag as per the Selector setting.
After clicking the linked Heading, you will get a direct link for that specific Heading. If you browse that link, you will go to the Exact linked Heading section.
Work with the Container Class Field Section
If you have many Headings in your section but want to use the Hash Link feature on specific headings, you can use the CSS Class field for this.
Step-1
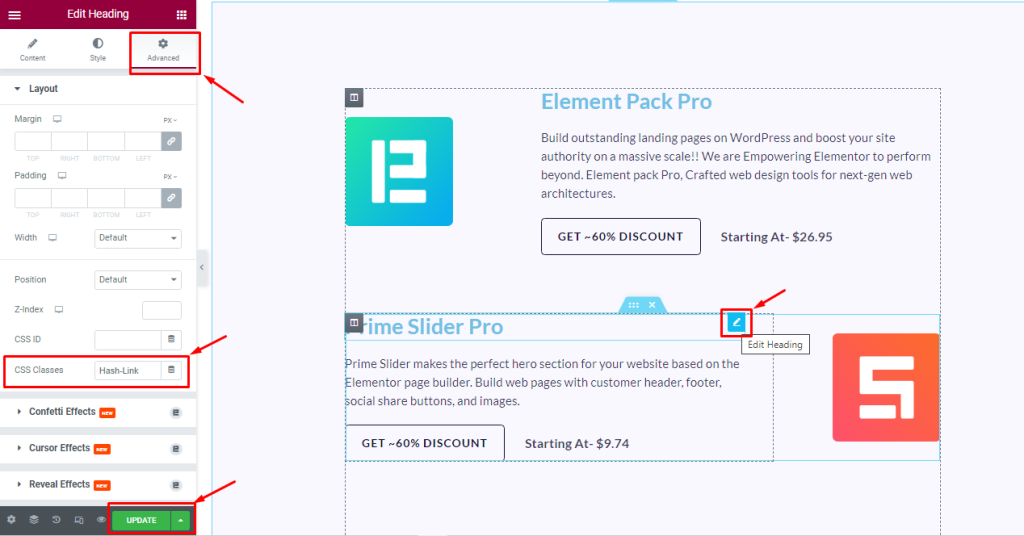
First, you should select the Specific Heading then Go to Advanced Settings> CSS Classes. Here you should Type/Enter a CSS Classes Id. Then copy the ID.
Step-2
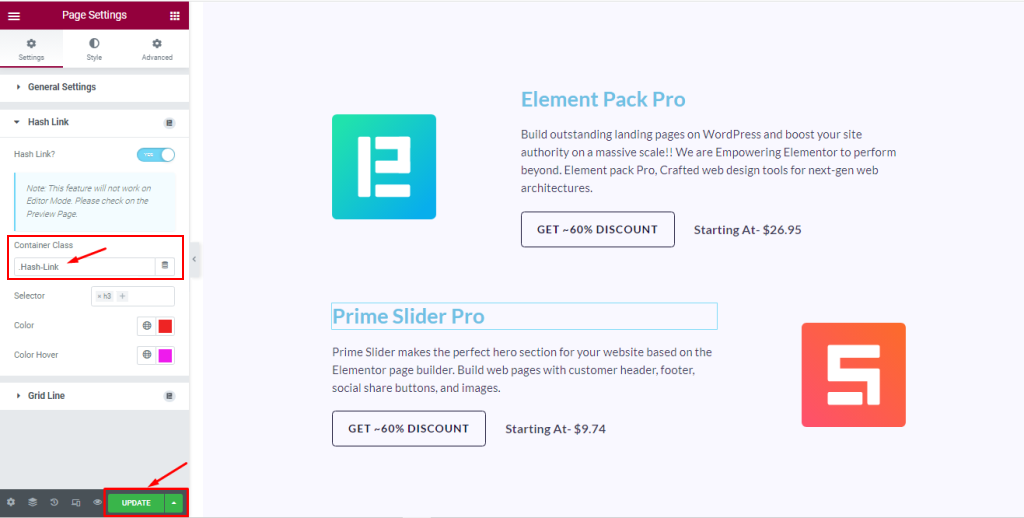
Now, go to Page Settings> Hash Link> Container Class.
Paste the copied CSS ID and hit the update button for saving.
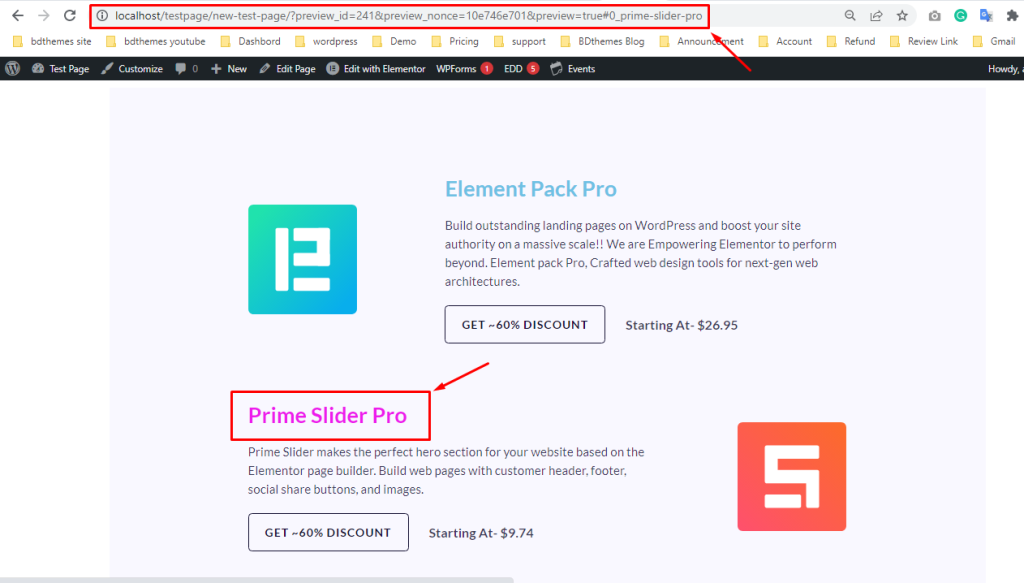
After that, Go to the preview page to see the output. The altered color of the titles indicates that the Hash Link feature is activated for them.
All done! You have successfully customized The Hash Link Extension on your website.
Please use this feature to excel your workforce.
Thanks for staying with us.