In this documentation, we will discuss the customization of the Lottie Image block, brought to you by Zoloblocks.
Enable the Lottie Image Block
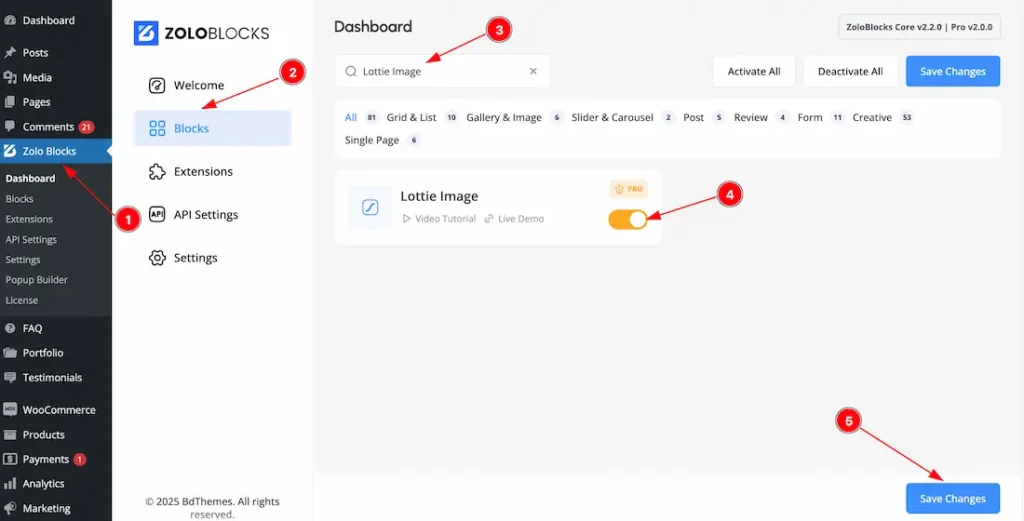
To use the Lottie Image block from Zoloblocks, you must first enable the block.
- Go to WordPress Dashboard > Zoloblocks Plugin dashboard.
- Then Click the Blocks Tab.
- Search the Lottie Image block Name.
- Enable the Lottie Image block.
- Hit the Save Button.
Inserting The Block into the Editor
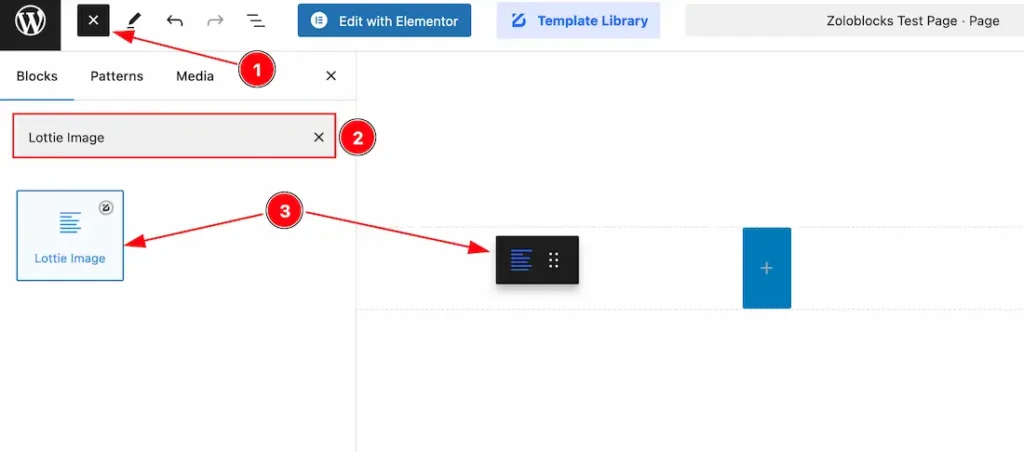
- Click the Toggle Block Inserter icon and a sidebar will appear on the left side, All the blocks will be visible here.
- Search the Lottie Image Block Name inside the search Box. otherwise, select the Icon blocks ( with Zoloblocks logo T.R corner).
- Then Drag and Drop it on the page.
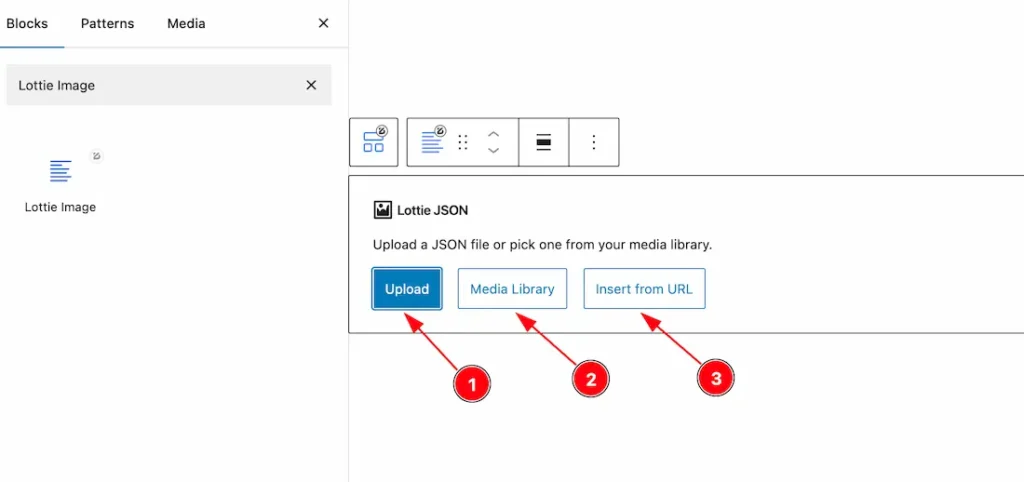
After inserting the Lottie Image block, you will get three options to upload the Lottie Image json file.
1. Upload: Allows you to directly upload a Lottie JSON file from your Local file.
2. Media Library: Lets you select a Lottie JSON file from the site’s media library if it has been previously uploaded.
3. Insert from URL: Enables you to insert a Lottie animation by providing a direct URL to a JSON file hosted online.
Basic Tab Customization
The Basic tab controller displayed here offers the flexibility to adjust the layout of blocks according to your preferences.
General Section
Go to Basic > General
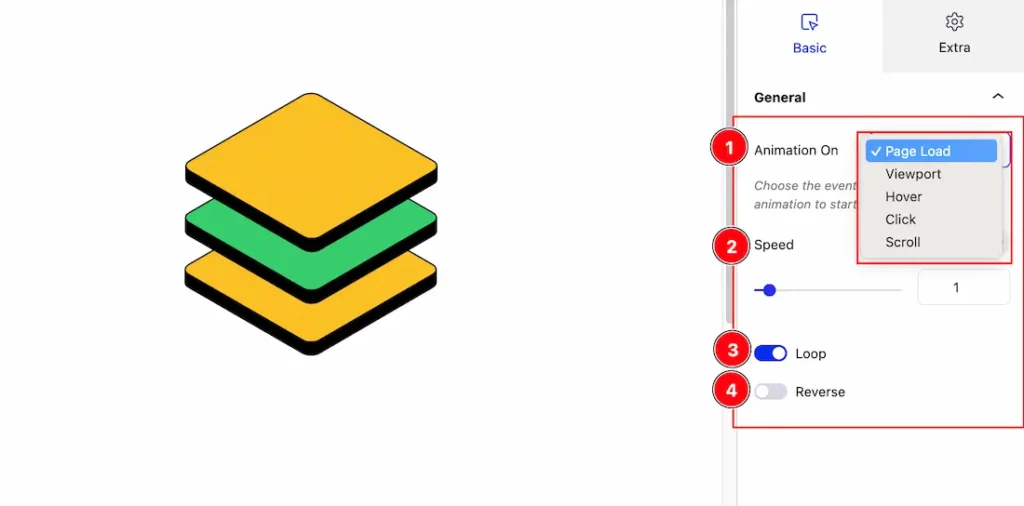
Come to the General section, you will get the below customization options to customize the Lottie Image-
1. Animation On: Selects the event that triggers the animation, such as Page Load, Viewport, Hover, Click, or Scroll.
Page Load: The animation starts automatically as soon as the page finishes loading.
Viewport: The animation begins when the element becomes visible within the user’s viewport
Hover: The animation is triggered when the user moves their cursor over the element.
Click: The animation starts when the user clicks on the element.
Scroll: The animation plays in sync with the user’s scrolling behavior on the page. (NB: The Scroll Feature works only for preview mode.)
2. Speed: Adjusts the speed of the animation by sliding the control or entering a numeric value.
3. Loop: Enables continuous looping of the animation when toggled on.
4. Reverse: Plays the animation in reverse when toggled on.
Extra Tab Control
The extra tabs provide the controls of any blocks. You can make different visual layouts by following these Controls.
Click to learn more>>.
Video Assist
You can also watch the video tutorial Learn more about the Lottie Image Block. Please visit the demo page for examples.
Thanks for being with us.