Post Gallery widget is an amazing tool developed by Element Pack Pro. With this widget, you can show hundreds of posts with a grid style. Developed for all occasions, this widget supports posts, blogs, products, etc. a variety of categories.
You can use the Post Gallery widget very easily by following the instruction I’m about to give you. Let me give you a complete guide to it!
To Insert Widget

Inserting the widget is just a matter of drag and drop. However, click and hold on the widget icon from the menu and drag the Elementor posts widget to the drop point. Follow the picture above.
Content Tab
Using the Content tab, you can basically make a layout of a particular part of the website.
Layout
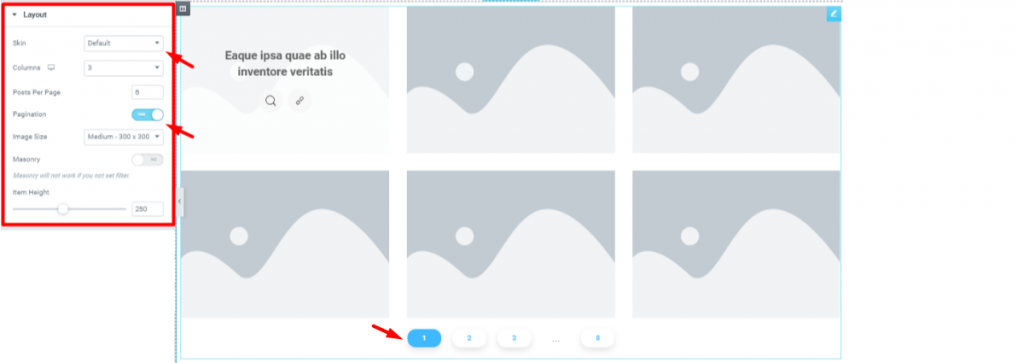
Go to Content Tab> Layout
The first section Layout has a bunch of controllers. You can choose the appearance style of the post gallery from the drop-down option named Skin. Remember, each Skin comes with a slightly different set of editable sections for the Post Gallery widget.
Also, you can select the number of posts showing per page. The Pagination switcher enables the pagination box underneath the posts.
Query
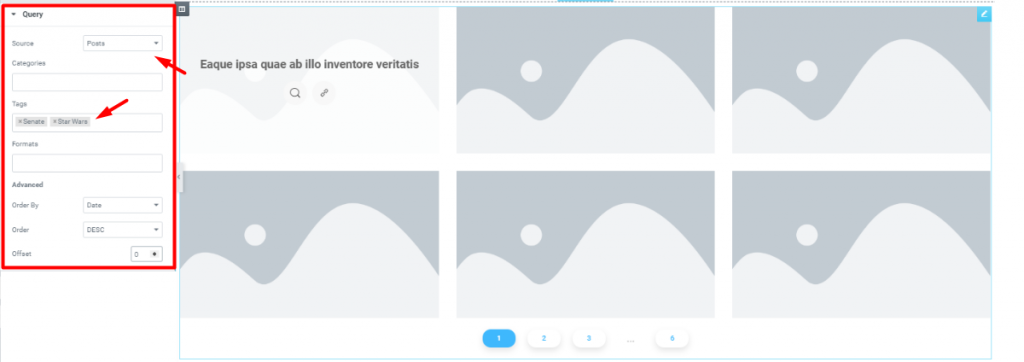
Go to Content Tab> Query
In this section, you can select what you want to display by selecting from Source. There’re also fields for unique selection such as Categories, Tags, & Format. You can set the order by or offset to the post gallery.
Filter Bar

Go to Content Tab> Filter Bar
The Filter Bar section has the Show switcher. Turning it on will show the filter bar above the Elementor post gallery. However, you can classify what the filter bar will show on the screen from Taxonomy.
Additional

Go to Content Tab> Additional
This is the last part section of the Content tab. In this section, you can choose an animation for the overlay screen that appears on the posts when you hover your mouse over it. Additionally, you can choose to show the title, excerpt, tags, tilt effect, etc. from here. Also, you can set animation for the whole grid entrance as well for the Elementor post gallery.
Style Tab
Now, time for some Style. In this Style tab, you will have more options to create your unique Post Gallery widget as you like. Let’s have a look.
Items
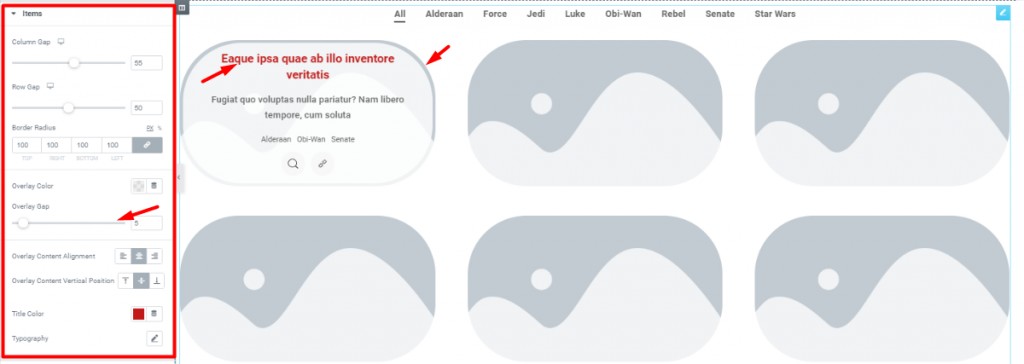
Go to Style Tab> Items
The first section of the Style tab is the Items section. Here, you will see some scroll bars and controllers. Like the image above, you can edit the overlay part, change the title color, or customize the borders of the post gallery.
Excerpt

Go to Style Tab> Excerpt
You can change the color, set margin, and edit the typography of the excerpt of the post gallery from here.
Button

Go to Style Tab> Button
The Button section lets you edit the two buttons on each post boxes in the post gallery. You can change their color, background, add hover effect, border, etc. of the Elementor Post Gallery Widget from this section.
Filter Bar
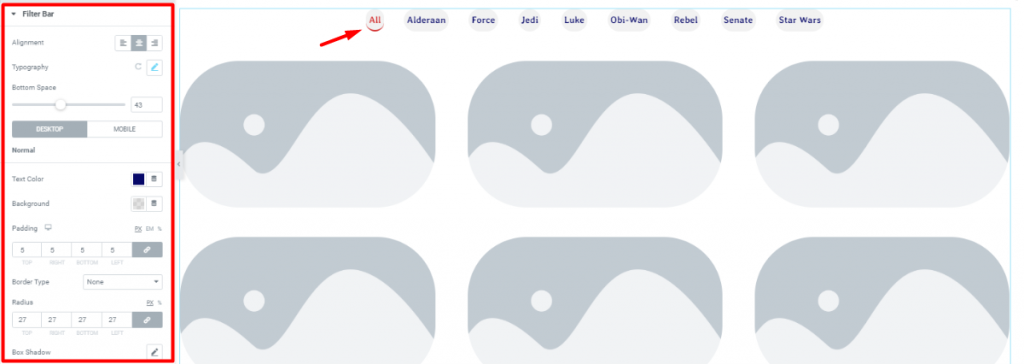
Go to Style Tab> Filter Bar
In this section, you will get a bunch of controllers to customize the filter bar at the top of the post gallery. It’s easy to edit their appearance, hence you should take a look at it.
Category

Go to Style Tab> Category
This section has a color and a typography controller for the category you can see on the overlay screen.
Pagination

Go to Style Tab> Pagination
Lastly, you can change the appearance of the pagination at the bottom of the post gallery. You can basically change the color, background type, offset value, spacing, padding, etc. of the pagination buttons here. Pretty easy right?
Video Assist
Well done. Seems you have learned the whole thing and how it works. It is easy and fun. Watch Video Assist and to get more in-depth ideas about the usage of the Post Gallery widget, take a tour to the demo page.
[Note: on-site video link]


