In this documentation, we will discuss the customization of the Scroll Parallax Effect Extension, brought to you by Zoloblocks.
Enable the Scroll Parallax Effect Extension
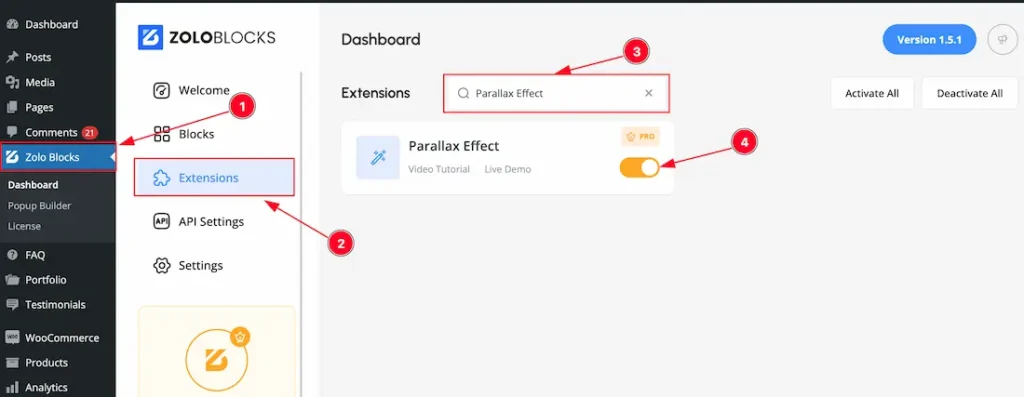
To use the Scroll Parallax Effect Extension from Zoloblocks, you must first enable the Extension.
- Go to WordPress Dashboard > Zoloblocks Plugin dashboard.
- Then Click the Extension Tab.
- Search the Parallax Effect extension Name.
- Enable the Parallax Effect extension.
Start With Any Design to show the Scroll Parallax Effect
To get started with the feature, let’s first use an existing design on the page. This helps in better understanding how the feature functions. Here, I’ve set up a container that demonstrates the Scroll Parallax Effect. In this container, I’ve added two heading elements and a background image to showcase the effect in action.
Where You Find and Enable the Extension
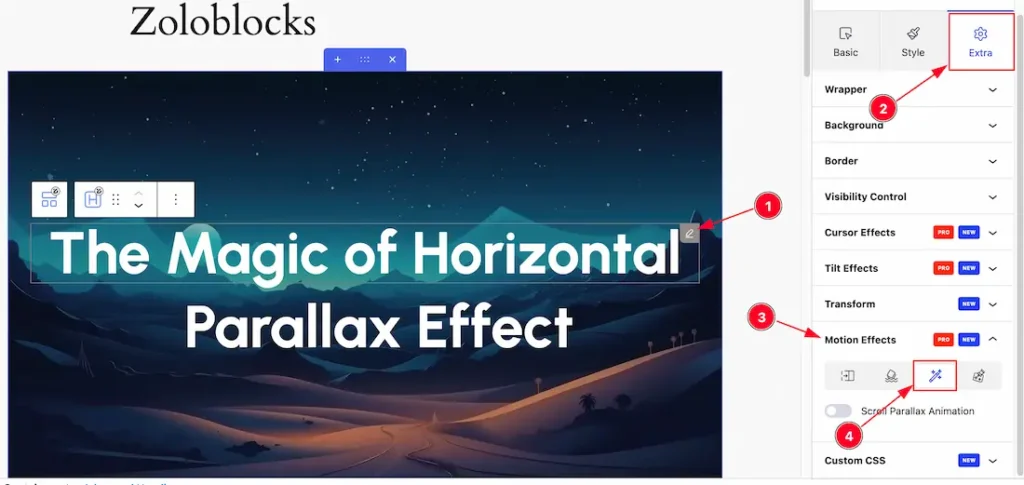
Once your container design is complete, follow these steps to apply the Scroll Parallax Effect:
- Select the Heading block.
- Go to the Extra Tab section.
- Within the Extra Tab, open the Motion Effects section.
- In the Motion Effects section, locate the Scroll Parallax Animation extension and enable it.
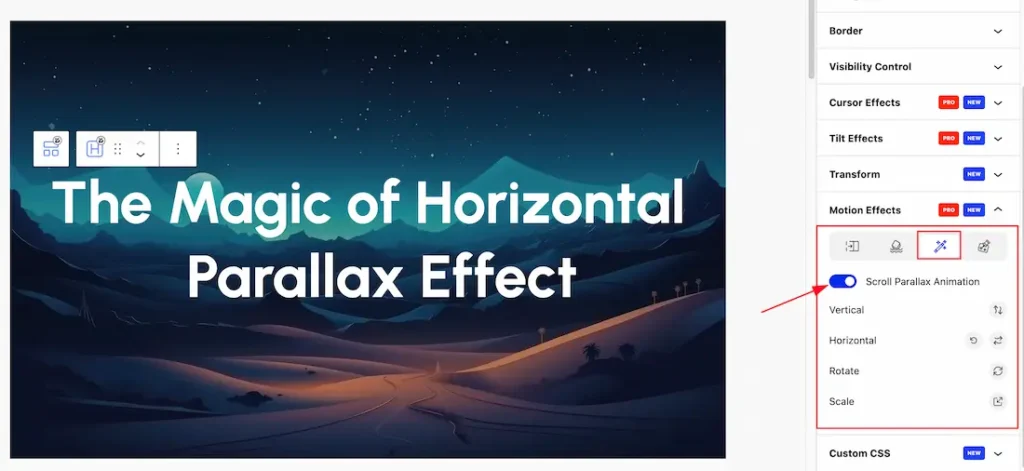
After enabling the Scroll Parallax Effects switcher, the full feature settings will appear, allowing you to customize the effect.
Let’s Explore the Internal Feature of the Scroll Parallax Effect Extension
After enabling the Scroll Parallax Effects switch, a range of customization options will appear, including Vertical, Horizontal, Rotate, and Scale adjustments. Let’s go through each feature:
Customize The Scroll Parallax Horizontal Feature
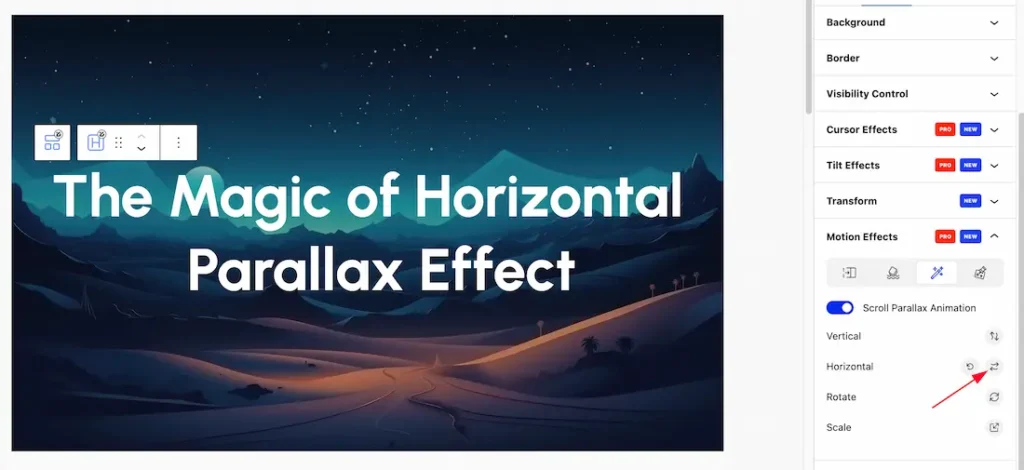
After hitting the Horizontal icon, the Horizontal internal function will appear. Please see the below screenshot-
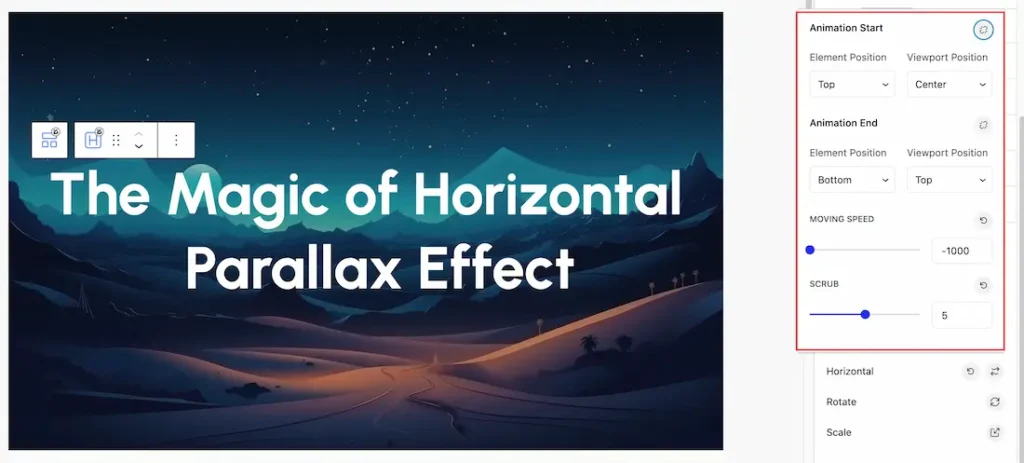
Animation Start: This allows you to set the starting position for the animation by choosing the element’s and viewport’s relative positions.
- Viewport Position: Specify where the animation should start in the viewport, with options like Top, Center, or Bottom.
- Element Position: Choose the starting point of the element, such as Top, Center, or Bottom.
Animation End: Let you define the ending position for the animation by setting the element’s and viewport’s relative positions.
- Element Position: Select the element’s endpoint, such as Top, Center, or Bottom.
- Viewport Position: Decide where in the viewport the animation should finish, with options like Top, Center, or Bottom.
Moving Speed: Adjust the speed of the element’s movement in the animation. Higher negative values increase the speed of movement in the opposite direction. Here you also can use the Positive Value for the Movement. For example, here we used two headings and we set two different Moving speed values. For the 1st Heading, we are using a Negative value (-1000) and for the 2nd Heading, we are using a Positive value(+1000) for moving the heading in each opposite direction.
Scrub: Control the smoothness and responsiveness of the animation as you scroll. For example, in the screenshot, a Scrub value of 5 creates a balanced scroll effect, making the animation gradual and smooth as you move through the page. Adjusting this value will increase or decrease the scroll sensitivity of the animation.
Unlink the Horizontal Start and End Animation Feature
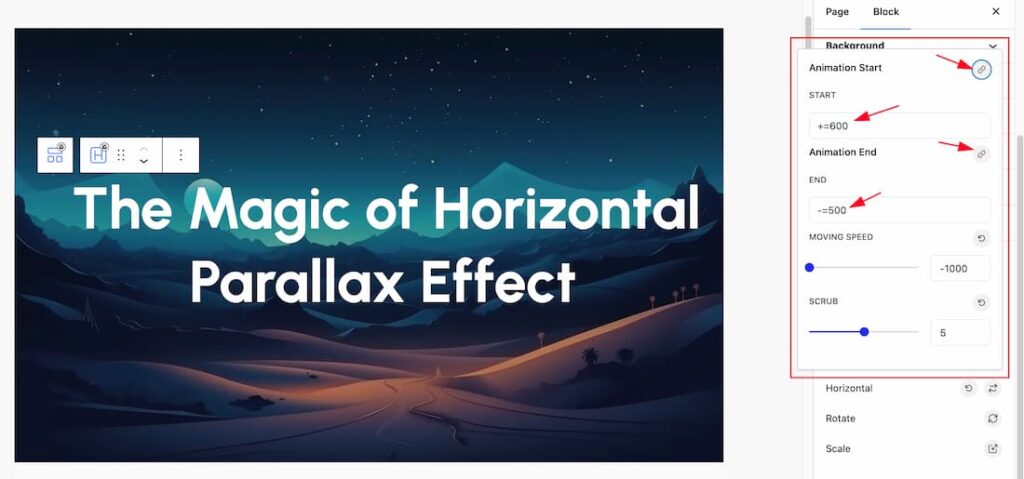
Animation Start and End (Unlinked): When the start and end animations are unlinked, you can individually set different scroll offsets for when the animation begins and ends.
- Start: This defines the point at which the animation starts as you scroll, with a positive offset (+600) meaning the element will start animating once it has scrolled 600 pixels into the viewport.
- End: This defines the point at which the animation ends as you scroll, with a negative offset (-500) meaning the element will finish animating 500 pixels before it leaves the viewport.
The Unlinked feature allows you to customize the Horizontal Start and End animation settings independently, enabling you to adjust each aspect of the animation to meet your specific requirements. For detailed guidance on using this feature, please refer to the development documentation here.
Customize The Scroll Parallax Vertical Feature
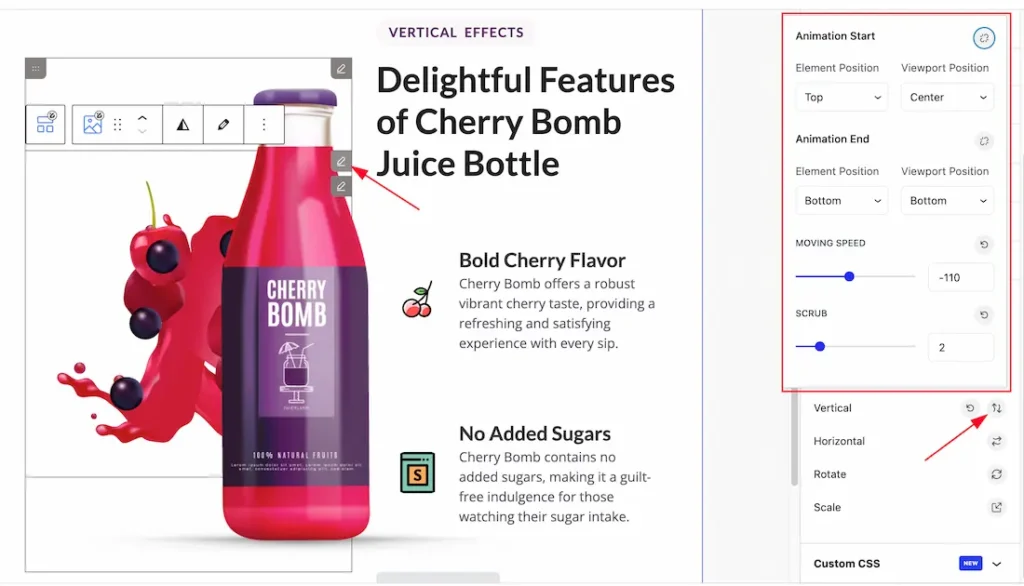
To demonstrate the Vertical feature, we’ve designed an additional section. By selecting the block and clicking on the Vertical Icon, you’ll access options similar to those in the Horizontal feature. Please refer to the above feature description for guidance.
Customize The Scroll Parallax Rotate Feature
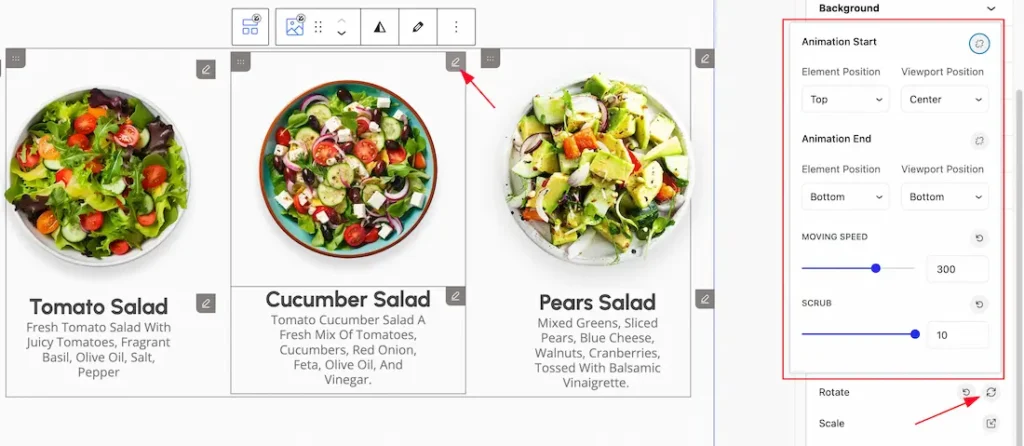
To demonstrate the Rotate feature, we’ve designed an additional section. By selecting the block and clicking on the Rotate Icon, you’ll access options similar to those in the Horizontal feature. Please refer to the above feature description for guidance.
Customize The Scroll Parallax Scale Feature
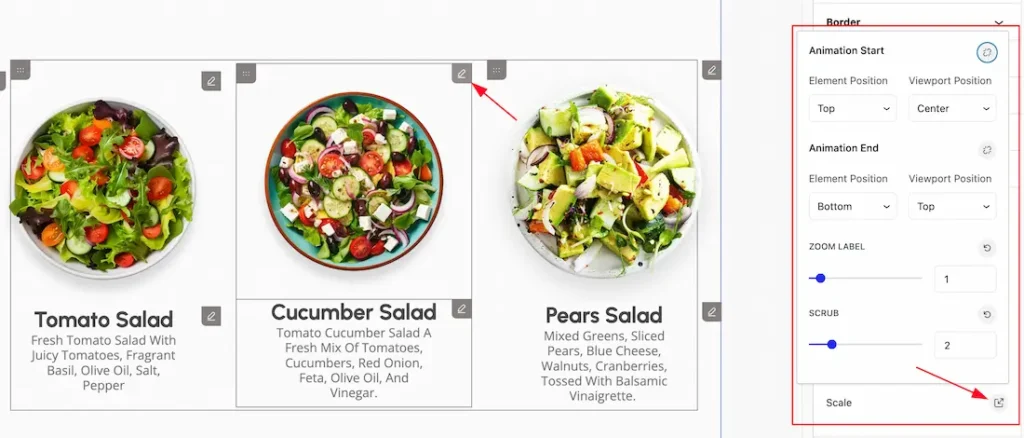
Animation Start: This allows you to set the starting position for the animation by choosing the element’s and viewport’s relative positions.
- Viewport Position: Specify where the animation should start in the viewport, with options like Top, Center, or Bottom.
- Element Position: Choose the starting point of the element, such as Top, Center, or Bottom.
Animation End: Let you define the ending position for the animation by setting the element’s and viewport’s relative positions.
- Element Position: Select the element’s endpoint, such as Top, Center, or Bottom.
- Viewport Position: Decide where in the viewport the animation should finish, with options like Top, Center, or Bottom.
Zoom Label: Adjusts the scale of zoom for the animation.
Scrub: Controls the smoothness and responsiveness of the animation as you scroll.
We successfully customize the Scroll Parallax Effects Extension.
Video Assist
The Video will come soon. Please visit the demo page for examples.
Thanks for being with us.
