In this documentation, we will cover how to use the Maintenance Mode feature, brought to you by Zoloblocks.
What is the Maintenance Mode Feature and Why the Feature Use?
Maintenance Mode is a feature that allows website owners to temporarily take their site offline for updates or maintenance while displaying a customizable message to visitors. This ensures a smooth user experience by informing visitors of the downtime and expected return while keeping the site’s backend accessible to administrators for necessary work.
Start With Any Design to show the Maintenance Mode Feature
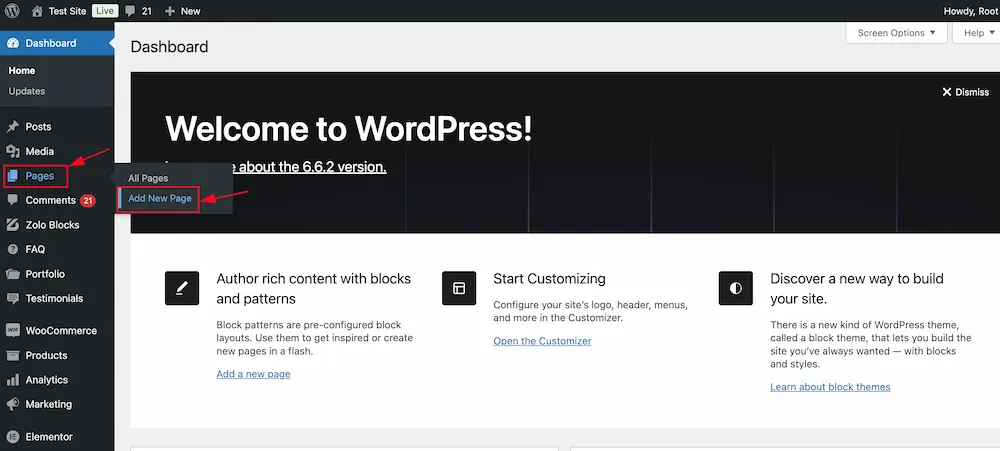
To show the Maintenance Mode Feature, first, you should need to create a Maintenance Mode page that you want to show to your visitors. For that, go to your WP dashboard > Pages > Add new page. Please see the below screenshot-
And create a new page for the Maintenance Mode Feature. Here we created a new page for the Maintenance Mode Feature. Please see the below screenshot-
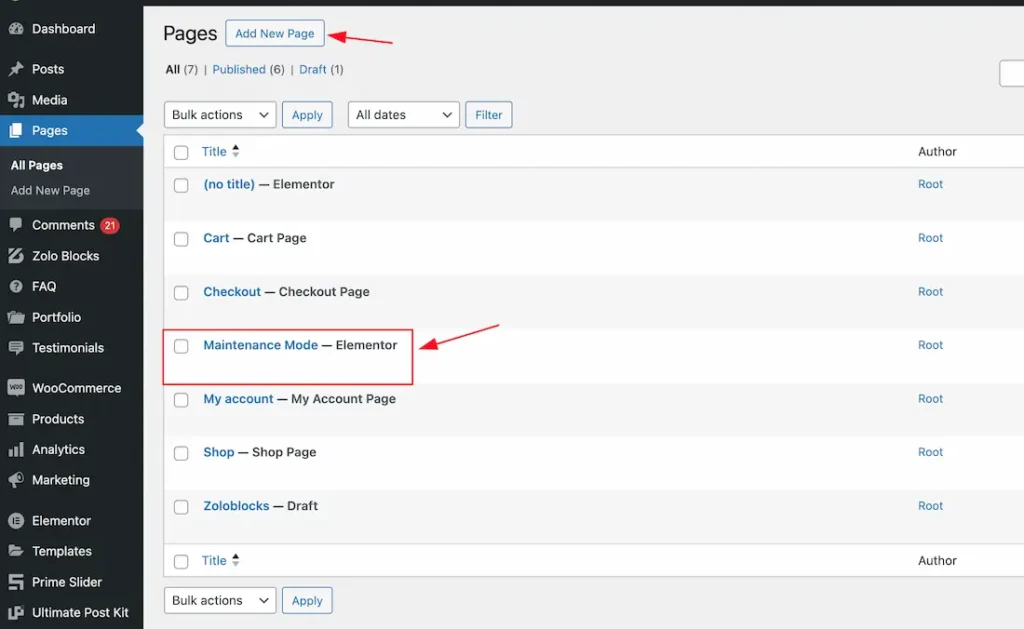
After creating the Maintenance Mode page, please design the page to your working demand.
Where You Find and Enable the Maintenance Mode Feature
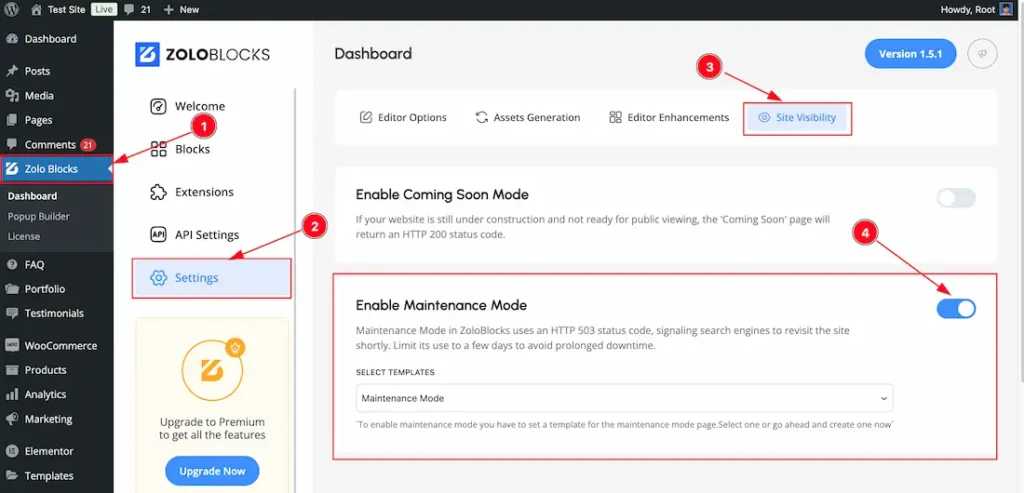
To use the Maintenance Mode from Zoloblocks, you must first enable the Feature.
- Go to WordPress Dashboard > Zoloblocks Plugin dashboard.
- Click the Settings Tab.
- Then Click the Site Visibility Tab.
- Enable the Maintenance Mode feature switcher button.
Select the Maintenance Mode page
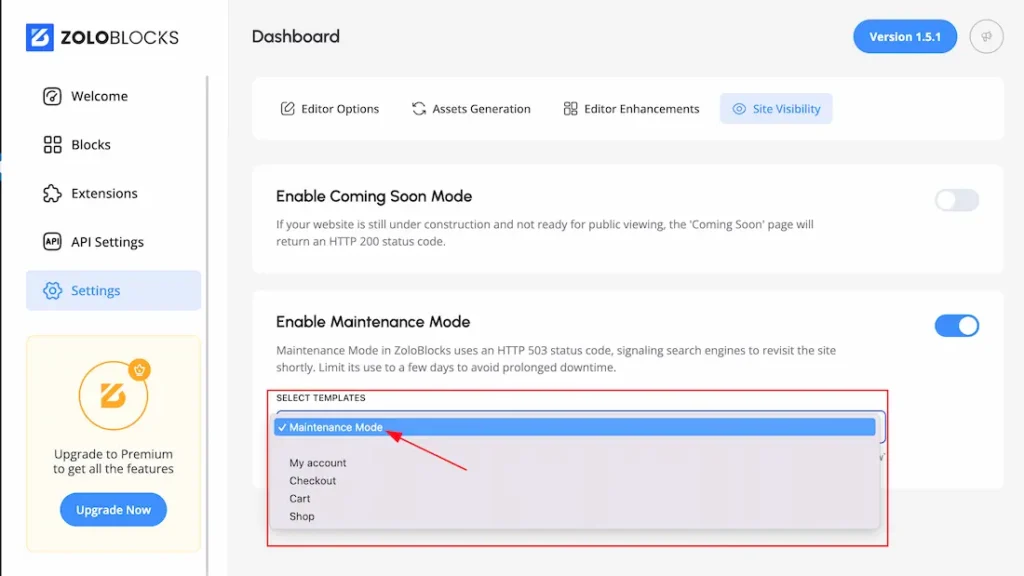
After enabling the Maintenance Mode switcher button, click on the Select Template field. All of your previously created pages will appear on the screen, and from there, simply choose your created Maintenance Mode page. Here we select the Maintenance Mode page that we created before.
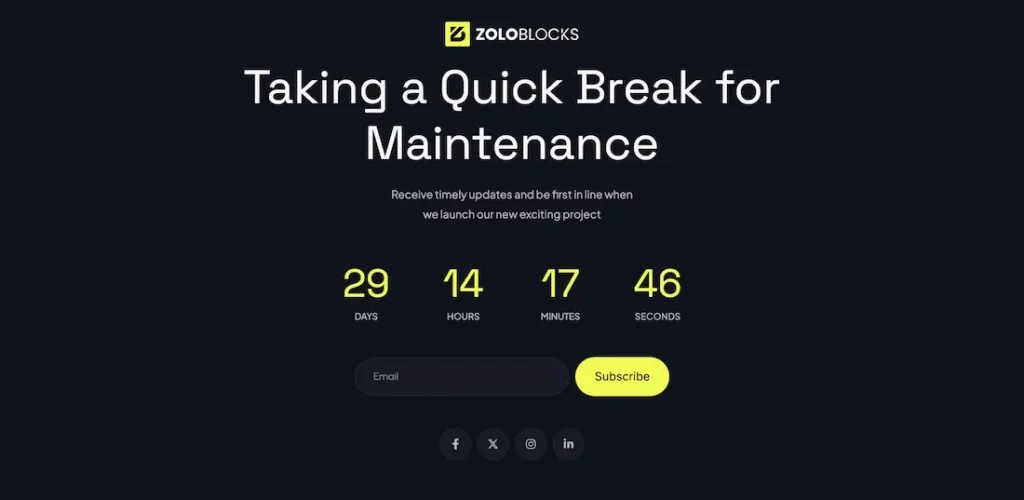
After selecting your Maintenance Mode page, just logout to preview your Maintenance Mode feature. You will see your selected Maintenance Mode page as like in the above screenshot.
Video Assist
The Video help you to learn more about the Feature. Please visit the demo page for examples.
Thanks for being with us.
